Microsoft Word sometimes show small L-shaped bracket marks at each corner of your page. These marks will appear in all blank as well as existing documents and are called crop marks. While they do not affect printing or the content itself, they can be distracting and disrupt the clean aesthetics of your working page. In this article, we will explain what crop marks are, why they appear, and how to remove them from your Microsoft Word documents in Windows and Mac.
What are Crop Marks?
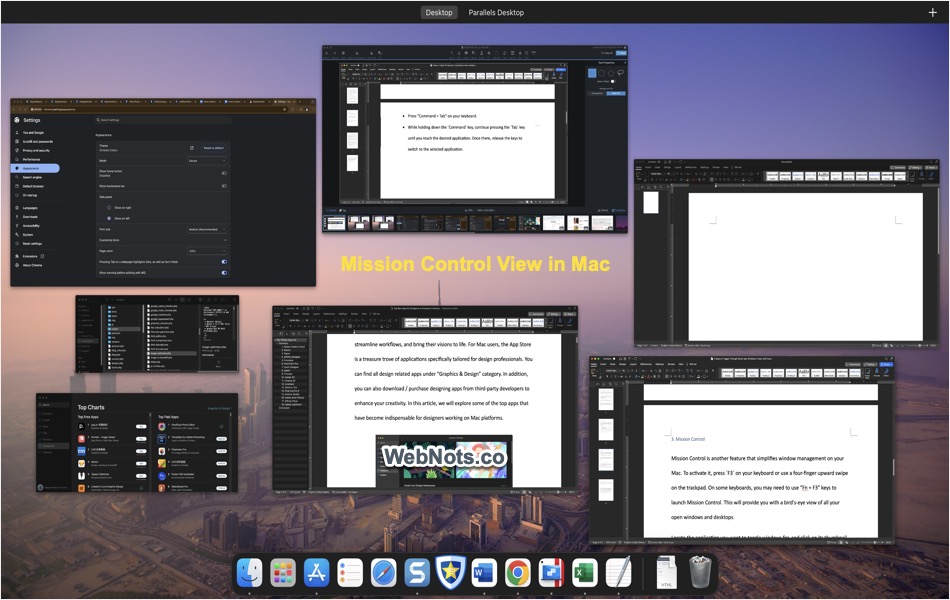
Crop marks are visual indicators that show where the text margins or printing boundaries are on a page. In Microsoft Word, these marks can appear as dotted or solid lines or as corner guides at each edge of your document. Below is how the crop marks look on Windows and Mac Word version of Microsoft 365.


Why Do Crop Marks Appear?
There are several reasons crop marks might suddenly show up in your Microsoft Word document:
- Text Boundaries Setting: This feature is designed to help users visualize the printable area of the document.
- Asian Language Support: Enabling support for certain Asian languages (e.g., Japanese, Chinese, Korean) can activate crop marks as part of the interface.
- Template or Document Origin: Documents created from templates or other sources might inherit settings that activate crop marks.
- Word Version Updates: After software updates or upgrades, some display settings may revert or activate by default.
1. Remove Crop Marks in Windows Version
First let us see removing the crop marks from Microsoft 365 Word for Windows version.
1.1. Disable from Advanced Settings
- Launch Word app and open a blank or an existing document.
- Go to the “File” tab and select “Options”.
- In the Word Options dialog box, select “Advanced” in the left pane.
- Scroll down to the “Show document content” section.
- Uncheck the box labeled “Show crop marks”.
- Click “OK” to apply the change.
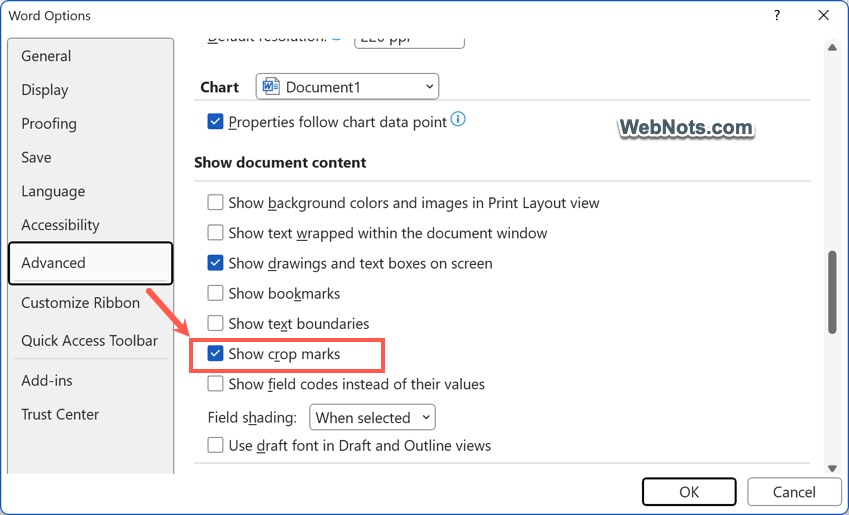
Note: You can also try disabling “Show text boundaries” option to remove borders created surrounding each text block.
1.2. Adjusting Language Settings (Asian Language Support)
If disabling crop marks does not resolve the issue, Word might have activated support for East Asian languages.
- Open a blank or existing document and go to “File > Options”.
- Click on “Language” tab in Word Options dialog.
- Check if any East Asian language (Japanese, Simplified Chinese, Korean) is enabled under “Office authoring languages and proofing.”
- If one is present but unused, select it and click “Remove” or set your default language to English or your preferred language.
- Restart Word and the crop marks should disappear.

1.3. Resetting Microsoft Word Template
If none of the above methods work, it may help to reset Word’s default document file to its original settings. This will clear all customizations, returning Word to its default state, so try as a last resort.
- Press “Windows Key + R” to open the Run dialog. Type winword /a and press enter. This opens Word in its default configuration.
- If the crop marks are gone, close the Word app.
- Go to C:\Users\<Username>\AppData\Roaming\Microsoft\Templates Location in File Explorer (make sure to change your username).
- Delete the normal.dotm template file which is used for blank documents (or move the file to another location).
- Relaunch Word and the app will automatically regenerate the template file afresh.
- Now, check the crop marks are gone.
Note: By default, template files are hidden on Windows. So, you should first unhide hidden files to view hidden folders and locate Word’s template file.
1.4. Disable Add-ins
Some third-party add-ins or templates may force text boundaries or crop marks. Disable all add-ins under “File > Options > Add-ins > Manage COM Add-ins > Go…” section and restart Word to check if the marks are removed. If yes, you can enable the add-in one by one to narrow down the item causing problems.

2. Remove Crop Marks in Word for Mac (Microsoft 365 Version)
Word for Mac also offers similar features like Windows Word version.
2.1. Disable from Preferences
- Open a blank document in Word and navigate to “Word > Preferences…” menu.

- Click “View” option showing under “Authoring and proofing tools” section.

- Uncheck “Crop Marks” option under “Show in Document” section.
- Close the pop-up and you the crop marks should be removed from your document.

2.2. Change East Asian Languages Setup
On Mac, Word follows the system language setup. However, there is also a separate setting for East Asian languages.
- Open a document in Word app and go to “Word > Preferences… > East Asian Languages” section.
- Choose “English” from “Select a language” dropdown.

2.3. Reset Template File
- Close the Word app completely (from “Word > Quit Word” menu).
- Locate the normal.dotm template in ~/Library/Group Containers/UBF8T346G9.Office/User Content/Templates.
- Simply delete or move the file to another location.
- Restart Word and check the crop marks are removed.
Note: Generally, template files are hidden on Mac. You need to unhide hidden files to view the template file.
Frequently Asked Questions
No, crop marks in Word are for on-screen display only. Your printed pages will look the same regardless of whether crop marks are shown.
This may be due to language settings or templates that force their display. Check language settings and try the methods outlined above.
Crop mark settings in Word are application-wide, not document-specific. Turning them off will affect all documents you open.
No, crop marks are visual guides for page boundaries while text boundaries appear for each block as shown below (like borders).
Final Words
While often unwanted, crop marks can be helpful when preparing documents for printing, as they show where the page will be trimmed. If you’re collaborating on a publication or professional print job, confirm with your team before removing them. It’s also important to note that crop marks and text boundaries are visible only on screen. They will not appear in printed documents or converted PDFs unless created with specialized publishing tools.