WordPress uses two main components to run a website: its files and a database. The WordPress files contain the core software, themes, plugins, and uploaded media, while the database stores your website’s posts, pages, settings, comments, users, and other important information. Most WordPress hosting providers use MySQL or MariaDB for the WordPress database. Keeping a copy of your database is an important part of maintaining a reliable backup strategy. In this guide, we will show you how to download a WordPress database using phpMyAdmin.
Why Should You Back Up Your WordPress Database?
A WordPress website can contain years of posts, pages, comments, settings, and other information. Losing the database can therefore mean losing a significant portion of your website. A database backup can be useful in several situations:
- Recovering your website after a hacking incident or serious technical problem.
- Restoring content after accidentally deleting or modifying database information.
- Moving your WordPress website to another hosting provider.
- Creating a local copy of your website for development or testing.
- Troubleshooting database-related problems.
- Restoring your site after a failed update or migration.
It is important to understand that a complete website backup should include both the database and important WordPress files.
What is phpMyAdmin?
You cannot normally download a MySQL database using FTP because the database is managed separately from your website’s files. Instead, you can use the phpMyAdmin tool to view database tables, run SQL queries, import databases, and export databases. Although phpMyAdmin is a web-based application, many hosting companies provide phpMyAdmin access through their hosting control panel. Depending on your provider, you may find it under a section such as Databases, MySQL, or phpMyAdmin.
How to Download Your WordPress Database?
The exact steps may vary slightly depending on your hosting provider. The following procedure works similarly in cPanel and other hosting control panels that provide access to phpMyAdmin.
Step 1: Finding Your WordPress Database Name
This step is not necessary if you only have a single website. However, if you manage multiple website, it is important to know which database belongs to your WordPress installation. One of the easiest ways to find the database name is to check your WordPress wp-config.php file. Open the wp-config.php file in the root directory of your WordPress installation and look for:
define( 'DB_NAME', 'your_database_name' );The value shown as your_database_name is the database used by your WordPress site. You can also find the database username, password, and hostname in the same file. Do not share these credentials publicly.
Note: The database tables may not necessarily start with wp_. Your WordPress installation may use a custom table prefix.
Step 2: Access phpMyAdmin
- Sign in to the hosting account where your WordPress website is hosted.
- Open the hosting control panel for the website you want to back up.
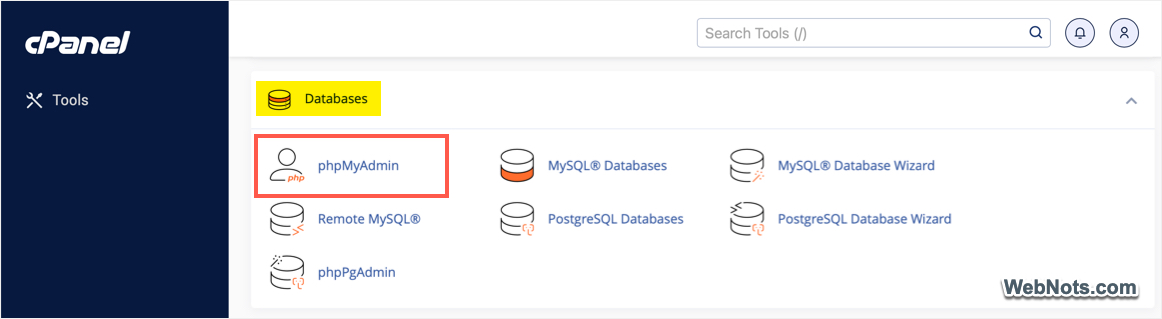
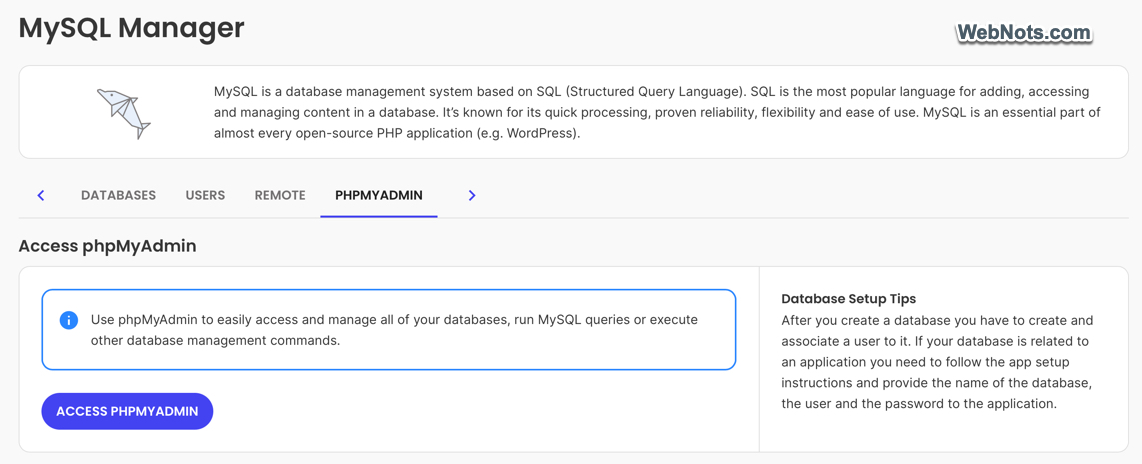
- Find and open phpMyAdmin tool from your hosting control panel. Below two screenshots show the availability of the tool in standard cPanel (under Databases section) and in custom SiteGround Site Tools panel (under Site > MySQL section).
- phpMyAdmin tool generally opens in a new browser tab or window and displays all the databases available in your hosting account.
- Select the database used by your WordPress installation (as used in the
DB_NAMEvalue in wp-config.php file).
Note: Some hosting companies offer separate control panels for each hosted websites. This means you don’t need to remember of find your database name as phpMyAdmin will show only one database applicable for the selected site.
Step 3: Customize the Parameters and Download
- After selecting the database, phpMyAdmin will display its tables like wp_posts, wp_postmeta, wp_options, etc. (your table prefix may be different from wp_).
- Click the “Export” tab at the top of phpMyAdmin and you will normally see two export methods: Quick & Custom. For a simple full database backup, “Quick” is usually sufficient. If you want to review or control the export settings, select “Custom” (this is recommended).
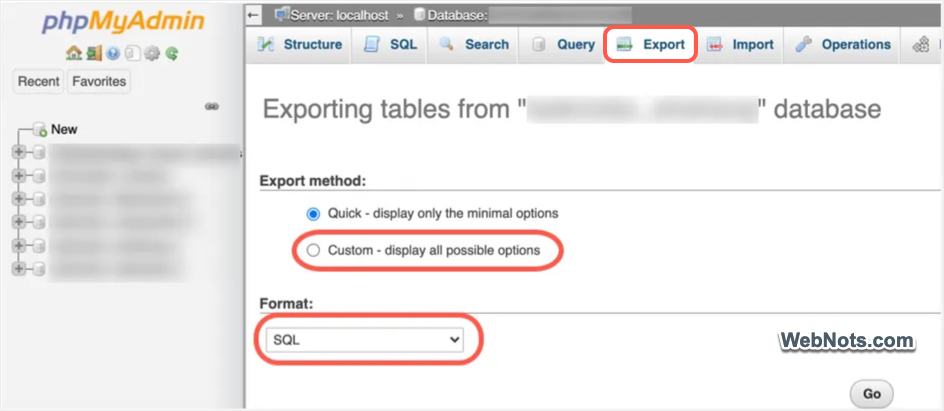
- Make sure the export format is set to SQL, which is the standard format used to export and restore the contents of a MySQL or MariaDB database.
- If you select “Custom”, make sure the tables you need are included. For a complete WordPress database backup, select all tables belonging to the WordPress database.
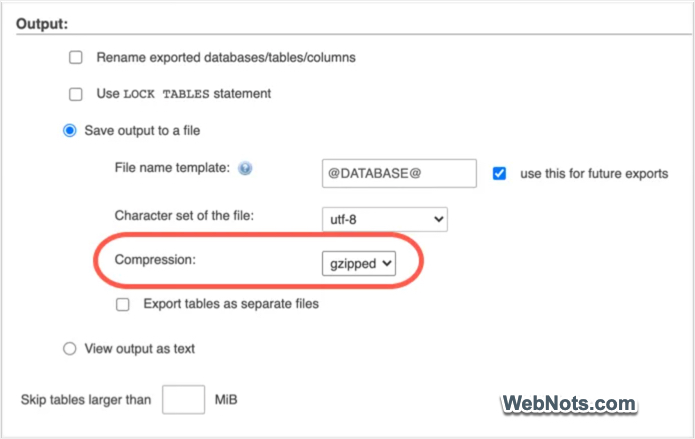
- If available, choose a “Compression” option as gzipped or zipped. Compression can significantly reduce the size of the downloaded database, particularly for larger websites.
- After checking other export settings (generally, you don’t need to change them), scroll down and click “Export” or “Go”, depending on the phpMyAdmin version.
Step 4: Check the Downloaded Database File
phpMyAdmin will generate the database export and your browser will download the file. The amount of time required depends on the size of your database and your hosting environment. Make sure you have a stable internet connection and do not close the browser or hosting panel until the download has completed.
The exported database is normally saved to your computer’s Downloads folder unless your browser is configured to use another location. The compressed file will have a name something like wordpress-database.sql.gz (with .gz extension). You can extract the compressed file to obtain the SQL database dump (with .sql extension). It is a good idea to rename the file like example.com-wordpress-db-2026-09-02.sql.gz so that you can easily identify the website and backup date.
Step 5: Check Whether the Backup Worked
Generally, you don’t get any errors when downloading a database file. However, it’s common that the file misses some tables or truncates without the complete data. So, do not assume that a file is a usable backup simply because the download was completed.
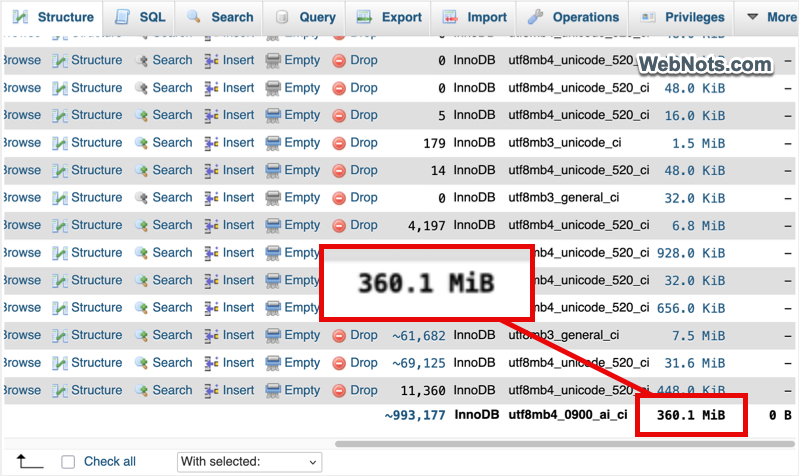
- First, check the file size is reasonable. You can find the size of the original database in phpMyAdmin below the tables list under “Structure” tab. Compressed file has generally one tenth of the original SQL file’s size.
- If you downloaded a compressed file, extract it and verify that it contains an
.sqlfile. Open the .sql file in text editor apps like VS Code to confirm the file is not corrupted. - For additional assurance, you can import the SQL file into a test database or local WordPress installation. This is particularly useful before relying on a backup for a major migration or recovery operation.
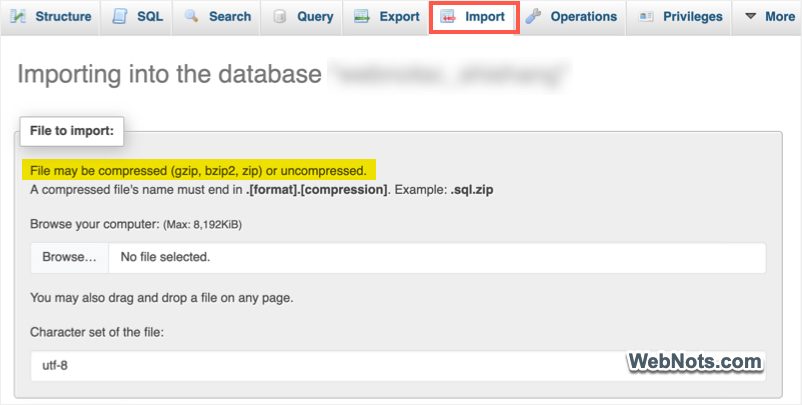
Note: The exported SQL/compressed file can also be used to restore a database. In phpMyAdmin, select the destination database and open the “Import” tab. Select your SQL / compressed .gz file and start the import. Remember that restoring the database alone does not restore your complete WordPress website. You also need the corresponding WordPress files, including uploaded media, themes, plugins, and any custom files.
Frequently Asked Questions
No. phpMyAdmin exports the database only. It does not back up your WordPress files, images, plugins, or themes.
WordPress databases are commonly exported in SQL format. phpMyAdmin can also compress the SQL export using formats like .gz, depending on the available options.
Yes. The database export can be imported into a new WordPress database as part of a migration. You will also need to migrate the WordPress files and update the site’s configuration and, where necessary, URLs.
Yes. An SQL dump is essentially a text file containing the table data. However, large database exports can be very large, so a suitable code or text editor is recommended.
The appropriate frequency depends on how often your website changes. A site that publishes content every day may need daily backups, while a less frequently updated site may need backups less often. For important websites, automated backups are generally preferable to relying exclusively on manual downloads.
Not necessarily. Many traditional hosting providers provide phpMyAdmin, but some managed WordPress hosts use their own database management or backup systems and may not provide direct phpMyAdmin access. If phpMyAdmin is unavailable, check your hosting provider’s documentation for its database export or backup procedure.
Deleting individual records or tables incorrectly can cause missing content, broken settings, plugin errors, or a completely non-functional website. Deleting the entire database will generally make the existing WordPress installation unable to access its content. Always create a backup before making changes directly in phpMyAdmin.
A database export is normally a read operation and does not modify your database. For a normal database export, you generally do not need to put your website into maintenance mode.