
Right-click context menu is one of the easiest ways to get things done in Windows PC. The “Send to” option in Windows right-click menu is a handy feature for quickly transferring files or creating shortcuts to your frequently used locations. By default, it includes options like Desktop, Documents, or email, but did you know you can customize it to include your own shortcuts? Here’s a step-by-step guide to add shortcuts to the “Send to” menu and streamline your workflow. Also, learn how to add or remove items from right-click context menu.
Example Case
Let’s say, you have a “Projects” folder in “Downloads” location. Whenever you come across project related items, you want to quickly save that file to “Downloads > Projects” folder. This makes your task easier to manage the content in single place by sharing or collaborating with others.
The default right-click context menu looks something like this in Windows. You need to right-click on a file and then select “Show more options” to view the complete menu items in Windows 11. Some apps may add additional shortcuts in “Send to” menu to speed up your work.
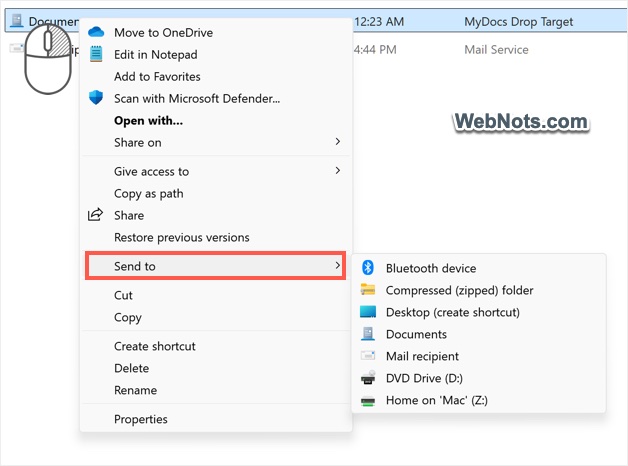
We well explain how you can add “Downloads > Projects” location in your “Send to” shortcut so that you can right-click and send ay files to this location.
Step 1 – Locate “Send to” Folder
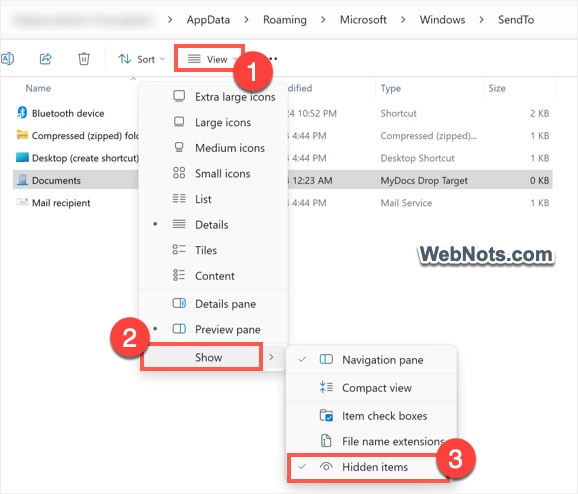
The “Send to” menu’s options are stored in a specific folder on your computer. To access that folder, go to the following location in File Explorer (make sure to replace username with your actual username).
C:\Users\<username>\AppData\Roaming\Microsoft\Windows\SendTo
Otherwise, press “Windows Logo + R” keys to open the Run dialog box. Type shell:sendto in the box and press “OK” button to open the “Send to” location.

Note: AppData is a hidden folder in Windows PC. So, go to “View > Show” in File Explorer and select “Hidden items” to view the hidden files.
Step 2 – Add Shortcuts to the Folder
Now that you’ve opened the “Send To” folder, you can add custom shortcuts.
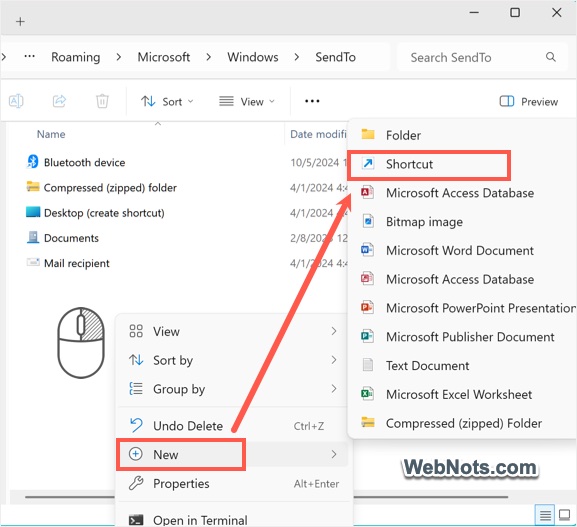
- Right-click on the empty area and select “New > Shortcut” option.
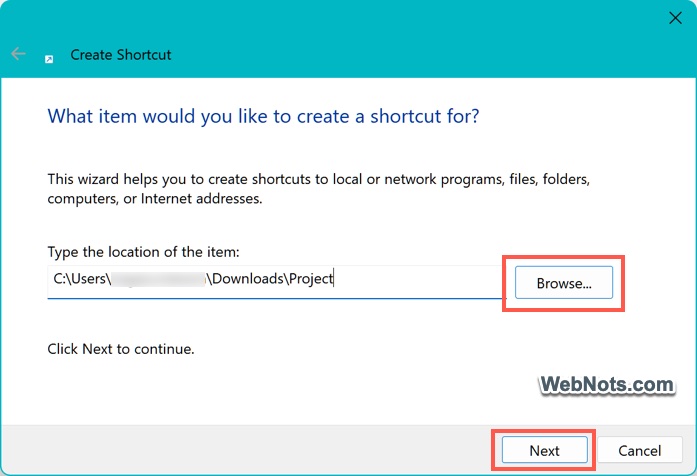
- Click the “Browse” button and locate the folder you want to add (“Downloads > Project” folder in our case). Click “Next” button to continue.
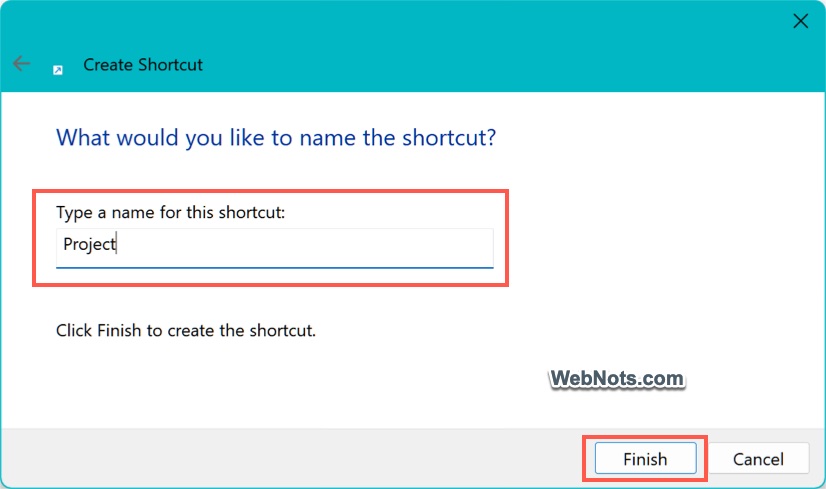
- If required, change the name for your project which you can remember and click “Finish” button. This is the name you will see in the “Send to” right-click context menu.
Step 3 – Check Added Shortcut
You will immediately see the shortcut name is added in “Send to” folder.
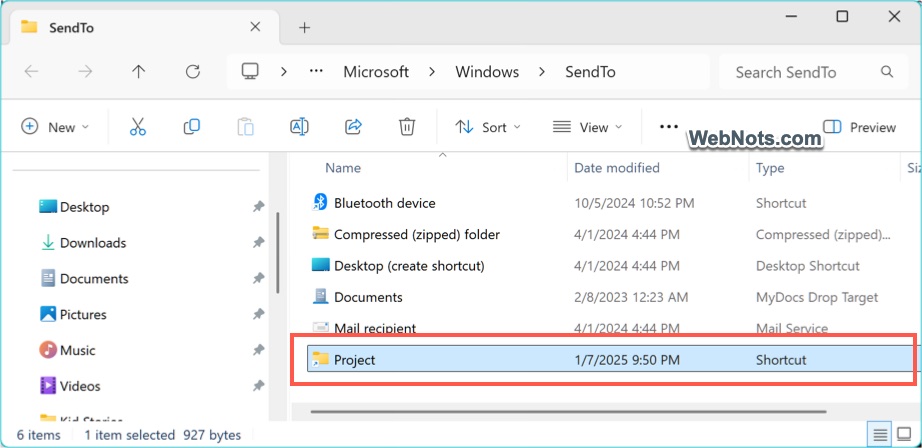
To test the shortcut is working, select a file in any location and right-click on it. Select “Show more options” and then “Send to” menu to confirm new “Project” shortcut location is added. Click on the “Project” option to quickly send the copy of selected file to “Downloads > Project” location.

Examples of Useful Shortcuts:
You can add any of the following items in “Send to” folder to make your workflow easier.
- A frequently accessed folder as explained above to quickly send files.
- An application like Microsoft Word, Notepad or Photoshop to open files with that application.
- A shortcut to a USB drive for quick file transfers.
- Add mapped network drive location to share files quickly.
- You can add a batch file or script shortcut to automate tasks like compressing, archiving or emailing files.
Final Words
By adding shortcuts to “Send to” menu, you can save time and reduce repetitive tasks. You can anytime navigate to “Send to” location in File Explorer and delete custom shortcuts added to clean up the right-click context menu. It is also possible to rename the default and custom shortcuts to keep them with the name you desire.


