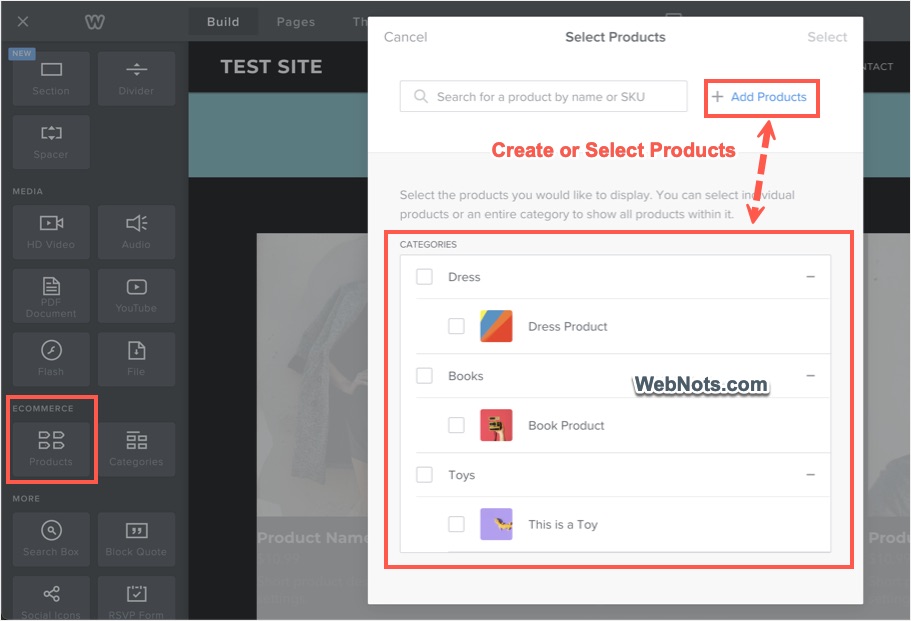
Weebly offers simple way to sell your products online and convert your site into an online ecommerce store. Adding products to Weebly store is done using a Products element available under “Ecommerce” section. You can just drag and drop the element to your site content area to add products. When a product element is dragged and dropped, you will see the below popup window offering you the possibility of selecting any existing products or adding a new product.
Creating Items from Dashboard Vs Creating from Editor
You can click on the “Add Products” link to create a new product when in Weebly editor. However, the list of categories and products shown for selection are appearing from the Categories / Items created from your dashboard. Since Weebly is aligning the interface with Square Online (as Square bought Weebly), creating products and categories are done in the dashboard. The “Add Products” link also will essentially take you to the dashboard interface.
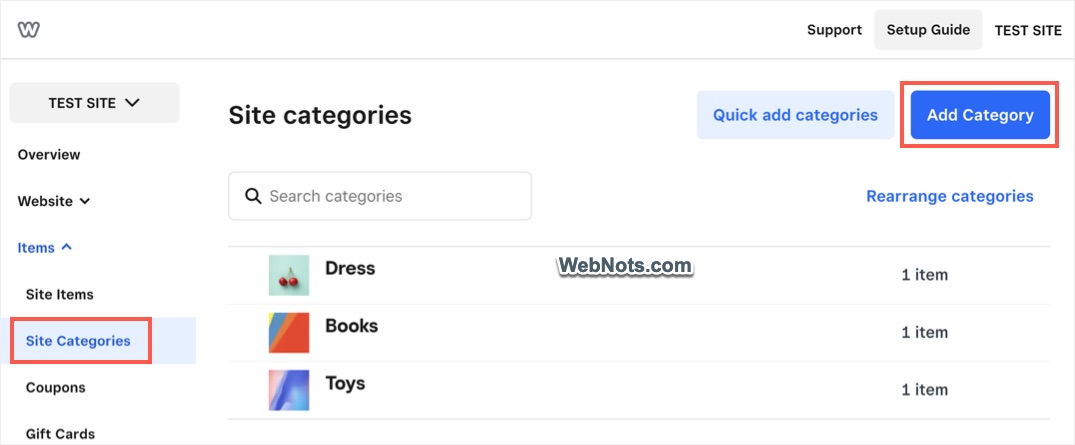
Create a Product Category
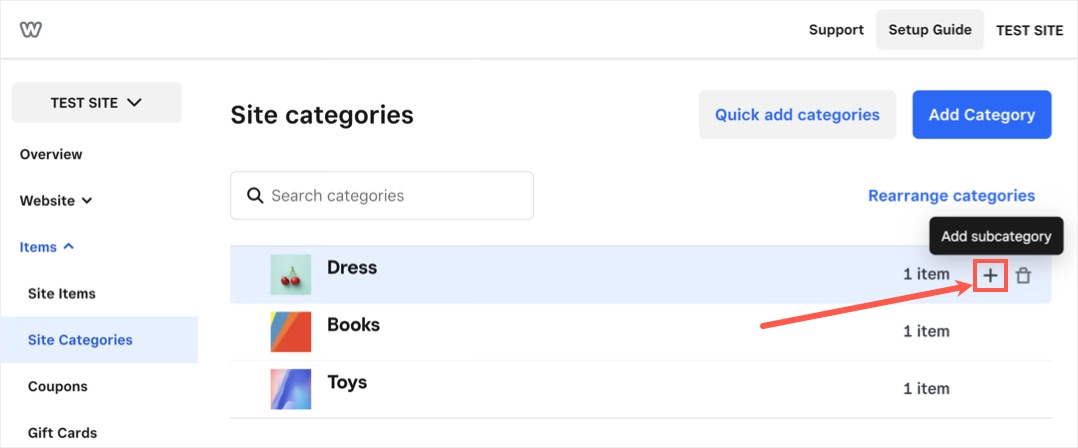
When you are in Weebly Dashboard, go to “Items > Site Categories” section and click on the “Add Category” button.
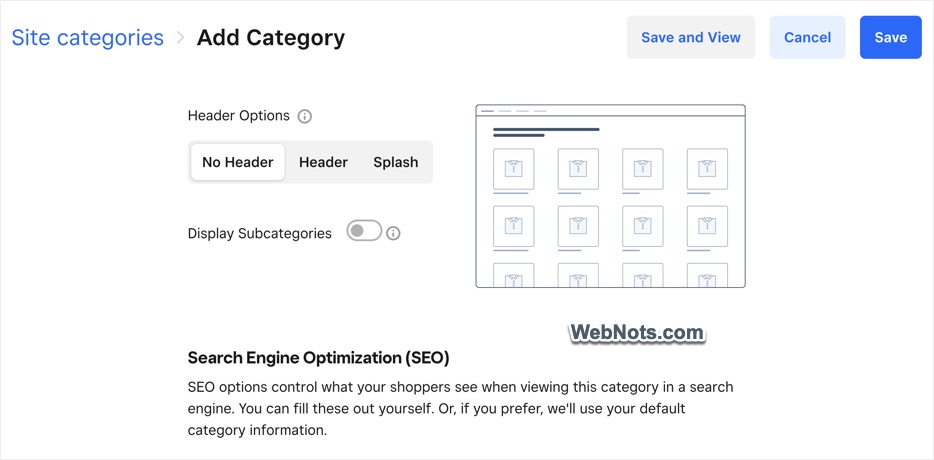
Provide name, SEO information, image, select the layout and save your category.
You can also create a sub-category under the main category by clicking on the + icon showing against the category name.
Creating a Product Item
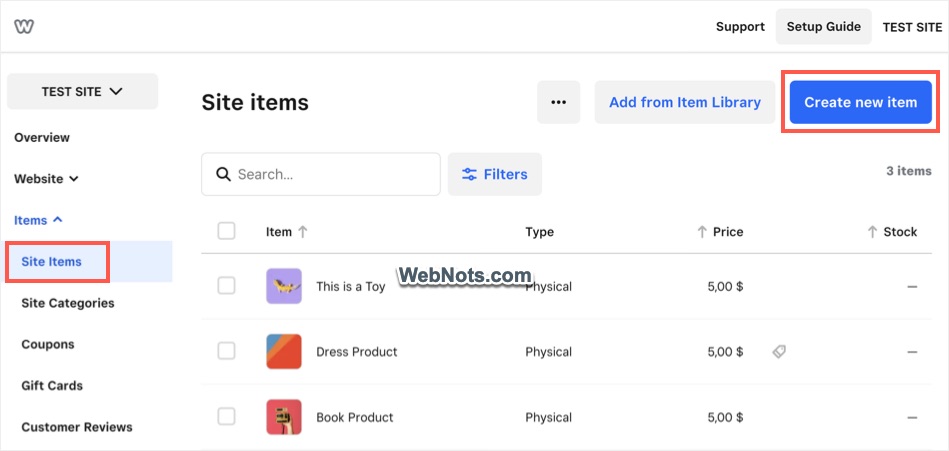
When you are in Weebly Dashboard, go to “Items > Site Items” section and click on the “Create new item” button.
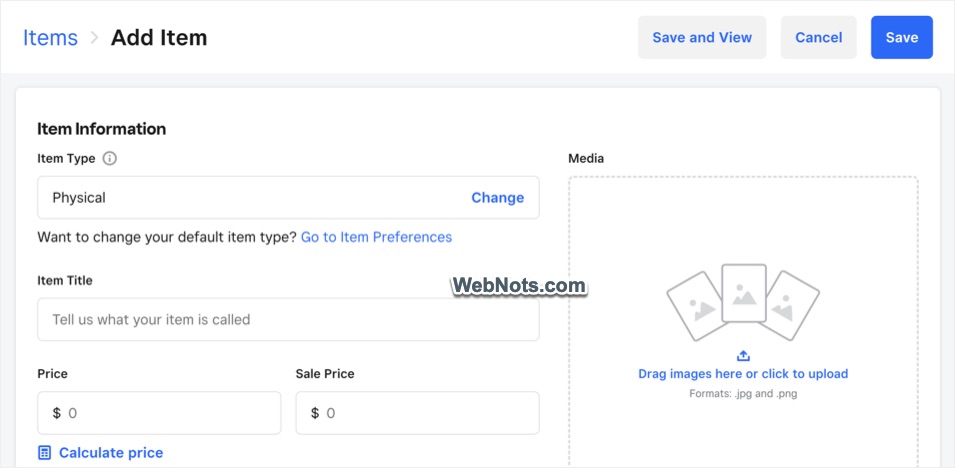
Select item type, upload image, set price, add description, provide SEO information and set visibility for your item.
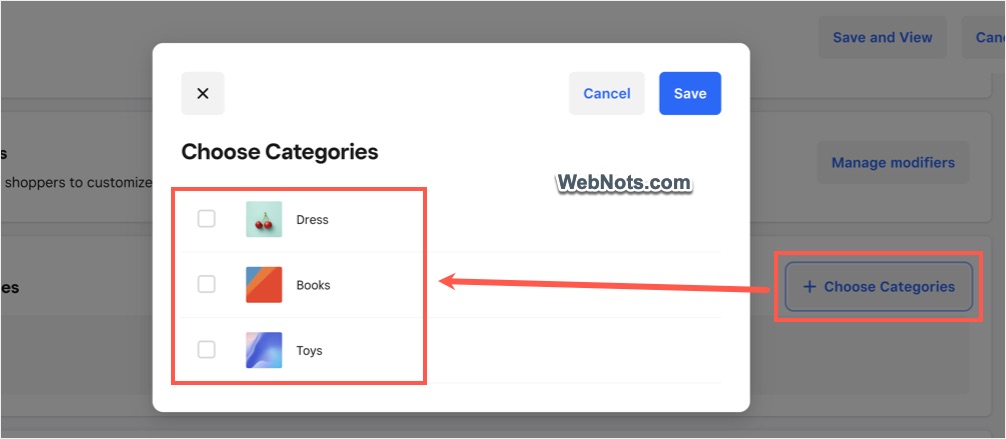
Click on the “Choose Categories” button and assign your item to one or more categories previously created.
Adding Item with Products Element
Now that the items and categories are ready, edit your site and go to Weebly editor.
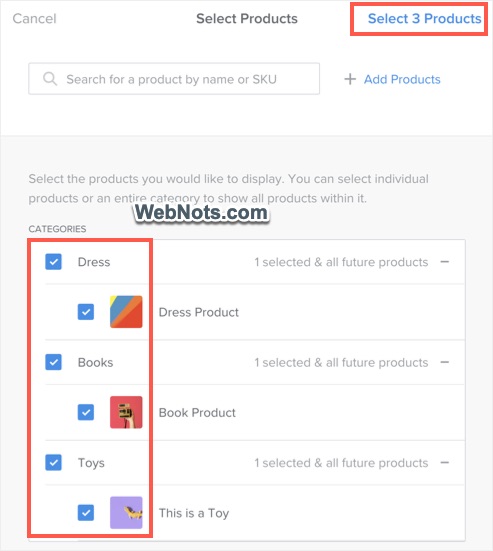
- Drag and drop a “Products” element to view all your categories created in dashboard.
- Expand the categories to view the attached items.
- Select the required items and click the “Select x Products” link.
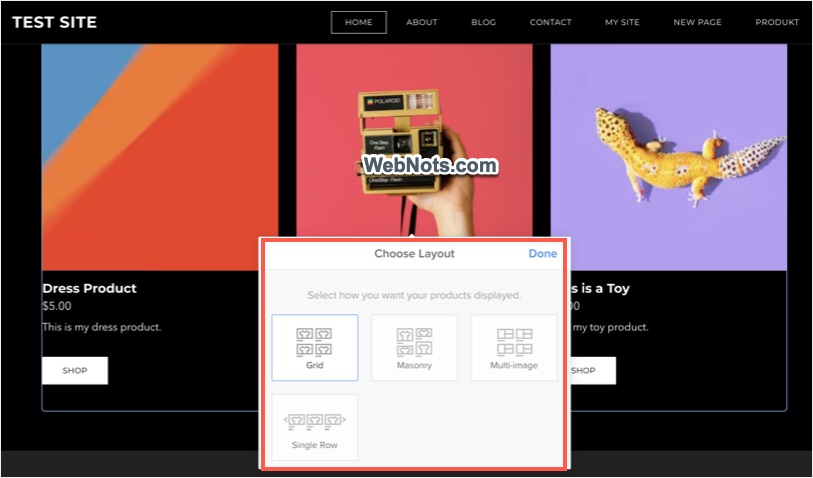
- Choose the category layout from Grid, Masonry, Multi-image or Single Row options. You can instantly preview the layout and click “Done” to confirm using that layout.
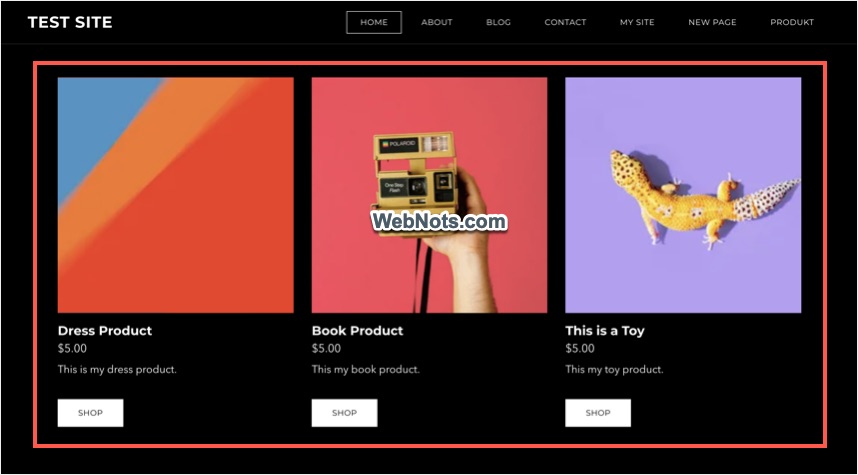
Now, you can see the product items are added in a beautiful layout as selected.
Customizing Products Layout
Click on the insert products element to see a pop-up showing customizing options.
- Manage Products – click this button to add or remove products from the display.
- Change Layout – this option allows you to choose a different layout.
- Columns – adjust the number of columns to show on the display.
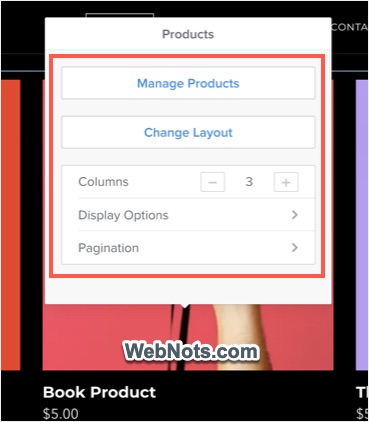
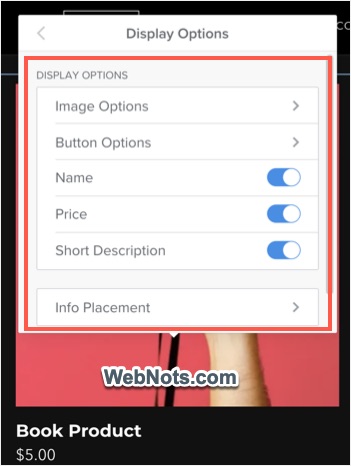
- Display Options – enable or disable product image, button, name, price and short description. When the images are shown, you can change the aspect ratio, position, text alignment and choose a slideshow option to display multiple product images as a carousel. You can also change the button style and text as per your need.
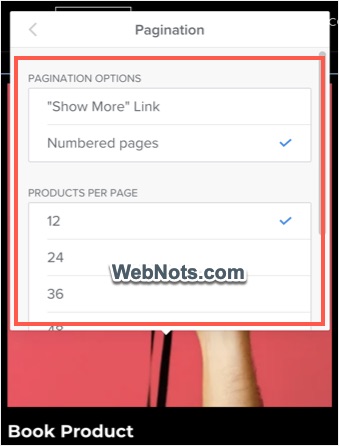
- Pagination – when you have more number of products, then choose the pagination style as “Show More” link or “Numbered pages”. Weebly allows to show 12, 24, 36, 48, 60 or 72 products per page.
After finished customizing your Products element setup, click on the “Publish” button to apply the changes to live site.