Square is one of the payment processing options for ecommerce website owners to collect money from customers. They offer a store website builder tool called Online targeting small business owners. If you want to create a small ecommerce store, then Square Online builder is tool you can consider due to simplicity and ordering processing features.
Weebly Vs Square Online
If you know or using Weebly, you can connect Square for processing received payments with Weebly site. However, Square bought Weebly and uses their backend to offer a new Square Online site builder. Though you can still use Weebly site builder using your Square account, Online is a separate builder tool. So, do not get confused with Weebly.com and Square Online builders as both site builders use Weebly’s backend and can be accessed through Weebly.com site. Learn more about Weebly.com Vs Square Online and creating an ecommerce store with Weebly site builder.
1. Creating a Square Account
It is mandatory to sign up for a Square account for using Online builder. You can do this using one of the below options:
- Go to Weebly.com and click the “Sign UP” button.
- Go to Square.online and click “Create Your Website” button.
Both options will take you to the account creation page on Sqaureup.com site. Provide details about your business, select template and follow the wizard to create your account.

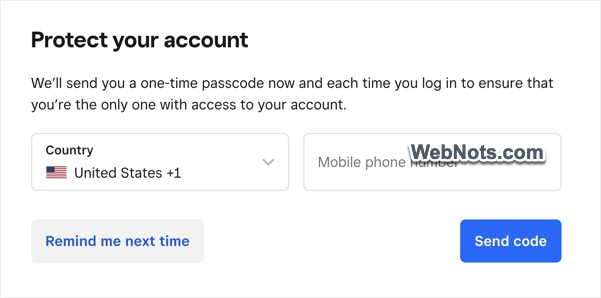
You will be prompted to verify your phone number for payment collection. You can ignore this verification for setting up a site but need to verify for accepting orders with Square payments on your site.
2. Logging into Square Dashboard
Again, you can either use Weebly.com or use Square.online site to login to your Square Dashboard. Go to Square Online site and click the “Sign In” link. Provide your email / password and login to Dashboard. If you are using Weebly and Square on the same browser session, make sure to delete your browsing cache / history. Otherwise, you will see the password is wrong though it is correct.
The Dashboard will look like below and you will see the options to claim or preview your store website. There will also be Online or Square Online links under recommended or sidebar sections and click any of that link.
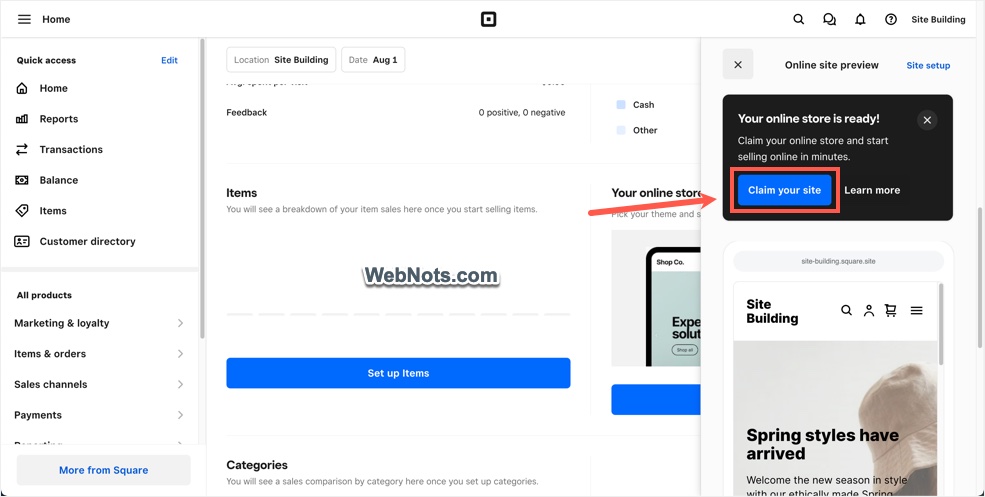
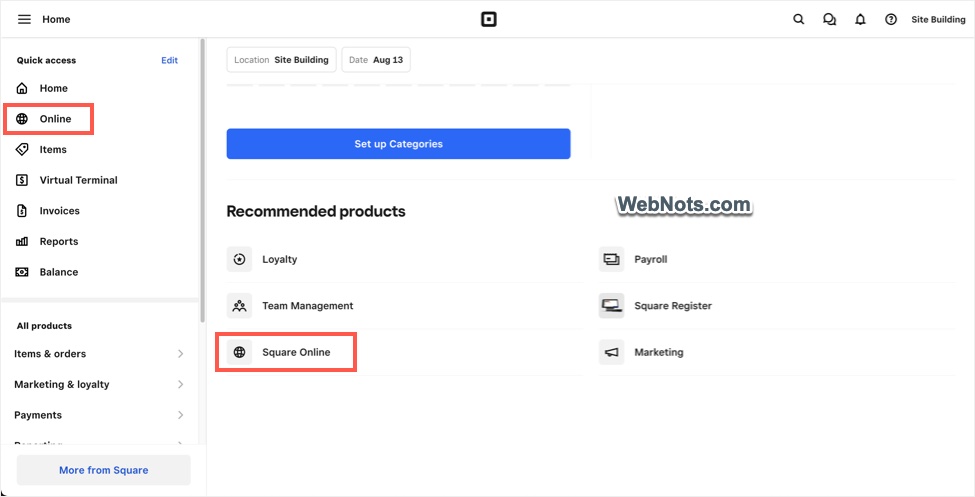
If this is the first time, you will see a top notification and click on that to continue. You will be taken through a wizard to select a theme and setup your site, otherwise, you will land on Square Online Dashboard.

3. Square Online Dashboard
Online Dashboard will show steps to finish for selling your items through your site. Click on the “Edit site” button to start building your content.

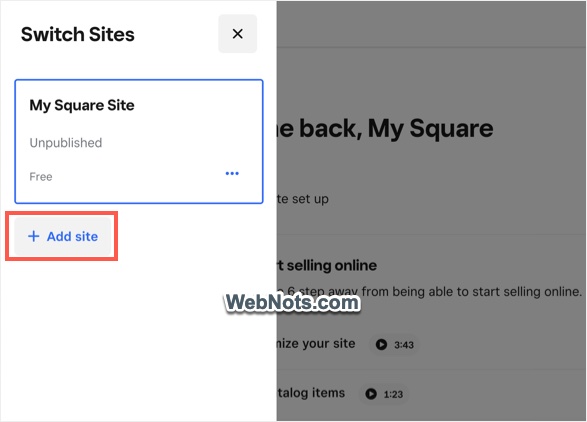
For creating a new site, click the site switching dropdown on top left corner and select “Add site” button.
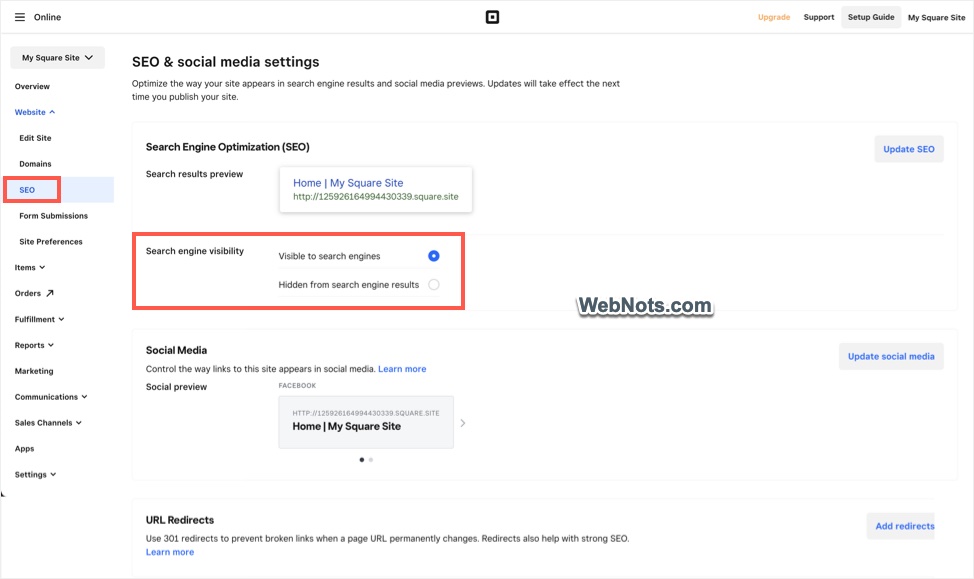
Your site level settings are available under “Website > SEO” section in the Dashboard. Here you can change the “Search engine visibility” option to “Hidden from search engines” to hide the site using robots.txt entries. Once you are site is ready to be published, you can change this setting back to “Visible to search engines”. In this way, you can avoid users seeing your under construction pages in Google or Bing search results.
You can purchase a custom domain and manage many other stuffs directly from the Online Dashboard. Let’s move on with editing a site.
4. Creating Store with Square Online Builder
The Online editor will look like below showing your store with the selected template. First, click on the “Site design” button to change the color and font styles applied throughout your site. After that click on the + icon and create a page, item, section or category.

The process of setting up online store is complicated as you can integrate product items from Square Library and sync them on your site. Here we will explain with the standalone product items for easier understanding.
4.1. Creating a Page
By default, you will see Home, Shop and few other pages are added as per the template you have selected for the site. If you do not want them, click the page selection dropdown and delete the unnecessary pages.
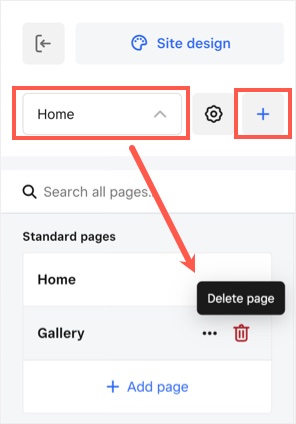
Note that you can’t delete the Home page as it is mandatory for your site. First create a new blank page, click the three dots horizontal icon and select “Make this my homepage”. Now, you can delete the Home page created by default to have a custom home page for your site.
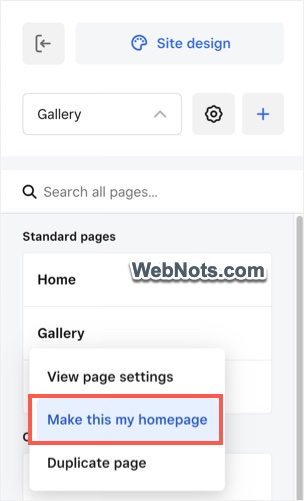
Click the + icon and create a page for your site.
4.2. Creating Categories
You can create categories directly from Square Dashboard without going to Online editor.
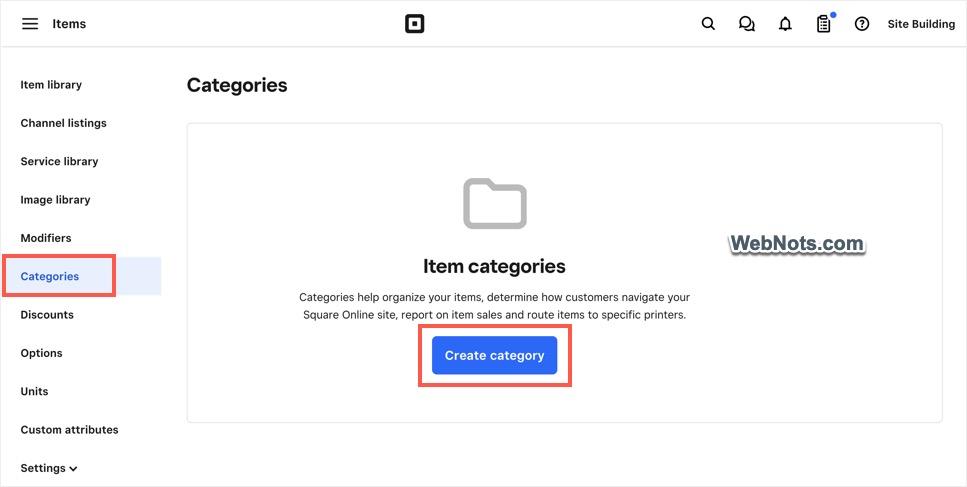
Categories are at higher level that you can link to any of the site in your Square account. The store website is a “Channel” which you can include when creating a category so that you can filter the orders based on the channels. Since we did not create items, click “Save” button to add a new category.
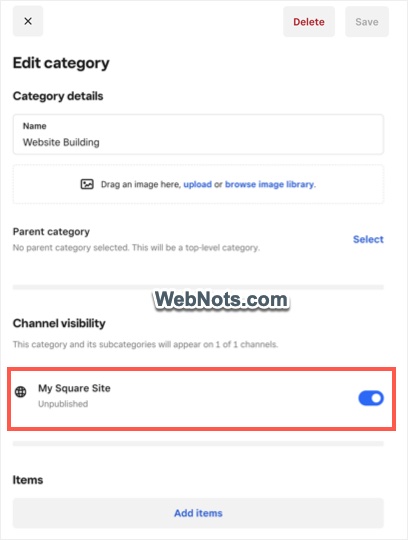
4.3. Creating Items
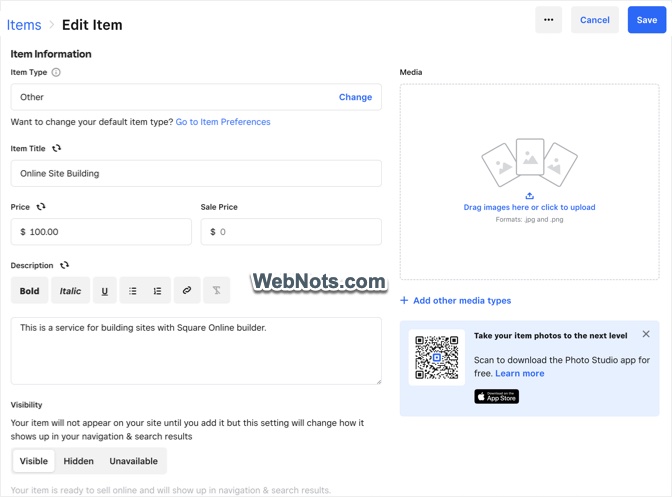
Now get back to Square Online editor and add an item. This will show “Add item” pop-up where you can provide the basic information like type, title, price, description, fulfillment and upload a product image.
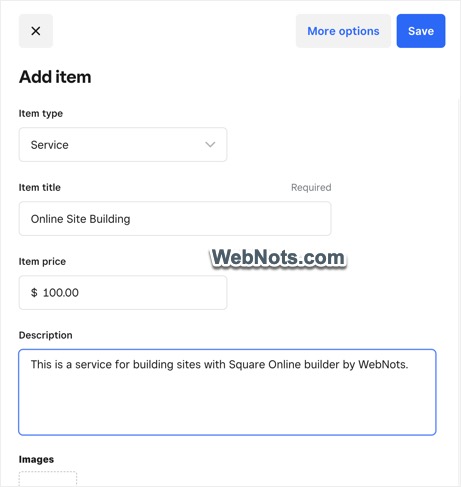
Click on the “More options” button to see the complete item page where you can set the visibility, add SEO settings and include variations.
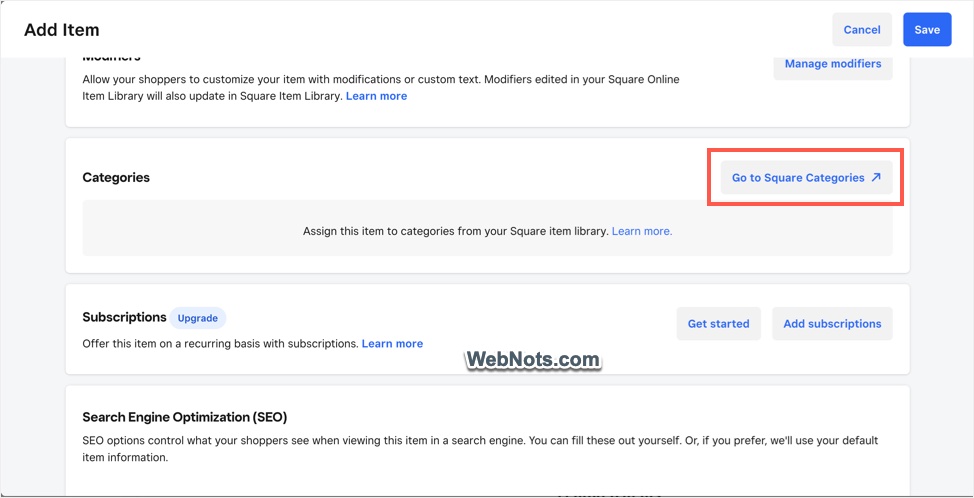
Click on the “Go to Square Categories” button under “Categories” section.
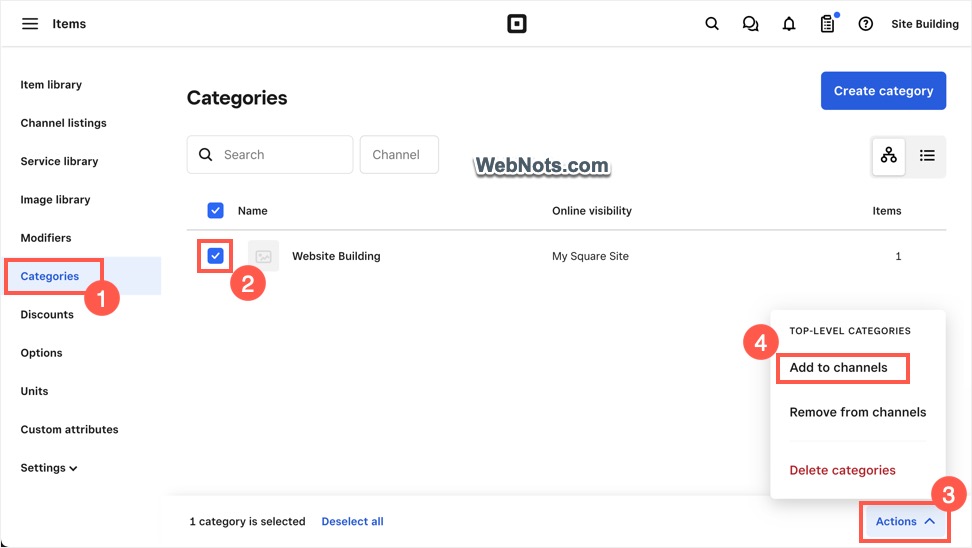
This will take you to the “Categories” section in Square Dashboard where you can find a list of all previously created categories. Select a category from the list, click the “Actions” button and then select “Add to channels” option.
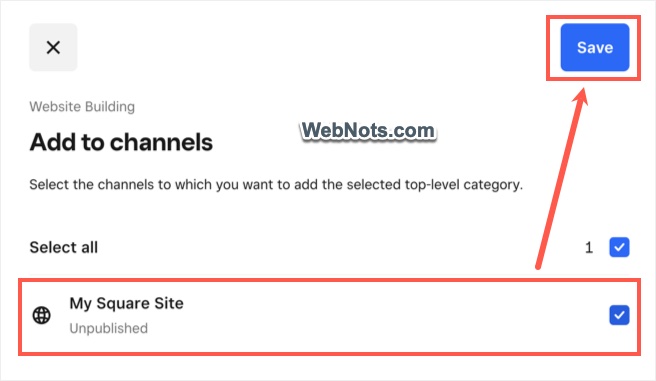
On the pop-up that appears, select your site and click “Save” button.
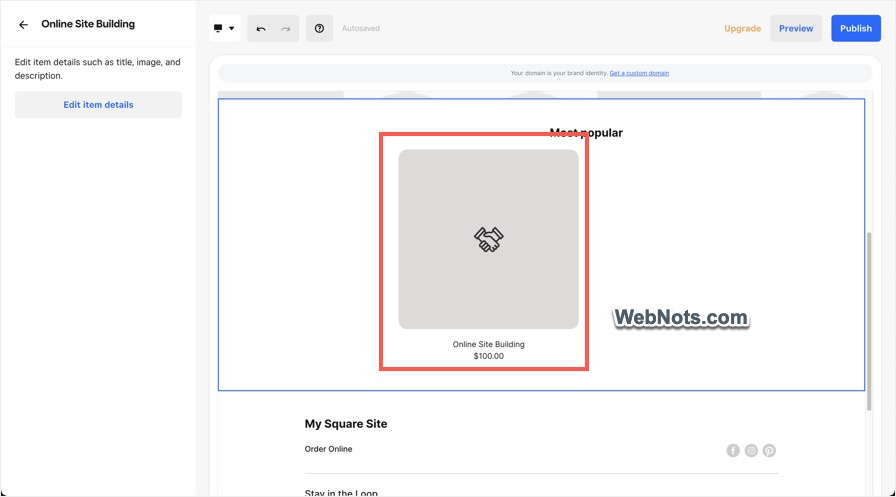
Now, you will see the created item is added to your site.
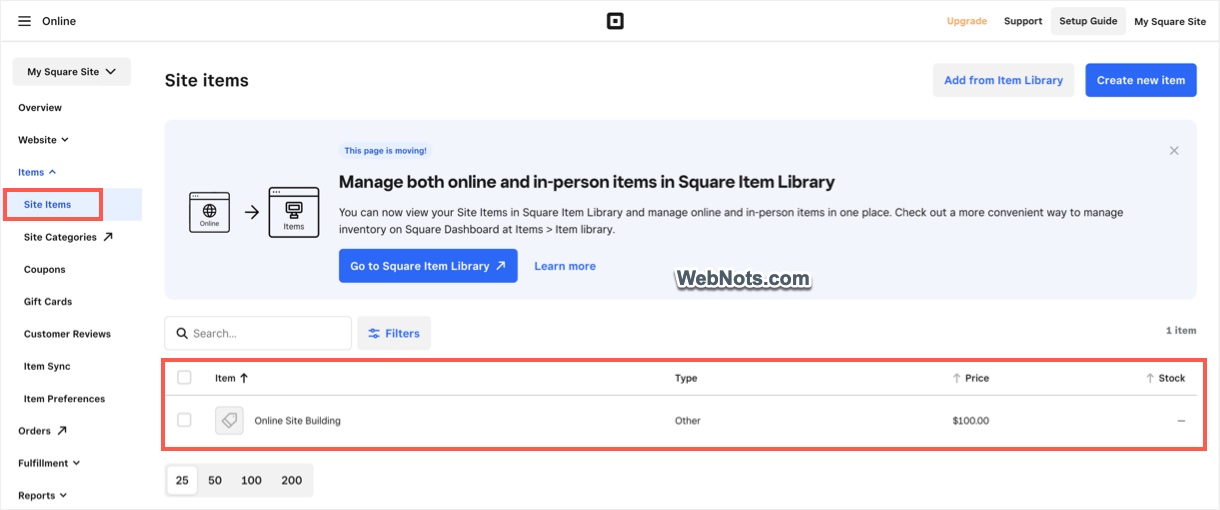
Note that you can also create items directly from Square Online Dashboard under “Items > Site Items” section. Here you can view all created items on your account level. In addition, items can also be viewed from Square Dashboard under “Item library” section.
4.4. Adding and Editing Sections
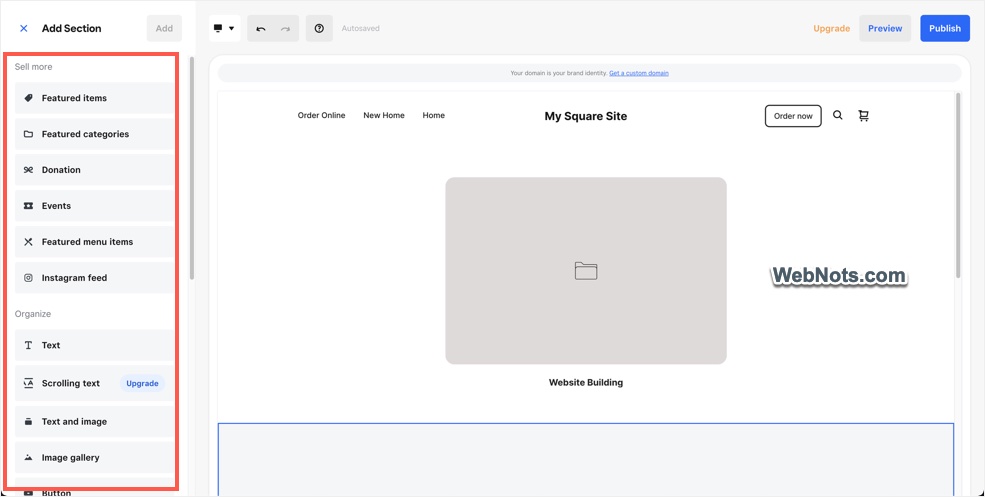
By default, you can select Header, Main banner and Footer section from the sidebar and customize the appearance. For adding a new section on the page, click on the “Add Section” button showing on the sidebar. You will see a list of sections and click on any item to insert it on your page. For example, you can insert “Featured categories” section and select the categories previously created.
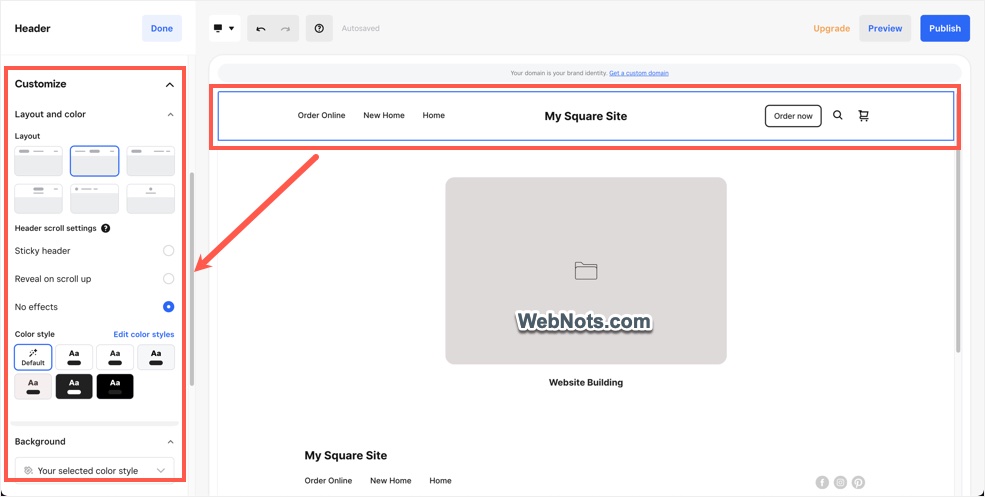
Selecting a section on your page will show the relevant customization options like layout, fonts and colors. Select the options and change the appearance as per your need.
5. Publishing Online Store
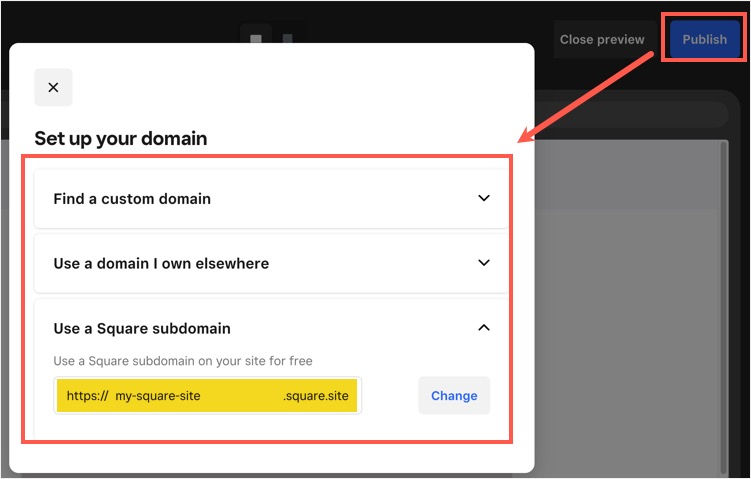
When you are done with creating all pages, click on the “Publish” button to make your site online. You will see options to purchase a domain, select your custom domain or use subdomain with Square. Select the option and follow the steps to publish your site. Subdomain option will use yoursite.square.site with SSL pre-installed (will use https).
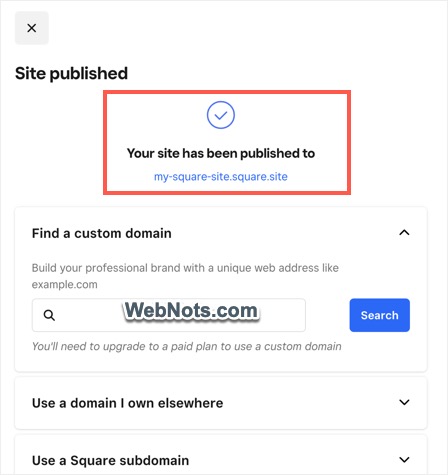
You will see a success message showing the site is published along with the URL.
Click on the URL and view the site is looking perfect on the browser.

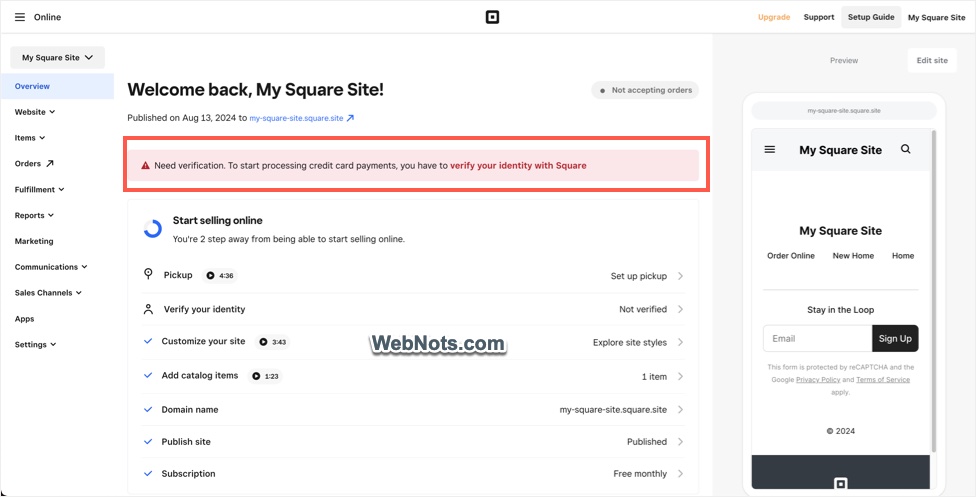
Go back to Square Online Dashboard and set the correct search engine visibility status so that your site can be indexed by Google and other search engine. As mentioned, you can only accept orders after verifying the phone number. Click the notification showing on Square Online Dashboard and finish the verification process to start receiving orders from your customers.
6. Pricing and Fees
Though the free site will allow you to accept order, you need custom domain to remove footer ad. You can purchase Professional, Plus or Premium plans as per your budget and needs. Highest Premium level plan allows you to get complete features including gift cards, coupon, low fees and with premium support.

Remember that you need to pay 2.9% + $0.30 fee for each transaction. This is same for free, Professional and Plus uses and will be 2.6% + $.30 for the Premium plan users.
Final Words
As you can see, the process of setting up online store is complicated using Square Online. You need to manage stuffs in different places like Square Dashboard, Square Online Dashboard and Online editor. The advantage is that the payment processing is automatic after verification and you can manage items / categories centrally across multiple sites.