When you browse a folder full of pictures or documents, Windows automatically creates and stores miniature copies of those files (called thumbnails). You can use these thumbnails as preview and check the image or document before opening with an app. While thumbnails in Windows 11 are handy for quickly recognizing files, they can also be a privacy weakness and a drain on system performance.
Windows Thumbnails and Privacy
Open a folder containing few images in File Explorer. Windows offers multiple ways to view the files under “Views” menu like icons, list, details, titles, or content. In addition, you can toggle preview or details pane as a right sidebar. Regardless of the view of your layout, you can find the thumbnails of the files either under the center column or on the right column.
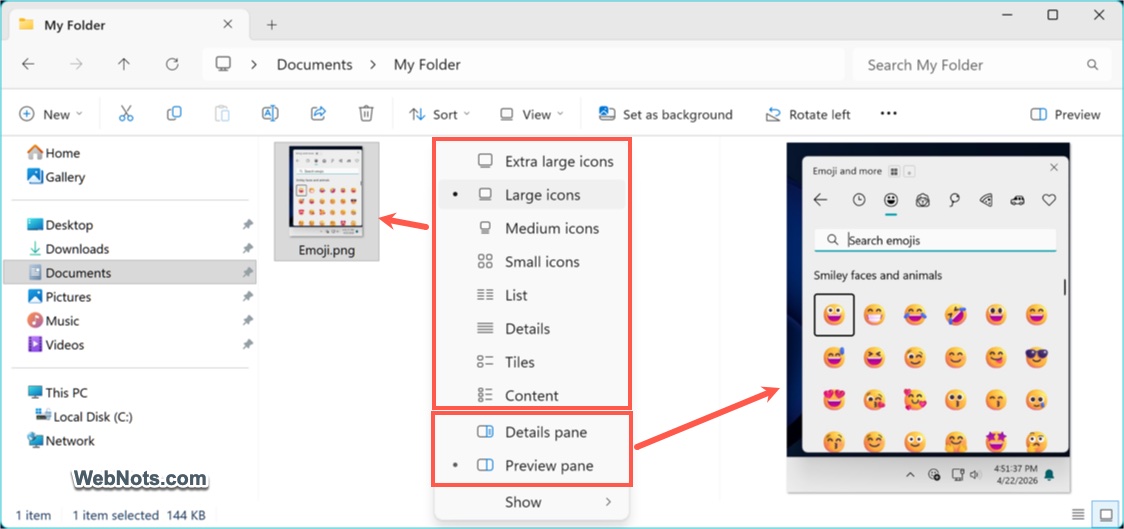
Though these thumbnails are useful for reading a PDF or Word document’s content without opening the file, they will reveal the images causing privacy issue if you have personal photos. You can easily disable these thumbnails previews using various method in Windows 11, which will affect File Explorer as well Desktop. The good thing is that you can still preview documents (like Word or PDF) while disabling the thumbnails for images.
1. Using File Explorer Options
- Press Windows Logo + E keys and open the File Explorer.
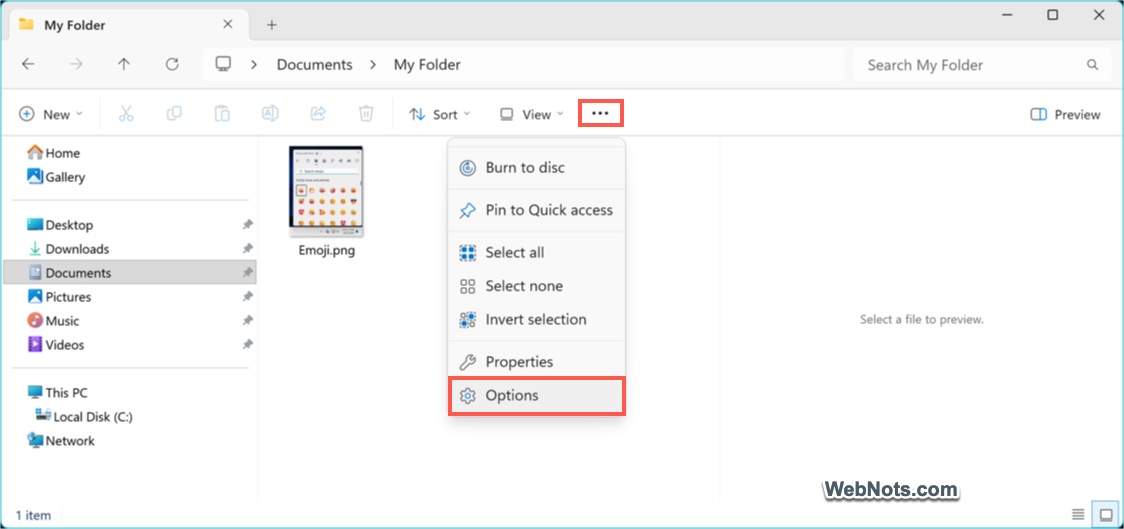
- Click the “See more” option (three dots symbol …) and select “Options”.
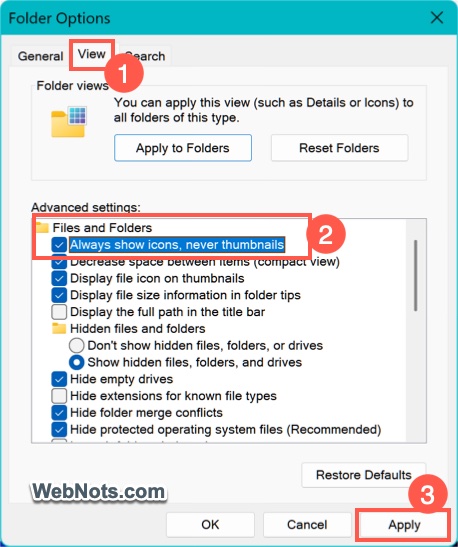
- Go to the “View” tab and check the box next to “Always show icons, never thumbnails”.
- Click “Apply” and then “OK” buttons.
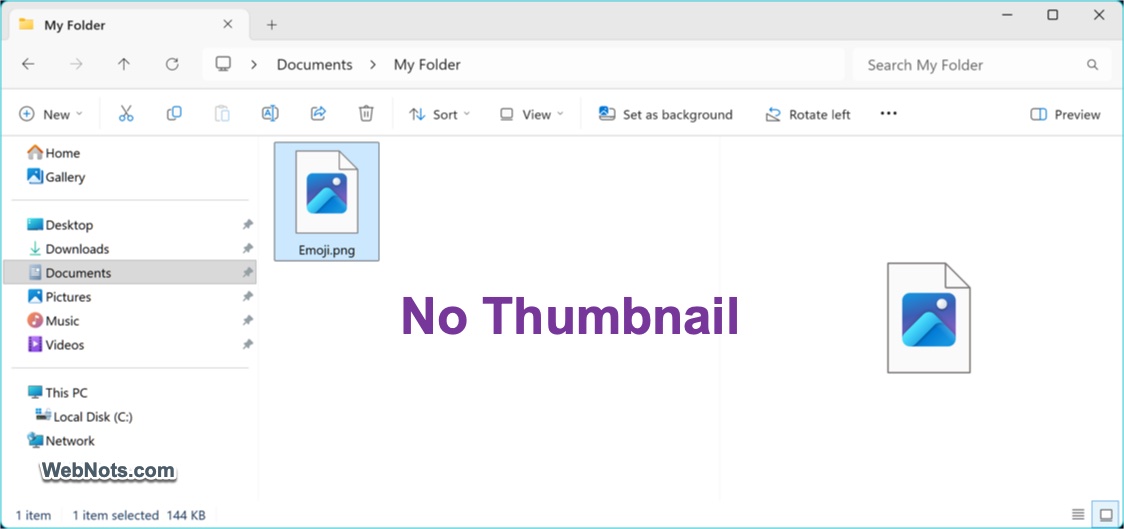
Now, the thumbnails of image will disappear the view as well as preview panes in Files Explorer. Also, the image files on the desktop will change to icons hiding the previews.
2. Using Performance Options
- Press Windows Logo + R keys to open the Run prompt.
- Type systempropertiesperformance and press “OK” button.
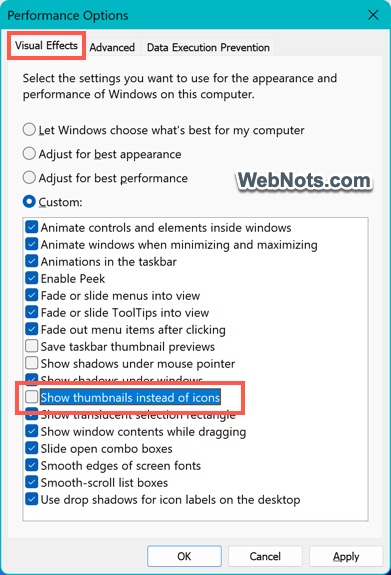
- This will open “Performance Options” dialog and make sure you are in the “Visual Effects” tab.
- Uncheck “Show thumbnails instead of icons” option.
- Click “Apply” button and close the dialog box.
3. Using Group Policy Editor
This is another method especially useful if you are using Windows Pro, Enterprise, Students edition as Group Policy Editor is not available in Windows Home edition.
- Press Windows Logo + R keys and open Run prompt.
- Type gpedit.msc and press “OK” button.
- This will open Local Group Policy Editor app and navigate to the following path.
User Configuration > Administrative Templates > Windows Components > File Explorer
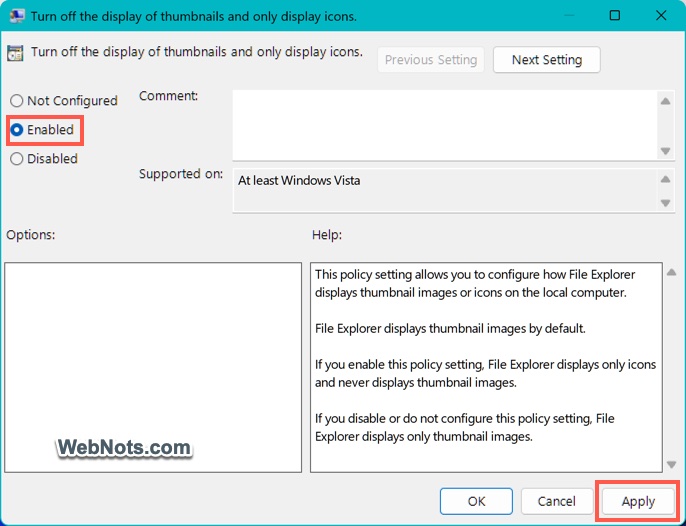
- Find and double-click “Turn off the display of thumbnails and only display icons.” policy on the right side.
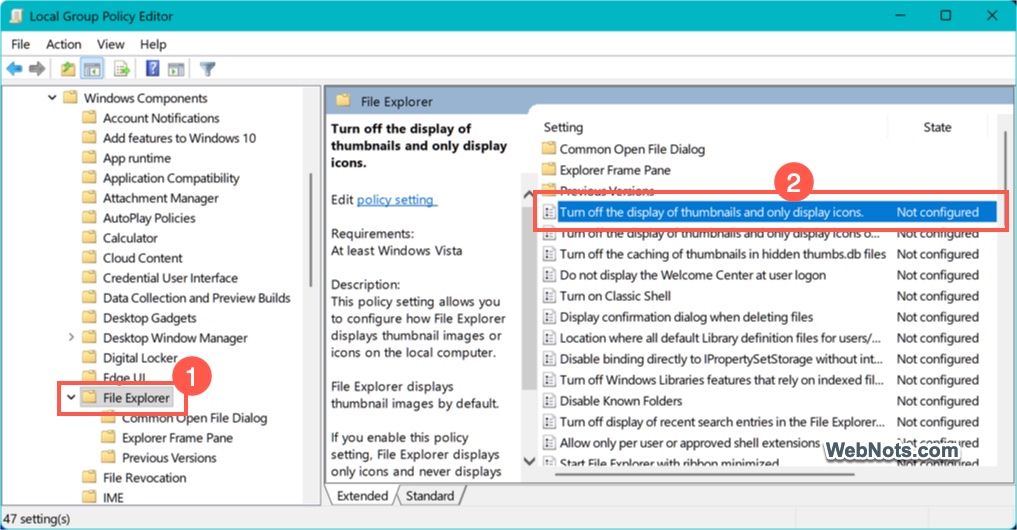
- Select “Enabled”, then click “Apply / OK” buttons.
4. Using Registry Editor
- Press Windows Logo + R keys and open Run prompt.
- Type regedit and press “OK” button to open Registry Editor app.
- Copy paste the following path in address bar and press enter to navigate to that location.
HKEY_CURRENT_USER\SOFTWARE\Microsoft\Windows\CurrentVersion\Policies\Explorer
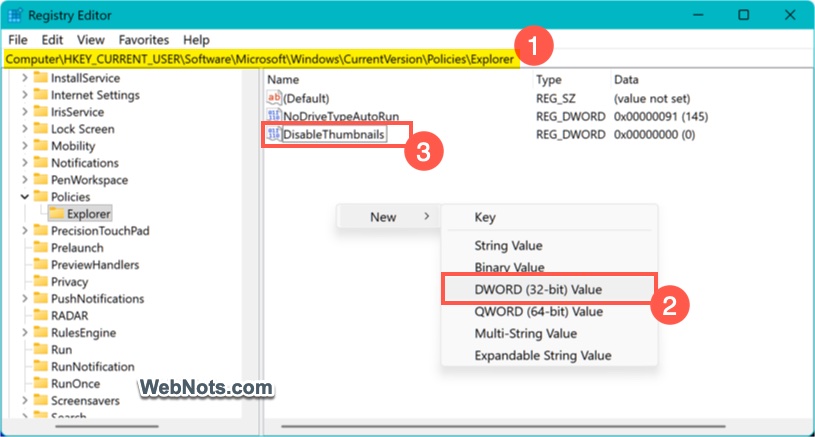
- Right-click on the empty area and select “New > DWORD (32-bit) Value”.
- Change the name of the DWORD as DisableThumbnails.
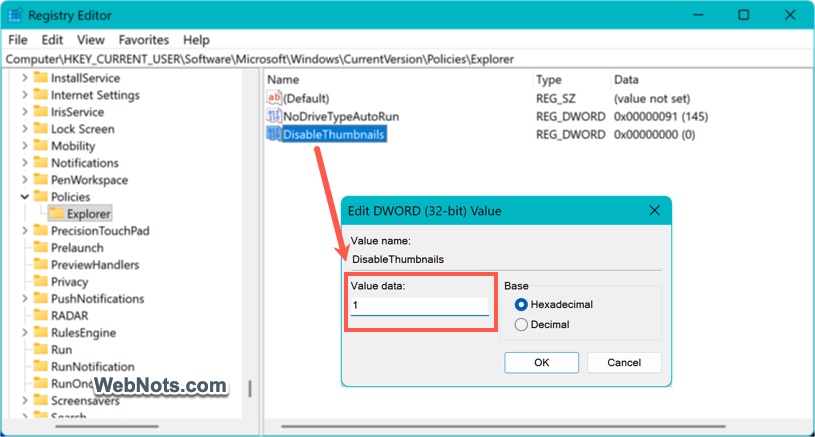
- Double-click the new entry, set the hexadecimal “Value data” to 1.
- Click “OK” and close the Registry Editor.
- Restart your computer and you will no longer see the image thumbnails.
Note: Take a backup of the Registry before making any changes as incorrectly editing the entire can damage your system.
Clear Existing Thumbnail Cache
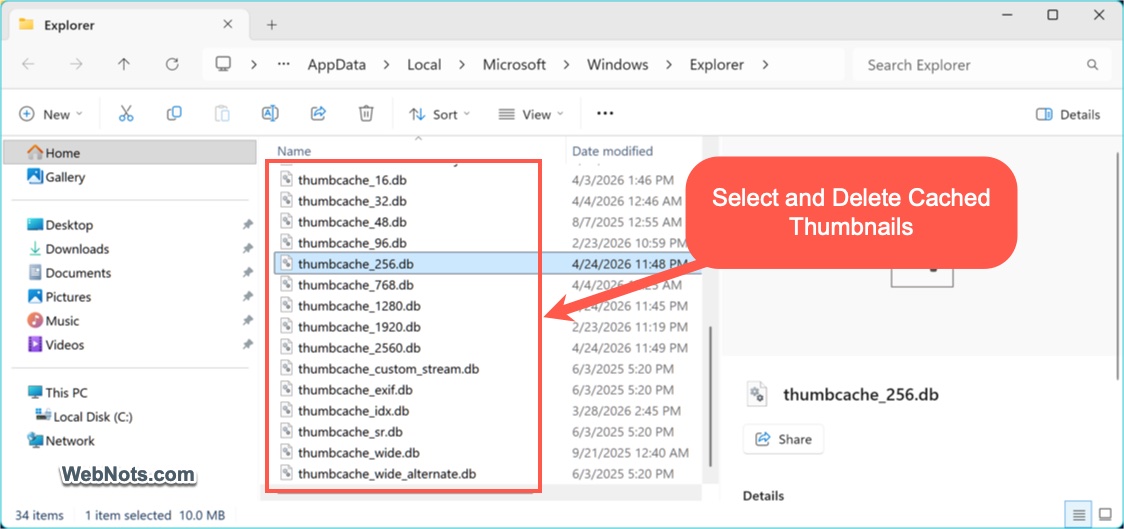
Older Windows versions used to create a thumbs.db file in the same folder to store all the generated thumbnail previews. However, Windows 11 saves them in hidden cache files, like thumbcache_*.db in a centralized location. Cleaning up these files help the folders to load faster the next time you open.
- Press Windows Logo + R keys and open Run dialog.
- Copy paste the following path in the box and press enter.
%localappdata%\Microsoft\Windows\Explorer
- Select everything starting with thumbcache_* and delete all those files.
- Restart your system.
Note: You can re-enable thumbnails anytime by reversing these changes. For example, uncheck “Always show icons, never thumbnails” in Folder Options, or re-check “Show thumbnails instead of icons” in Performance Options. If you used Group Policy or Registry Editor, set the policy back to “Not Configured” or change the DisableThumbnails DWORD value to 0 (or remove the entry) to restore thumbnails. Even if you have deleted the cached thumbnail files, Windows will regenerate them again.