There are plenty of options available for creating and editing media content, including low-cost tools like Apple Creator Studio. However, Adobe’s tools stand out from the crowd, and Adobe Express has evolved into an all-in-one platform for design, photo, and video editing that simplifies content creation for everyone. With a single interface, you can create a variety of materials like social media posts, presentations, images, and videos. Understanding how to leverage its latest features can significantly improve your workflow. So, here are 10 detailed tips to help you get the most out of Adobe Express.
Using Adobe Express
Adobe Express is a free app that you can download on your smartphone, offering access to basic features. In this article, we have explained with the Pro features available through web interface, which unlocks additional design elements and capabilities. To access these advanced features, you can subscribe to Adobe Creative Cloud or purchase Adobe Express as a standalone product. A 30-day free trial is also available, allowing you to explore the features before making a commitment.
1. Schedule Social Media Posts
Adobe Express comes with a personal calendar for scheduling social media posts. You can connect with popular social accounts like Facebook, Instagram, TikTok, Pinterest, X, or LinkedIn and automatically post your content. AI can also assist you to generate a media for your or generate caption / description for the media you upload from your files and projects (you can also upload from your computer).
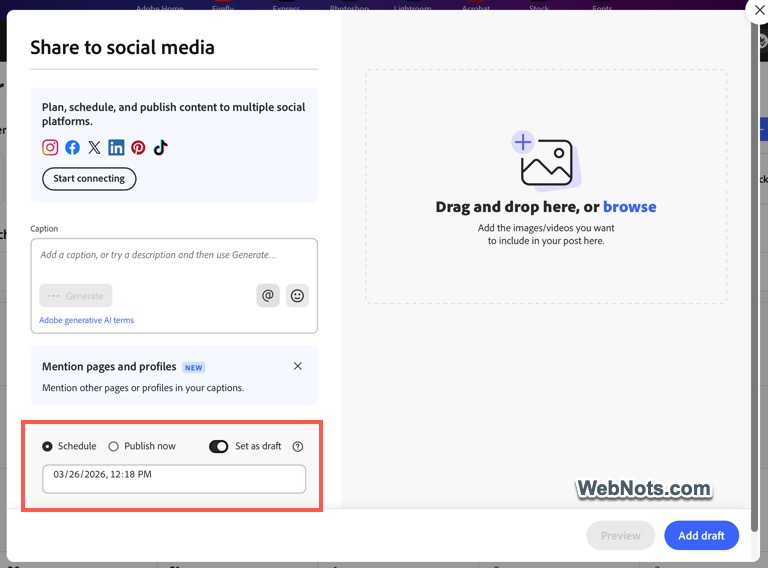
The best part is that you can first schedule the post as a draft and work on your file in parallel to finish it before the timeline.
2. Make Use of Add-ons
Adobe Express is not just a design tool; it functions as a hub to connect with various other tools you need or already use. Go to Add-ons marketplace to discover category-wise items and install the needed ones. For example, after publishing your posts on social media, you can track the performance using the Metricool Analytics add-on within the same interface.

You will also see add-on suggestions when searching for assets.
3. Establish Visual Consistency with Brands
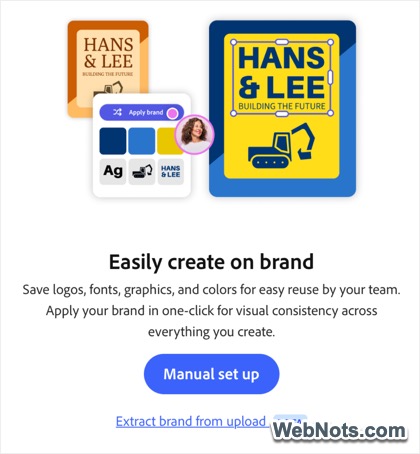
Instead of manually picking colors and fonts for every new project, you can create a centralized kit that houses your logo, color palette, and fonts. You can create brand assets or upload from an existing project. For example, you can extract logo, font, and colors from an image instead of creating them from scratch to save time.
4. Leverage Generative AI for Content Creation
As of now, AI Assistant feature is in beta mode and not available for all users (including premium users). It allows you to make changes directly via chat conversations instead of using the menus. Simply turn on the button (on top left corner of the web interface) and check whether you got the access. There are other Generative AI features (Add Content > Generative AI) to create text effects, videos, images, and templates.
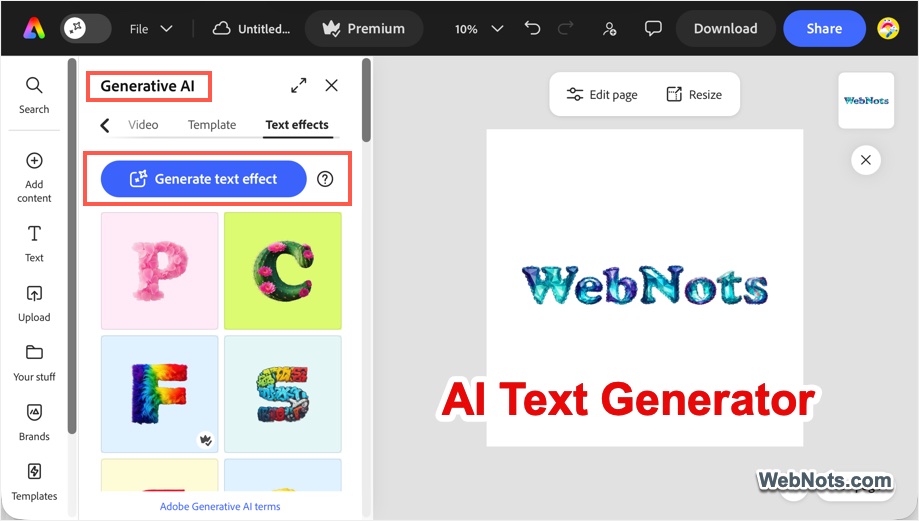
You can generate beautiful fonts or templates in few seconds using these AI tools. Remember to save the file as a template for reusing in your projects and also save the AI credits.
5. Remove Object Backgrounds
You might be already using the background removal feature for the entire image. In addition, Adobe Express allows you to remove the background from any objects added as layers on the image. For example, you can place an image (also possible to paste an object from clipboard) on top of a base image (or a background) and remove the background of the top image to blend it with the base image.
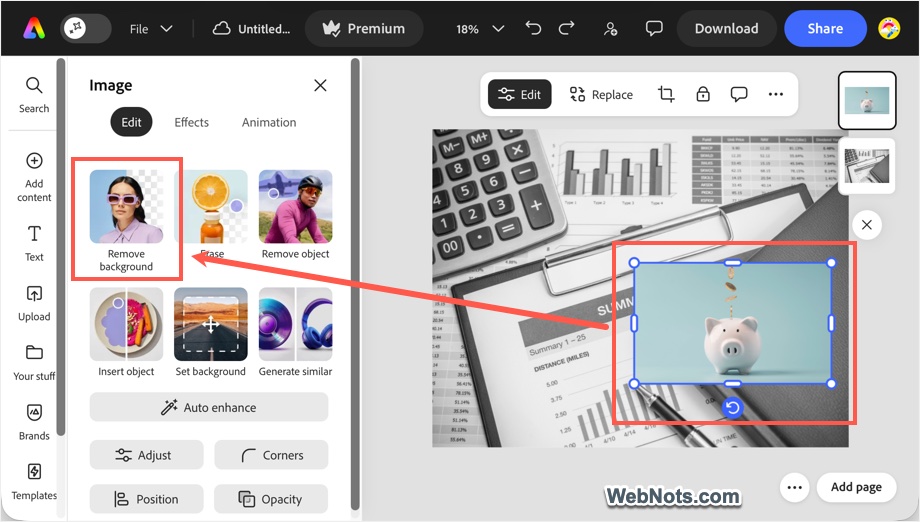
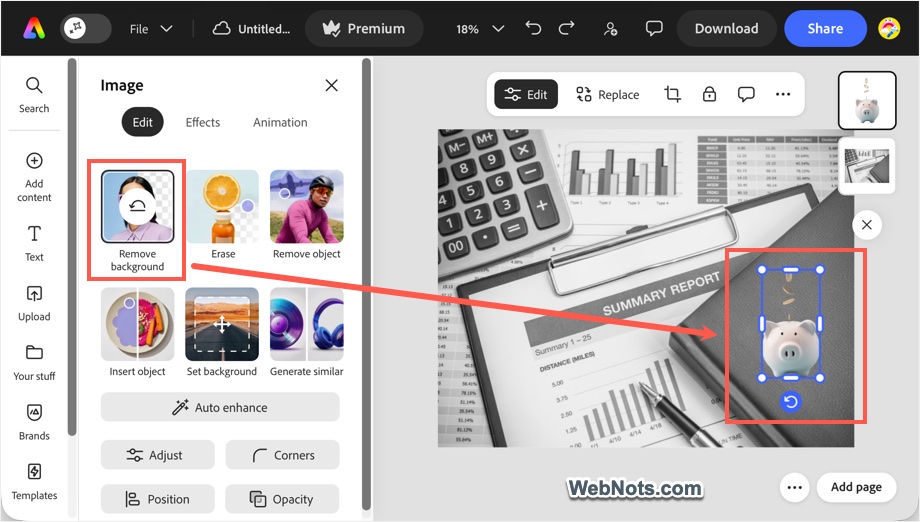
Note that you can also remove an object from the image without any blurring.
6. Use Quick Search Filters
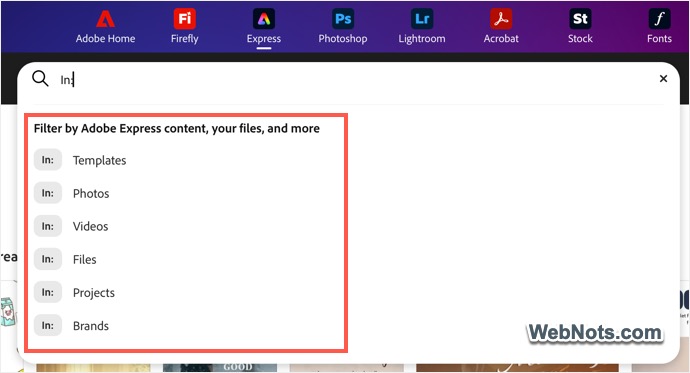
Whenever you select or search an item, Adobe Express uses the filter to show relevant results. For example, if you select “Templates”, the search box will automatically add a filter In:Templates and allows you to search within the templates section. You can make use of the following search filters (not case sensitive) to quickly find items within any section instead of going through the navigations.
| In:Templates | In:Photos |
| In:Files | In:Projects |
| In:Text | In:Add-ons |
| In:Webpage templates | In:Design assets |
| In:Stickers | In:Backgrounds |
| In:Videos | In:Brands |
| In:Libraries | In:All |
Otherwise, type In: in the search box and select a filter from the dropdown.
7. Collaborate Effectively with Comments and Permissions
If you are working in team, Adobe Express has built-in collaboration tools that make feedback loops much smoother.
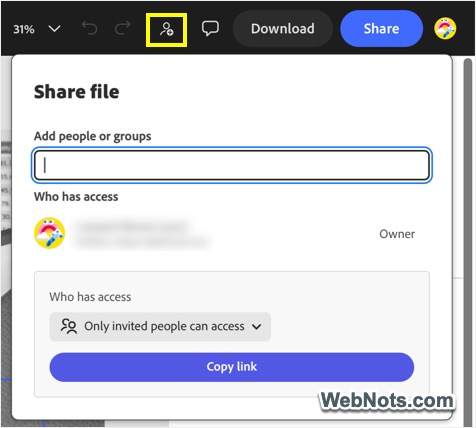
- Collaboration: Click the “Invite” icon on top right and add the people with required access. You can also generate a public link for anyone to access your files.
- Commenting: Add comments for any objects in the file to make a specific feedback. This will help to address the issue easily.
8. PDF Printing Features
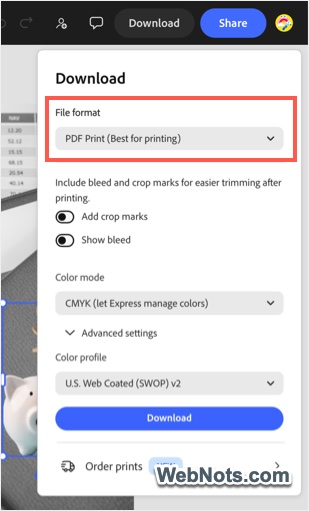
While Adobe Express is great for digital content, it also handles print jobs professionally with “PDF Printing” option.
- Click “Download” button and select “PDF Printing (Best for Printing)”.
- Turn on “Add crop marks” and “Show bleed” option for easier trimming after printing.
- Select “CMYK (let Express manage colors)” option for “Color mode”. Click the “Advanced settings” and select your preferred color profile from the dropdown. This helps the colors on the digital file and physical printout are matching.
9. Master Advanced Video Editing in the Timeline
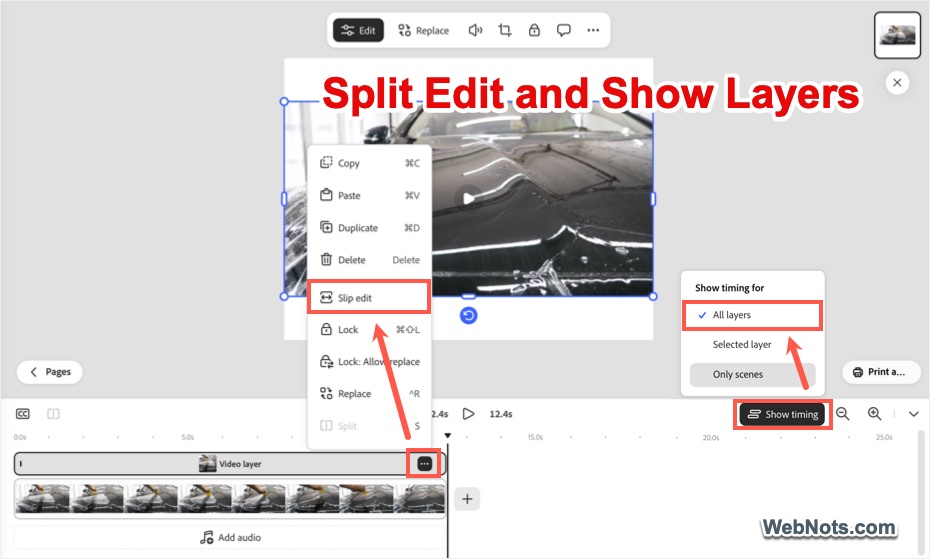
Adobe Express is no longer just for static images; it offers robust video editing capabilities that rival dedicated apps (so, you don’t need another video editing app).
- Slip Edit: Change the visible portion of the video in timeline without moving its position or duration. You do have a “Split” option to split long videos into multiple clips.
- Show All Layers: When editing video, click “Show timing” and select “Show All Layers” view in the timeline. Now, you can clearly see the layered element and adjust easily.
- Enhance speed: Remove audio noise and disturbances from your video with single click.
10. Resize Content Instantly
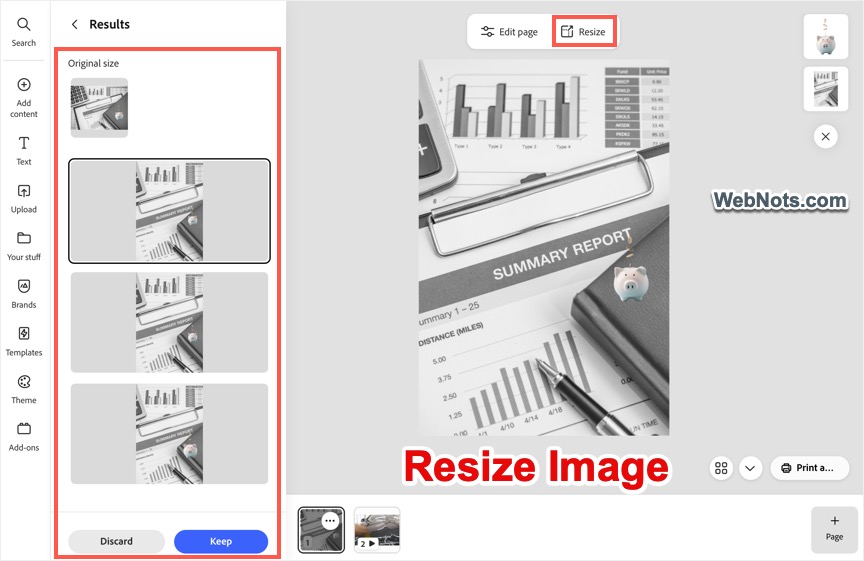
Generally, resizing images will cut off the portions especially if the aspect ratio is changing. This a challenge when you want to publish the same image on multiple social platforms. With the Adobe Express’s “Resize” feature, you can adapt one design for multiple platforms like Instagram, Facebook, and YouTube in just a few clicks. You will also get variations to choose the best result or revert back to the original size. Below is the example showing how an image with 2560 x 1954 pixels is resized for a 1000 x 1500 pixels Pinterest pin without any distortion.
Complete Features List
By integrating the above features into your daily routine, you move beyond simply using Adobe Express as a basic template editor. If you are completely new to Adobe Express, there are two things you can do with the premium subscription: (click the ⨁ icon and go to “Create” or “Quick Actions” tab).
- Create: Create any digital asset like images, videos, posters, flyers, logos, presentations, documents, webpages, newsletters, ad banners, and invitations. Predefined sizes are available for all popular social and advertising platforms like TikTok, YouTube, Pinterest, Facebook, Instagram, X, Linked, Google Ads, and Amazon Ads.
- Quick Actions: Select one of the predefined “Quick Actions” to get things done faster.
| Remove Background | Generate QR Code | Resize image |
| Convert to GIF | Convert to MP4 | Caption Video |
| Convert to SVG | Edit PDF | Profile Picture Maker |
| Collage Maker | Merge Videos | Clip Maker |
| Resize Videos | Trim Videos | Crop Videos |
| Animated Characters | Convert to JPG | Convert to PNG |
| Crop Image | Logo Maker | Card Maker |
| Generate Presentation | Convert to PDF | Combine Files |
| Organize Pages | Convert from PDF | Generate Image |
| Remove Object | Insert Object | Generate Template |
| Generate Text Effects | Generate Video | Generate Similar |
| Firefly Boards |