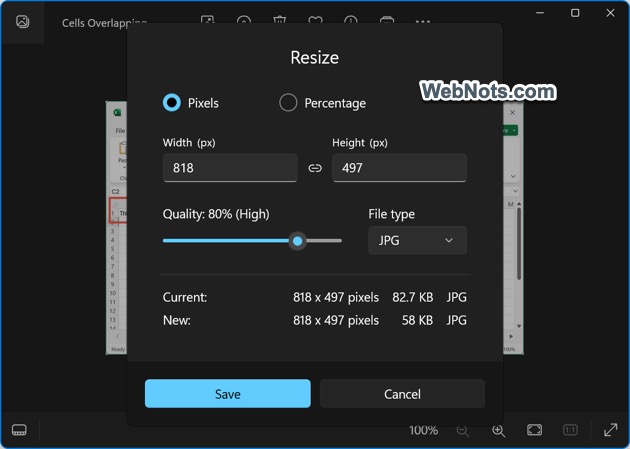
Sometimes you want to change the height and width of a picture to fit it in your document or send across email. Windows 11 comes with a default Photos for image processing. Though you can resize images with Photos app, it can only process one image at a time. You can click on “See more” icon on top toolbar and select “Resize image” option to change your image’s dimensions in pixels or percentage. If you want to bulk resize images in Windows, here is how you can do it.

Microsoft PowerToys App
PowerToys is an official Microsoft app that comes with various missing tools of Windows OS. You have a color picker, Peek file preview, Keyboard Manager for assigning shortcut to app, File Explorer add-ons, always on top, keep system awake and many other useful features packed in PowerToys app. There are two ways to install this app in your PC.
- Install it from Microsoft Store.
- Download and install it from GitHub repository.

Enable Image Resizer in PowerToys
After installing the app, open it from Start menu list or by searching with Copilot or Taskbar search. Go to “Dashboard” section from left sidebar and then scroll down on the right pane. Find “Image Resizer” section and switch on the button to enable it.
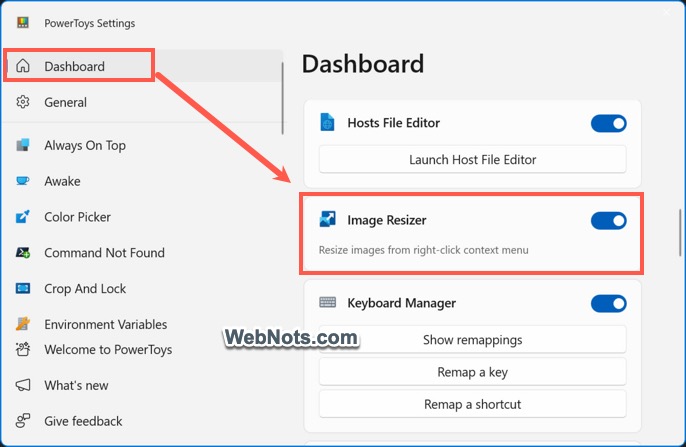
Customizing Image Resizer
Basically, you are ready to go after turning on the options. However, you can customize the editor by navigating to “Image Resizer” section. You can also enable the tool right from here instead from “Dashboard”.
Preset Image Sizes
The tool offers the following predefined image sizes:
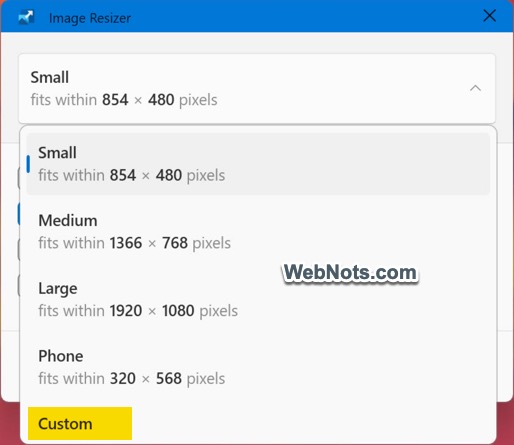
- Small – fits within 854 x 480 pixels.
- Medium – fits within 1366 x 768 pixels.
- Large – fits within 1920 x 1080 pixels.
- Phone – fits within 320 x 568 pixels.
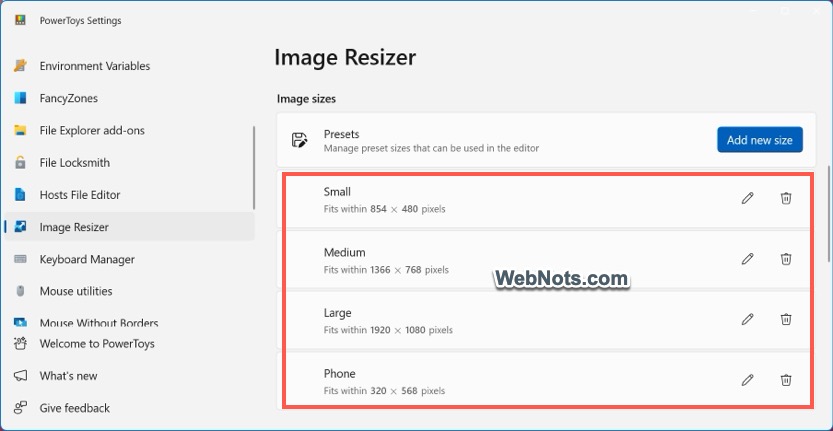
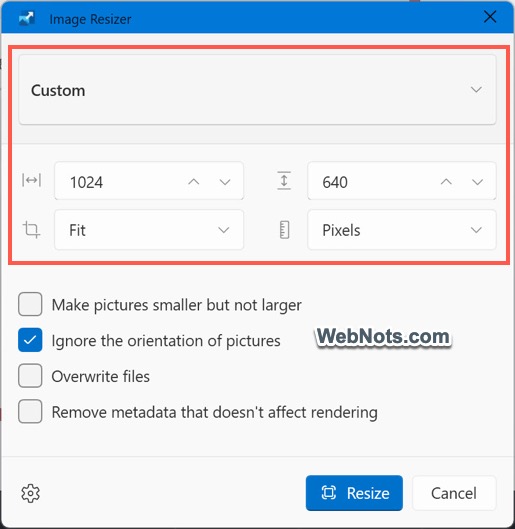
If you want to create a custom size, click on “Add new size” button. You will see a “New size 1” added with 854 x 480 pixels size. Click on the edit pencil icon to change the name, fit, width, height and unit as per your need. Available “Fit” options include Fill, Fit or Stretch and available Unit options are Centimeters, Inches, Percent or Pixels.
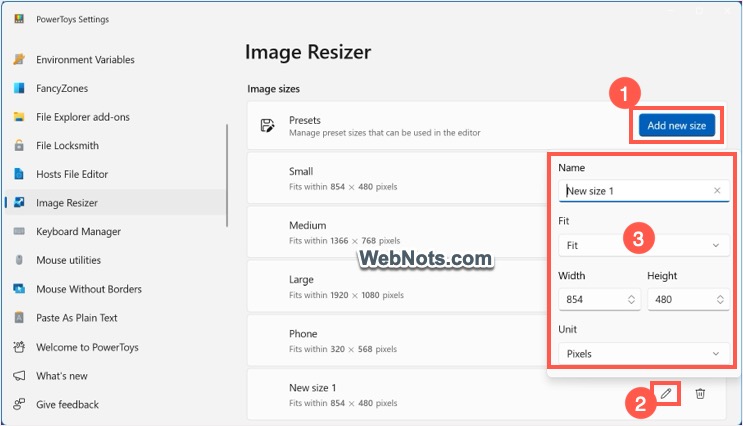
Note: You can also delete any preset image size if that is not needed for you.
Encoding Options
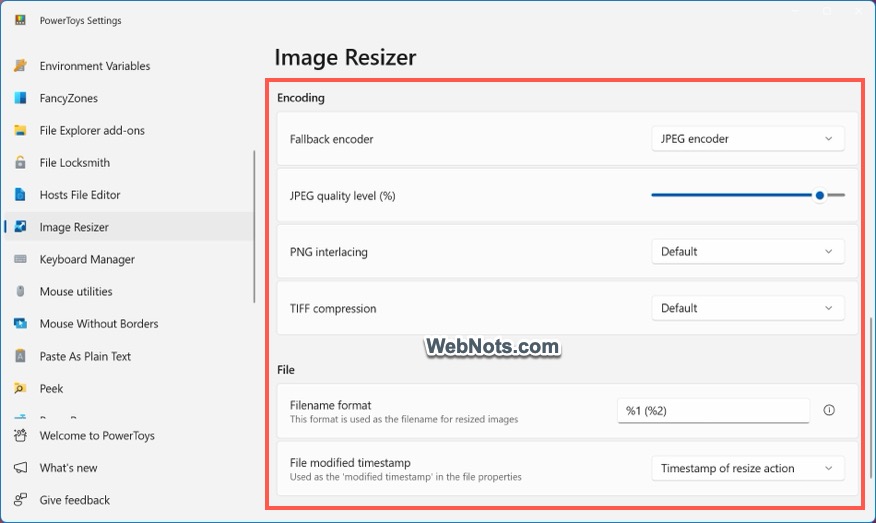
Under this section, you can select the following options. You can leave the default values without changing them.
- Fallback encoder – JPEG encoder is the default and you can change to PNG, BMP, TIFF, WMPhoto or GIF encoder.
- JPEG quality level (%) – use the slider to set the image compression level for JPEG (or JPG) images. Though low compression helps to reduce the file size, it may distort images especially images with smaller sizes and with text.
- PNG interlacing – select Default, On or Off.
- TIFF compression – select Default, None, CCITT3, CCITT4, LZW, RLE or Zip.
File Name Options
The final section is to define the name format for the resized images. Use parameters from %1 to %6 to assign a name in “Filename format” box.
- %1 – Original filename.
- %2 – Image preset size name.
- %3 – Selected width.
- %4 – Selected height.
- %5 – Actual width.
- %6 – Actual height.
The default “Filename format” is set as %1 (%2) which means the resized file will be suffixed with image size name to original filename. For example, if your original image name is “My Image.jpg” and you resized it to “Large” preset size, then the resized image will be with the name “My Image (Large)”.
You can choose “Original file timestamp” or “Timestamp of resize action” for “File modified timestamp” option. This timestamp will NOT be added to the filename but it will be used as “Modified” time in the file’s properties (you can select a file, press “Alt + Enter” keys and check the “Modified” time in “Properties” dialog box under “General” tab).
Resizing Bulk Images Using Image Resizer
Now that you have customized the setup, it’s time to see the tool in action.
- Find the folder where you have images for resizing.
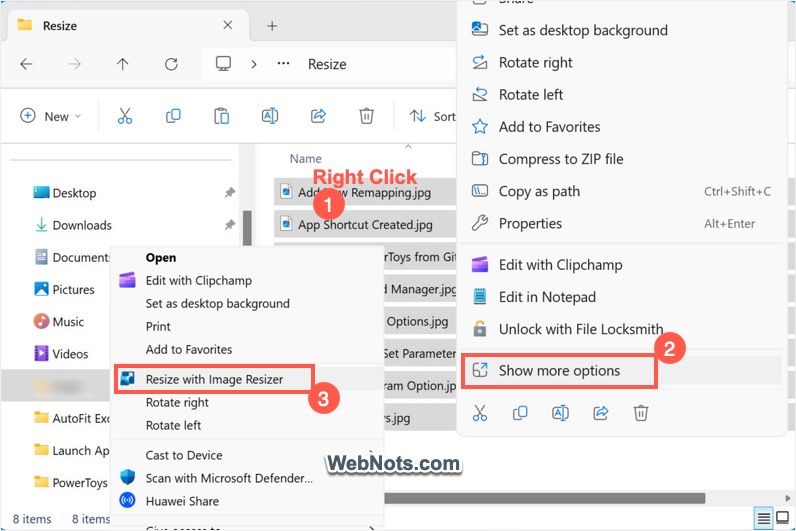
- Select the required images, right-click and select “Show more options” menu.
- Now, you will see “Resize with Image Resizer” menu and click on it to open Image Resizer editor.
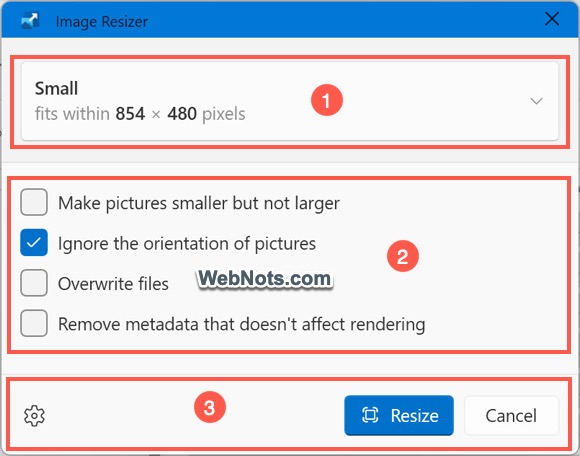
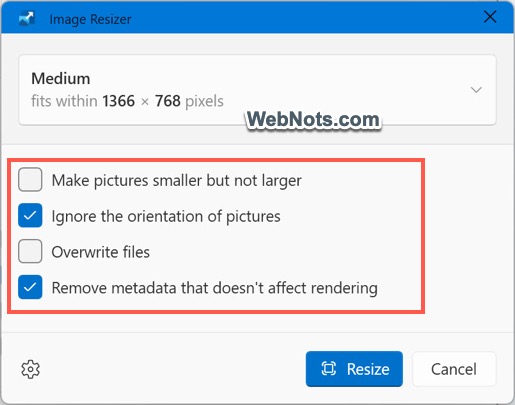
- Resize editor has three sections – top image size preset section, middle additional options and bottom section.
- Click on the top image size preset section and choose one of the sizes you have defined in the customization. It is also possible to add new image size from here by clicking on the “Custom” option.
- Check the required additional options.
- Click the “Resize” button.
Clicking on the gear icon will take you to the PowerToys Image Resizer settings section to modify the setup.
Additional Options Available
It is important to understand the additional options before resizing:
- Make pictures smaller but not larger – this will only allow the images to be resized to smaller sizes. Selecting large preset sizes will not have any impact in this case.
- Ignore the orientations of pictures – uncheck to consider picture’s orientation for resizing.
- Overwrite files – original file will be overwritten with the resized image. Recommend unchecking this option to keep both original and resized images.
- Remove metadata that doesn’t affect rendering – check this option to remove metadata.
Checking Resized Images and Dimensions
All resized images will be available in the same folder along with original images. Therefore, it is important to provide correct filenames so that you can easily sort them out.
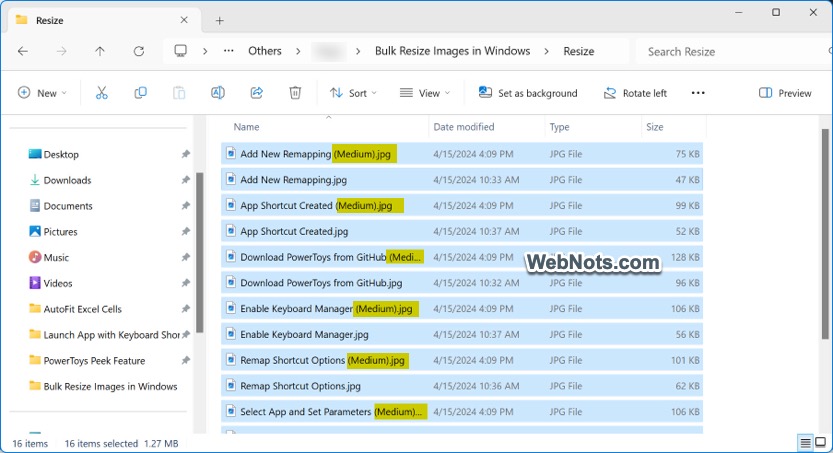
You can hover over each image and find its size and dimension. Otherwise, follow the below steps to compare the sizes in a “Details” view.
- Go to the folder of original images in File Explorer and press “Control + Shift + 6” to change to “Details” view.
- Right-click on the header row and select “More” option.
- Select “Size” and “Dimensions” and click “OK” to add those columns in the view.

- Click on the “Name” header to sort the files based on their name.
- Now, you can easily find the dimensions and sizes of resized images to compare with original images.
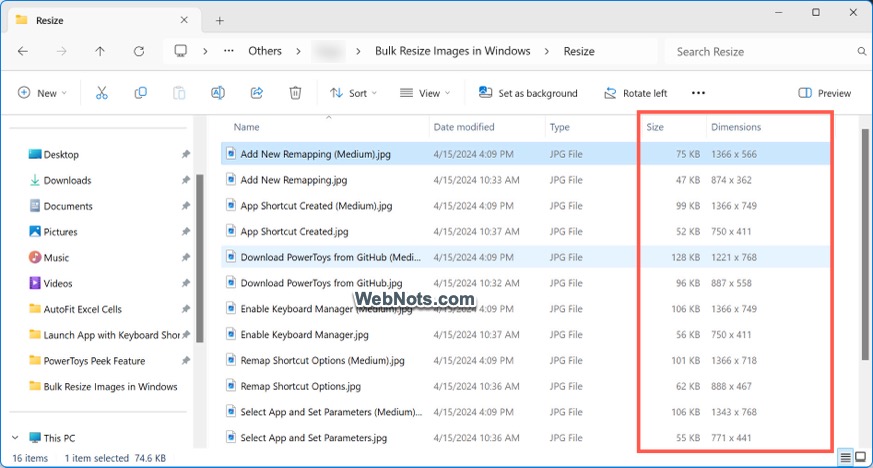
Since I have selected fit within medium size of 1366 x 768 pixels, the resized images are fitted within the maximum width or height dimensions. If required, you can change the “Fit” option in preset image size to “Fill” or “Stretch” to regenerate the images again.
Learn more on how to rename files in bulk.