
Apple markets itself as the privacy-first tech company. And to be fair, iPhones are built with more privacy protections than most devices. But that doesn’t mean you’re fully protected out of the box. Some settings are turned on for convenience, not for privacy and others are buried deep in the menus where most users never look. Here’s a straight-to-the-point guide to the most important privacy settings to check and adjust.
Update Your iOS
All the options explained in this article are based on iOS 18. So, before proceeding further, make sure to update your iOS to the latest available version.
1. Lock and Hide Apps
Apple now lets you lock apps with Face ID or Touch ID — and even hide them completely in a locked folder.
- Press and hold any app.
- Select “Require Face ID” from the menu that appears.
- Choose “Require Face ID” to lock the app or select “Hide and Require Face ID” to hide the app.
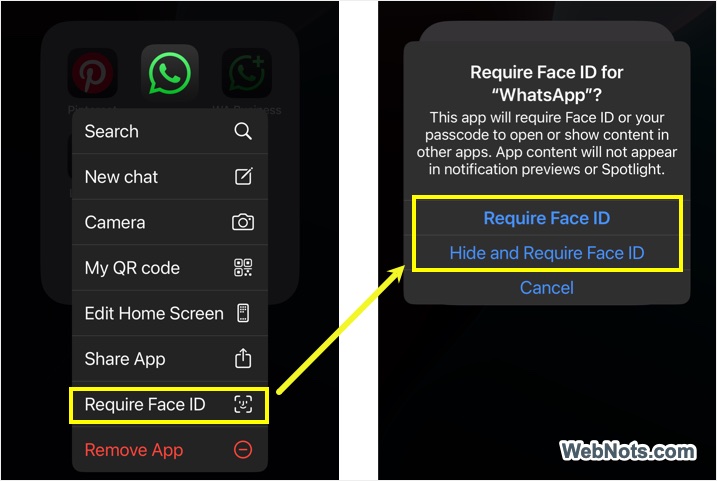
You can find the hidden / locked apps in “Hidden” folder available at the bottom of App Library section. Use this feature for messaging apps, banking apps, or anything sensitive like Journal app. It adds a layer of privacy beyond just locking your iPhone.
2. Control App Tracking
Apps can track your activities to show relevant ads or serve personalized content. Apple will force the apps to ask for your permission for allowing tracking after installation.
- Go to “Settings > Privacy & Security > Tracking” section.
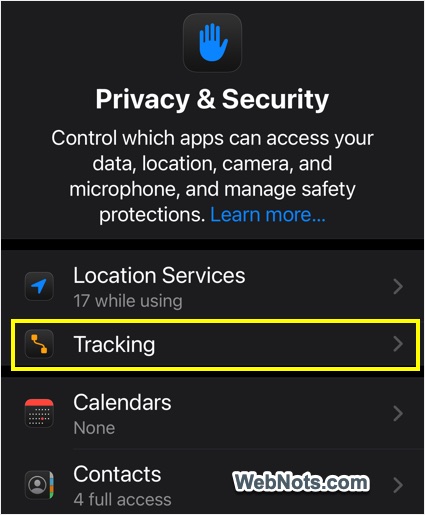
- Turn off “Allow Apps to Request to Track” option.
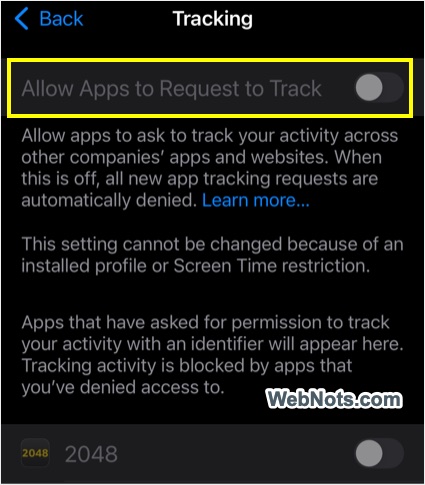
This blocks apps from even asking to track you across other apps and websites.
3. Restrict Access to Sensitive Photos
iOS 18 adds more control over what photos apps can access. You can now auto-update which photos are shared with an app when your library changes.
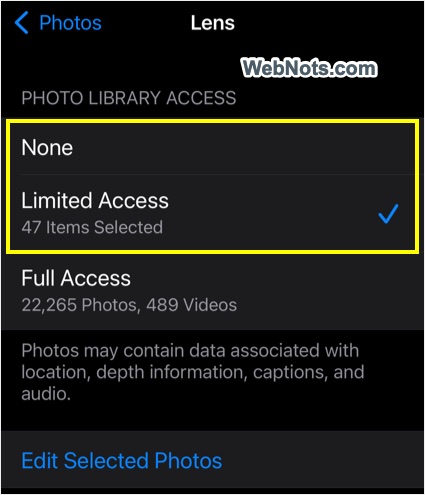
- Go to “Settings > Privacy & Security > Photos”.
- Choose the app and select “None” to restrict the access.
- If you have previously selected “Limited Access” option, then tap on “Edit Selected Photos”. Now, you can add additional photos or tap on “Show Selected” link showing at the bottom to review and remove previously accessed photos.
4. Review Location Services and Clean Up
Apps still love to get your location. You can check and remove unnecessary access.
- Go to “Settings > Privacy & Security > Location Services”.
- Tap each app and switch to “While Using the App” or “Never”.
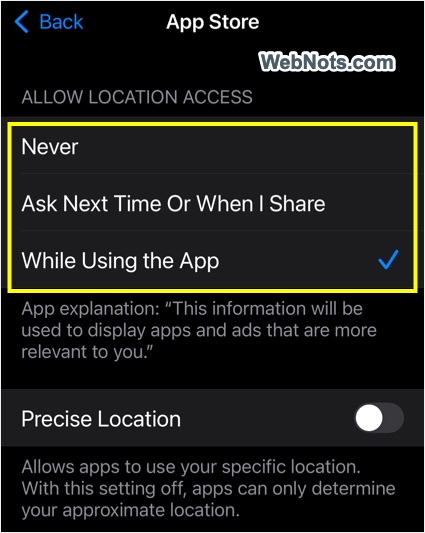
Also, scroll down to the bottom on “Location Services” page and tap on “System Services” option. Go to “Significant Locations” and turn off “Significant Locations” option.
5. Use Safari’s Advanced Privacy Protections
Safari app now offers even tighter anti-tracking. Go to “Settings > Apps > Safari” section and turn on the followings:
- Prevent Cross-Site Tracking.
- Hide IP Address > Trackers and Websites.
- Fraudulent Website Warning.
- Not Secure Connection Warning.
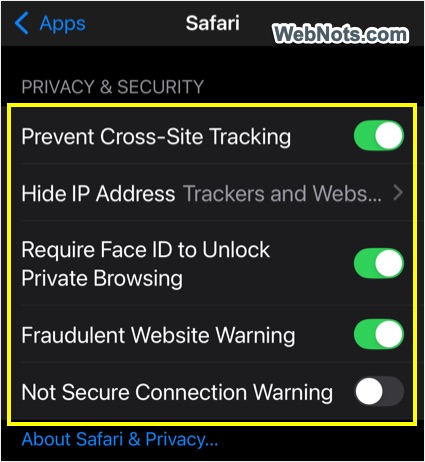
Also, consider enabling Private Browsing Lock, which uses Face ID to keep your private tabs truly private. Scroll down and tap on “Advanced” option to enable “Advanced Tracking and Fingerprinting Protection” All or only for Private Browsing.
6. Remove Unnecessary Access and App Permissions
Some apps ask for Bluetooth access just to scan for nearby devices – which can be used to track you.
- Go to “Settings > Privacy & Security > Bluetooth” section.
- Turn off the access for apps that don’t need it.
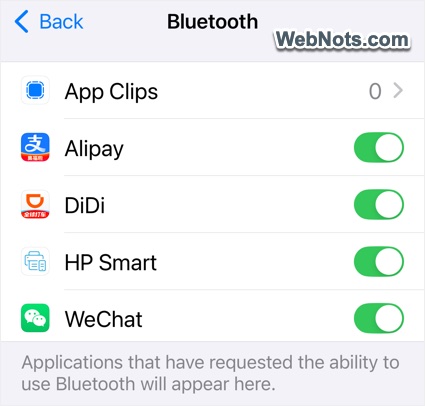
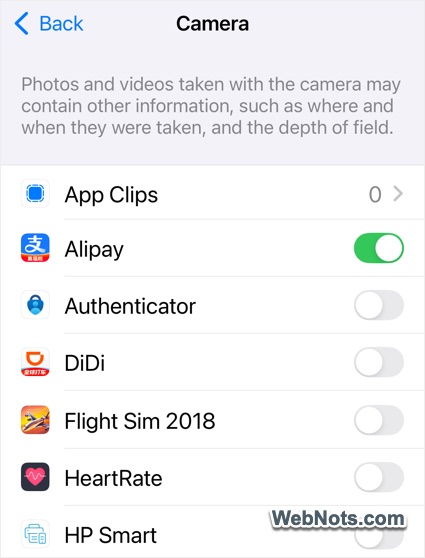
Similarly navigate to “Microphone” and “Camera” sections under “Privacy & Security” page and disable access for any app that shouldn’t need it. Tap on items like Contacts, Calendars, Reminders, etc. and turn off access where it’s unnecessary.
You can also check “App Privacy Report” to find which apps are using the data, sensor, app network and website network and take necessary actions accordingly.
Note: Tap “Photos” from here to control the apps having access to photo library.
7. Mail Privacy Protection
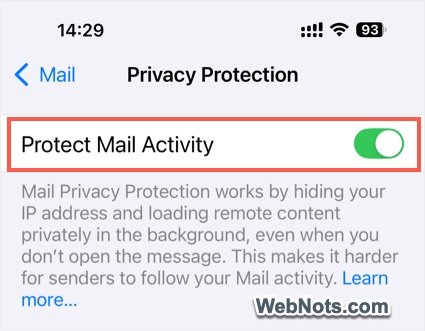
You can stop email senders from tracking your actions. Navigate to “Settings > Apps > Mail > Privacy Protection” section and turn on “Protect Mail Activity”. This hides your IP and stops senders from knowing if or when you opened their email.
8. Limit Lock Screen Access
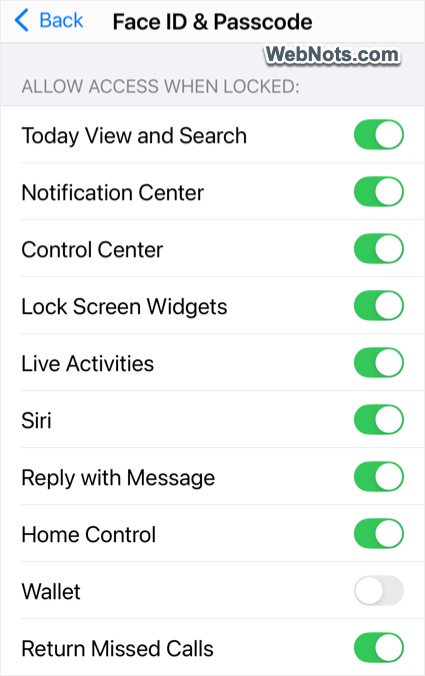
By default, certain features can be accessed while your iPhone is locked. If someone grabs your phone, they shouldn’t be able to use anything.
- Go to “Settings > Face ID & Passcode” section and enter your passcode to unlock the settings page.
- Scroll down to “Allow Access When Locked:” section and turn off access to the following items:
- Notification Center
- Control Center
- Reply with Message
- Wallet
- Return Missed Calls
9. Turn Off Analytics and Improve Siri Feedback
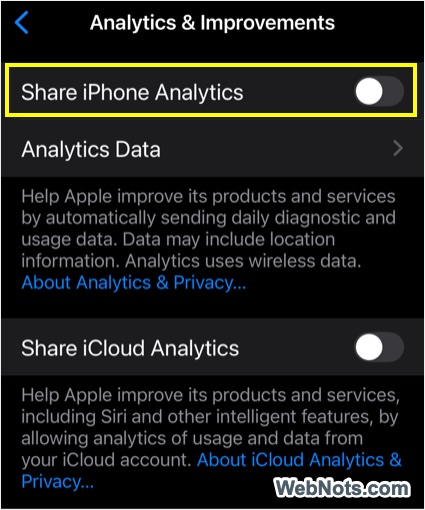
Unless you explicitly want to help Apple, you should turn off analytics sharing. Go to “Settings > Privacy & Security > Analytics & Improvements” section and disable everything:
- Share iPhone Analytics
- Share iCloud Analytics
- Improve Siri & Dictation
- Improve Assistive Voice Features
- Improve AR Location Accuracy
This prevents your device from sending usage and performance data to Apple or third parties.
10. Use iCloud Private Relay (iCloud+ Feature)
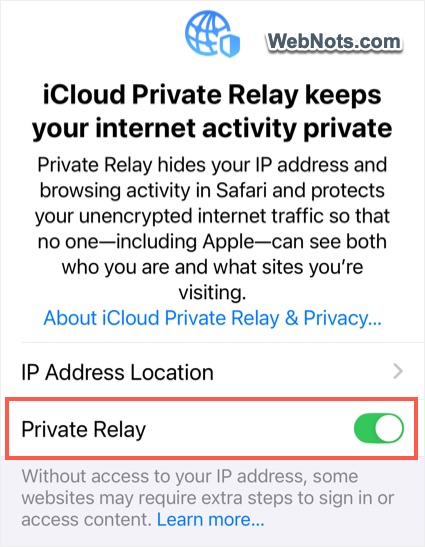
If you pay for iCloud+, enable Private Relay. It hides your IP and encrypts your Safari traffic. Go to “Settings > [Your Name] > iCloud > Private Relay” and turn it on. It works in Safari and Mail, preventing websites and ISPs from building a profile of you.
Final Tips
Apple gives you the tools, but you need to use them. Go through your iPhone’s privacy settings and tighten things up intentionally. You don’t need to live off the grid – but there’s no reason to hand out your data for free. A quick 10-minute pass through your settings could mean the difference between peace of mind – and leaking your data without knowing it.


