You can simply press, “Control + P” and press enter to print the document with the default printer in Windows 11. Whenever you print, the document will be added in a queue before being sent to the printer. If you have mistakenly printed a document with hundreds of pages or wanted to temporarily stop the printing, it is easy to cancel or pause the printing.
Pause or Cancel Printing
You have two in-built options in Windows 11 – one is to completely cancel and another is to pause the printing.
- Pausing allows you to temporarily stop the printing and resume it anytime later when needed.
- Cancelling allows you to permanently delete the jobs in queue. In this case, you should reprint the documents afresh.
You can pause or cancel a specific document or all printed documents at once depending upon your situation. It is also possible that you first pause all printing, cancel some unwanted jobs and then resume the remaining needed jobs.
1. Pause All Printing from Settings App
This is the easiest option available in Windows 11 to pause and resume printing of all documents.
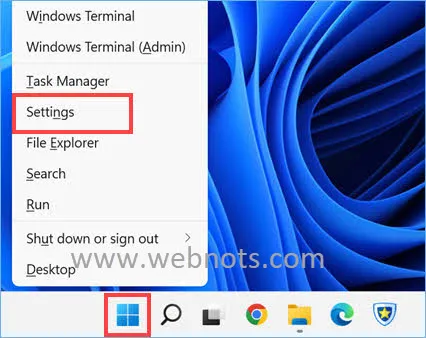
- Press “Windows Logo + I” keys or right-click on the Start icon and select “Settings” menu.
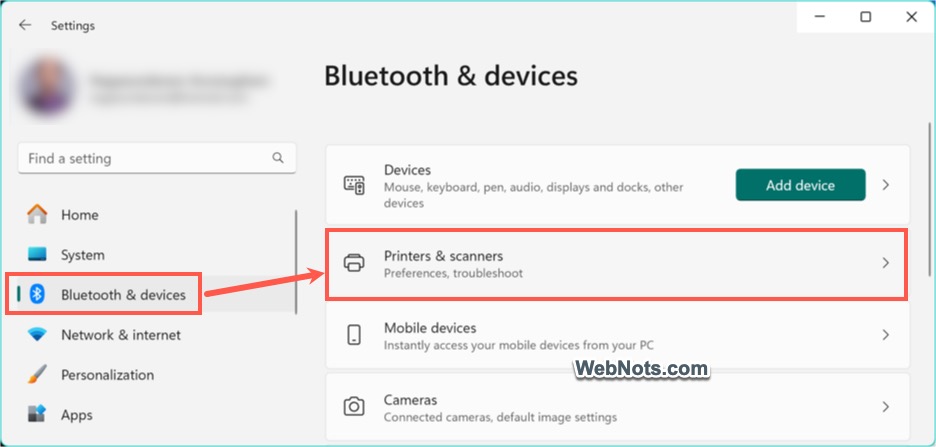
- When you are in the Settings app, go to “Bluetooth & devices” section.
- Select “Printers & scanners” option from the right pane.
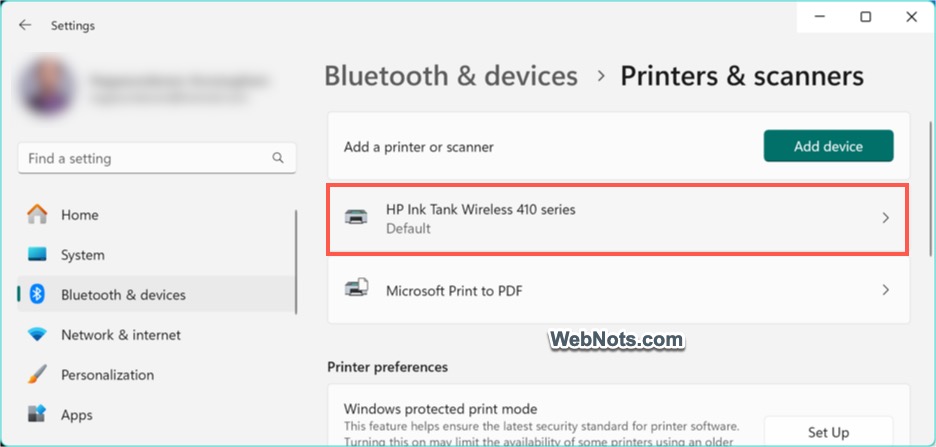
- You will see a list of available printers and click the one you have used for printing your document. Or click the “Default” printer from the list.
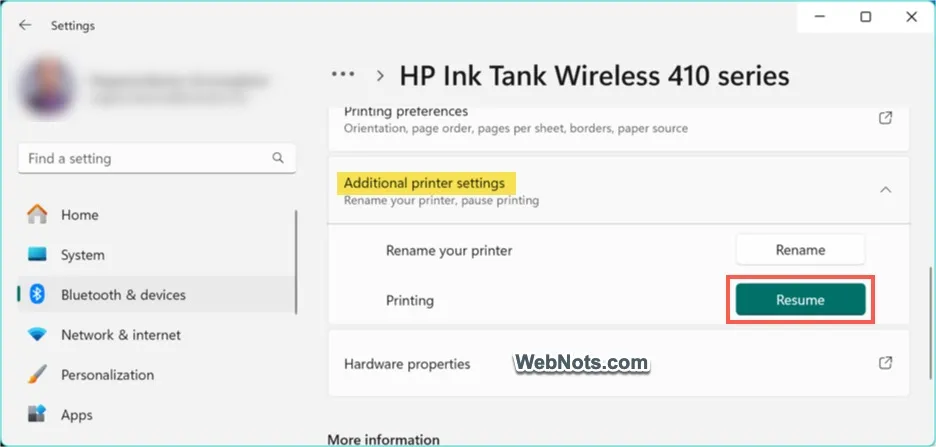
- Under the selected printer’s settings section, expand “Additional printer settings” option.
- Click on the “Pause” button against “Printing” option.

- Again, click on the “Resume” button whenever you want to continue with the printing.
It is not possible to select an individual printing job in this method.
2. Pause Printing from Print Management App
Windows 11 also comes with a Print Management app using which you can manage the printed documents.
- Type “Print Management” in Windows Search box and open the app.

- Go to “All Printers” or “Printer With Jobs” section and select the printer’s name from the list.
- Click the “More Actions” under the printer’s name in last column and select “Pause Printing…” option from the context menu.

- When needed, again click on “More Actions” and select “Resume Printing” option.

Print Management app follows Settings app and allows you to pause or resume all jobs at once.
3. Pause, Cancel or Restart Printing from Print Queue
With this option you can cancel a single or all printed documents in the queue.
- Open Print Management app and go to “All Printers” and then select your printer.
- Right-click on it and select “Open Printer Queue…” option.

- In the printer queue dialog box, go to “Printer” menu and select “Cancel All Documents” option. Alternatively, you can also select “Pause Printing” option from here.

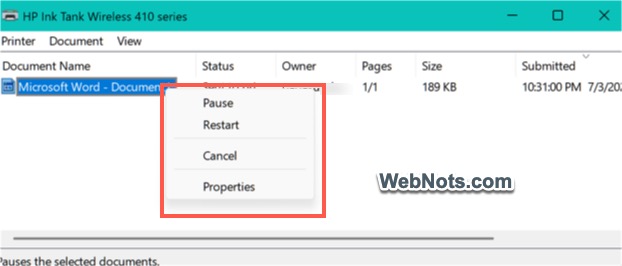
- For cancelling an individual job, select a job and right-click on it. Select “Cancel” option to remove it from the queue which will stop printing the document. You can also select “Pause” or “Restart” the job from here.
4. Pause or Cancel from Taskbar Print Queue
This is another method to handle individual printed jobs.
- Click on “Show hidden icons” arrow on the Taskbar system tray to view “Print Queue” icon. This icon will appear whenever you print a document and show a tooltip about the number of pending documents in the printing queue.

- Right-click on it and select “Open All Active Printers” option.

- This will open different “Print Queue” dialog box.
- Right-click on a job and select “Pause” or “Cancel” option.
- Otherwise, click the three dots icons showing above top right corner of the first job and select “Pause all” or “Cancel all” option as you need.

If you have paused, it is possible to “Resume” or Resume all” the job(s) anytime later.
5. Cancel Printing from the Printer
Most printer models come with a button to cancel all the printing documents at once. If you have larger printer with display (offers printing, copying and scanning together), then you can view the jobs in queue and print or cancel them individually.
It is also a common practice in organizations to verify the document with employee number before they can be printed. This will help to:
- Avoid mistakenly printing from the computer.
- Pick up the printed documents immediately without forgetting.
- Keeping track of employees printing large documents.
- Applying printing limits for individual employees.
Final Words
Though all the above methods will work to pause or cancel the printed document, they are useful when you have printed multiple documents or a document with large number of pages. If you have printed a single or two pages, they will be printed before you try to cancel.