Most operating systems like Mac and Windows offer an in-built option for tiling app windows on the screen. Even you can use Edge browser’s Split Screen option to compare two webpages side by vertically or horizontally. Google Chrome also added a similar feature called Split View to arrange two webpages side-by-side in a single tab for comparison or reading them in parallel. Let’s explain how you can use this feature on Chrome.
Enable Split View in Chrome
There are multiple ways to use Split View and is enabled by default on Chrome. However, you need to turn on this feature for using drag and drop option.
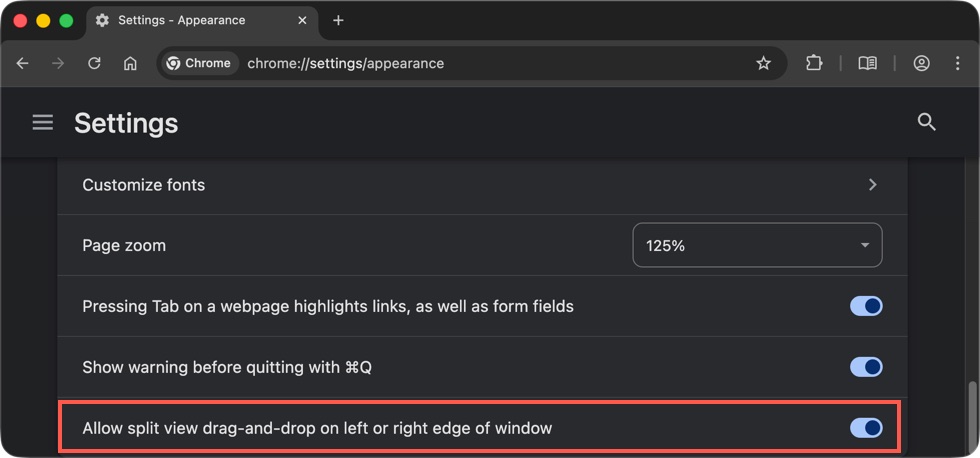
- Open Chrome, paste this command URL chrome://settings/ in the address bar and press enter.
- This will open Chrome’s settings page and navigate to “Appearance” section.
- Scroll down to bottom and turn on “Allow split view drag-and-drop on left or right edge of window” option.
1. Using Drag and Drop
This method works after you have enabled the drag and drop setting as explained above and is useful when the two tabs are already opened.
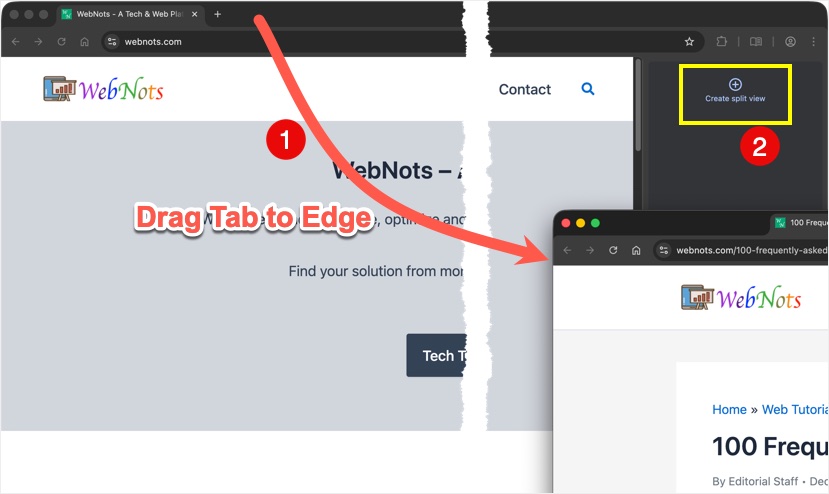
- Simply drag one of the tabs from the top to right or left edge of the browser window.
- When you see a “Create a Split View” notification, drop the tab.
- Now, Chrome will show the current and the dragged tabs as a single tab side-by-side.
2. Using Right-Click Menu
This works by default and is useful for using any hyperlink in Split View.
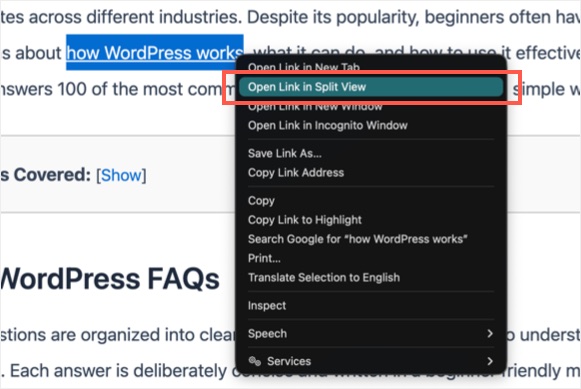
- Right-click on any hyperlink on your current tab.
- Select “Open Link in Split View” option from the context menu.
- Chrome will create a Split View by adding the hyperlinked page to the right of the current tab.
3. Using Split View from Title Bar
This method is useful to create a Split View with any one of the open tabs and the current tab.
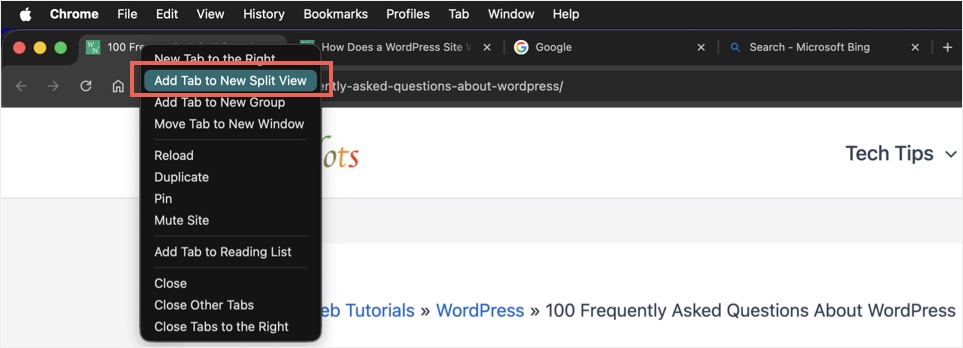
- Right-click on the title bar of the active tab and select “Add Tab to New Split View” menu. If you right-click on an inactive tab, then select “New Split View with Current Tab” option.
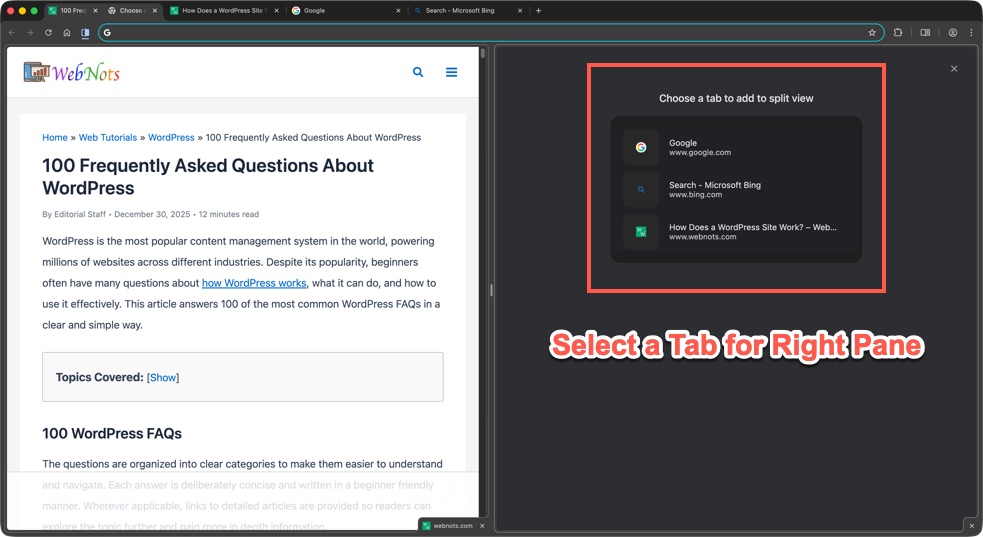
- Chrome will keep the current tab in left position and show a list of all other open tabs on the right pane for selection.
- Click the tab you want to use in Split View and Chrome will use that tab in right pane.
4. Pin Split View Icon
This is useful for quicker access by clicking the icon next to the address bar.
- By default, the icon is not showing on the browser interface. So, first create a Split View using one of the above methods to add the icon left side of the address bar.
- Now, right-click on the Split View icon and select “Pin” option.
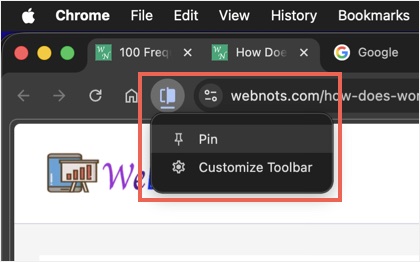
You can anytime right-click on the icon and unpin to remove it.
5. Enable Split View Icon from Customization Sidebar
This is alternate method to add the Split View icon in Chrome’s toolbar.
- Open a new tab and click on the “Customize Chrome” button showing on bottom left.
- Click on the “Toolbar” option to customize.
- Turn on “Open In Split View” button to add the icon in the toolbar.
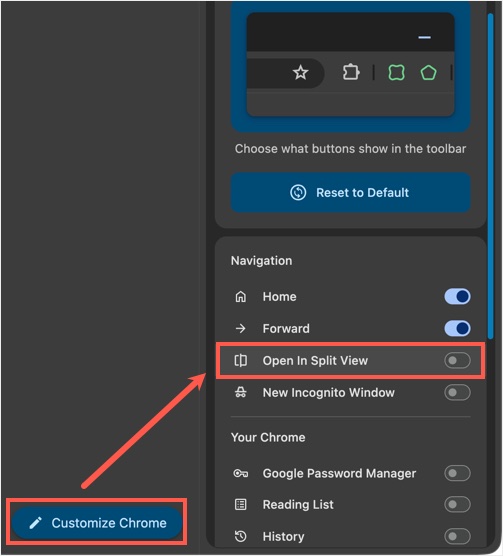
You can anytime turn it off to remove the icon from toolbar.
How Split View Works?
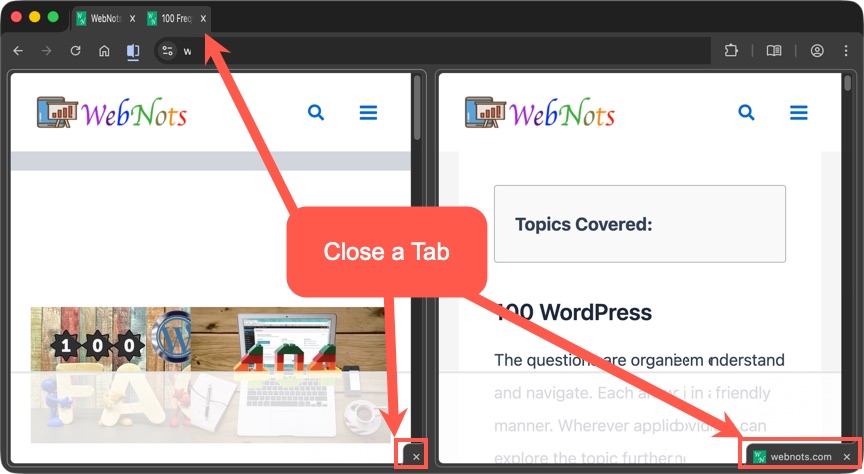
When you are in the Split View, Chrome will show both the tabs as a single tab on the title bar and also add a Split View icon to the left side of address bar. You can scroll on both tabs independently to compare or read the content.

- Click the close button on the title bar to close any one of the split tabs. Otherwise, click the “Close This View” button showing on bottom right corner of each split tabs to close that tab.
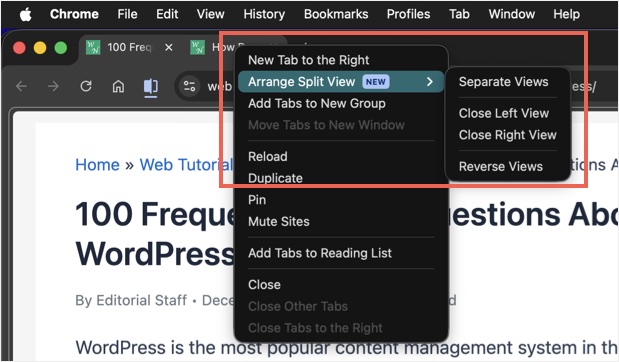
- You can also click the Split View icon and select “Close Left View” or “Close Right View” option.
- From the Split View icon, select “Separate Views” to detach them to two different tabs.
- You can reverse the left and right tabs position without closing and reopening them.
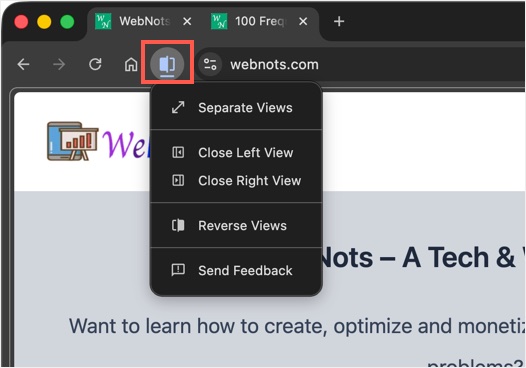
It is also possible to right-click on the split tab’s title bar to use all the above options from “Arrange Split View” menu.