Apple gives you 5GB of free storage with iCloud account. However, if you heavily rely on Microsoft 365 apps (like Word, Excel, Outlook, etc.) on your Mac, then it’s a good idea to use OneDrive instead of iCloud. Free OneDrive account also comes with 5GB storage space but you can make use of the 1TB free storage with your Microsoft 365 subscription.
Using OneDrive on Mac
If you primarily focus on editing synchronized files in Word or Excel, then you don’t need to install a separate OneDrive app. Otherwise, for a complete file management solution (like browsing and finding different file types), you need the OneDrive app.
1. Using OneDrive with Microsoft 365 Apps
Let’s explain here with Word and you can do the same with Excel and PowerPoint.
Open OneDrive Document for Editing
- First, login to Word app with your Microsoft account having a valid Microsoft 365 subscription.
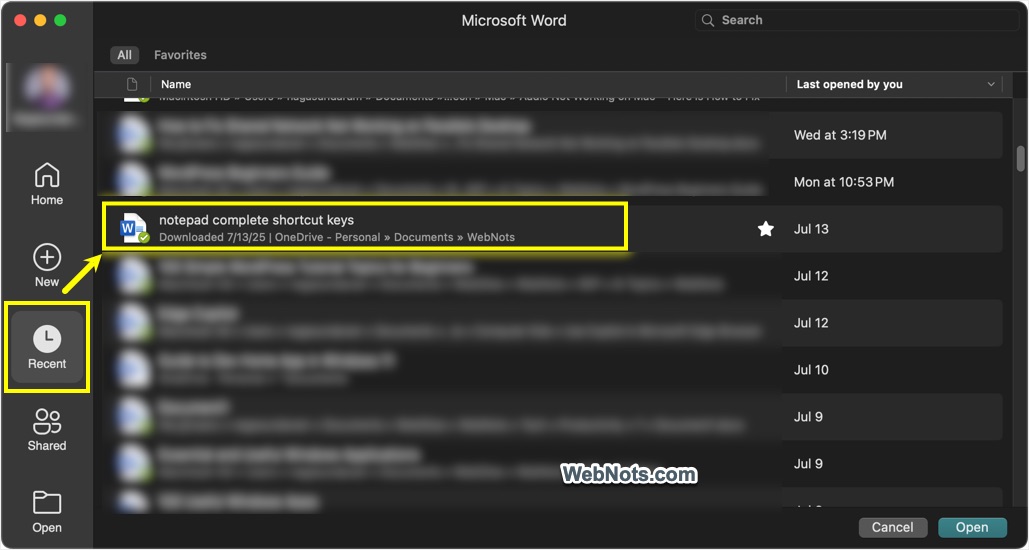
- The start screen window (called Document Gallery in Word for Mac) will show all your recently accessed documents including files from your OneDrive account. Select the file to start editing on Mac.
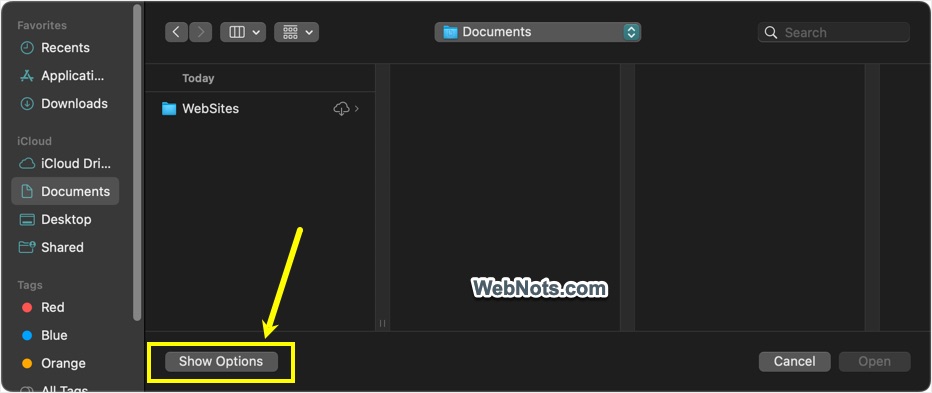
- Alternatively, go to “File > Open” and then click on the “Show Options” button.
- Now, click on the “online Locations” button.
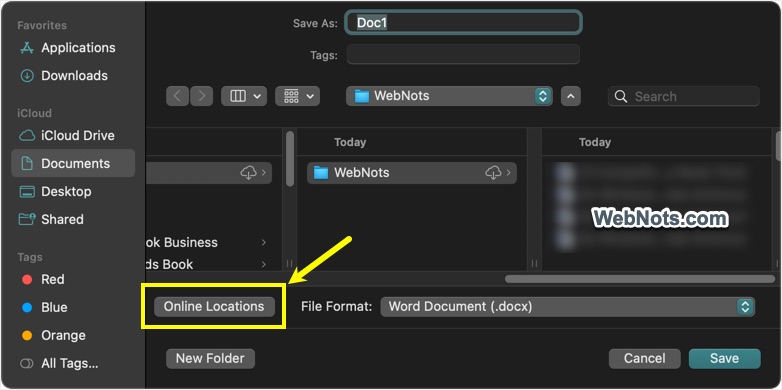
- Go to OneDrive location for browsing and selecting a document for editing.

Saving Files in OneDrive
If you are editing a document from OneDrive, it will be automatically saved with Version History. You need to enable this by going to “Word > Preferences… > Save” section and turning on “Turn on AutoSave by default” option.

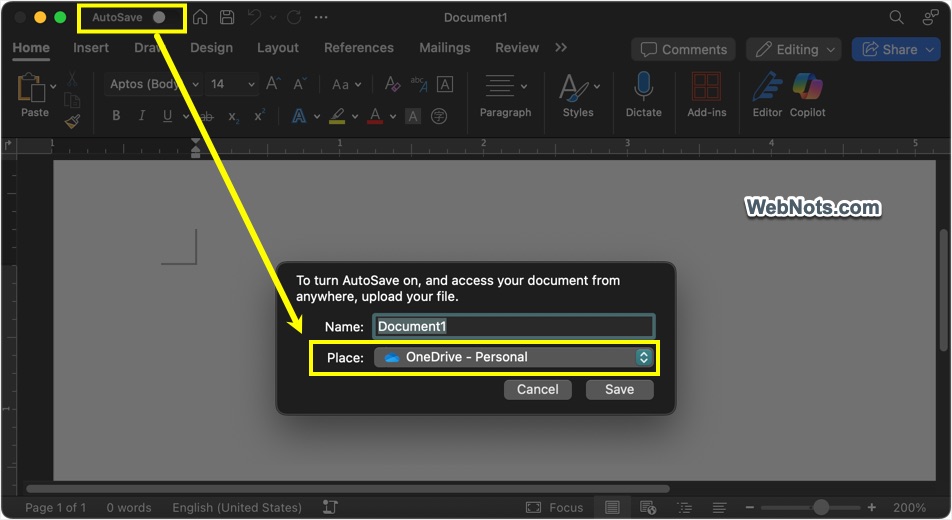
If you have opened any other local document or created a document from scratch, click on the “AutoSave” toggle on top left corner. Make sure OneDrive is selected against “Place” and click “Save” button to upload the document in your OneDrive account. Later you can open this document from cloud on any other device and edit its content.
2. Managing Files with OneDrive App on Mac
This is similar to using OneDrive app on your Windows PC. Though you don’t need to have Microsoft 365 apps on Mac for using OneDrive, we strongly recommend using those apps for editing Office files. Editing Microsoft 365 files with Apple iWork package (Pages, Numbers and Keynote) will lead to incompatibilities like missing fonts. Also, you may not be able to edit Pages and other files on Windows.
Setting Up OneDrive App
- Open Mac App Store, search for “OneDrive” to find and install the app.

- Once installed, open the app and login with your Microsoft’s account.
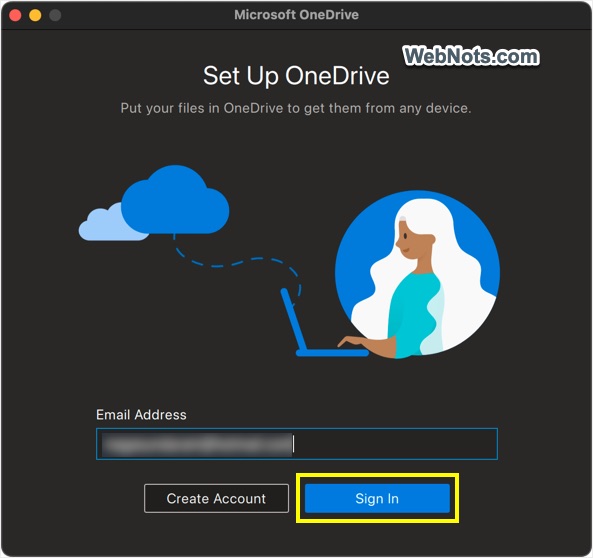
- Accept privacy and select diagnostic data sharing (opt out for privacy) option.
- Click on the “Choose OneDrive Folder” button and select a folder where you want to sync or save your files. By default, the app will select your user account folder. We recommend creating a custom folder and use for OneDrive setup. We create a folder named “OneDrive” under “Documents” section and link with the app.

- Click “Next” buttons on the subsequent screens and you will be prompted to provide permissions for starting synchronization.

- You will see plenty of instructional screens and just click “Next” or “Later” buttons to reach the final screen that says “Your OneDrive Is Ready for You” screen.
- Close that screen or click on the “Open OneDrive Folder” button to open the location in Finder app.

Syncing Files and Folders
OneDrive will automatically add an icon on top menu bar. Click on the menu bar icon to find your recent files and the current status of synchronization.

OneDrive will also add its location folder on Finder’s sidebar. Simply drag any file or folder into that folder for uploading to your OneDrive account. You can also save your Microsoft 365 files in your OneDrive location on Mac.

Customizing OneDrive App Settings
Click on the menu bar icon and then click the gear icons that says, “Help & Settings”. Now, select “Preferences” to open the app’s settings dialog box. Alternatively, go to “OneDrive > Preferences…” from menu.
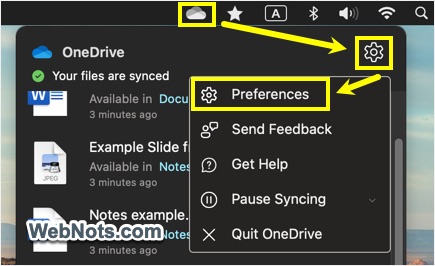
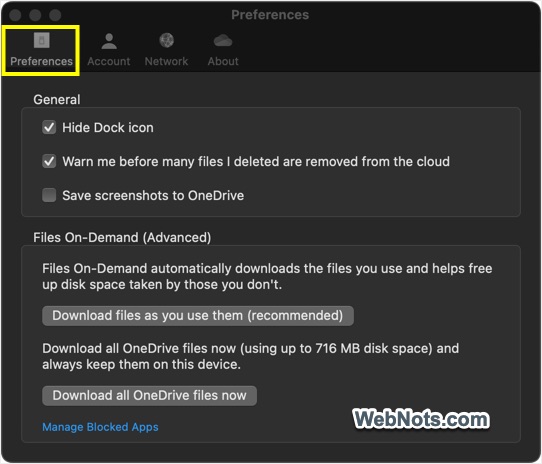
Here are some of the important things you can enable or disable:
- Preferences – save all screenshots automatically to OneDrive folder and choose whether you want to download all the files or download only when you use.
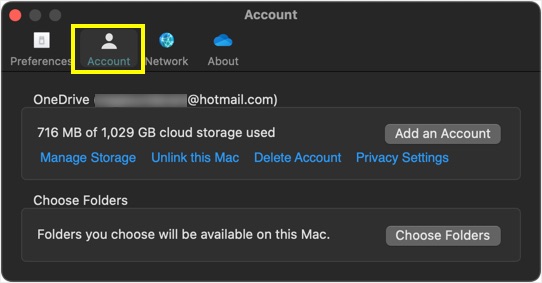
- Account – check the storage space for your account and choose the folders you want to hide in Finder.
- Network – Set the limit for upload and download speed.
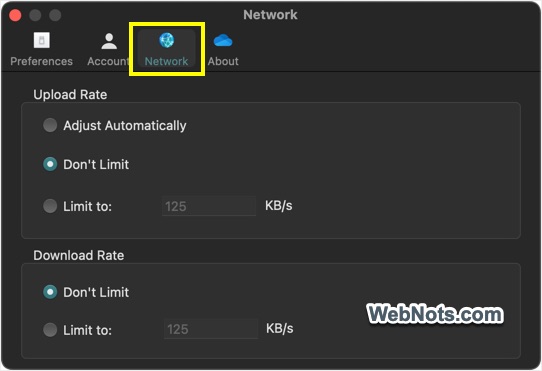
If you want to pause OneDrive syncing, go to “OneDrive Menu Icon > Gera Icon > Pause syncing” and select 2, 8 or 24 hours option.
Deleting OneDrive App on Mac
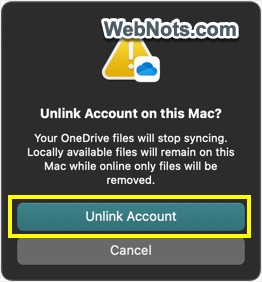
If you want to completely delete the app, first go to preferences section. Under “Account” tab, click on the “Unlink this Mac” link. Confirm your action by clicking on “Unlink Account” button.
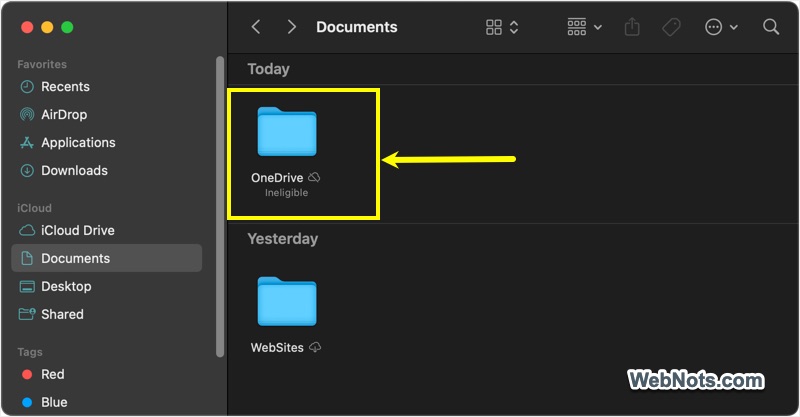
Now, you can simply drag the OneDrive app and drop into the Trash for deleting it. You will still see the Finder folder is showing as “Ineligible” along with sub-folders (no files will be shown unless if they are on your Mac). Delete your OneDrive folder to remove it from your Mac. Your synchronized files will be available on OneDrive and can be accessible from any other device.
Conclusion
As mentioned, OneDrive will be super useful if you are depending on Microsoft 365 apps. It works similar to iCloud and offers synchronization, collaboration and sharing capabilities. All you need is to install the app, login with your account and start syncing the files.