By default, Mac shows the recently accessed Applications, Documents and Servers under “Apple Menu > Recent Items” section. Similarly you can view all recently accessed items under “Recents” section in Finder’s sidebar. Though these options are convenient, it can easily clutter your workspace or raise privacy concerns. For example, someone can see the SMB server you have connected or view your private files from the list. If that bothers you, here are the options to delete / remove the recent items from Apple menu and from Finder.
1. Recent Items in Apple Menu
As you can see in the below screenshot, there is a huge list of items shown in the recently accessed section. There are three categories and each category will show 10 items by default.
- Applications – Recently opened apps.
- Documents – Files you have viewed which includes images, text documents, PDF, etc.
- Servers – Your hard disk drives, virtual machines and external servers connected previously.
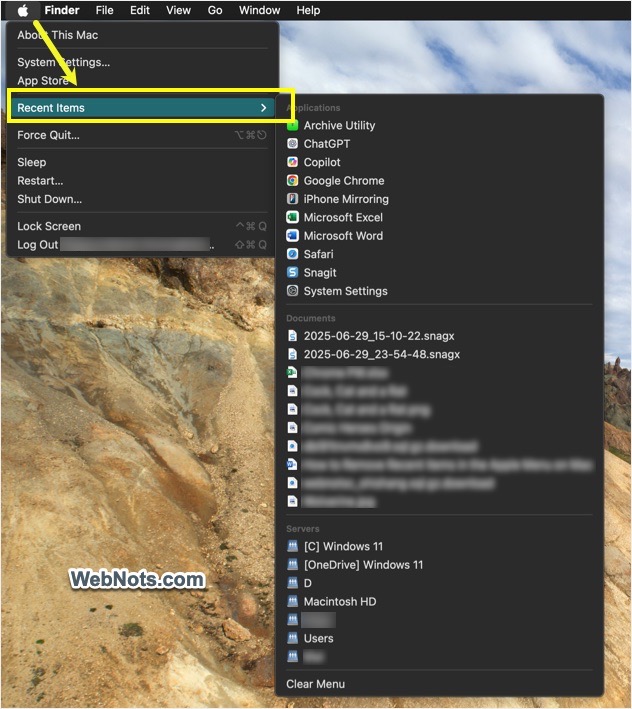
These 30 items pretty much reveal your history to anyone accessing your Mac.
1.1. Deleting Recent Items History
Follow the below steps to delete the historical items, new items will be added again when you work on the Mac.
- Click the Apple logo located in the top-left corner of your screen to reveal the dropdown menu.
- Hover over the “Recent Items” option to view a submenu showing the recently accessed items.
- At the bottom of the submenu, select “Clear Menu”.
- This will instantly remove all entries from the “Recent Items” list.
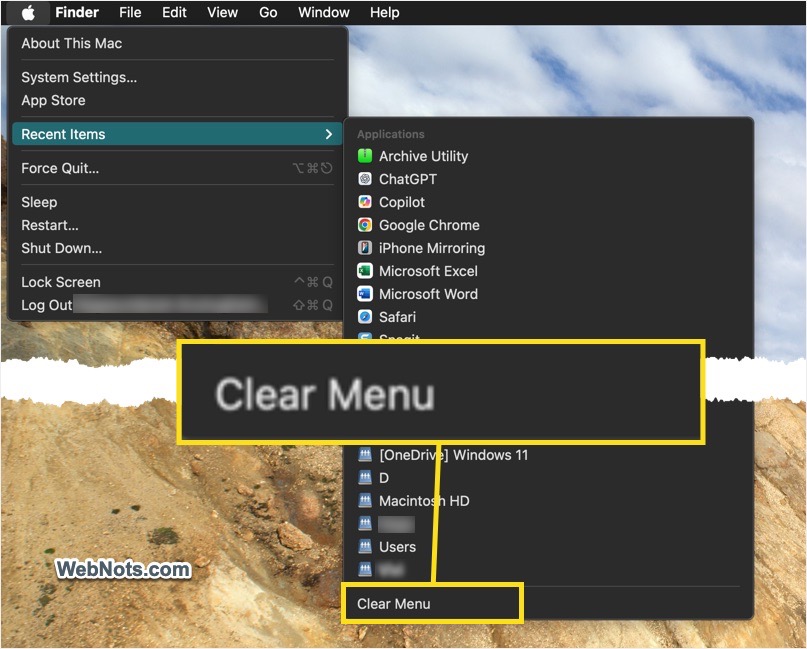
1.2. Remove Recent Items Menu
Follow the below steps if you want to completely remove the menu item. This is an ideal option to protect your privacy.
- Click the Apple logo and then select “System Settings…” menu.
- Navigate to “Control Center” section from the left side menu.
- Scroll down to the bottom on right pane and find “Recent documents, applications, and servers” option.
- Click the dropdown and select “None” option to disable the feature entirely.
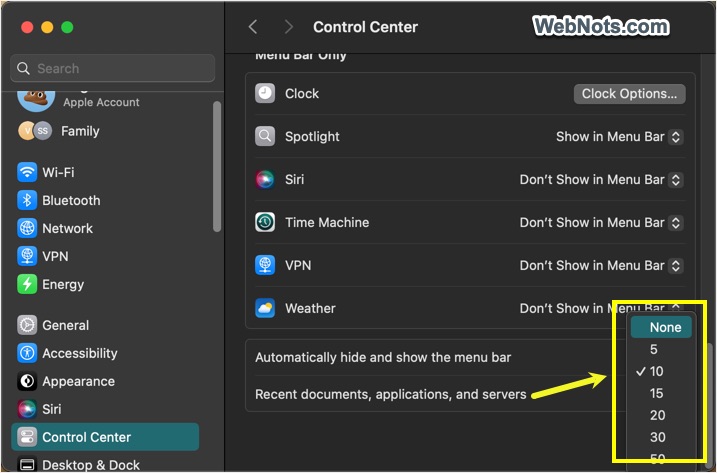
Now, click the Apple logo and you will not see the “Recent Items” menu.
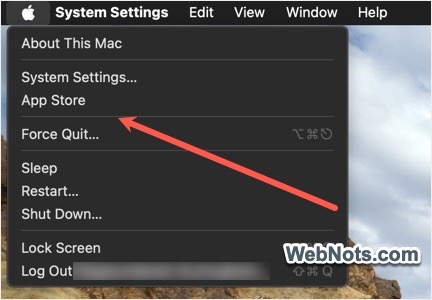
Note: You can also change the number of items to 5, 10, 15, 20, 30 or 50.
2. Recents Section in Finder
As you can see in the below screenshot, Finder app shows 34,619 items under “Recents” section and we don’t see any limit for this. Though this does not include apps and servers, it contains all types of files like images, documents, etc.
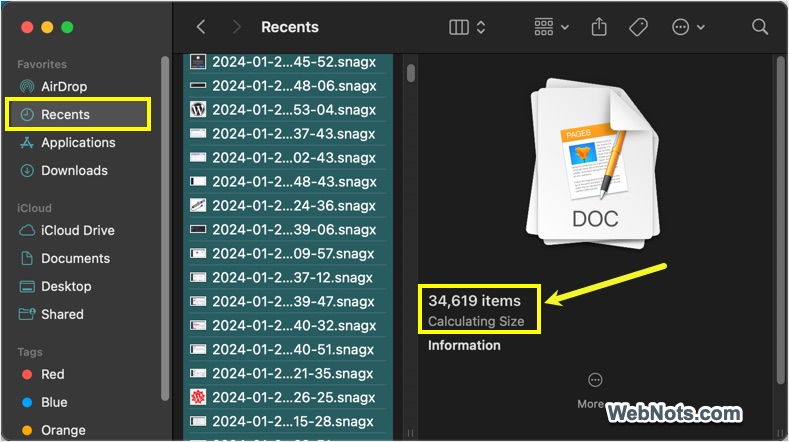
Unfortunately, you can’t clear Finder’s recent items history with one-click. All you can do is to hide the section completely from Finder app.
2.1. Remove Recents with Right-click
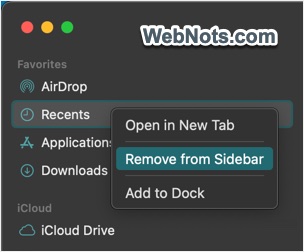
- Open Finder app and right-click or control + click on the “Recents” item on the sidebar.
- Select “Remove from Sidebar” option.
2.2. Use Finder Settings
- Open Finder and navigate to “Finder > Settings…” menu (or press Command + Comma keys).
- Go to “Advanced” tab in Finder Settings pop-up.
- Uncheck “Recents” showing below “Favorites” section.
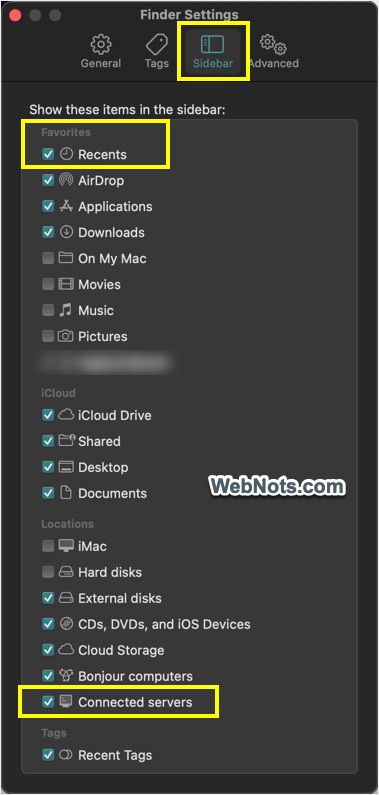
This will instantly remove the section from the sidebar and you can enable it anytime when you need.
Note: You can also hide the servers shown in the sidebar by unchecking “Connected servers” under “Locations”.