If you think only online companies like Google, Facebook, etc. are tracking and stealing your data, you are wrong!!! Microsoft and Apple are also in that list and you should be careful when using your personal computer. Whether you are concerning about privacy or customizing the system, it is a good idea to review and turn off certain settings on your Mac.
Also, check out article on how to disable ads and recommendations in Windows 11 if you are using a PC.
What Data Apple Collects?
You may be wondering what type of data Apple collects when using Mac. It includes your contact names, relationship between you and them, family members, device identifier, apps installed on your Mac, search terms you use, etc. Now, you can understand the danger of using the services offered by these tech companies as they can go to any level for collecting and using your personal data on the name of improvements.
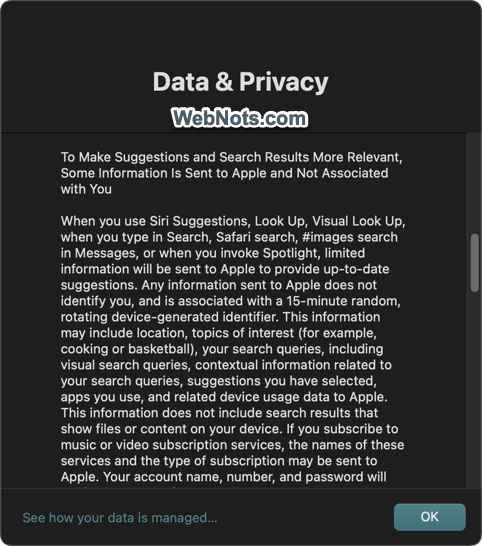
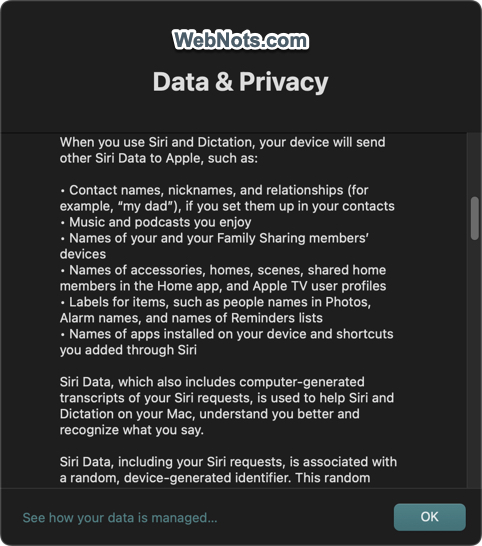
It seems you not only have to pay hefty for purchasing one of the costliest laptops available on the market but also literally share every personal information about you to Apple and app developers. If that alerts or shocks you, then here are some of the settings you should check and turn off immediately.
1. Sharing Mac Analytics
After installing macOS, Apple will show a notification that Analytics will be automatically enabled to share your Mac data with Apple. This data includes your location and helps Apple to improve the product as they claim. Unfortunately, you will not have any option to disable data sharing when setting up macOS. Only way is to manually disable it from the Settings app.
- Go to “Apple logo > System Settings…” menu.
- Navigate to “Privacy & Security” section.
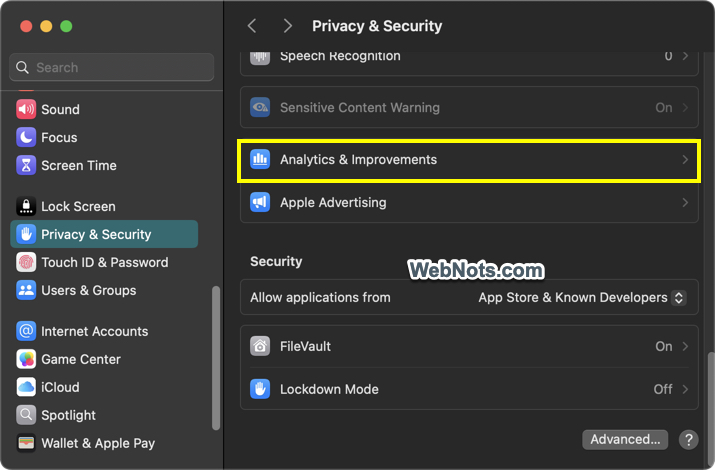
- Scroll down to bottom on the settings page and click “Analytics & improvements” option.
- Turn off “Share Mac Analytics” and all other options on that page.
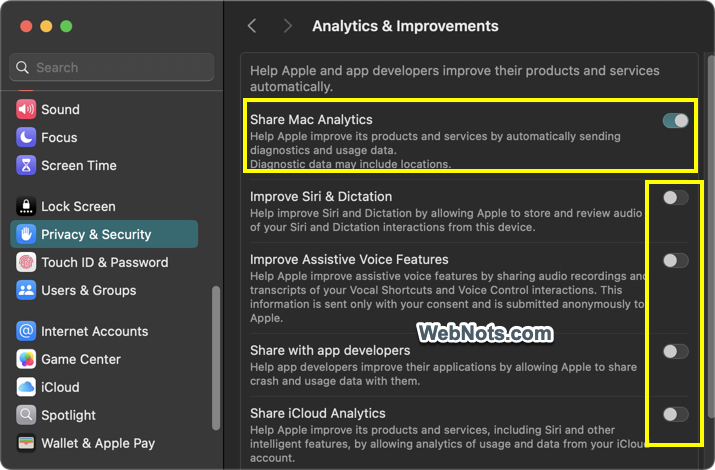
The annoying part is that you should disable this option every time after updating your macOS.
2. Apple Advertising
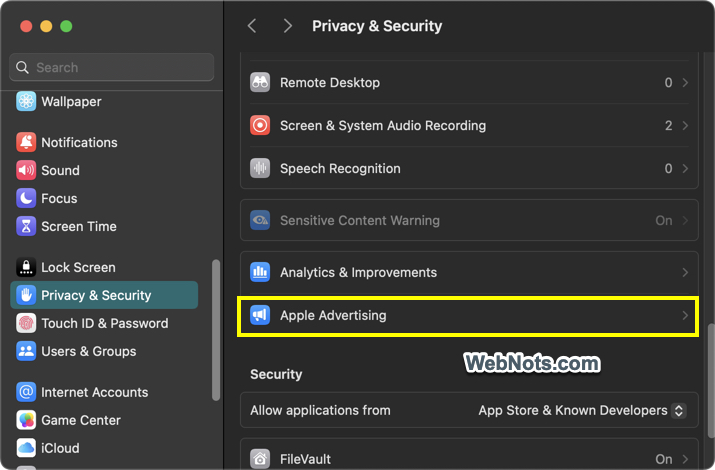
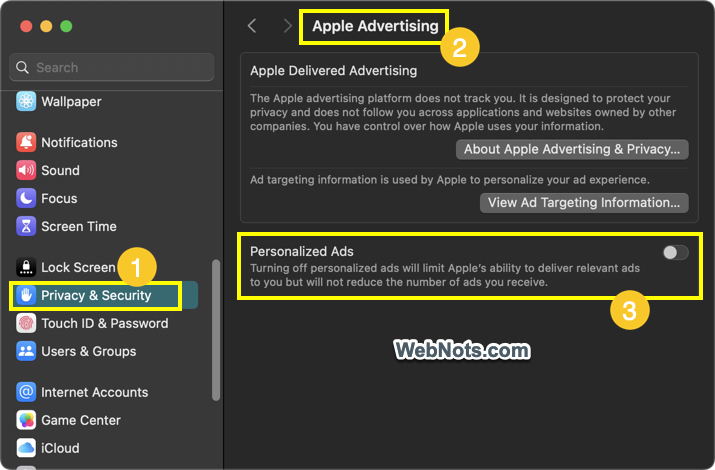
Next is to disable personalized advertisements from Apple which are shown in App Store and other places.
- Go to “Privacy & Security” section in Settings app.
- Scroll down to bottom of the page and click “Apple Advertising” option.
- Simply, turn the switch off against “Personalized Ads” option.
3. Spotlight Privacy and Indexing
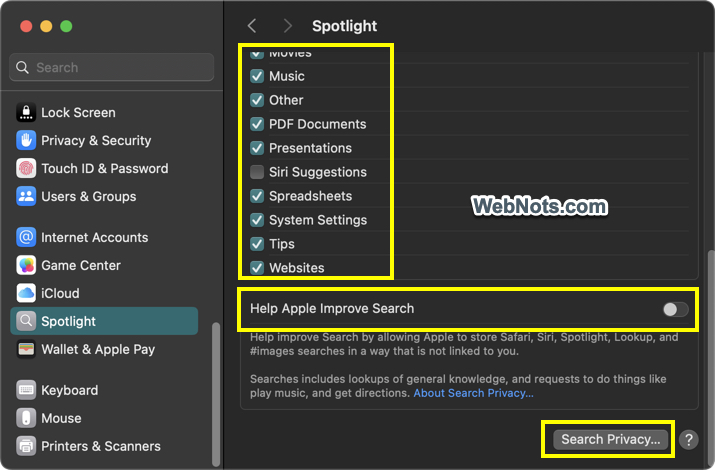
Apple will also collect data from your searches to improve the performance. You can turn off this option to stop sharing your search data. If you are also annoyed with Spotlight showing everything in results (like your private photos and emails), then you can exclude the unwanted categories.
- Go to “Spotlight” section in Settings app.
- Scroll down to bottom on the right pane and turn off “Help Apple Improve Search” option.
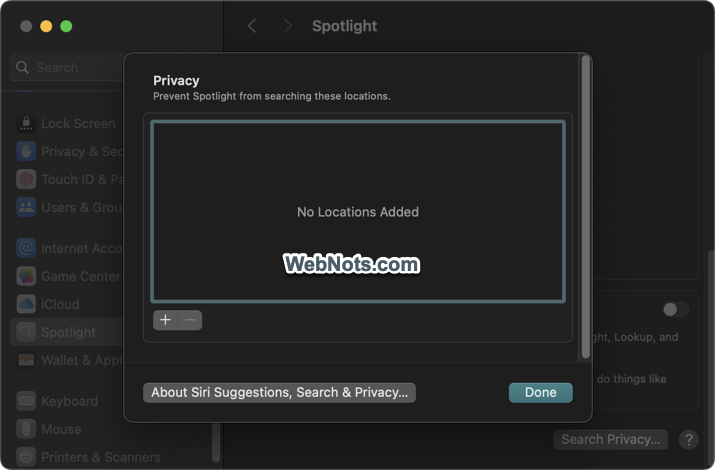
- Uncheck the categories from the list to prevent them from indexing. Also, click on the “Search Privacy…” button and add folder locations which you do not want to show in Spotlight.
4. Turn Off Siri
Siri is the voice assistant from Apple that helps to search Mac and complete tasks using voice commands. Siri sends your voice input, contacts and location data to Apple while using Ask Siri and dictation features.
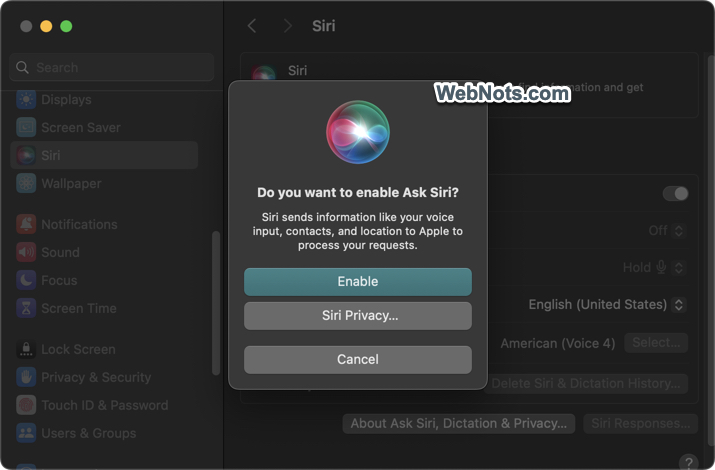
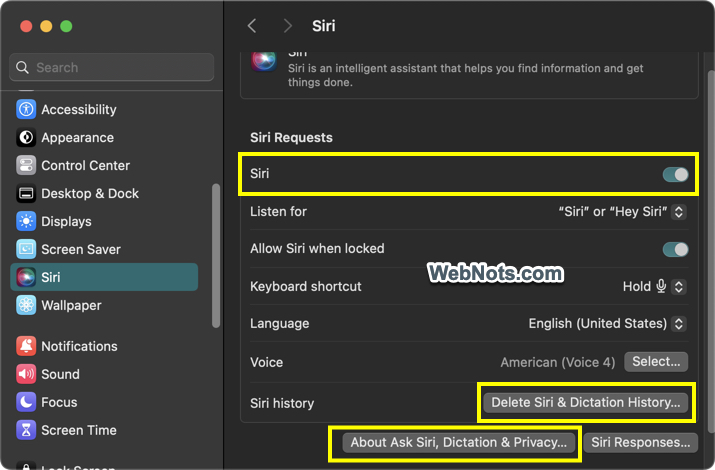
- Go to “Siri” section in Settings app.
- Simply turn off “Siri” under “Siri Requests” to disable “Ask Siri” feature.
- Click “Delete Siri & Dictation History…” to delete your history.
- For selectively disabling Siri for apps, click “About Ask Siri, Dictation & Privacy…” button. Select an app and disable all the available options.
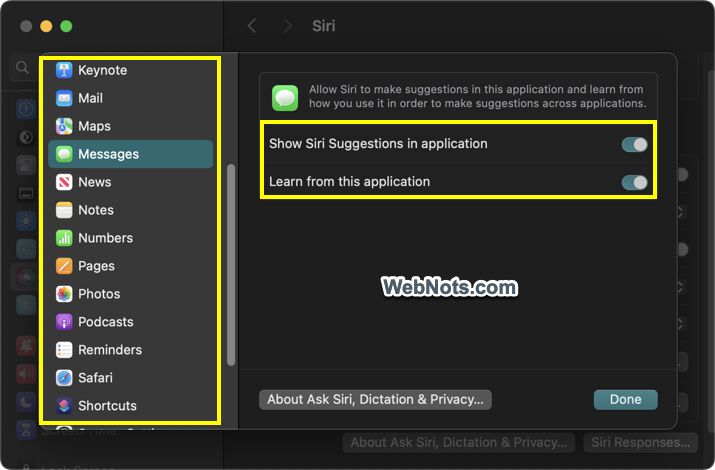
Note: You can disable “Siri Suggestions” category for Spotlight as explained above in section 6, disable iCloud sync for Siri as explained in section 5 and disable sending Siri & Dictation data to Apple as explained in section 1.
5. Game Center Profile Privacy
If you do not want your Game Center activities visible to others, you can hide by following the below steps:
- Go to “Game Center” section in Settings app.
- Click the dropdown against “Profile Privacy” and select “Only You” option.
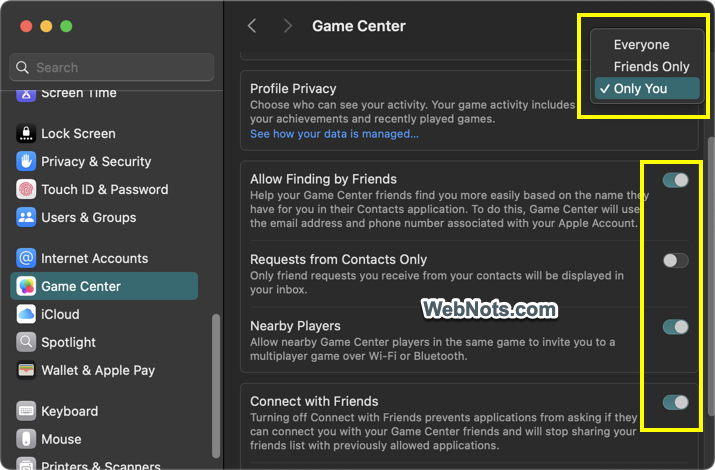
You can also disable other options to avoid someone can search and find you.
6. Location Services
Some apps need to provide accurate information based on your location (like Maps). However, most of the apps use this information to serve location-based advertisements and services.
- Go to “Privacy & Security” section in Settings app.
- Click “Location Services” option.
- Either completely disable “Location Services” option or selectively disable it for specific apps.
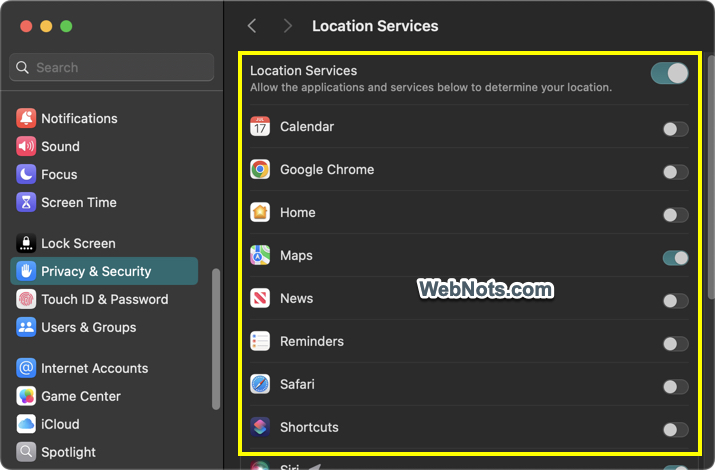
Note: You can disable “Siri” option to prevent from Siri sending your location information to Apple.
7. Turn Off Full Disk Access and Other Permissions
To save a document, macOS needs permission to that location (like Desktop or Documents). However, providing the complete system access to apps is not necessary. Though this is not set by default, you can periodically check and remove unnecessary apps having access to your system.
- When you are in “Privacy & Security” settings, go to “Full Disk Access” section.
- Turn off the apps from the list or select an app and click the – icon to remove it.
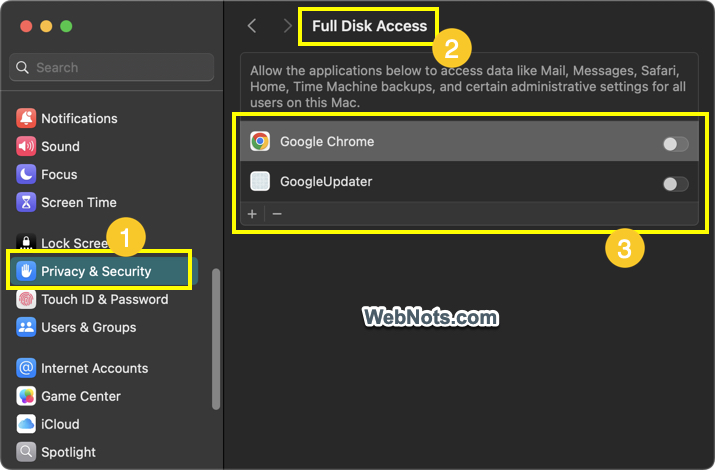
Note: Apps having permissions may collect data without your knowledge (as you have already provided the permission) and send to developers. So, go through under “Privacy & Security” section to review app permissions given to access your microphone, camera, screen recording and disable unnecessary permissions.
8. Automatic macOS and App Updates
Your Mac may automatically download and install the latest available updates for apps and OS. Though this sounds good and you will get notification before OS installation, it may affect your working when downloads run in the background. This is also Apple’s tactics to release frequent OS updates and make your Mac obsolete thus pushing you for purchasing newer model.
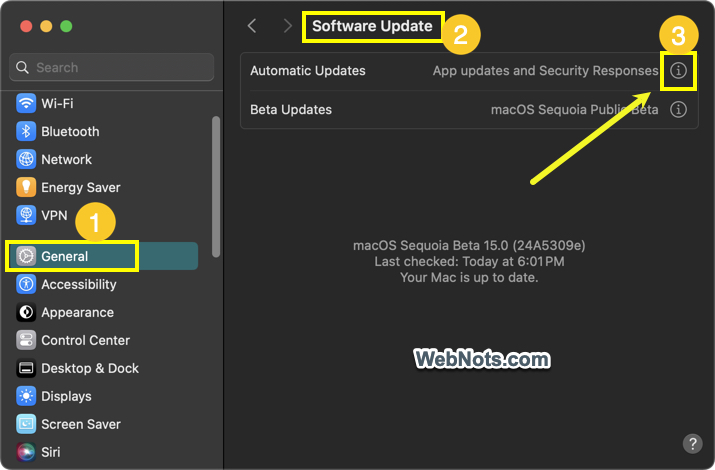
- Go to “General > Software Update” section in Settings app.
- Click the information icon showing at the end of “Automatic updates” option.
- On the pop-up that appears, turn off the options under “Automatically” heading. You can only turn on “Install Security Responses and system files” option to automatically install security updates.
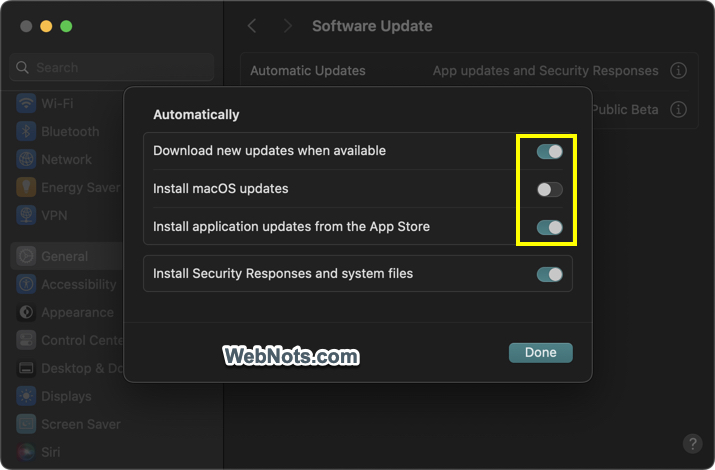
Also, sometimes the OS updates will have bugs affecting your tasks which you can avoid by manually installing after certain time from the release.
9. iCloud Sync
Apple offers 5 GB free storage space for iCloud and push you for purchasing a premium plan when exceeding that limit. This will be a problem if all your Mac’s content is automatically synchronized with iCloud. If you are not using iCloud, then make sure to disable the sync to avoid insufficient storage issue. Also, some countries like China needs the data to be stored within the country. In that case, Apple uses local third-party cloud companies to store your data on their servers thus putting your privacy at risk.
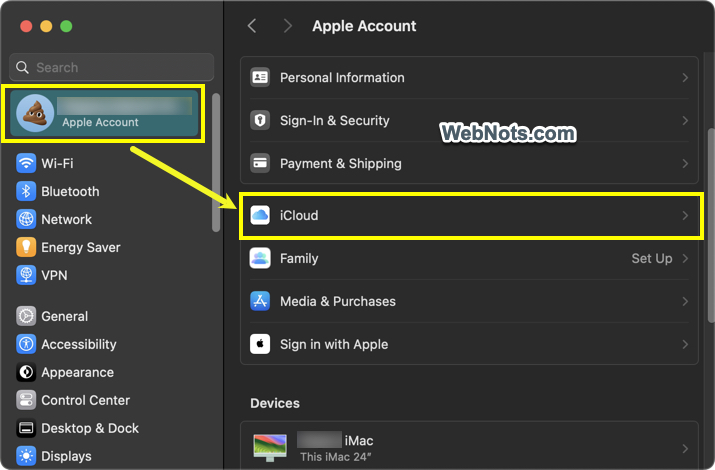
- Click your Apple account showing on top of the sidebar in Settings app.
- Go to “iCloud” section from the right pane.
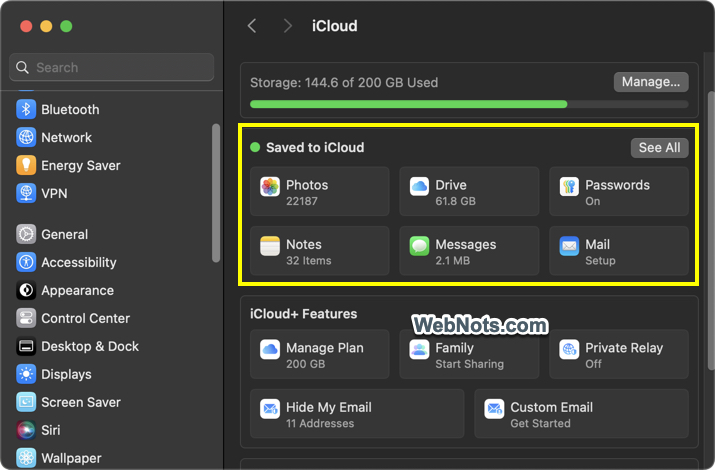
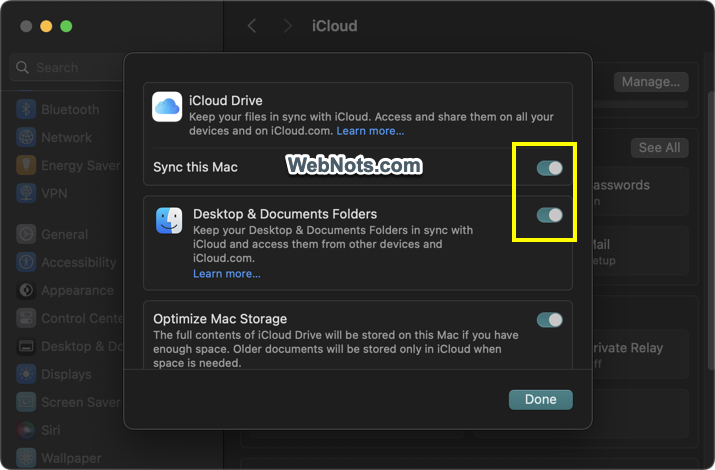
- You will see various tiles showing under “Saved to iCloud” section. Click any of the item and turn it off. For example, click “Drive” tile and turn off “iCloud Drive” and “Desktop & Documents Folder” options.
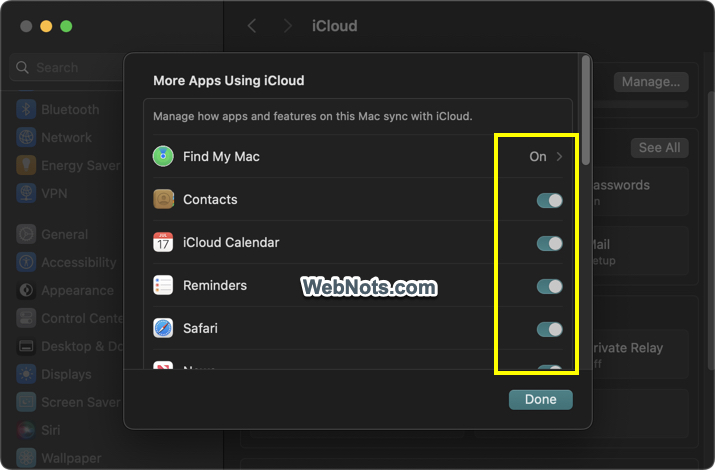
- If you want to disable multiple items, click the “See All” button showing in “Saved to iCloud” box. On the pop-up, turn off the items that you do not want to sync with iCloud.
10. Disable Apple Intelligence and ChatGPT
If your device supports Apple Intelligence (macOS 15 or later with M series chip), disable that by going to “Apple Menu > System Settings > Apple Intelligence & Siri” section. Also, under “Apple Intelligence & Siri” settings page, go to “ChatGPT” and turn off “Use ChatGPT” option. This will avoid sending your queries to ChatGPT or recommending to use ChatGPT. It is also possible to apply restrictions to disable AI features, go to “Apple Menu > System Settings… > Screen Time > Content Restrictions > Intelligence & Siri” and turn off all items under “Apple Intelligence” heading.
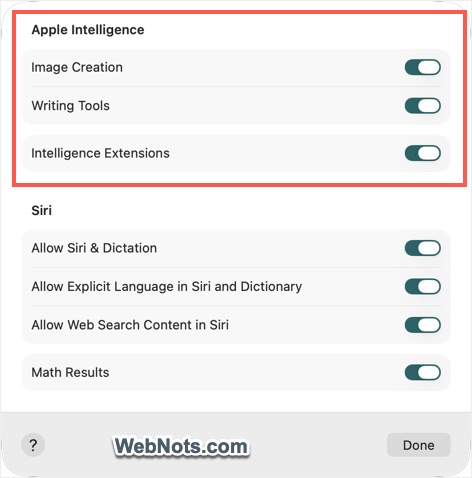
You can anyway use the ChatGPT app and confine your conversations within that app instead of integrating AI with macOS.
Bonus Tip for Safari: Stop Sharing Website Addresses from Safari
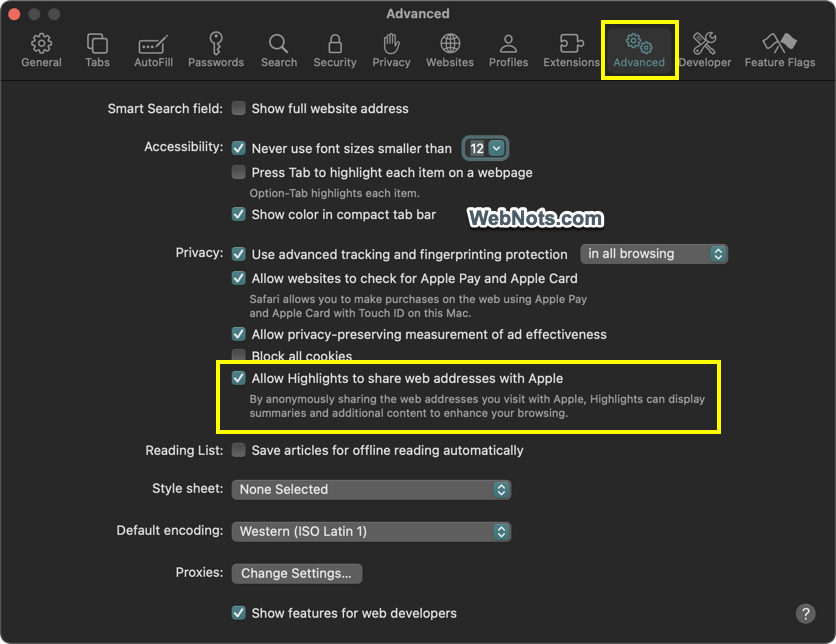
Apple also collects website addresses you visit from Safari browser to show summary and other details in Highlights (a function introduced from macOS Sequoia).
- Open Safari and go to “Safari > Settings…” menu.
- Go to “Advanced” tab and uncheck “Allow Highlights to share web address with Apple” option.
Mac Settings Vs Preferences
The topics explained in this article are from the Settings app, which you can open from “Apple logo > System Settings…” menu (except the last one from Safari). The Settings app is available only from macOS Ventura or later versions. On Monterey or earlier macOS versions, you can see the same options are available under “Apple logo > System Preferences…” section. The options may be under different preferences sections and you can use the search box to find and disable them. Also, some options like Apple Intelligence will not be available on older macOS.