AirPods Pro are known for their seamless connectivity and superior sound quality. However, AirPods can also experience connection issues with your iPhone like other wireless devices. These problems can range from connectivity drops, difficulties in pairing, intermittent audio, etc. In this article, we will explain how to troubleshoot and fix AirPods Pro connection problems with your iPhone.
Basics of AirPods Pro
The device has four components:
- USB-C Charging cable.
- MagSafe Charging Case which holds the AirPods. You can find the power input is located at the bottom and the setup button is on the back.
- Left and right pods.
- Four sets of ear tips – choose from medium, large, small and extra small size tips that fits your ear.
Left and right pods are charged when they are placed inside the case and the case needs to be charged with the cable by plugging to the power point. This means, case and pods can have different charging level and iPhone will show the battery level whenever you open the case.
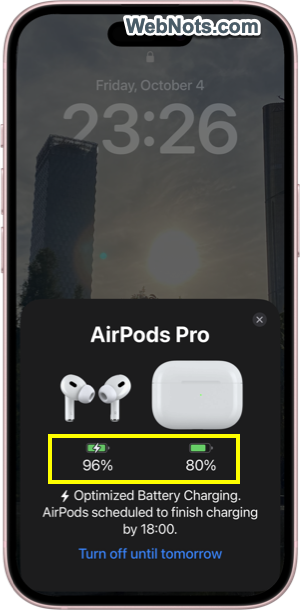
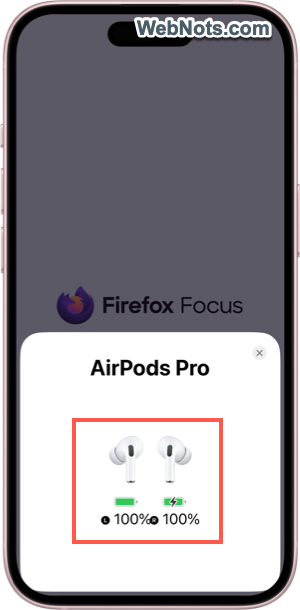
AirPods connect with your iPhone using Bluetooth pairing and shown in your device list. The latest version is AirPods Pro 2nd Generation which uses H2 chip and offers ultimate hearing capabilities.

Common Connection Problems
Below are some of the common connection problems when using AirPods Pro with iPhone. We have provided various suggestions for fixing these issues. However, make sure to understand your issue and try only applicable suggestions.
- AirPods not pairing with iPhone.
- Sound cuts out intermittently while using AirPods Pro.
- Poor audio quality during phone calls or media playback.
- AirPods Pro automatically switch between Apple devices.
1. Check AirPods Battery Level
As mentioned above, your iPhone will automatically show the battery percentage of AirPods whenever you open the case. Sometimes, this will not be correct thus confusing you. For example, iPhone may show 70% battery while the pods do not have sufficient battery at all.
- First, open the MagSafe Case nearer to your iPhone.
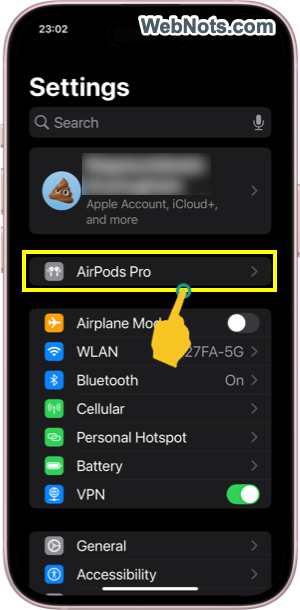
- Open Settings app and tap on “AirPods Pro” option.
- Check the battery percentage of case and pods.
As you can see in the below screenshots, the pods are having 84% battery which is not a problem.

However, below screenshot is an example of the problematic case where the left pod is having only 2% while the right pod has 98%. Obviously, low battery of pods will result in connectivity drops, so, ensure they are charged sufficiently.
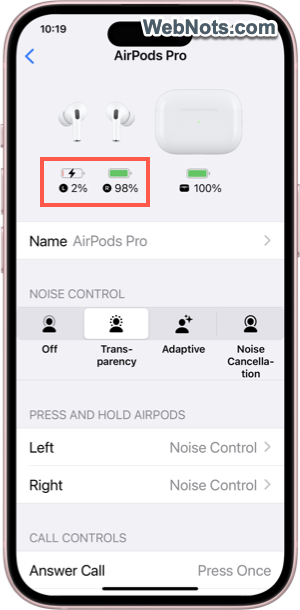
Note: AirPods Pro settings will be shown only when the case is opened nearer to iPhone or AirPods are placed in your ear. If “Settings > AirPods Pro > Optimized Battery Charging” is enabled, the charging may stop at 80% until you use or turn off the setting.
2. Re-pair Bluetooth
Sometimes, simply re-pairing your AirPods Pro to your iPhone can resolve connection issues.
- Open the case or place AirPods in the ear.
- Open Settings app in iPhone and go to “Bluetooth” section.
- First, make sure AirPods Pro is showing as “Connected”. If not, simply tap on the device name to connect.
- If already connected, tap the ⓘ icon showing at the end of your AirPods Pro device name to go to its settings page.
- Scroll down to the bottom and tap “Forget This Device” link.
- Place your AirPods Pro back in the case and close the lid.
- Wait sometime and then press the setup button on the back side of the case until the light blinks.
- Now, open the case and go to “Settings > Bluetooth” section in your iPhone. Tap on the AirPods Pro name to reconnect and re-pair.
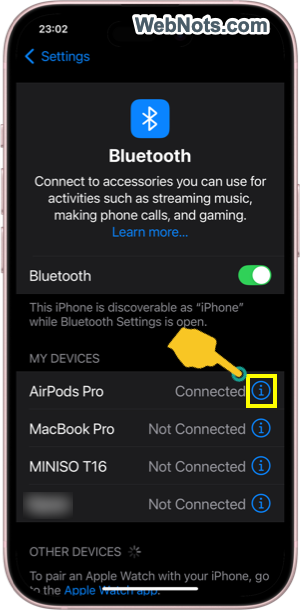
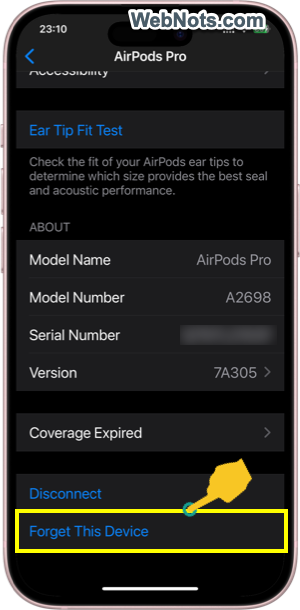
This will resolve most of the connection problems between AirProds Pro and your iPhone.
3. Restart Your iPhone
In some cases, connection issues can be on the iPhone’s end rather than the AirPods. Restarting your iPhone can fix minor software glitches.
- Press and hold the side button and one of the volume buttons until the power-off slider appears.
- Drag the slider to power off.
- Wait for a few seconds, then press and hold the side button again until the Apple logo appears to restart your iPhone.
After restarting, try reconnecting your AirPods Pro and check it that helps.
4. Reset Network Settings on iPhone
Resetting your iPhone’s network settings can help if your AirPods are still not connecting. Remember to keep your Wi-Fi password handy as this action will reset Wi-Fi and you need to reconnect afresh.
- Go to “Settings > General > Transfer or Reset iPhone”.
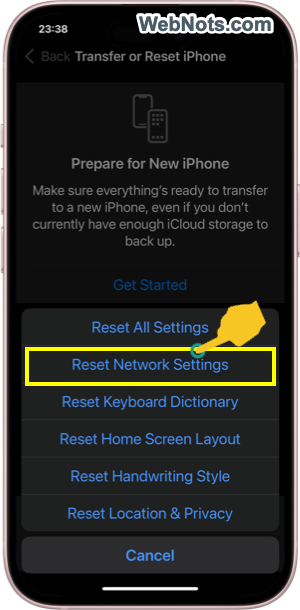
- Select “Reset” option and then tap on “Reset Network Settings” option.
- Confirm the action with your passcode.


5. Update iOS and AirPods Pro Firmware
Both iOS and AirPods firmware updates often include bug fixes for connection issues. Keeping your devices updated can resolve compatibility issues between your iPhone and AirPods Pro. To update iOS, go to “Settings > General > Software Update” section to download and install an update if available.
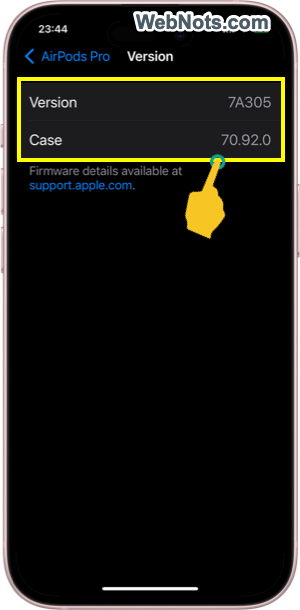
There are no manual options to update your firmware of AirPods. You can find the firmware version of pods and case under “Settings > AirPods Pro > Version” section. Check if these versions are lower than the required versions mentioned in Apple’s specification page, follow the steps in our earlier article to learn how to get firmware updates.
6. Turn Off Automatic Ear Detection
Sometimes the automatic ear detection feature can interfere with the connectivity of your AirPods Pro. Disabling this feature can improve connection stability.
- Go to “Settings > AirPods Pro”.
- Scroll down and turn off “Automatic Ear Detection” option.
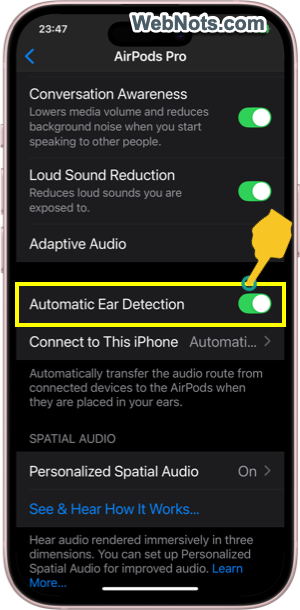
This means the AirPods will play audio even when they are not in your ears, so, remember to manually pause when necessary.
Note: “Conversation Awareness” is a feature that automatically detects your voice and lowers AirPods volume. You can disable this if not required.
7. Do Ear Tip Fit Test
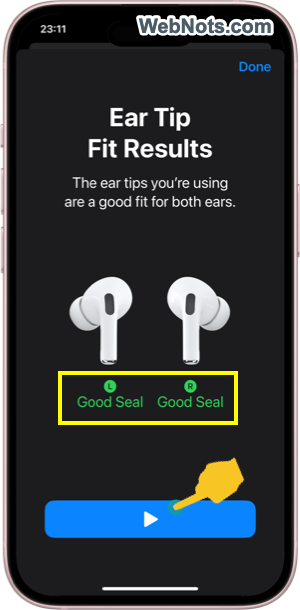
As mentioned, you will get four sets of buds (called Ear Tips) for fitting in front of the AirPods to fit inside your ear. If the sealing of the ear tips is not proper, you will get disturbance from outside noise.
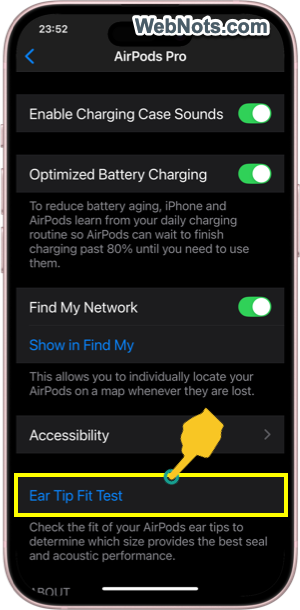
- Go to “Settings > AirPods Pro” section.
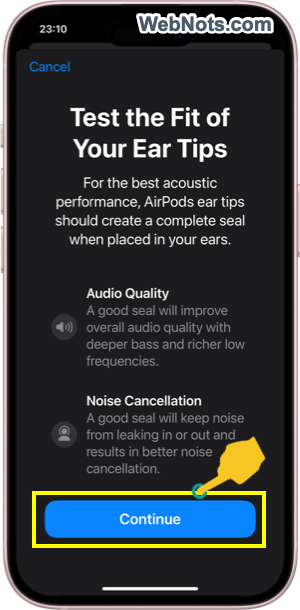
- Scroll down and tap on “Ear Tip Fit Test” link.
- Play the sound and iPhone will confirm the size you are using is proper or suggest the correct size.
8. Connecting to Multiple Devices
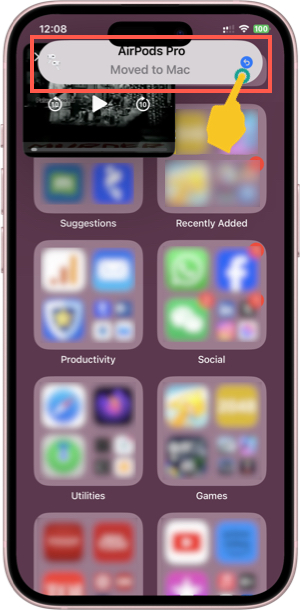
AirPods will automatically connect to all your Apple devices like Mac, iPad and Apple Watch. This will be annoying if the audio is switching automatically without your control. For example, you will see a “Moved to Mac” notification when the AirPods connection is switched from iPhone to Mac. You can tap on the undo button to reconnect with your iPhone.
Also, there are possibilities that having too many Bluetooth devices connected simultaneously can cause interference, leading to audio issues with your AirPods Pro. If you are experiencing audio drops or poor connectivity, disconnect or unpair any unused Bluetooth devices like your Mac.
- Go to “Settings > Bluetooth” section in your iPhone. Disconnect other Bluetooth devices by tapping their names and selecting “Disconnect” or “Forget This Device” option.
- Otherwise, go to Bluetooth settings on your Mac or iPad and disconnect or disable automatically connecting to AirPods Pro.
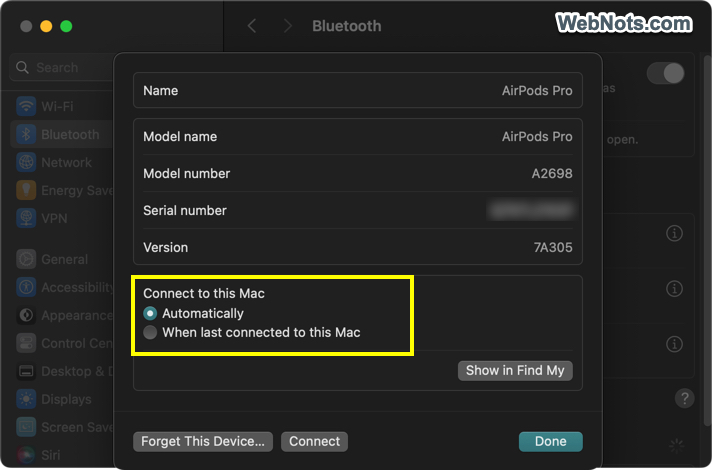
For more details, check our article on how to stop AirPods Pro from automatically connecting to multiple devices.
9. Contact Apple Support or Visit an Apple Store
Generally, AirPods Pro comes with one year warranty coverage. Go to “Settings > AirPods Pro” section and scroll down to the bottom to check whether you have a valid warranty coverage. If you have warranty and the problem persists, it is a good idea to contact Apple support. There could be a hardware issue with your AirPods Pro preventing connection or affecting audio quality. Contacting Apple Support or visiting an Apple Store for professional assistance can help in this case.
- Go to Apple Support webpage for AirPods Pro.
- Choose your issue and follow the steps for personalized troubleshooting or schedule a visit to the Apple Store for a repair or replacement.
Conclusion
In most cases, connection issues with AirPods Pro and iPhone happen due to Bluetooth and settings. If the above suggestions did not help, then you may need to reach out to Apple Support to fix your issue.