
AirPods Pro can be easily connected to iPhone from Bluetooth settings. However, the problem comes when you are also using Mac. AirPods Pro will automatically connect to Mac without the need of setting up separately. This happens when your devices are nearby and using the same Apple account. Switching between the devices can easily annoy you and the good thing is that Apple allows you to stop or disable automatic connection to AirPods Pro.
Automatic and Manual Switching of AirPods Pro
When multiple devices are connected at the same time, AirPods Pro will automatically switch to iPhone when receiving a call. If you are listening to music on Mac and play a video or music on iPhone, AirPods Pro connection will be moved to iPhone. You will see a notification showing that AirPods Pro moved to another device. Click the “Connect” button on Mac or undo icon on iPhone to continue using the current device.


You can also manually disconnect AirPods Pro from one of the devices from Bluetooth setting.
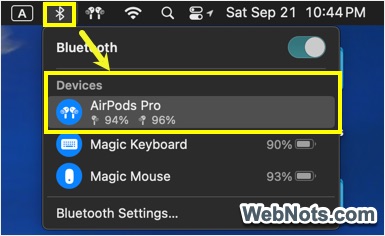
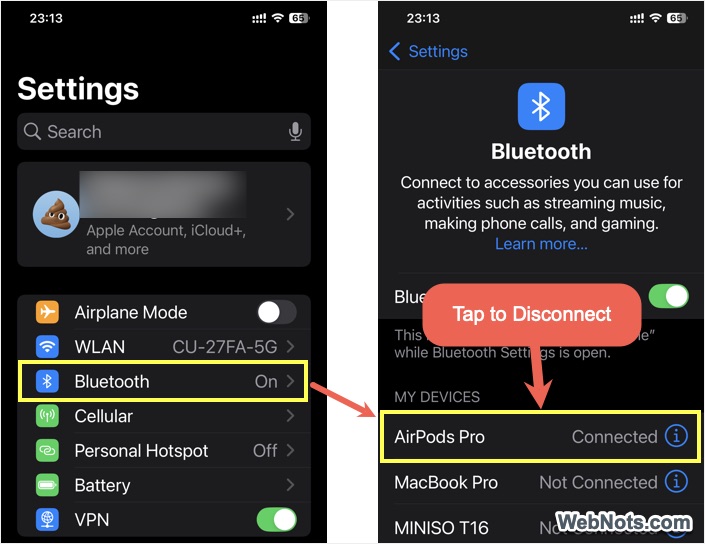
If automatic connection is annoying, what you can do is to configure AirPods Pro to connect to your preferred device and avoid all other devices.
When AirPods Pro are Connected (in Your Ears)
Follow the below steps on your Mac:
- Click the AirPods icon on top menu bar and select “AirPods Pro Settings”.
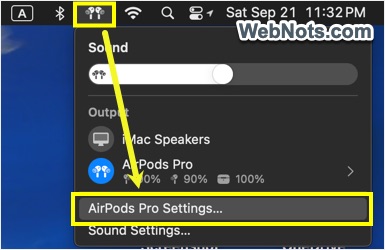
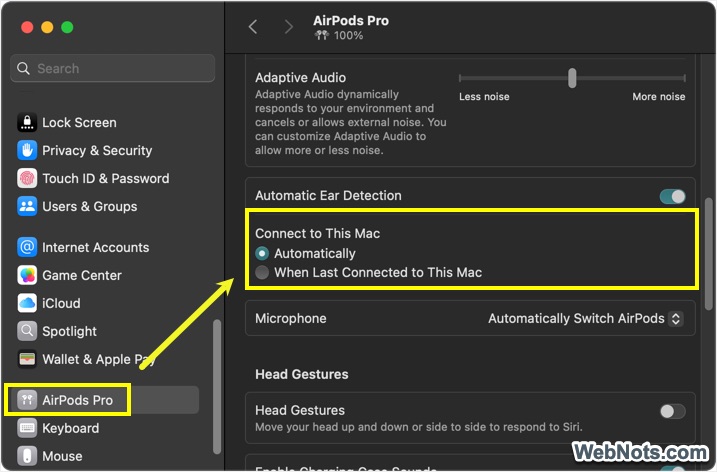
- Scroll down on the Settings app and go to “Connect to This Mac” section.
- Select “Automatically” if you want to use Mac as your default device. Otherwise, select “When Last Connected to This Mac” option. This will connect AirPods to Mac only when you have connected previously.
Follow the below steps on your iPhone:
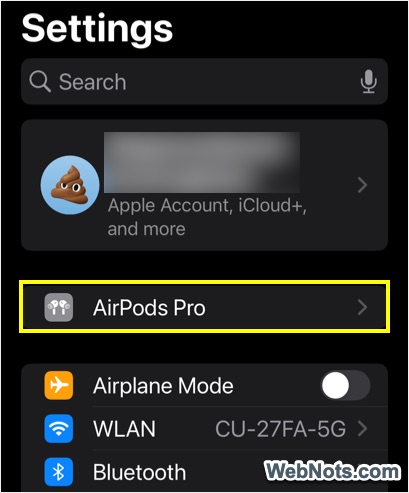
- Open Settings app and tap on “AirPods Pro” option showing below your Apple account.
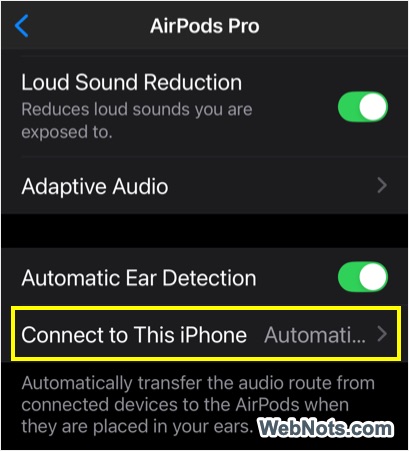
- Scroll down on the page and tap on “Connect to This iPhone” option.
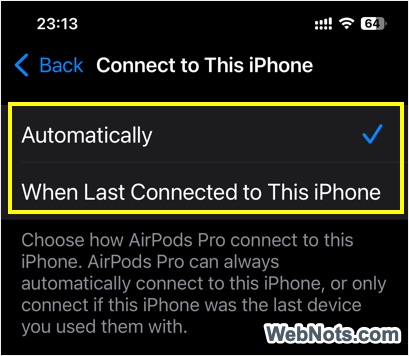
- Select “Automatically” or “When Last Connected to This iPhone” option.
When AirPods Pro are Not Connected (in the Case)
Follow the below steps on Mac:
- Click the Apple logo on top left corner of the screen and select “System Settings…” menu.

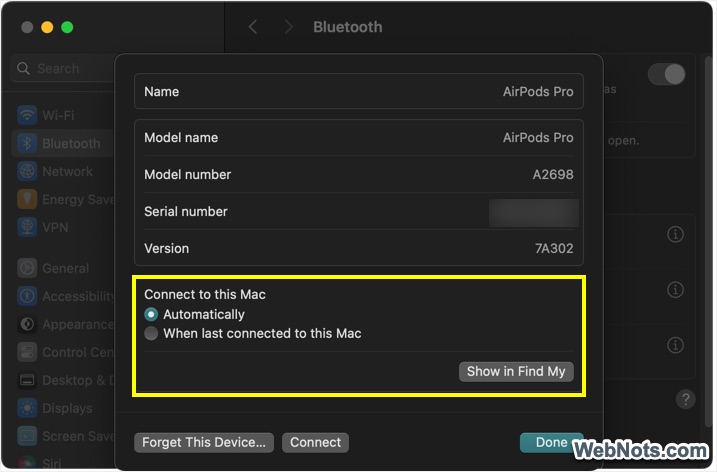
- Go to “Bluetooth” section and click on the information icon showing next to your AirPods Pro device name.
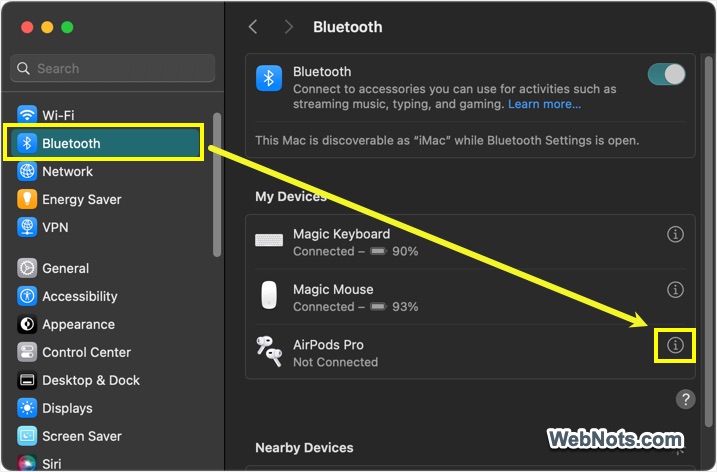
- A pop-up will appear and check under “Connect to this Mac” section.
- Select “Automatically” or When last connected to this Mac” option.
- Click “Done” button and close Settings app.
Follow the below steps on iPhone:
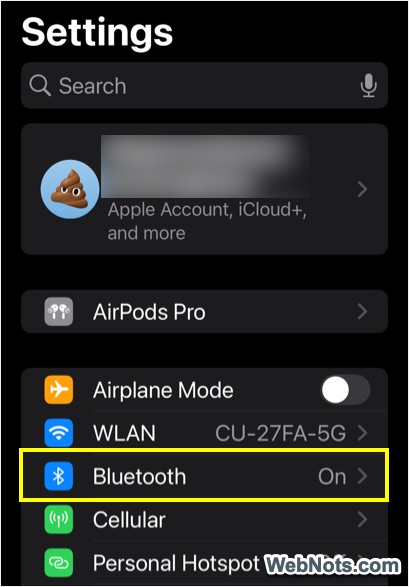
- Open Settings app and tap on “Bluetooth” option.
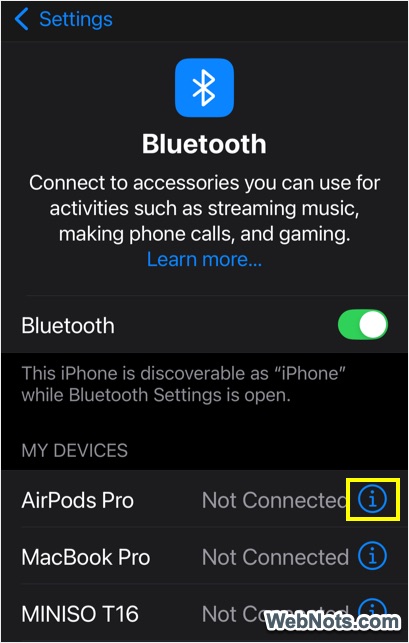
- Tap on the information icon showing at the end of your AirPods Pro name.
- Now, tap on “Connect to This iPhone” option.
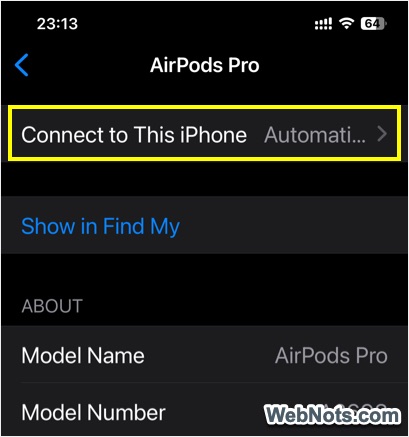
- Select “Automatically” or “When Last Connected to This iPhone” option.
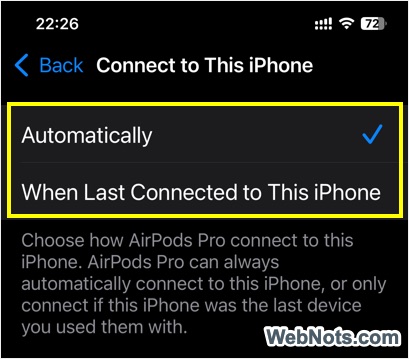
Note: By default, automatic option will be selected on all your devices. Make sure to select automatic option on one device and “When last connected…” option on another device based on your preference.
Completely Forgetting AirPods Pro Connection
Sometimes, you may want to use AirPods on a single device without switching. In this case, you can disconnect and forget the Bluetooth pairing so that AirPods will not automatically connect again.
Follow the below steps on Mac:
- Go to “Apple logo > System Settings… > Bluetooth” section.
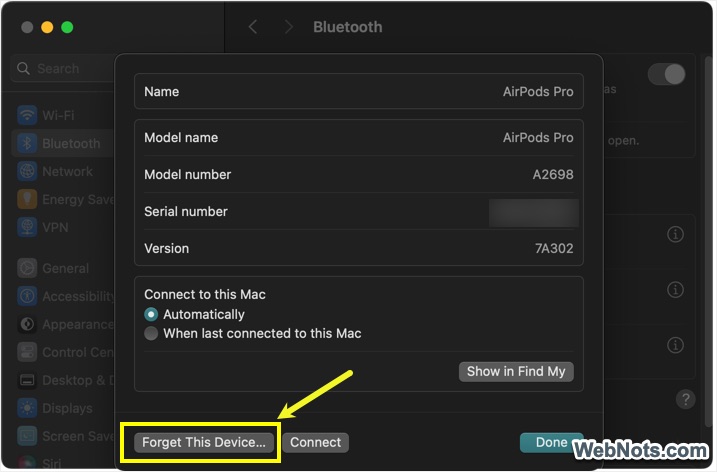
- Click on the information icon showing next to your AirPods Pro name.
- On the pop-up, click on “Forget This Device…” button.
Follow the below steps on iPhone:
- Go to “Settings > Bluetooth” section.
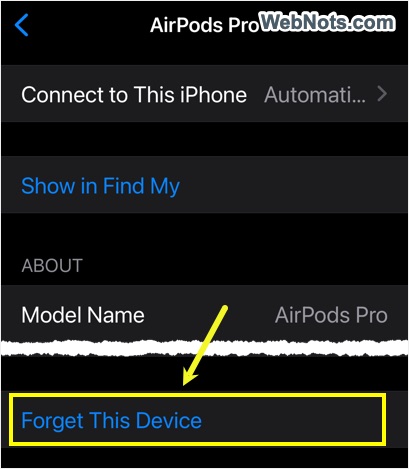
- Tap on the information icon showing against your AirPods Pro device name.
- Tap on “Forget This Device” link showing on bottom of the page.


Very clear article about “How to Stop AirPods Pro from Automatically Connecting to iPhone and Mac?”. Unfortunately it isn’t as helpful as it needs to be because there’s a long-standing bug in Apples system, that causes MacOS (and maybe iOS and iPadOS) to ignore the “connect only when last connected” option and revert to the “connect automatically” setting – not every time, but often enough to be a real pest. Other people have been reporting this behaviour for years.