Apple’s AirPods Pro are impressive and they something truly magical when using with an iPhone. The tight integration unlocks features that go far beyond basic playback. Here are 10 tips to help you master the experience.
AirPods Pro
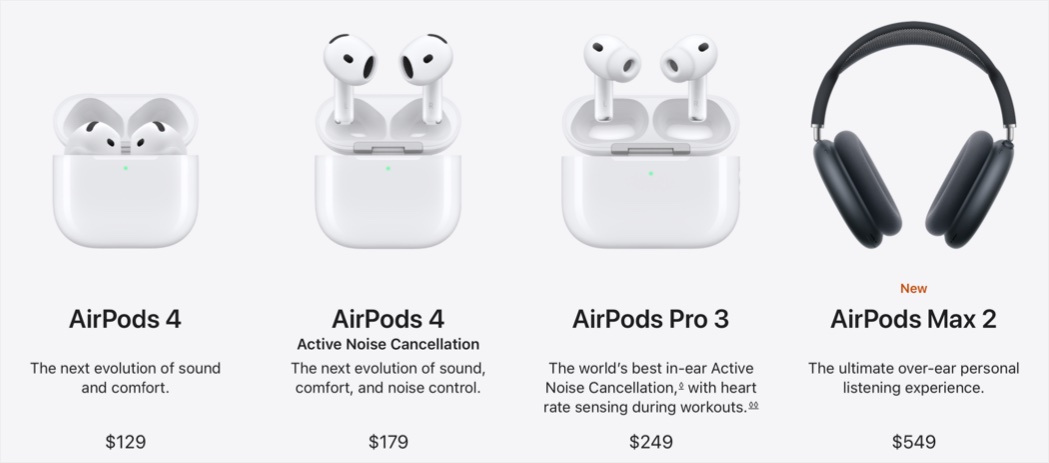
At this point, you can buy three types of AirPods:
- AirPods 4 (and 4 with Active Noise Cancellation).
- AirPods Pro 3.
- AirPods Max 2.
All tips in this article apply to AirPods Pro 3 (and AirPods Pro 2 if you use that model) when connected with an iPhone running on iOS 26 or later. So, some of the features may not be available on other models or when used with an iPad or Mac. Place the AirPods in your ear and go to “Settings > AirPods Pro” section on your iPhone to configure the settings. Alternatively, go to “Settings > Bluetooth” section and tap the ⓘ icon showing against you connected AirPods Pro.
1. Customize Press-and-Hold Controls
AirPods Pro use a hidden force sensor on the stem. By default, you can press one of the AirPods stem to activate the followings:
- One press: Play, pause , mute or answer a call.
- Two presses: Skip forward or end call.
- Three presses: Skip backward.
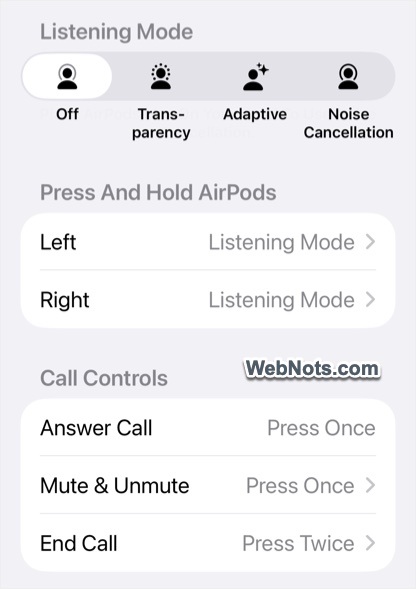
- Press and hold: Switch between Adaptive, Transparency, and Noise Cancellation modes.
You can decide which modes the press-and-hold gesture cycles through when pressing left and right AirPod under “Press and Hold AirPods” settings. It is also possible to trigger Siri instead of changing the listening mode. Similarly, you can select press once or twice for muting / unmuting / call ending controls.
2. Find Correct Ear Tips Size
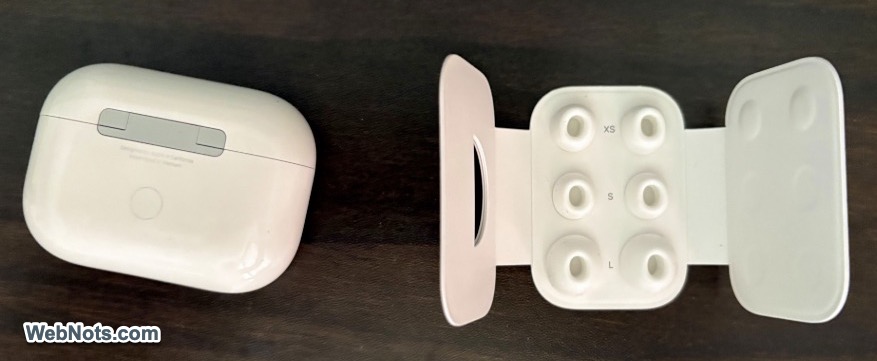
AirPods work better when you use the proper sealing called ear tips to seal the gaps properly. You will get 4 pairs – 2 on AirPods and 3 sets separately, in various sizes to choose from.
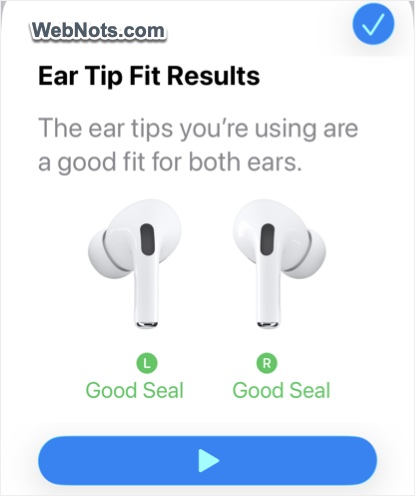
Place the AirPods in your ears and open the “Ear Tip Fit Test” from AirPods Pro settings page. This plays music to check your seal and will recommend a different tip size if needed.
3. Personalize Spatial Audio
Spatial Audio makes sound feel like it’s coming from all around you. Turn on the “Personalized Spatial Audio” option and scan the front of your face with your iPhone’s camera to tune the 3D audio specifically to your ear shape.
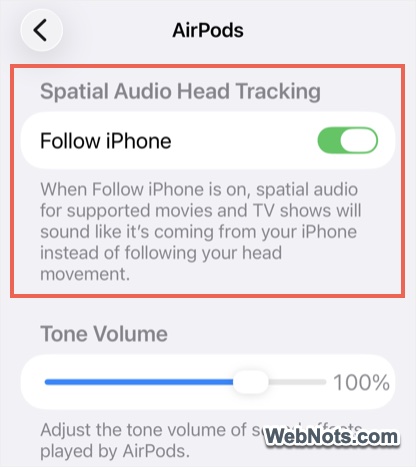
For best results, go to “Settings > Accessibility > AirPods (under Accessories)” and turn on “Follow iPhone” under “Spatial Audio Head Tracking” section.
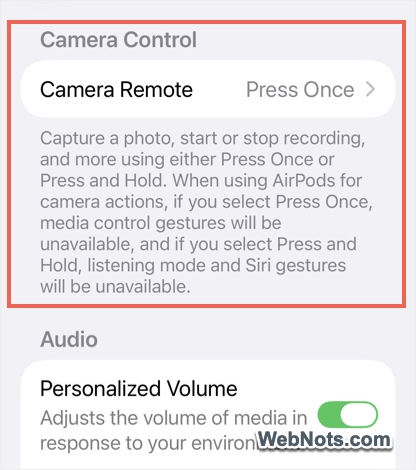
4. Control Camera with AirPods
From iOS 26 version onwards, you can take a picture by using AirPods when the camera is opened on your iPhone.
- Under “Camera Control” tap on “Camera Remote” option.
- Select “Press Once” or “Press and Hold” trigger.
- When the camera is opened, press the AirPod’s stem.
- The countdown timer runs from 3 to 1 and then captures photos using Burst mode.
- Typically, 10 photos are taken in Burst mode, allowing you to review and choose the best shot.
5. Share Audio with a Friend
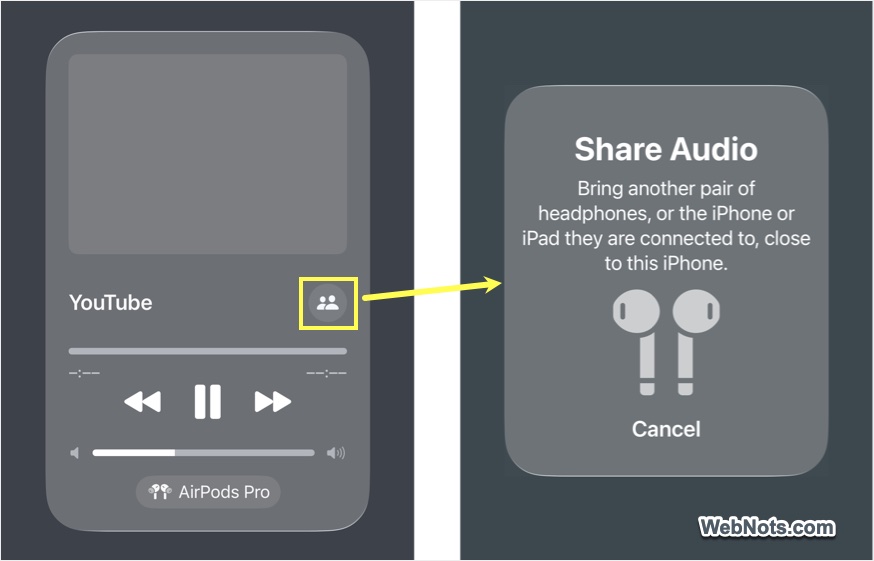
Want to watch a movie together? Swipe down to open Control Center, tap the playing media (like YouTube video) and then tap the “Share” icon. You will see a message to hold another pair of AirPods near your iPhone to connect them simultaneously.
6. Use Announce Notifications and Head Gestures
You can respond to calls and notifications from AirPods without saying a word.
- Go to “Settings > Notifications > Announce Notifications (under Siri heading)” and turn it on.
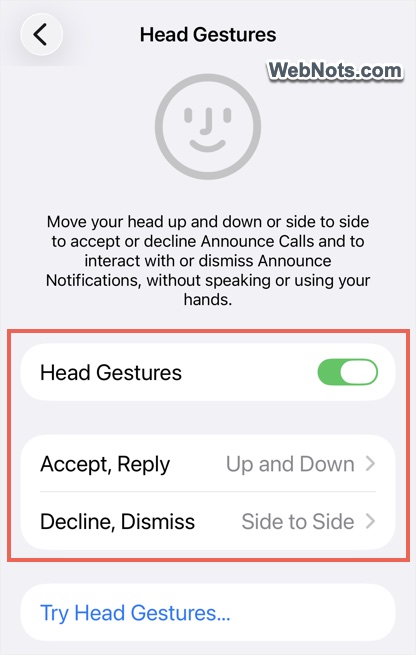
- After that, go to “Settings > AirPods Pro > Head Gestures” and turn it on. Choose up & down or side to side head movement for accept / reply and decline / dismiss announced calls and notifications by Siri.
7. Connect AirPods to Another Device
It’s possible to connect your AirPods Pro to another iPhone or Android phone.
- Make sure the AirPods are placed inside and open the case.
- Press the button on back side of the case until a light blinks.
- Now, you can choose the AirPods from Bluetooth settings of any other phone to connect and use.
8. Optimize Charging for Battery Health
Keep your AirPods batteries healthy longer. Go to “Settings > AirPods Pro > Battery” section and enable “Optimized Battery Charging” option. Your AirPods will learn your routine and hold at 80% charge until you normally need them.
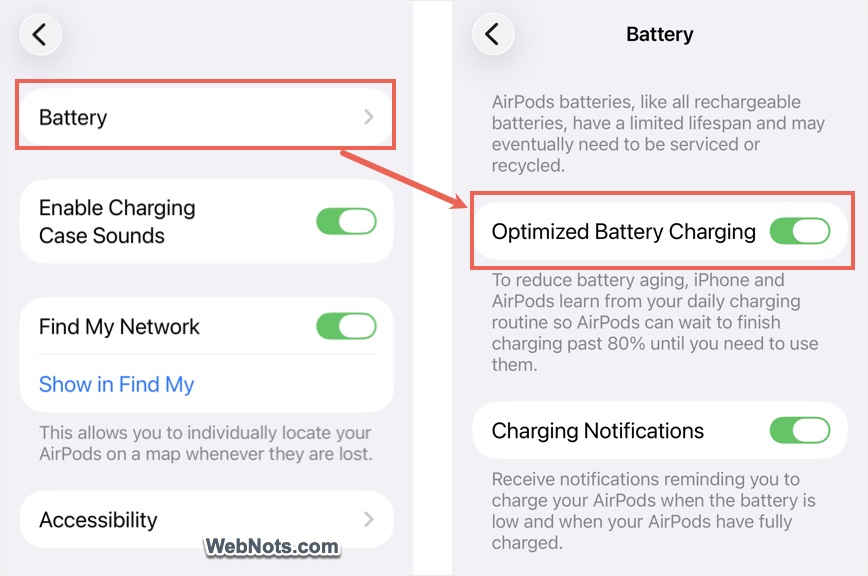
You can simply open AirPods case near your iPhone to see the battery levels of both the AirPods as well as the case. (or go to “Settings > AirPods Pro” and you will see the battery details on top).
9. Find Your Lost AirPods Pro
Misplaced a bud? The Find My app on your iPhone can help to locate it.
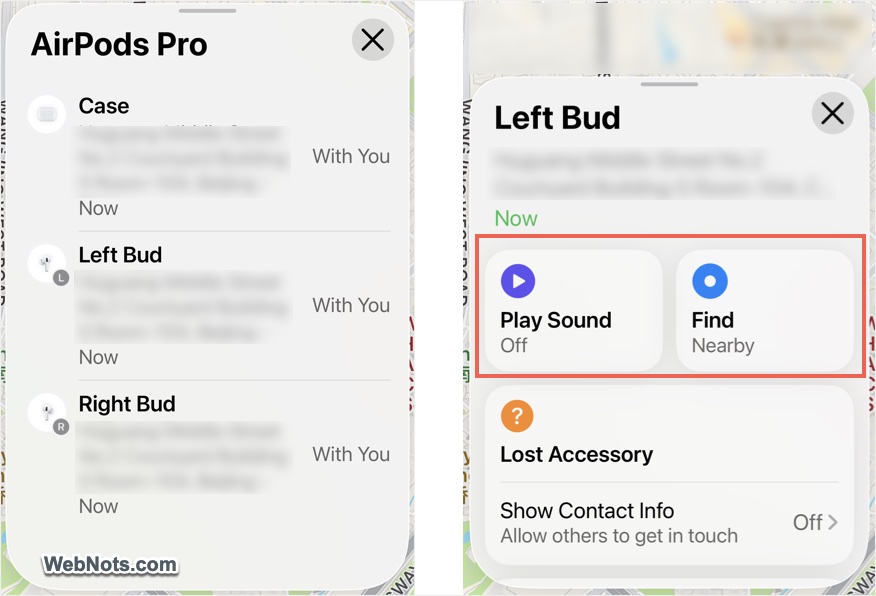
- First, turn on “Find My Network” option in AirPods Pro settings page.
- Open the Find My app and go to “Devices” tab.
- Select Case, Left Bud, or Right Bud.
- Play a Sound to locate the item or use “Find Nearby” to get distance and direction cues.
10. Switch Devices Seamlessly
AirPods Pro automatically switch between your iPhone, iPad, and Mac. To control this, go to “Settings > AirPods Pro > Connect To This iPhone”. Choose “Automatically” for convenience or “When Last Connected to This iPhone” to force them to stay on your phone.
Final Words
Once you start using these tips, your AirPods Pro will feel less like headphones and more like a natural extension of your iPhone. The real magic isn’t just in the sound, it’s in how effortlessly everything works together. You can also use additional features like Live Translation with Apple Intelligence and automatically pause the media when falling asleep to make the most from your AirPods.