Getting a new Mac is exciting – it’s fast, sleek, and clean. But if you’re sticking with Apple’s default settings, you’re not going to get the best experience. Apple sets up macOS to be as broadly appealing as possible, which means it’s not optimized for you. Whether you’re new to Mac or just upgrading, here are 10 essential settings to tweak immediately on a new Mac to get the most out of your machine.
Mac System Settings App
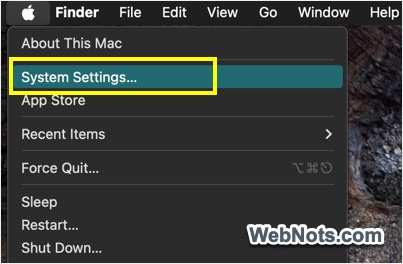
Each app in Mac comes with its own settings page which you can access by pressing “Command + Comma” shortcut keys when you are in that app. However, macOS also comes with a default app called System Settings to customize and configure the settings that affect the operating system level. Click on the Apple Menu located on top left corner of the screen and select “System Settings…” menu to open the app. Most settings explained in this article need to be changed in the System Settings app.
1. Customize the Dock
The default Dock is cluttered and oversized. It’s designed for show with magnification (changes size while hovering and moving the mouse horizontally) and genie effect but not optimized for speed.
- Go to “Apple Menu > System Settings…”.
- Navigate to “Desktop & Dock” section from the left sidebar.
- Reduce the size of the Dock or adjust the size according to your preference.
- Move the “Magnification” slider to “Off” position to disable and keep the Dock compact but readable. Also, change the position and minimize windows effect if needed.
- Turn off “Show suggested and recent apps in Dock” to avoid visual clutter.
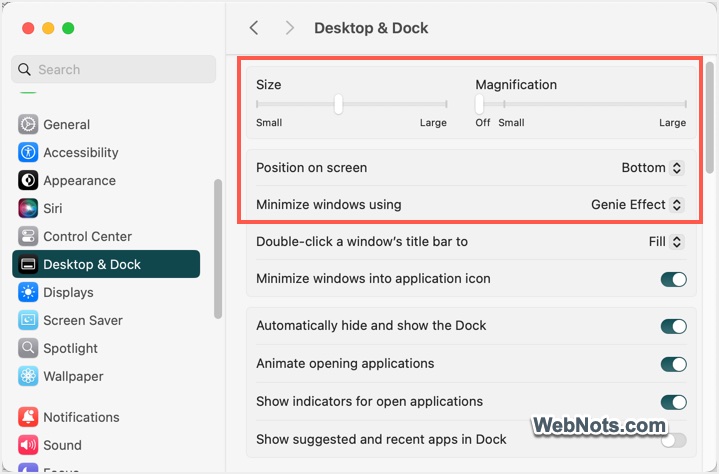
You can also rearrange or remove apps you don’t use by dragging them off the Dock. This gives you a cleaner, faster-access workspace that reflects your priorities.
2. Change Trackpad Gestures on MacBook
Apple’s gestures are powerful, but not all are intuitive or enabled by default.
- Go to “System Settings > Trackpad > More Gestures”.
- Enable or tweak gestures like “Swipe between full-screen apps”, “Mission Control”, or “App Exposé”.
- If you’re coming from Windows, enable “Tap to click” option under “Point & Click” tab – it saves time and feels more natural for many users.
These settings speed up how you navigate your system and improve multitasking.
3. Set Your Default Browser
Safari is good, but not everyone wants to use it. If you prefer Chrome, Firefox, Edge, or Brave, it’s easy to change the default browser.
- First, go to App Store to find and install your preferred browser.
- Go to “System Settings > Desktop & Dock” section.
- Scroll down and find “Default Web Browser” option.
- Click the dropdown and select one of the installed browser apps from the list.
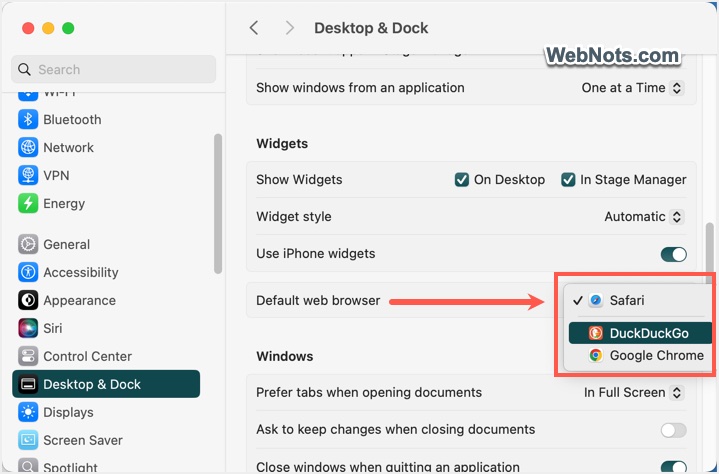
Apple doesn’t make this obvious but using the browser you’re comfortable with makes everything smoother.
4. Tame Notifications
macOS can bombard you with alerts – news, messages, app updates, and random nudges. Cutting down on distractions helps you stay productive and sane.
- Head to “System Settings > Notifications” section.
- Review and disable unnecessary notifications for apps you don’t need real-time alerts from.
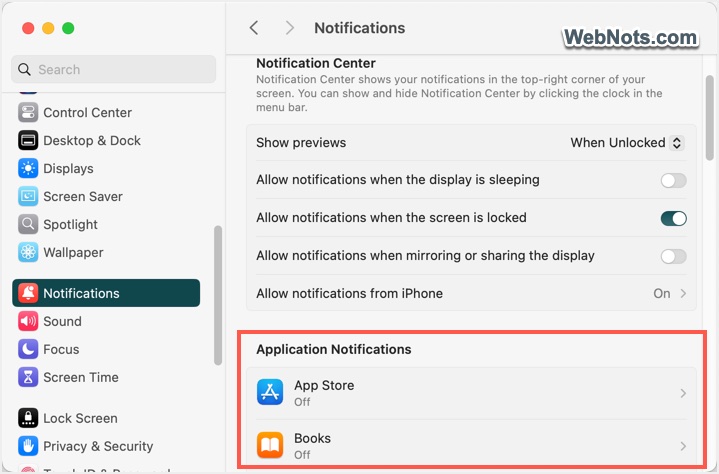
You can also turn on “Do Not Disturb” for focus hours or work sessions under “System Settings > Focus” section.
Note: It’s also possible to receive iPhone notifications on Mac using the iPhone Mirroring app setting.
5. Show Full File Path in Finder
Finder doesn’t show where you are in the file system by default – not helpful for anyone working with files seriously.
- Open Finder, then go to “View > Show Path Bar”.
- You can also press “Command + Option + P” shortcut keys to toggle the path bar.
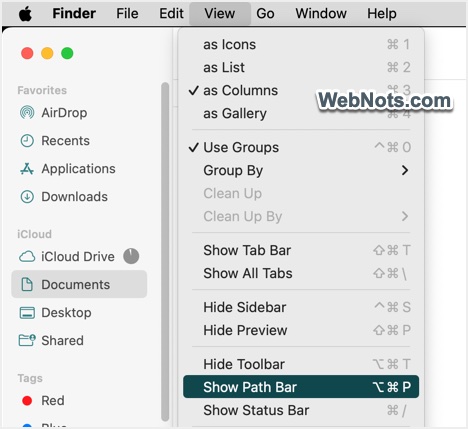
Now you’ll always know exactly where your files are located – no more guessing (path bar shows at the bottom).
6. Enable Right-Click on Trackpad and Mouse
Not everyone knows this: Macs don’t have “right-click” enabled by default on the trackpad.
- Go to “System Settings > Trackpad”.
- Navigate to “Point & Click” tab.
- Click the option below the “Secondary Click” and select “Click in bottom right corner”.
By default, “Control + Click” works as a right-click for mouse. You can change this:
- Go to “System Settings > Mouse”.
- Navigate to “Point & Click” tab.
- Click the dropdown against “Secondary Click” and select “Click Right Side” option.
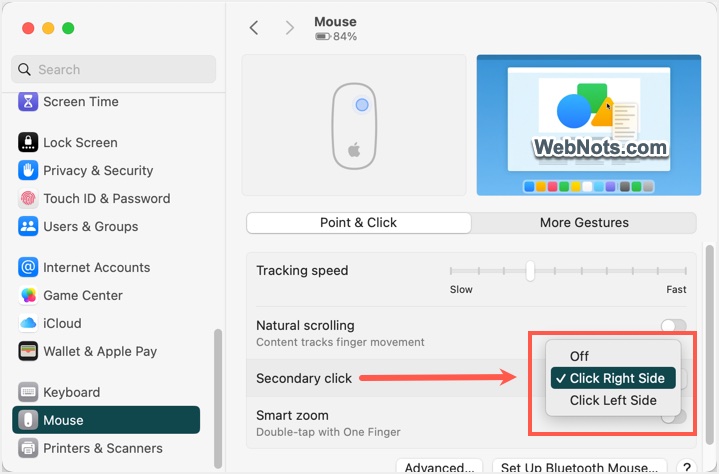
You’ll need this constantly – from context menus to file options – so don’t skip it.
7. Configure Hot Corners
Hot Corners lets you trigger key actions just by moving your cursor to a screen corner. Super useful, but off by default (generally, enabled only on bottom right corner to open Quick Notes).
- Go to “System Settings > Desktop & Dock”.
- Scroll down to bottom on the right pane and click “Hot Corners” button.
- Assign corners to actions like “Lock Screen”, “Mission Control”, “Quick Note”, or “Put Display to Sleep”.
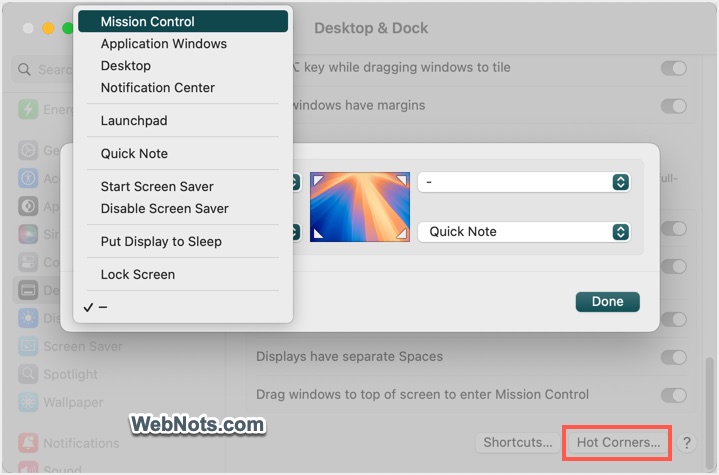
Just be careful: Unintentional triggers can be annoying. Pick corners you don’t accidentally hit often.
8. Change Screenshot Format and Save Location
macOS comes with a default Screenshot app for recording and capturing your screen. By default, screenshots are saved to your desktop cluttering the display. Also, the images are in PNG format, which is generally larger compared to JPG (JPEG) format. You can fix both.
- Open Screenshot app by pressing “Command + Shift + 5” keys.
- Click “Options” and select one of the available locations under “Save to”. Otherwise, select “Other Location…” and then choose the folder where you want to save the captured screenshots.
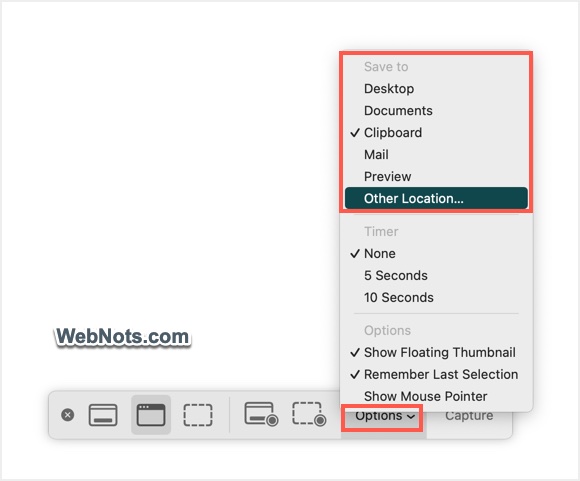
- To change the file type to JPG, open Terminal app from “Finder > Applications > Utilities” folder and type the following commands one by one.
defaults write com.apple.screencapture type jpg

killall SystemUIServer
Now your screenshots are cleaner, lighter, and out of the way.
9. Setup Spotlight for Efficiency
Spotlight search is powerful, but it indexes everything – even the stuff you don’t use. That slows it down.
- Go to “System Settings > Spotlight”.
- Scroll down and uncheck categories you never search (like Mail & Messages, Events & Reminders if you don’t use Apple Mail, Calendar, and Reminders apps).
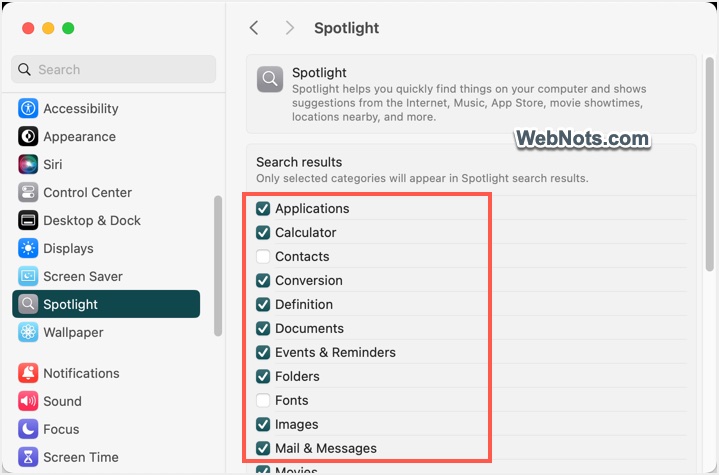
This change makes sure Spotlight search is fast and relevant.
10. Secure Your Mac (Firewall, FileVault, Lock Screen)
Your Mac holds everything from sensitive documents to synced passwords. Don’t leave it exposed for unauthorized access.
- Set “Start Screen Saver when inactive” and “Turn display off when inactive” to less than 5 minutes and set “Require password after Screen Saver” begins or display is turned off” to “Immediately” under “System Settings > Lock Screen” section.
- Go to “System Settings > Network > Firewall” and turn on “Firewall” option.
- Similarly, Go to “System Settings > Privacy & Security” section and turn on FileVault (encrypts your disk).
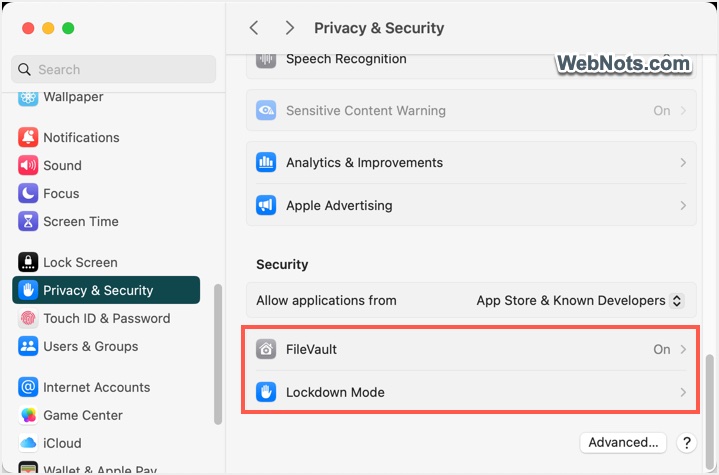
Security is boring until it’s critical. These changes keep your data safe from the start.
Final Thought
Apple gives you a powerful machine with smart defaults — but they’re generic. Changing these 10 settings gives you a Mac that’s faster, cleaner, more secure, and tailored to the way you work. You’ll save time, avoid headaches, and enjoy using your Mac more every day. There are also options available to customize the Control Center, Keyboard layout, Displays, etc. Play around with the System Settings app and build a setup that works for you instead of settling with the factory settings.