Unlike Windows laptops, Apple’s MacBooks are durable and built for security. However, if you are not carefully using the device, macOS also will be affected with malware, phishing attacks, data theft, and unauthorized access. Good thing is that there are plenty of options available in macOS. Here are the 10 effective ways to improve the security of your Mac and keep your personal information safe.
1. Use Strong Password and Enable Touch ID
If you are sharing a Mac with family members, friends, or colleagues, then use a strong password for your account making it difficult for someone to gain access to your data. Latest Mac models come with a Touch ID keyboard or you can use Apple’s Magic Keyboard to enable Touch ID for faster and more secure authentication.
Go to “Apple Menu > System Settings… > Touch ID & Password” section to change your account’s password or setup Touch ID.
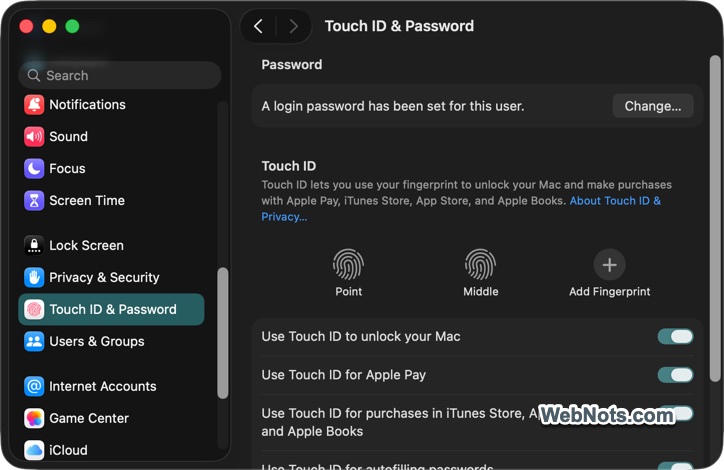
Note: Even if Touch ID is enabled, you must set up a password. The password is required for unlocking your Mac and for authentication in situations where Touch ID is not available.
2. Turn on FileVault Encryption
FileVault encrypts the entire startup disk on your Mac (this is generally your hard disk), ensuring your data cannot be accessed without login credentials.
- Go to “Apple Menu > System Settings… > Privacy & Security”.
- Scroll down to click “FileVault” option.
- Turn “FileVault” option in the next screen. Mac will run the data encryption in background, which may many hours depending on the size of your data.
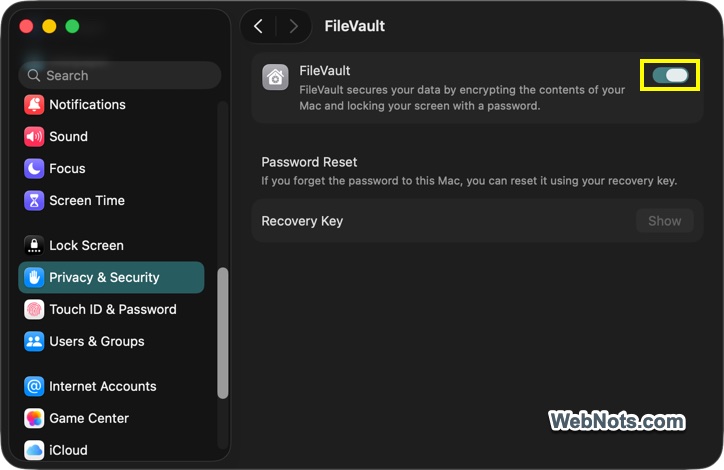
This is especially important if your Mac is lost or stolen, as it prevents others from reading your files even if they remove the hard drive. You can also turn on “Lockdown Mode” option if you feel the system was already hacked or infected. This will limit the access to websites, FaceTime calls, messages with attachments, etc. to protect all incoming network traffic.
Note: If you use Recovery Key option, make sure to write down in a safe place (outside of your Mac). You need this Recovery Key for resetting the password if you have forgotten. Otherwise, there will be no ways to reset your password and access the data.
3. Enable Firewall Protection
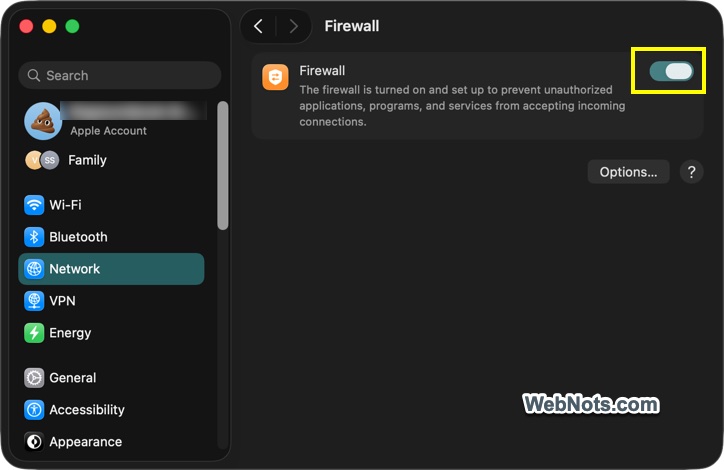
You can easily block unwanted network connections using the in-built firewall option. In this way, you can stop any individual app from sending or receiving data.
- Go to “Apple Menu > System Settings… > Network”.
- Click on “Firewall” option and turn the “Firewall” option on the next screen.
- Click “Options” button to check and block / allow incoming connections for apps. You can also enable stealth mode to hide your device from network.
4. Review and Remove App Permissions
Apps require permission to access features such as your location, camera, and microphone. Even web browsers like Google Chrome need camera and microphone access to support online video calls through services such as Zoom or Microsoft Teams. Over time, these permissions can accumulate, and some apps may gain access without you being fully aware of it.
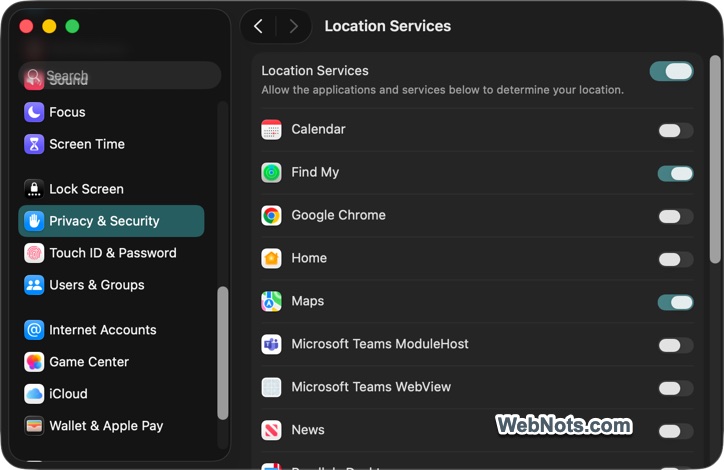
- Go to “Apple Menu > System Settings… > Privacy & Security” section.
- Click on “Location Services” to view and disable apps having permission to access your location.
- Similarly, review permissions for camera, microphone, and other items.
5. Protect from Dangerous Websites
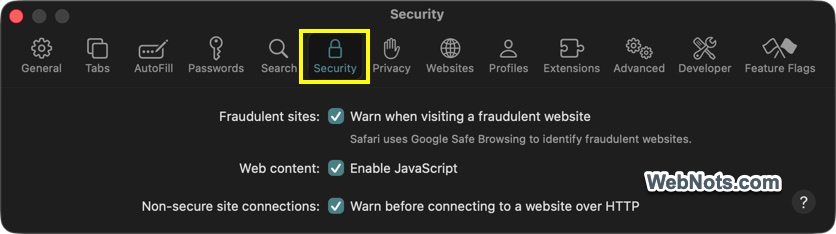
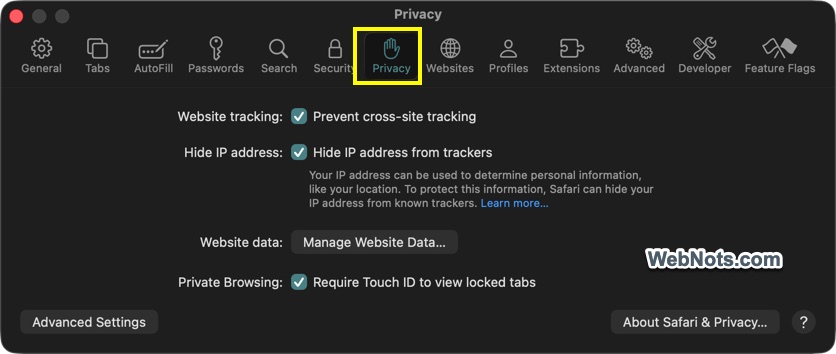
We strongly recommend using Safari as your primary browser on Mac. it comes with features like fraud protection, IP hiding, and force HTTPS.
- Open Safari and press “Command + Comma” keys to open settings.
- Navigate to “Security” and “Privacy” tabs.
- Turn on required options.
Besides these default settings, never click on links from unknown senders, and avoid downloading attachments from unexpected emails. Always verify requests by visiting official websites directly rather than clicking links. Check our article on how to protect your online activities while browsing with Safari.
Note: You can also use a VPN app for hiding your identity when browsing online.
6. Enable Find My
Find My is the default macOS app, which helps you to track your Mac’s location. You can also erase entire content remotely if your Mac is lost or stolen. This feature significantly improves your chances of recovering the device or protecting your data from unauthorized access.
- Simply open Find My app from iCloud website (online) or from any other devices, like on your iPhone. You can also use Find Devices option iCloud website.
- Once logged in, you can find all the devices logged into same the Apple account under “Devices”.
- Tap or click on your Mac’s name to find its location.
- Tap or click the item on its location to see actions like playing a sound, locking it, or trigger erase request.
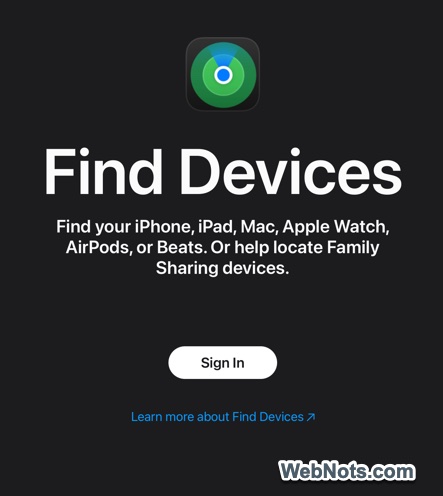
Note: Location Services should be turned on for “Find My” app in “Privacy & Security” settings.
7. Use Standard User Account for Daily Activities
Mac allows to create Administrator, Standard, and Sharing Only user accounts. If you are using an administrator account for everyday tasks, it increases security risks as any malware infection can make system-wide changes easily.
- Go to “Apple Menu > System Settings… > Users & Groups” section.
- Click “Add Users…” button.
- Select “Standard” user and provide other details to create new standard user account.
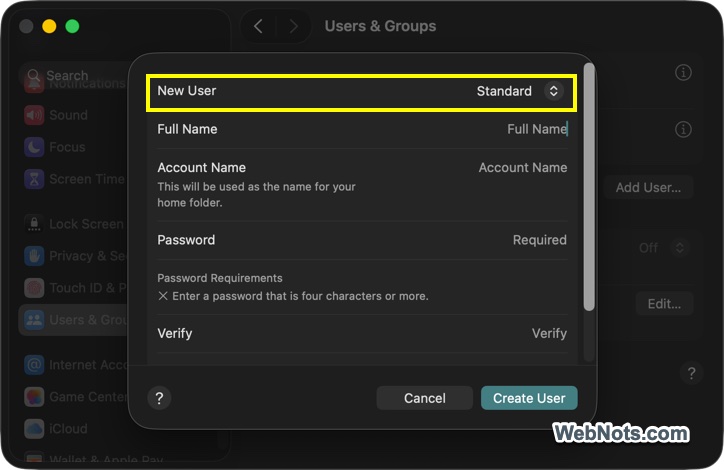
Use the standard user account for daily use and reserve the administrator account for installing software or changing system settings.
8. Keep macOS and Apps Updated
First step in protecting your Mac is to keep the operating system and applications updated. Though updating macOS on older devices may slow down the performance, it is necessary for fixing latest security issues (which makes your Mac vulnerable).
- Go “Apple Menu > System Settings… > General > Software Update” section.
- Click the ⓘ icon at the end of “Automatic Updates” option and turn on options for automatically installing macOS updates and security responses.
- Also, enable automatic updates for third-party applications through the “App Store > Settings…”.
Note: Enable “Background Security Improvements” under “Privacy & Security” section in System Settings app for additional security.
9. Use an Antivirus App
By default, Mac runs a security service called Gatekeeper to monitor downloaded apps are from verified developers. You will see a warning when trying to open the installer file downloaded from an unverified website. though this kind of protection is sufficient for most users, a third-party antivirus app can provide extra protection.
- Choose a premium and trusted antivirus app instead of going for the free one with limited features. These apps can detect threats that may slip through standard defenses, especially zero-day attacks or sophisticated phishing attempts.
- Keep the app updated and allow it to run regular scans.
Remember that the antivirus app is only an additional protection and not the replacement for your safe browsing habits and regular system updates.
10. Backup Mac Regularly
Mac comes with a Time Machine app that helps to automatically backup your files to an external drive. Go to “Apple Menu > System Settings… > General > Time Machine” section and add your backup disk. In addition, you can use the iCloud backup to sync and backup your passwords, files, and photos.
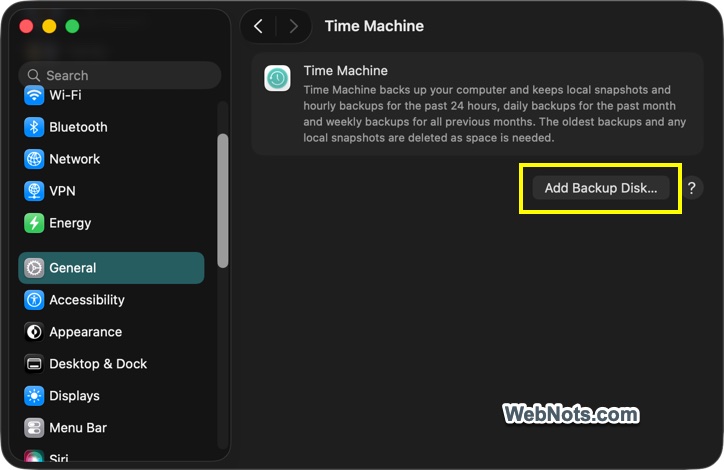
Taking regular backups protect you against data loss caused by hardware failure, malware, ransomware, or accidental deletion.
Conclusion
As you can see, there are plenty of options on Mac starting from basic protection to advanced settings. You can use the backup data in case if anything goes wrong. However, security of your Mac is not a one-time task but an ongoing process. So, make sure to regularly review these ten strategies are in place to enjoy your Mac with greater confidence and peace of mind.