Most hosting companies offer a staging environment for creating a backup of your live site. You may need such a dummy environment with live content for testing purposes. For example, you can test the theme change on a staging site to confirm everything works fine before deploying the changes on a live site. However, if your hosting plan does not support a staging site or you want to work locally on your computer, then using a local serve setup is the best option. In this article, we will explain how to move your live WordPress site to local computer (Mac, Windows or Linux) using the Local app.
Why to Choose Local App?
There are popular apps like MAMP and WAMP for setting up a localhost environment. However, if you only want to focus on a WordPress setup, then Local is the best option.
- Local app is owned by WP Engine. So, the app is well maintained and updated frequently for supporting latest PHP and SQL versions.
- You can easily use SSL locally, which is needed for testing payment gateways on sandbox setup.
- If you are using Flywheel or WP Engine hosting, then you can push the changes from Local app to live server.
- The app has plenty of useful features like browsing through the complete folder structure with Visual Studio Code app and free add-ons to get things done quickly.
You can also create unlimited WordPress sites locally on your Mac, Windows, or Linux OS. Here, we will explain with macOS and you can follow the same steps on other OS as well. The app offers two methods for moving your live site:
- Manual – download site and database files manually.
- Semi-automatic – Use an archived ZIP file (containing wp-content and database files).
This article explains about the semi-automatic method, which is much easier. If you want to follow the manual method, then check this article.
Step 1 – Download Live WordPress Site Files
First step is to download all your live WordPress site’s files to your computer. Since Local app is dedicated for WordPress, you don’t need to download the standard WordPress files. All you need is the /wp-content/ folder which contains your themes, plugins and uploaded images.
- Go to your hosting account panel and open File Manager app.
- Navigate to /public_html/wp-content folder and download the entire content.
- Alternatively, remotely login to your server using FTP clients like FileZilla and download all the files.

This step will take longer time depending on number of themes, plugins, images and other files on your live site.
Note: If you have large number of images, then ignore /wp-content/uploads folder. You can change the file upload path on local site and directly link to your live site’s images. Similarly, ignore the themes and plugins that are not active and can be installed freely from the WordPress repository. You can install these items on local site instead of downloading and uploading (as they are anyway inactive).
Step 2 – Export Live Database File
Next step is to download your live database file.
- Login to your hosting account and open phpMyAdmin app.
- Select your database and go to “Export” tab.
- Choose “Custom” option and then select gzipped (.gz) compression in SQL format to download the compressed version of your database file.


Note: When downloading, you can ignore the plugin files (in step 1) and tables (in step 2) related to security and caching. These tables and plugins will not work on localhost setup and create conflicts when installed.
Step 3 – Create a ZIP Archive
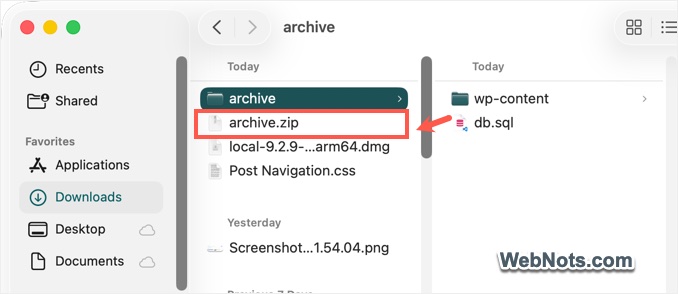
Now that you have the files and database of your live site, you need to create a ZIP archive.
- Extract the compressed database to a SQL file.
- Put wp-content and SQL file in a single folder.
- Compress it as a ZIP file (right-click and select compress or ZIP option).
You should have a single ZIP file with your live database and wp-content folder.
Step 4 – Download and Install Local App
The next step is to start preparing your localhost setup.
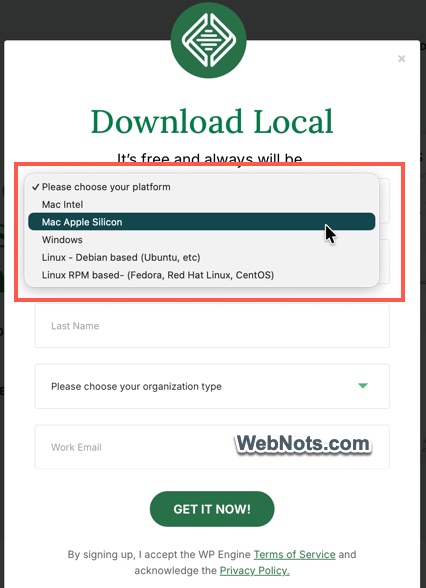
- Go to Local app’s website and click the download button.
- On the pop-up, select your OS (we will select Apple Silicon) and provide your email, name and download the installer file.
- Double-click to open the installer and then install the Local app on your computer.
Step 5 – Import a Local WordPress Site
- Launch the app and click the “+ Add Local Site” icon showing on bottom left corner.
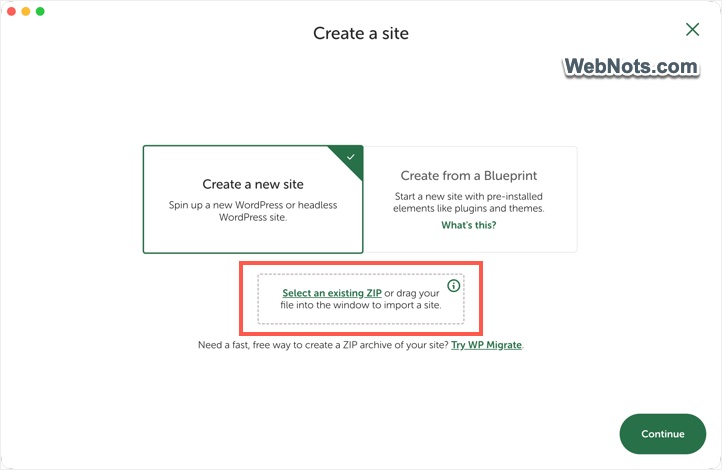
- Click “Select an existing ZIP” option and select the ZIP file created in step 3.
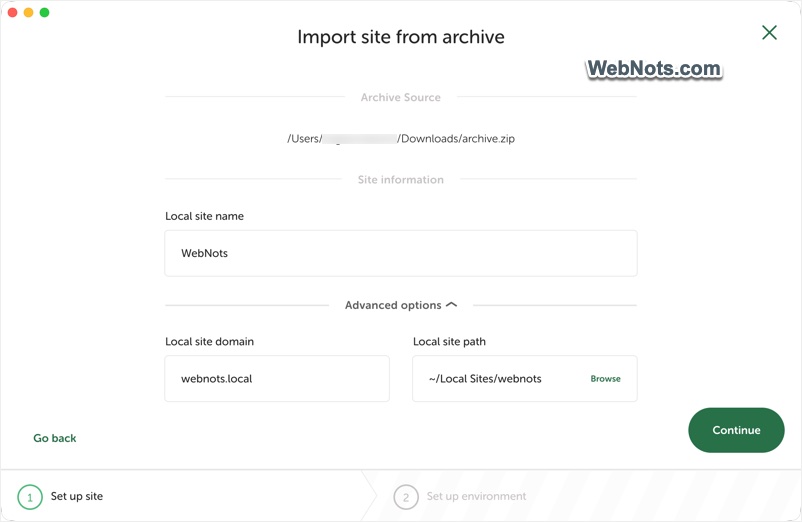
- Go to next step and provide site’s name and expand the “Advanced options”. Provide local site’s domain and change the installation path if needed. Your local domain name should be like webnots.local and this is the address you should be using to access the localhost on your browser.
- On the next step, click “Custom” environment option and choose PHP, web server and SQL server versions.
- Finally, click the “Import Site” button and Local app will start installing WordPress with the /wp-content/ folder and database from your live site’s content.
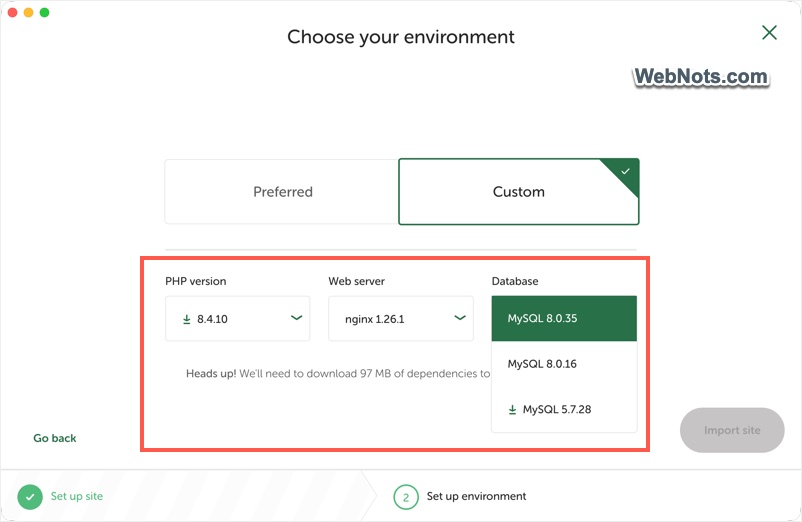
Note: If you don’t know the PHP and SQL server versions, extract the compressed live database file to a SQL file. Open it using text editors like VS Code and find the details at the start of the file.
Step 6 – Check Local Configurations
When the setup is finished, select your local site’s name from the app’s interface and do the followings:
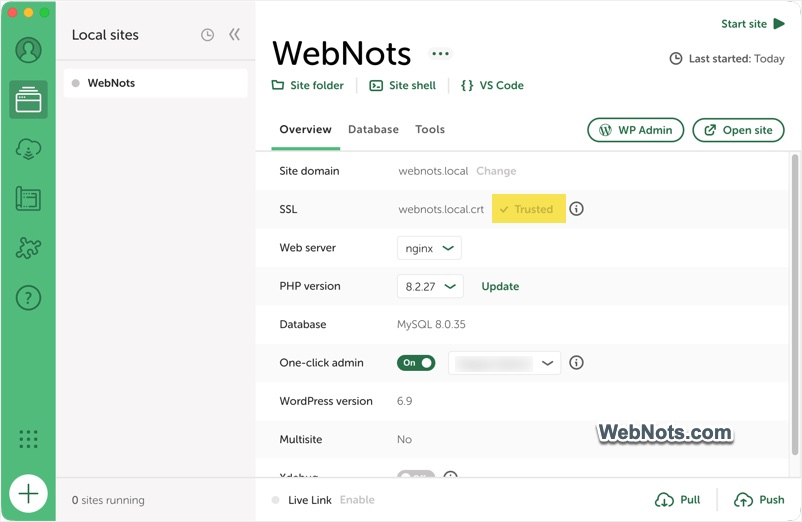
- Under “Overview” tab, click the “Trust” link against “SSL” option. This will install a local SSL certificate and allow you to access the site with https:// URLs. You should stop the site and restart again for the SSL to work.
- Turn on “One-click admin” option and select the username from the list. You should see the admin username is already imported from your live site. This will allow you to automatically login to your WordPress admin panel by clicking on the “WP Admin” button.
- You can anytime change the PHP version and web server. The app will download and install the necessary files for that without the need of reinstalling the entire site.
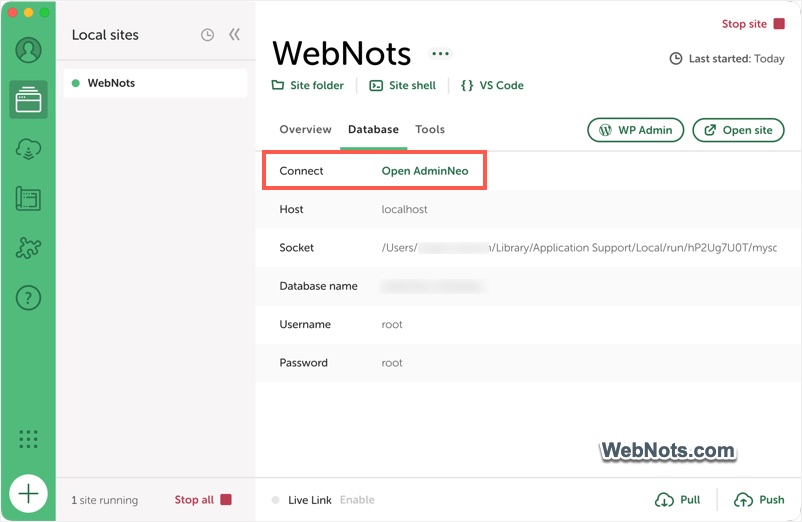
- Go to “Database” tab and click on the “AdminNeo” link to open your database section.
Frequently Asked Questions
Here are some common issues you may encounter when importing and accessing a site in the Local app, along with suggested solutions to resolve them.
First, install a local SSL certificate by trusting the site. Make sure to stop your site and restart again before your check. If you have enabled HTTPS only connection on your browser, disable that and try to access. In some cases, you should manually trust the certificate on OS level as explained in this article for macOS.
Regardless of whether you have imported /wp-content/uploads” folder or not all the images should be accessible as the URLs are related in WordPress. If you want to access the Media Library, then use WP Original Media Path plugin and change the path as live site’s uploads folder. This will allow you to access the images from localhost, however, you will not be able to upload images from local site to live server. Also, you should disable image hot linking feature if you are using that in Cloudflare or in your security plugin on live site.
Check your wp-config.php and confirm the database details are correct. The best option is to replace localhost file with your live site’s file.
It happens due to differences in SQL versions or large size. Local app also offers SSH shell access, which you can use for uploading database from Terminal. As mentioned, there is another manual method for moving your site and check if that works.
With the Local app, you can do that only by connecting to your WP Engine or Flywheel account. If you are using any other hosting company, then you need to move the content and database manually.