PDF or Portable Document Format is an easy way to send documents with proper formatting compatible across platforms. In addition, you can set password to protect the PDF file from copying content, editing or printing. Good thing is that creating a password protected PDF on a Mac is straightforward using built-in apps and functions without the need of Adobe Acrobat.
1. Set Password Using Save as PDF
This option will work on any app on Mac including third-party apps like Microsoft Word.
- Open the file in your favorite app (for example – open your document in Word for Mac app).
- Go to “File” menu and select “Print” option. Alternatively, press “Command + P” keys to open print dialog box.
- In the print dialog box, click the “PDF” button in the lower-left corner.
- Select “Save as PDF” option from the drop-down menu.
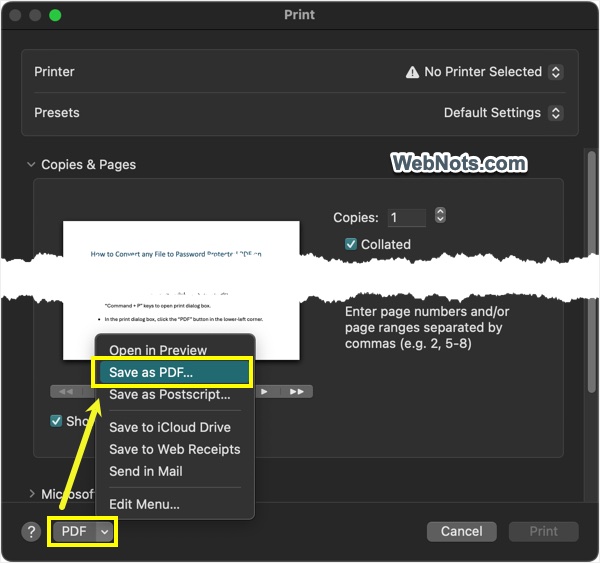
- In the save dialog box, click “Security Options…” button.
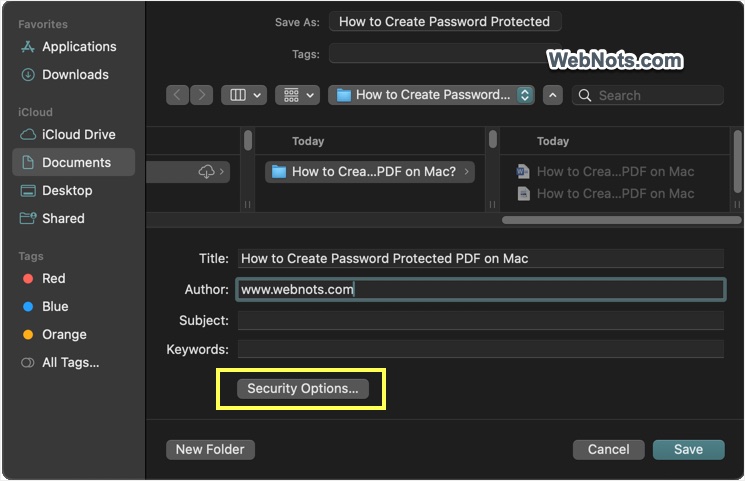
- You have three options to protect the PDF file:
- Require password to open document.
- Require password to copy text, images and other content.
- Require password to print document.
- Check the option(s) and type your desired password in “Password” and “Verify” fields.
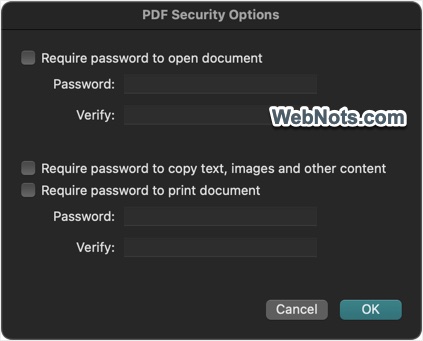
- Click “OK” button, then choose a location to save your password-protected PDF and click “Save” button.
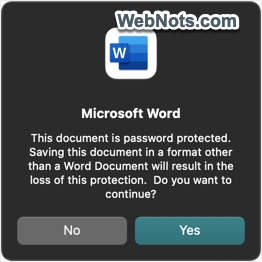
Note that you can’t set password in Microsoft Word (“Review > Protect Document”) and then save the document as password protected PDF file. Word will show a warning that the password protection will be removed if you save it as a PDF.
2. Using Export Option for Existing PDF File
Follow this option if you want to set password for an existing PDF file.
- Locate your PDF file in Finder and double-click it to open in the Preview app.
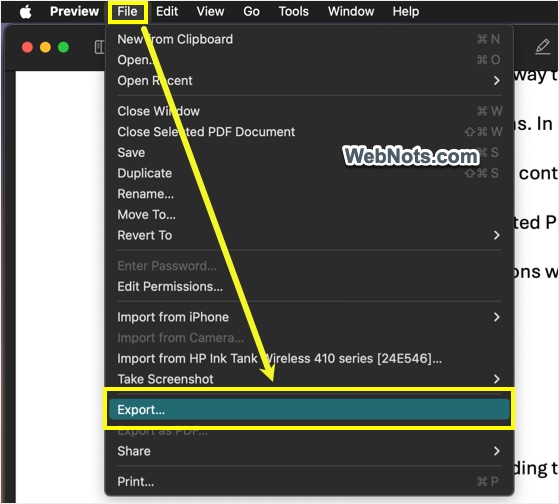
- Click “File” in the menu bar and choose “Export” option.
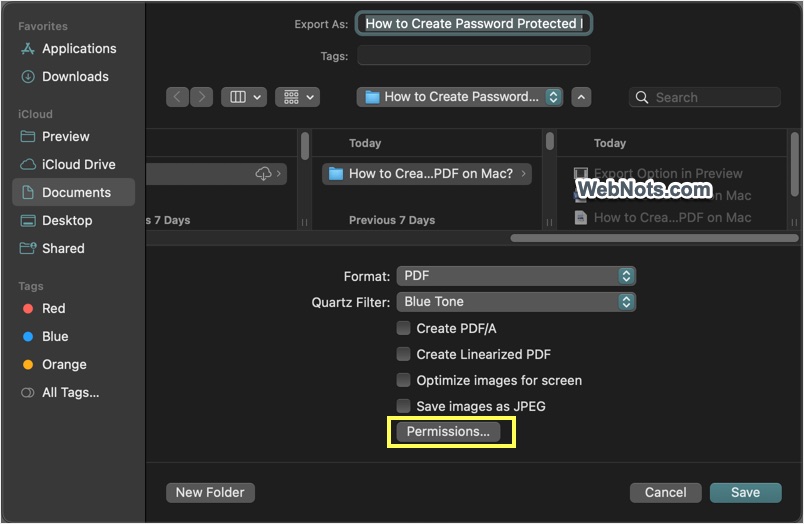
- In the export dialog box, select the Format as PDF and select one of the Quartz Filter options from the drop-down.
- Uncheck “Create Linearized PDF” option and click on “Permissions…” button (this button will be enabled only if you have disabled linearized PDF option).
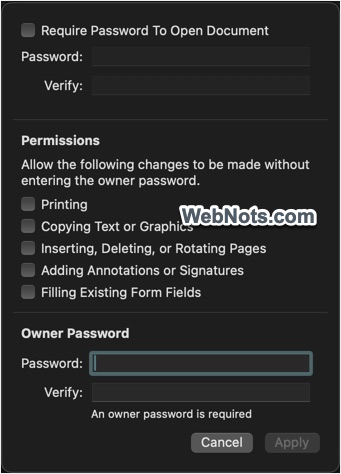
- First, type the “Owner Password” and check the list of items under “Permissions” section. You can select password protection for:
- Printing
- Copying Text and Graphics
- Inserting, Deleting, or Rotating Pages
- Adding Annotations or Signatures
- Filling Existing Form Details
- If you want to protect opening, check “Require Password To Open Document” option and type password.
- Click “Apply” button to save password and then click “Save” button to save your file.
3. Using Export Option for Converting Image to PDF
If you want to convert an image to PDF, then follow the below steps.
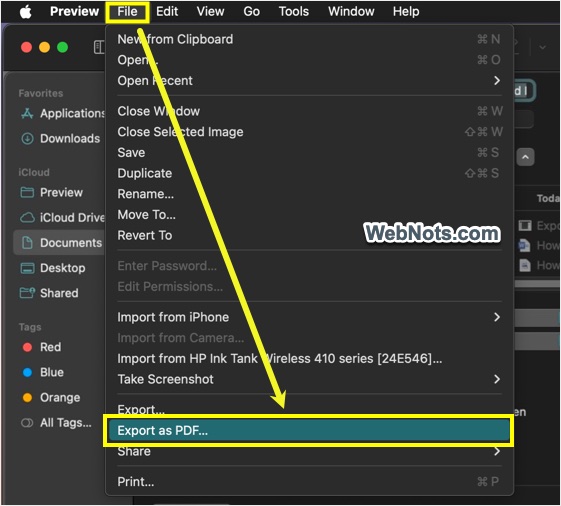
- Open the image in Preview and go to “File > Export as PDF…” menu.
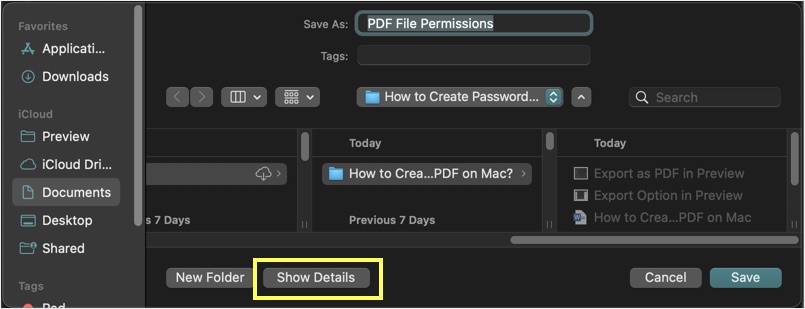
- Click the “Show Details” button in export dialog box.
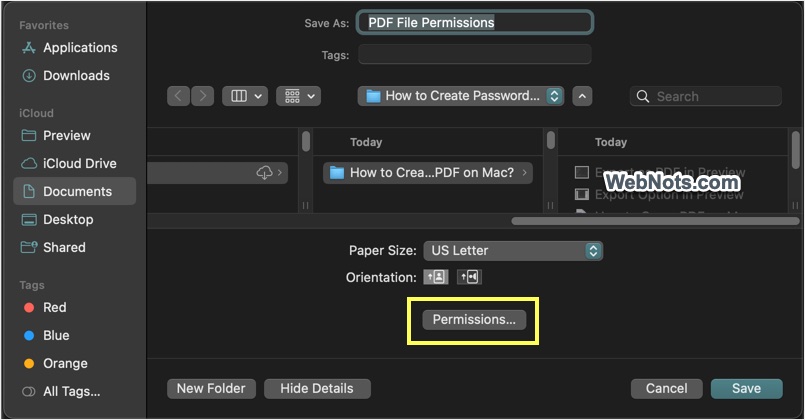
- Click the “Permissions…” button.
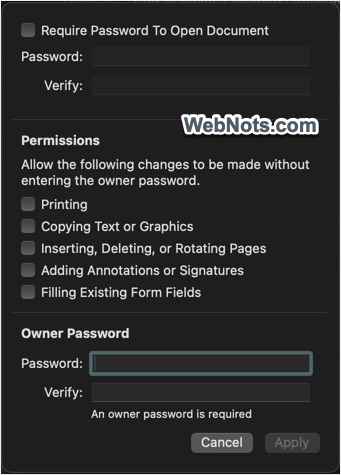
- Now, set the owner password for required permissions.
- If required, set a password to open the converted PDF document.
- Click the “Apply” button to set password and then “Save” your file.
4. Export Password Protect PDF from Pages
This open is useful to apply password for a PDF file converted you’re your document. However, you can only apply password for opening the file and not for printing, editing or copying.
- If you have a document file, open it in Pages app.
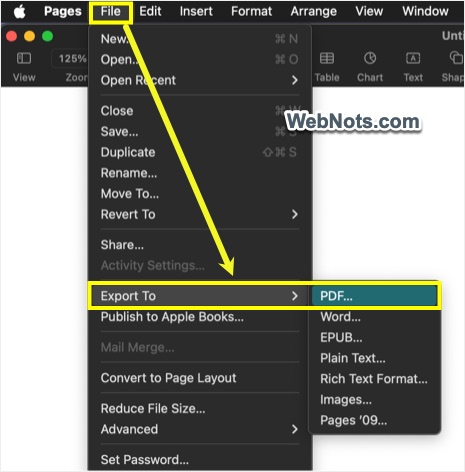
- Go to “File > Export To > PDF…” option.
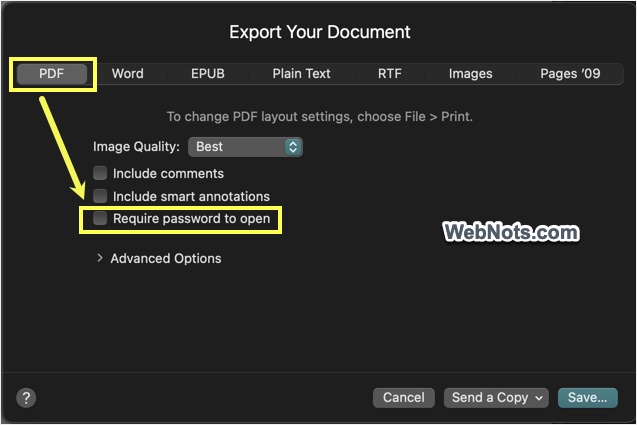
- Make sure you are in “PDF” tab of “Export Your Document” dialog and check “Require password to open” option.
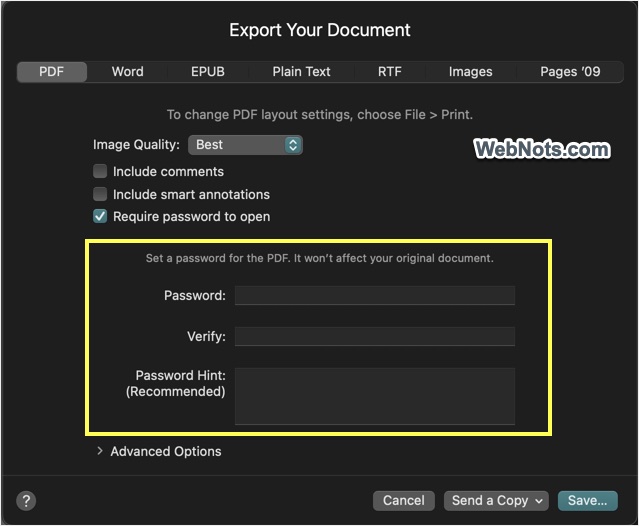
- Type your password and verify it. If required, enter a prompt to remind your password if wrongly entered.
- Click “Save…” button and then click “Export” button to save the copy of your PDF file. You can also directly share the password protected PDF file by clicking “Send a Copy” button and selecting the required option.
Note: You can also first set the password for your document in Pages (“File > Set Password”) and then export to PDF with the same password. As mentioned above, this is not possible in Microsoft Word app.
Conclusion
By following these methods, you can easily protect sensitive information in your PDFs on a Mac. After conversion, open the newly saved PDF file and ensure it prompts for a password. Though the original file will be still available, make sure to store your password securely to avoid losing access to your PDF file.