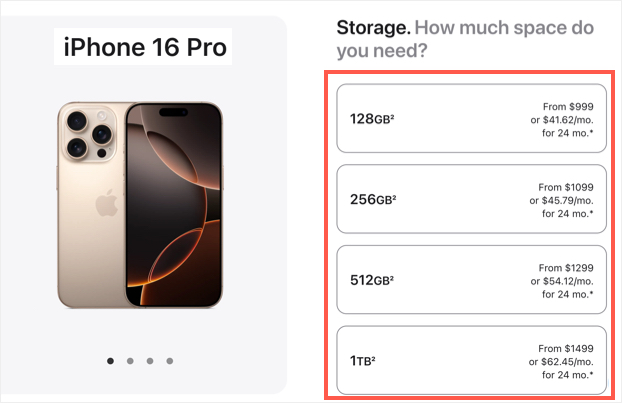
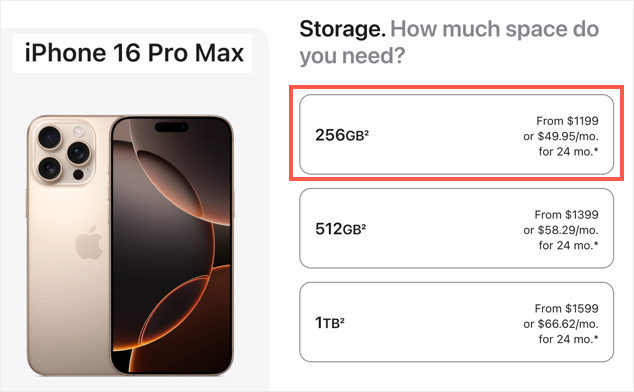
Nowadays, smartphones (both iPhone and Android models) come with in-built storage as well as additional cloud storage. You can use iCloud on iPhone, Google Drive on Android or any other cloud storage without hassle. However, the available phone storage and the free cloud storage you will get are not sufficient when you have too many social apps. For example, you can get iPhone 16 Pro and 16 Pro Max with 128 GB and 256 GB respectively with 5 GB free iCloud storage. This is not at all sufficient with apps like Facebook, WhatsApp, WeChat, Instagram, X, YouTube, etc.
These social media apps like WhatsApp are one of the major contributors occupying large storage space on your phone. In this article, we will explain how you can check the storage occupied by WhatsApp and clean the clutter.
WhatsApp Storage Space
Follow the below steps to check the WhatsApp storage on your Android or iPhone.
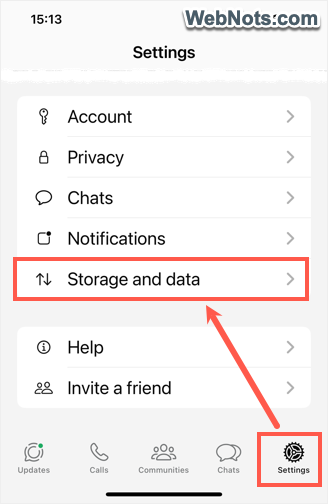
- Open WhatsApp, go to “Settings” and tap on “Storage and Data” option.
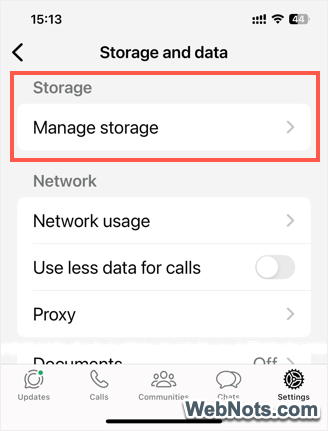
- Tap on “Manage Storage” option.
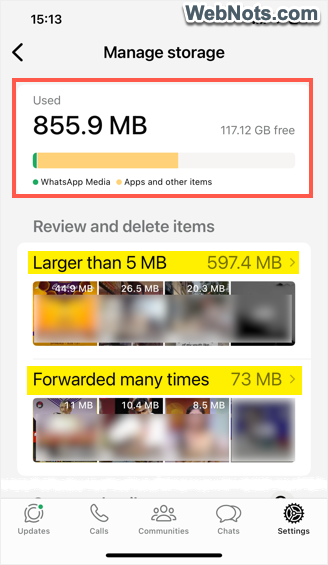
- Check the total space occupied by WhatsApp and the free available space on your phone’s storage.
1. Delete Unnecessary Chats and Media
Manage Storage section shows how much space WhatsApp is using and breaks down which chats and files are taking up the most space.
- Under “Review and delete items” you can find the larger and many times forwarded items.
- Scroll down to “Storage details” section and select the individual chats that occupy larger space.
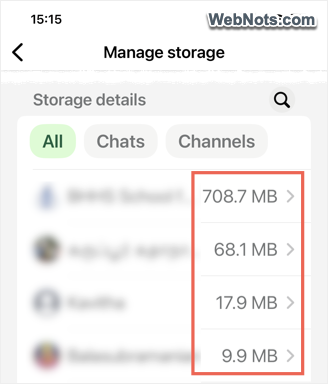
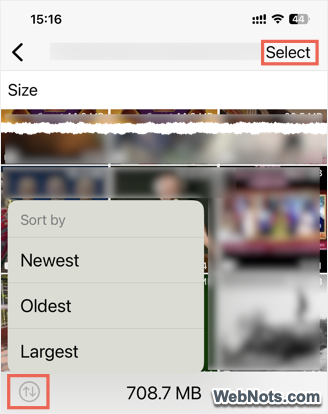
In both cases, you will see the option to select and bulk delete media files like videos, images and documents. You can keep important files and delete the rest.
2. Clear Individual Chats
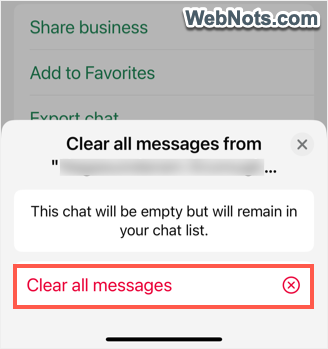
If you don’t want to delete the whole chat but need to free up space, open a chat, tap the three dots (on Android) or chat name (on iPhone), and select “Clear Chat” option.
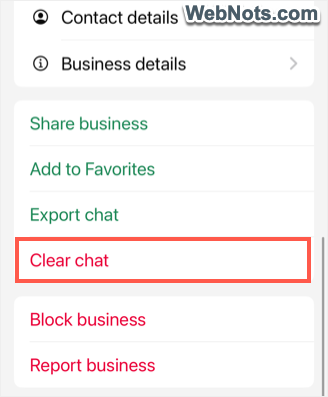
You can choose to clear all messages except starred ones.
3. Backup and Delete Photos & Videos from Your Phone
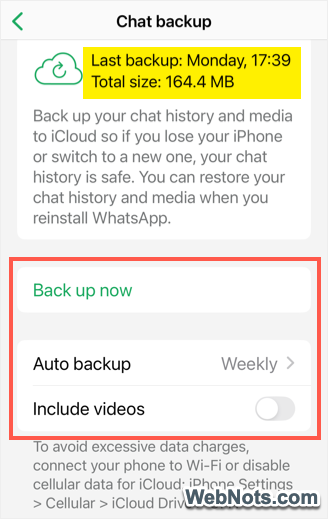
You can backup your photos and videos to a cloud service like Google Drive or iCloud and safely delete large media files from WhatsApp to save space without losing important memories.
Go to “Settings > Chats > Chat backup” section and tap on “Back up now” option. It is also possible to schedule automatic backup for daily, weekly or monthly. You can also check when your last backup occurred, size and whether to include videos in the backup (which can be a major space hog).
Now, you can delete the files and chat history as explained above in points 1 & 2.
4. Disable Automatic Media Download
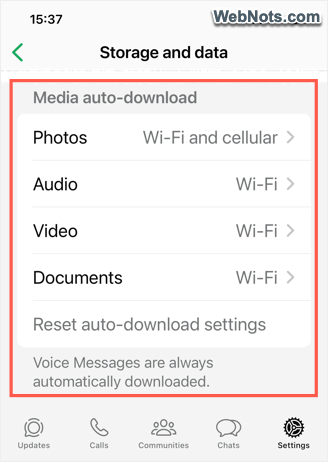
By default, WhatsApp will automatically download received photos, audio, media and documents to your local phone’s storage. This will create both storage as well as privacy problems as someone can accidentally see your pictures in albums and photo library.
- Go to “Settings > Storage and Data” section.
- Under “Media Auto-Download”, tap on “Photos”.
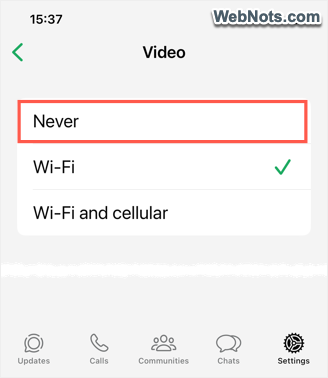
- Select “Never” on the next screen.
- Similarly, select “Never” for “Audio”, “Video” and “Documents”.
Voice messages can also occupy significant space over time. Unfortunately, there are no options to stop automatic download of WhatsApp Voice Messages. You need to open the Files app on your iPhone (or a file manager in Android), navigate to “WhatsApp > Media > WhatsApp Voice Notes” and delete unwanted voice notes.
5. Turn on Disappearing Messages
WhatsApp’s Disappearing Messages feature allows you to set messages in a chat to automatically delete after a specific period (24 hours, 7 days, or 90 days). This is a great way to keep your chats clutter-free and manage storage space efficiently without manually deleting older messages. Good thing is that you can setup automatically disappearing messages for your entire account or for a specific chat. To enable it:
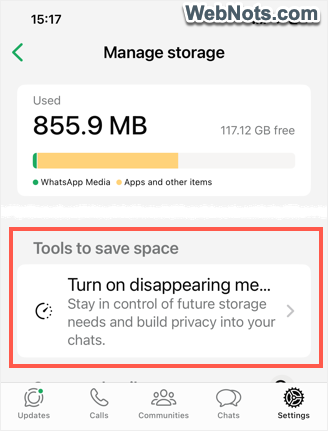
- Go to “Settings > Storage and Data > Manage Storage” section.
- Tap on “Turn on disappearing messages” option showing under “Tools to save space” heading.
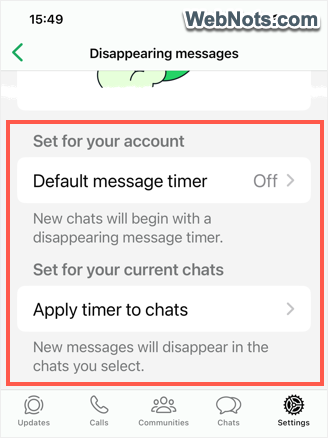
- For account level timer, tap on “Default message timer” under “Set for your account” and set the timer.
- For individual chat, tap on “Apply timer to chat” under “Set for your current chats”. Select the contact names and set the timer.
5. Uninstall and Reinstall WhatsApp (Optional)
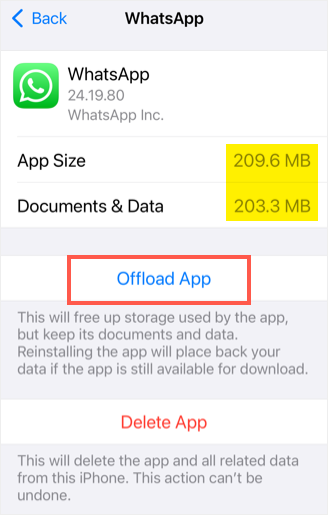
If your app is still sluggish after cleanup, uninstall and reinstall WhatsApp. Make sure to backup your data before doing this so you don’t lose important chats. In addition to deleting the app, iPhone also offers an option to offload WhatsApp App to free up storage space. When you offload an app, iPhone deletes the app itself but keeps its data and documents intact. This means that when you reinstall the app later, all your data and settings are restored as if you never deleted it.
- Go to “Settings > General > iPhone Storage” section.
- Scroll down and check the app list. If you do not find WhatsApp, tap on “Show All” and select WhatsApp app.
- Check the documents and app size, tap on “Offload App” option to remove the app from your iPhone.
Final Words
You can also log into WhatsApp Web on your desktop and use the browser interface to clean up chats and media files faster. In addition, archive the chats you don’t need to access regularly to keep your main screen organized. To do this, swipe left (iPhone) or long press (Android) on the chat and select “Archive” option.