Google AdSense is one of the first options for website owners to monetize their content. Earlier days you could easily get approval for one site and implement the same ad code on multiple sites. However, to protect advertisers, Google change the process and now you should get approval for each site separately. If you are new to AdSense, here is how to add a new site in your existing AdSense account.
New Sites and Subdomains
Here we discuss about adding a new site, which means you should already have an approved AdSense account with at least one site displaying ads. If you are looking for a fresh approval (for the first site), check our article on how to apply for an AdSense account.
Also, Google removed the option to add subdomains and your new site should be a top level domain like yoursite.com. All subdomains and subdirectories of an approved website will automatically display ads and you don’t need a separate approval for that.
Adding a New Site in AdSense Account
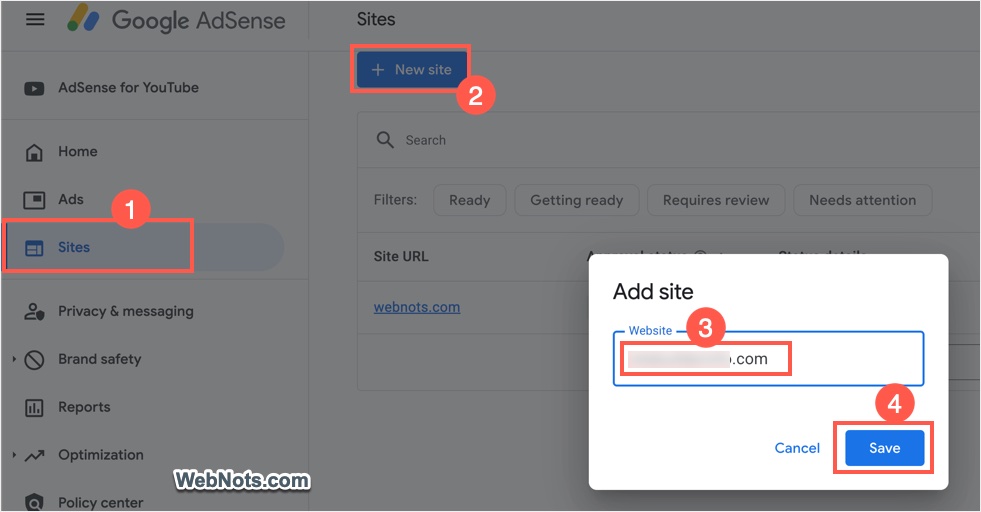
- Login to your AdSense account and go to “Sites” section.
- Click the “New Site” button and a pop-up will appear.
- Type the domain name of your site like yoursite.com and click “Save” button. Don’t include https or www, otherwise, you can’t save the site.
You will see a step-by-step process as explained below:
1. Verifying Site Ownership
The first step is to verify the ownership of the added site. You can use one of the three options for that:
- AdSense code snippet – this is the Auto ads code snippet, which should be added in the header section of your website.
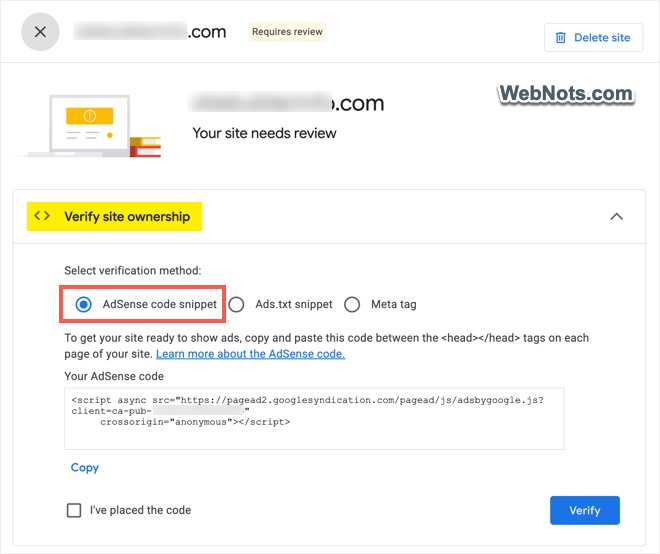
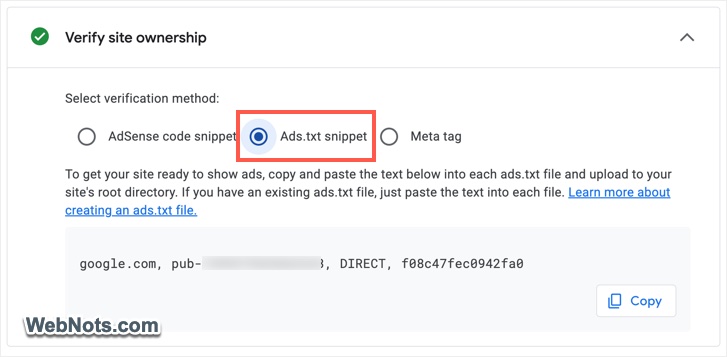
- Ads.txt snippet – copy the code shown under this option and create a plain text plain named ads.txt. You should upload the text file in the root directory of your server. This is a mandatory step (for displaying ads) even if you choose other methods to verify.
- Meta tag – copy the code and insert in the header section of your site.
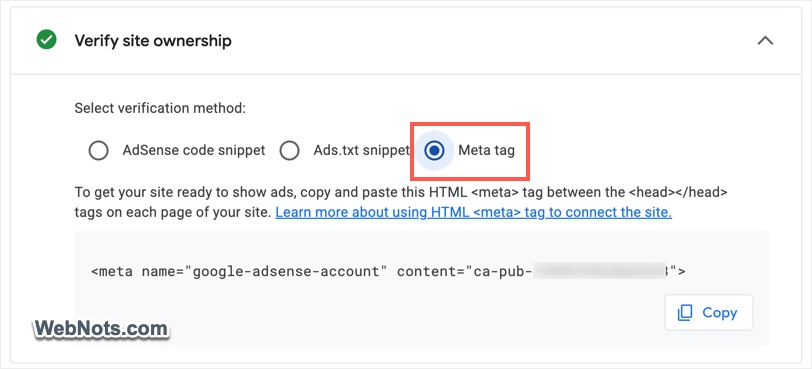
Check “I’ve placed the code” box and click the “Verify” button. Google will crawl your site to confirm the file or code is in place. If successful, you will see a “Your site is verified” message.

2. Requesting Review
Once the site is verified, simply click the “Request review” button shown as a second step.
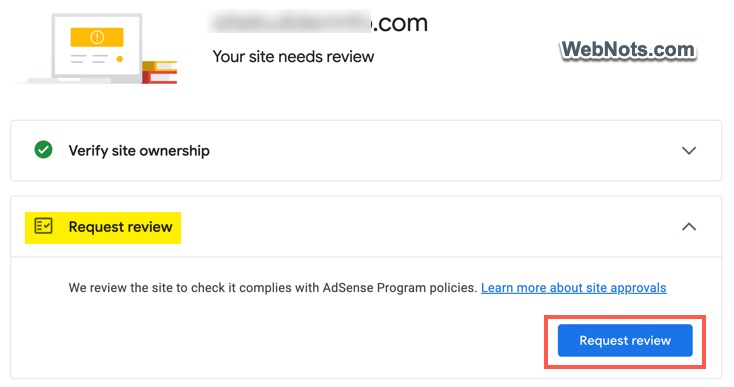
Google will take 2 to 4 weeks to review and inform you the status. You will NOT receive any email confirmation when requesting a review. Only the result will be informed to you over email.
3. Selecting a CMP (Consent Management Platform)
In certain geographical area like the Europe and the UK, it is mandatory to get user’s consent (for complying with GDPR) to show ads on your site. You can opt CMP at this point or decide to setup later.
- Google CMP – two choices with “Consent” and “Manage options”.
- Google CMP – three choices with “Consent”, “Do not consent”, and “Manage options”.
- Third-party CMP – any other Google certified CMP platform.
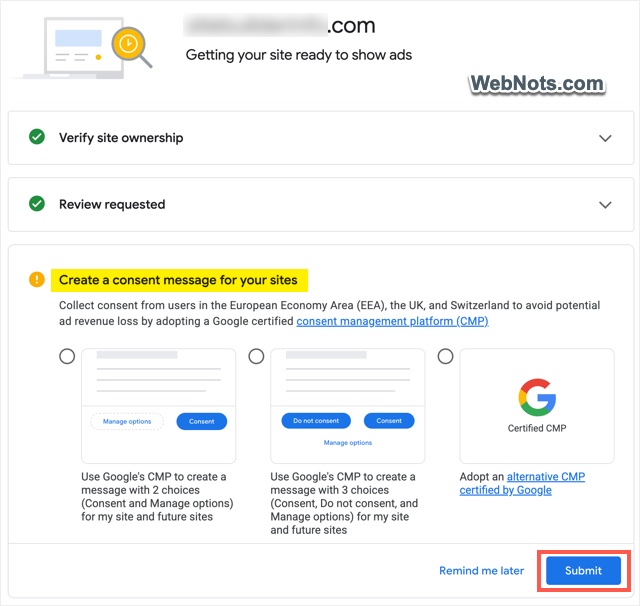
You can choose either first or second option and click “Submit” button.
Checking the Status
After submission, you should see all three steps show with green tick marks. Go to “Sites” section and the new site should be added in the list with one of the following approval statuses:
- Ready – approved and ready to show ads (this will take few days to few weeks’ time).
- Getting Ready – this is the status you will see after submitting a site for review and wait till you get the confirmation from Google.
- Requires review – if you have not requested review (as in the second step), you can initiate the review.
- Needs attention – your site is reviewed and has some problem to be fixed either for displaying ads or for applying another review.
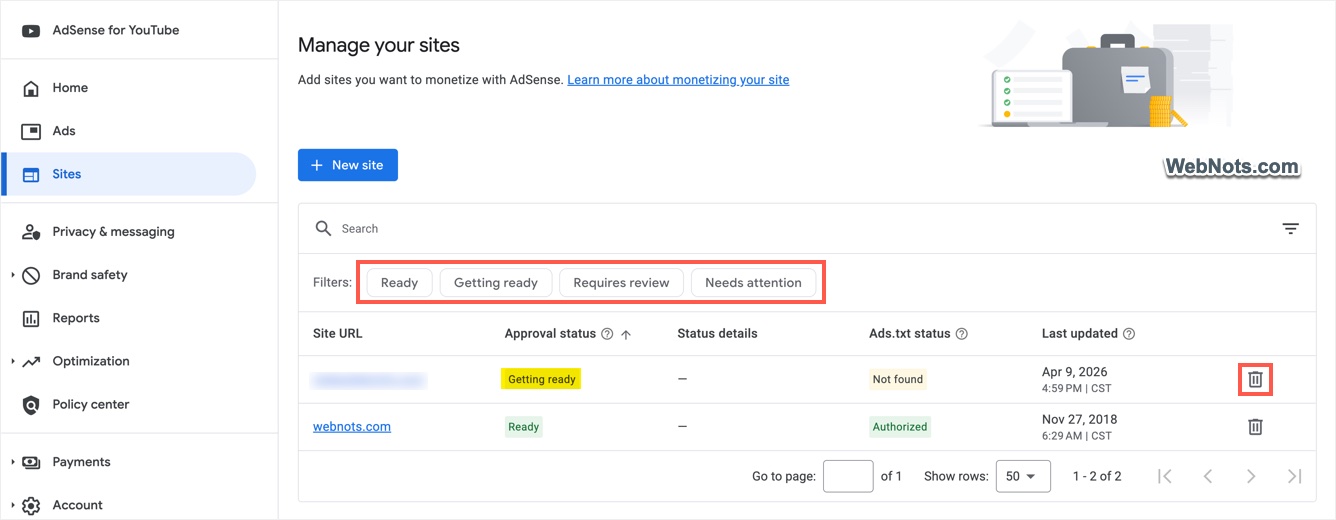
Once the status shows as “Ready”, make sure the “Ads.txt status” is also showing as “Authorized”. Otherwise, you will see a notification that the site is missing ads.txt affecting your revenue. Anytime, you can remove the submitted site by clicking the trash bin icon. You need to add your site and get the approval again even if it was previously approved.
Troubleshooting Verification and Other Issues
The verification will fail if Google can’t crawl your site or you did not place the code or file properly. And the ads will show only if you ads.txt file with your AdSense publisher ID entry and the CMP is enabled (for restricted regions). Here are some of the points to check:
- Security – disable any security rules applied on your site to block automatic bots crawling your content. It might a WordPress plugin or a Cloudflare security rule, preventing Google AdSense crawler from checking the content.
- Ads.txt – Make sure the text file is accessible through yoursite.com/ads.txt URL and check the “Ads.txt status” is showing as “Authorized” under “Sites” section.
- Meta tag or Code snippet – Make sure the code is inserted on all the pages of your site and not only on the homepage. After inserting, clear the cache so that the changes reflect properly. Check the source code and confirm the snippet is inserted property between
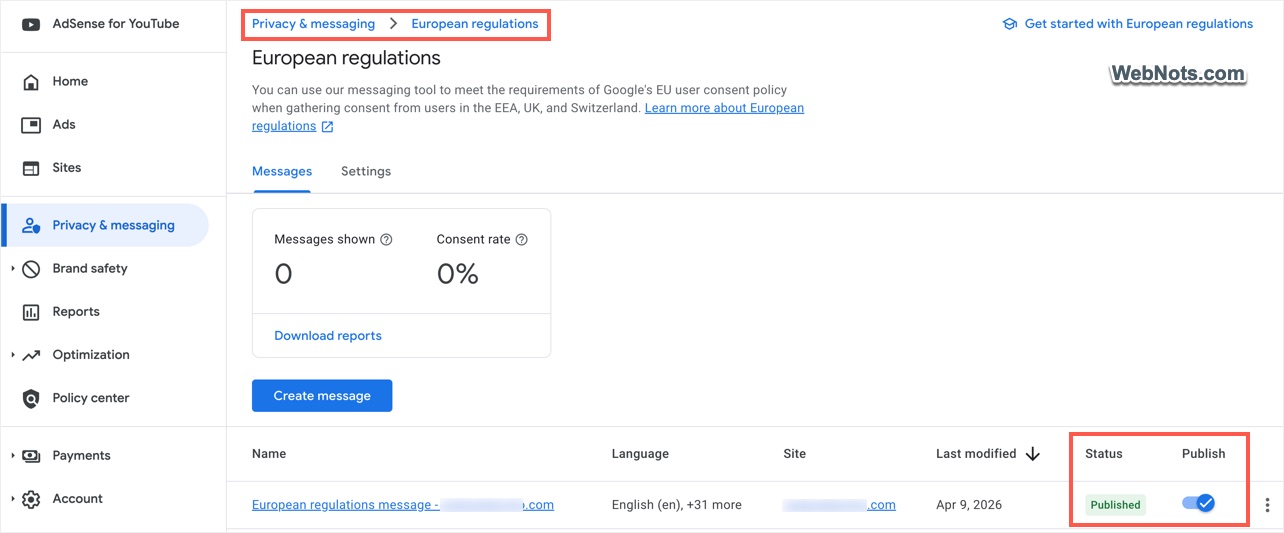
<head>and</head>tags. - Checking or Changing CMP – if you have chosen Google’s CMP, go to “Privacy & messaging” and click the “Manage” link under “European regulations”. Make sure the item is enabled and the status is showing as “Published”. If you have implemented third-party CMP on your site, simply turn if off to disable it.
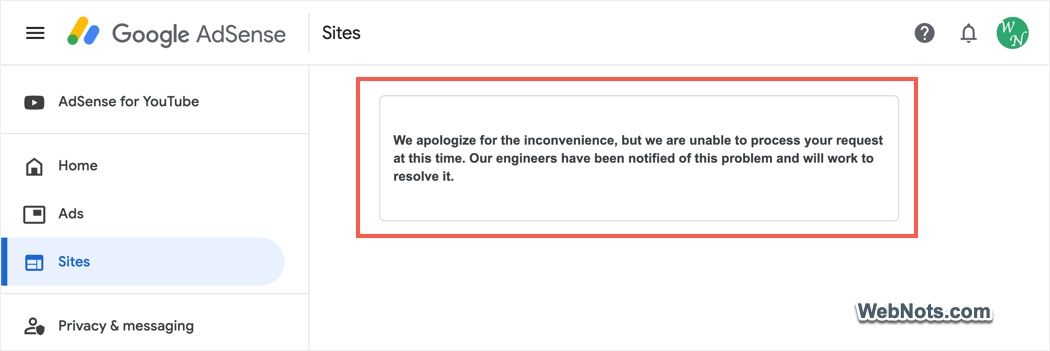
- AdSense “Sites” Section Shows Error – this generally happens if you are using an ad blocker on your browser. You will see a message mentioning Google engineers are working to resolve the issue. However, it’s not related to any error; you should simply disable the ad blocker and reload the page see the list of sites.