Having a website is one of the easiest ways to establish an online presence. Whether you run a business, work as a freelancer, write a blog, sell products, or simply want to share your ideas, a website gives you a place to present your work and reach people around the world. Creating a website may sound complicated if you have never done it before, but you no longer need advanced coding skills to get started. Website builders, content management systems such as WordPress, and modern hosting services make it possible to build and publish a website with relatively little technical knowledge.
This guide explains the website creation process step by step, from choosing a purpose and domain name to selecting hosting, building your pages, and publishing the site. By the end, you will have a clear understanding of what you need to create and launch your first website.
Why You Should Create a Website?
Before diving into the specifics of creating a website, it’s important to understand why having one is beneficial, especially in today’s interconnected world.
- Visibility: A website is your online storefront, visible to millions of potential customers or readers around the globe. It gives people the opportunity to learn more about you, your business, or your content, regardless of where they are located.
- Professionalism: A well-crafted website adds credibility and professionalism to your brand. Whether you are a freelancer, small business owner, or blogger, having an online presence signal to people that you are serious about what you do.
- Accessibility: Websites are accessible 24/7, meaning that people can engage with your content or services at any time. This is especially valuable for businesses, as a website can generate leads or sales even when you’re not actively working.
- Ownership: Unlike social media platforms where your reach and control are limited by algorithms, a website gives you complete ownership of your online presence. You can shape the design, content, and user experience according to your goals.
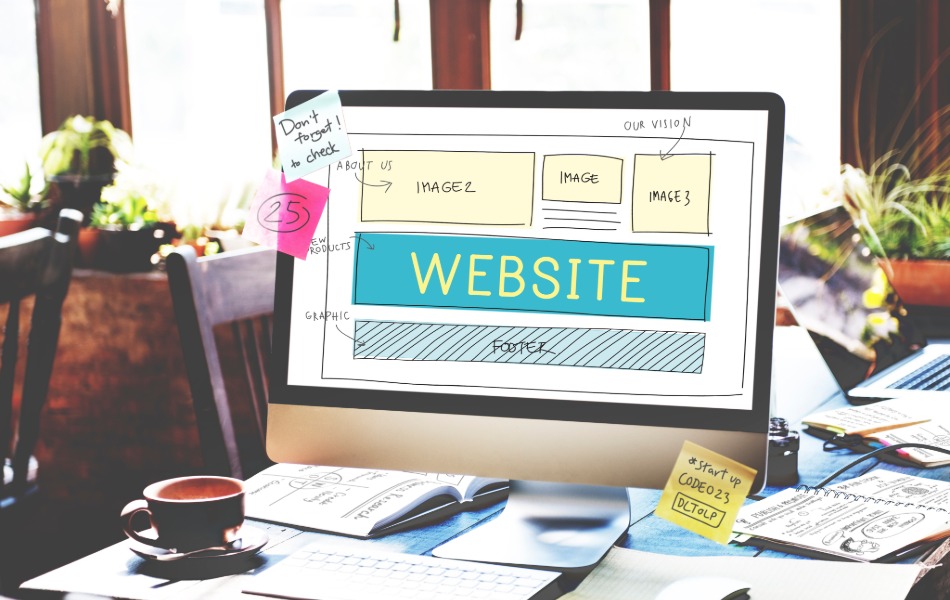
Now that you know the importance of having a website, let’s get started with the steps to create one!
Step 1: Planning Your Website
Before you start creating your website, it’s essential to plan out a few key elements. This will save you time later and ensure that your website aligns with your goals and vision.
Defining Your Website’s Purpose
The first step in planning your website is defining its purpose. What are you hoping to achieve with your website? Here are a few common purposes for websites:
- Business website: Showcase your products, services, and information about your business.
- Personal blog: Share your thoughts, experiences, and ideas with a wider audience.
- Portfolio: Display your work, whether you’re a designer, writer, or artist.
- Ecommerce store: Sell products or services directly from your website.
- Informational site: Provide valuable information or resources on a specific topic.
By identifying the purpose of your website, you’ll have a clearer idea of how to structure and design it.
Identifying Your Audience
Understanding your target audience is important when building a website. Consider the following:
- What type of people will visit your website?
- What information are they looking for?
- What problems can your website help them solve?
- What action do you want them to take?
Knowing your audience helps you create content and design that resonates with them and keeps them engaged.

Setting Goals
What do you want your website to achieve? Setting specific goals will help you measure success. Some common website goals include:
- Increasing traffic.
- Generating leads or sales.
- Growing an email list.
- Building a community or following.
- Showcasing a portfolio to potential clients.
Once you’ve defined your goals, you can structure your website in a way that drives users towards taking the desired actions, such as filling out a contact form or purchasing a product.
Step 2: Choosing a Domain Name
Your domain name is the address where people will find your website like www.example.com. It’s one of the first things people will notice about your site, so choosing the right domain name is important.
Domain Name Basics
A domain name consists of two parts:
- Name: This is the unique part that represents your brand or business (like example).
- Extension: This is the suffix that comes after the name (like .com, .net, .org).
While .com is the most popular and recognizable extension, other extensions may be more suitable depending on your industry or location like .net, .org, or country-specific extensions like .uk or .ca.
Tips for Choosing the Right Domain Name
- Keep it short and memorable, a concise domain name is easier for people to remember and type.
- Avoid numbers and hyphens, these can make your domain harder to communicate and remember.
- Choose a domain that reflects your brand or business, making it easy to identify.
- Make sure your desired domain name is available using domain search tools.

Registering Your Domain Name
Once you’ve decided on a domain name, you’ll need to register it through a domain registrar. Some popular domain registrars include GoDaddy and Namecheap. When registering, you’ll usually pay an annual fee, which can range from $10 to $20 per year, depending on the domain extension and the registrar.
In addition, you also need to purchase a domain privacy protection which may range from $15 to $25. This is important to hide your personal (ownership) details from public and replace it with registrars’ generic details. in this way, no one can access your name, email, phone number and other personal details by looking into WHOIS records.
Step 3: Selecting a Website Building Platform
Now that you have a domain name, it’s time to decide how you’re going to build your website. There are several options, but the choice largely depends on your technical skills and the type of website you want to create.
Popular Website Builders
For beginners, website builders are a great option because they offer a simple, drag-and-drop interface, and no coding skills are required. Here are some of the most popular website builders:
- Wix: Known for its easy-to-use drag-and-drop editor, Wix is ideal for beginners looking to create a visually appealing website quickly.
- Squarespace: Great for creatives and businesses, Squarespace offers sleek templates and powerful design tools.
- Weebly: A user-friendly website builder that’s affordable and great for small businesses or personal websites.

Content Management Systems (CMS)
A content management system (CMS) allows you to build and manage a website using pre-designed templates but offers more flexibility and customization than website builders. The most popular CMS is WordPress, which powers over 40% of websites on the internet.
- WordPress.org: A free, open-source platform that gives you complete control over your website. It requires web hosting and a domain name.
- WordPress.com: A paid service that takes care of hosting for you but offers less flexibility than WordPress.org.
Custom Development (Coding Your Own Site)
If you have coding experience or are working with a developer, you may opt to build your website from scratch using HTML, CSS, and JavaScript. This gives you complete control over every aspect of your website but requires technical knowledge and is time-consuming.
Step 4: Choosing a Web Hosting Provider
If you’re using a website builder like Wix or Squarespace, hosting is included in your plan. However, if you’re using WordPress or custom development, you’ll need to choose a web hosting provider to store your website files and make them accessible on the internet.
Types of Web Hosting
There are several types of web hosting, each suited to different website needs:
- Shared Hosting: The most affordable option, where your website shares server space with other sites. It’s ideal for beginners or small websites with low traffic.
- VPS Hosting: Virtual Private Server or VPS hosting offers more resources and control than shared hosting. It’s a good option for growing websites.
- Dedicated Hosting: Provides an entire server dedicated to your website, offering maximum performance and control. It’s best for large, high-traffic websites.
- Cloud Hosting: Scalable hosting that spreads your website across multiple servers, ensuring uptime and reliability even during traffic spikes.

Choosing the Right Hosting Plan
When selecting a hosting provider, consider the following:
- Look for hosts with at least 99.9% uptime guarantees.
- Choose a host with 24/7 support, especially if you’re new to website management.
- Hosting providers with fast loading times will improve your website’s user experience.
- Ensure that your host offers SSL certificates, daily backups, and malware protection.
Popular web hosting providers include Bluehost, SiteGround, HostGator and DreamHost.
Step 5: Designing Your Website
With your domain, hosting, and platform set up, it’s time to design your website. The design is critical because it affects both how your visitors perceive your site and how easy it is to navigate.
Selecting a Template or Theme
Most website builders and CMS platforms offer pre-designed templates or themes that you can use as the foundation for your website. These templates control the overall look and layout of your site. When choosing a template, consider:
- Does the template reflect the style and tone of your brand?
- Does the template have the features you need, such as ecommerce capabilities, blog layouts, or portfolio galleries?
- Can you easily customize the template to match your vision?
Customizing the Layout
Even with a template, you can often make significant changes to the layout to suit your needs. Key aspects to customize include:
- Header: The top section of your website that often includes your logo and navigation menu.
- Footer: The bottom section of your website where you can include additional links, copyright information, and social media icons.
- Homepage: The landing page where visitors first arrive. Make sure it’s visually appealing and contains clear calls to action (CTAs).

User Experience (UX) and Mobile Friendliness
Good design isn’t just about aesthetics; it’s also about functionality. You want visitors to easily find what they’re looking for, which is why focusing on user experience (UX) is essential. Some UX tips include:
- Use a simple and intuitive menu so visitors can easily navigate your site.
- A fast-loading website keeps visitors engaged and improves SEO.
- Ensure your website looks great and functions well on mobile devices, as more than half of all web traffic comes from smartphones.
Step 6: Adding Content
Content is the heart of your website. It informs, educates, and engages your visitors. When adding content, it’s important to keep it relevant and well-organized.
Essential Pages for Every Website
While the exact pages you’ll need depend on the purpose of your website, here are some common pages that most sites include:
- Homepage: Your homepage is the first impression visitors will have of your site. It should clearly communicate your value proposition and guide visitors to explore further.
- About Page: An about page gives visitors insight into who you are, what you do, and why they should care. It’s a great opportunity to establish trust and authenticity.
- Services or Products Page: If you’re running a business or selling products, you’ll need a page dedicated to explaining what you offer and how visitors can benefit.
- Blog: A blog allows you to regularly publish content, which can attract traffic and establish you as an authority in your niche.
- Contact Page: Make it easy for visitors to get in touch by providing a contact form, phone number, or email address.
- Privacy Policy and Terms of Service: These pages are essential for legal compliance, especially if you’re collecting visitor data.
You can check the homepage, privacy policy, about, and contact pages available on this site to visually get an overall idea.

Writing Effective Content
When writing content for your website, consider these best practices:
- Avoid jargon and get to the point quickly. Your content should be easy to read and understand.
- Break your content into sections using headings (H1, H2, H3) to improve readability and SEO.
- Tailor your tone and style to the preferences of your target audience.
- Encourage visitors to take specific actions, such as signing up for a newsletter, filling out a form, or making a purchase.
Using Visuals and Media
Visual elements such as images, videos, and graphics can enhance the user experience and make your content more engaging. Here are some tips for using visuals effectively:
- Use professional, high-resolution images that are relevant to your content.
- Compress images and videos to ensure they don’t slow down your website.
- Always include descriptive alt text for images to improve accessibility and SEO.
Step 7: Optimizing Your Website for Search Engines (SEO)
Search engine optimization (SEO) is the process of improving your website so that it ranks higher in search engine results pages (SERPs). Higher rankings mean more organic (non-paid) traffic, which is key to growing your website’s visibility.
Basic SEO Practices
Here are some basic SEO practices every beginner should follow:
- Keyword Research: Identify the keywords and phrases that your target audience is searching for. Use tools like Google Keyword Planner or Ubersuggest to find relevant keywords.
- On-Page SEO: Optimize each page of your website for specific keywords. This includes adding keywords to page titles, headings (H1, H2, H3), meta descriptions, URL slugs and image alt text.
- Internal Linking: Link to other pages on your site to create a logical flow of information and help search engines understand your site structure.
- Content Creation: Regularly publish high-quality, valuable content that answers your audience’s questions. This not only attracts visitors but also signals to search engines that your site is authoritative.

Technical SEO
Technical SEO refers to the optimization of your website’s backend structure and code. While some technical SEO tasks require more advanced knowledge, here are a few beginner-friendly tips:
- Use tools like Google PageSpeed Insights to check your website’s speed and implement suggestions for improvement.
- Ensure your website is responsive and provides a seamless experience on mobile devices.
- Install SSL certificate (https://) to encrypt data between your site and users, which also improves your SEO ranking.
- Submit your Sitemap to Google Search Console and Bing Webmaster Tools to help search engines crawl and index your website efficiently.
Step 8: Launching Your Website
After you’ve designed your website and added content, it’s time to prepare for launch. Before going live, it’s important to do a final check to ensure everything is functioning properly.
Testing Before Launch
Test every aspect of your website to ensure it works seamlessly for users. Here’s a pre-launch checklist:
- Ensure that all internal and external links are working properly and lead to the correct pages.
- Test any contact forms and signup forms to verify that they are working and that you receive submissions.
- View your website on different browsers (like Chrome, Safari, Firefox, and Edge) to ensure it looks good across platforms.
- Test your website on various mobile devices to ensure it is responsive and user-friendly.

Publishing Your Website
Once you’re confident everything is ready, it’s time to make your website live. Depending on your platform, this may involve simply clicking a “Publish” button or updating your domain’s DNS settings to point to your hosting provider.
After publishing, search engines will begin crawling your site, and visitors will be able to find you online.
Step 9: Promoting and Maintaining Your Website
Creating a website is only the first step. Once your website is live, you’ll need to promote it and maintain it regularly to keep it running smoothly and attracting visitors.
Social Media and Marketing Strategies
Promoting your website is crucial to driving traffic. Here are some ways to promote your site:
- Share your content on platforms like Facebook, Instagram, X (Twitter), and LinkedIn to reach a wider audience.
- Build an email list and send newsletters with updates, promotions, and valuable content.
- Write guest posts for other websites in your niche and include a link back to your site.
- Run paid ads through platforms like Google Ads or Facebook Ads to target specific demographics.

Regular Updates and Maintenance
To keep your website running smoothly and secure, regular updates and maintenance are essential:
- Keep your content fresh and up-to-date to maintain relevancy and improve SEO.
- If you’re using a CMS like WordPress, regularly update your themes, plugins, and core software to prevent security vulnerabilities.
- Make regular backups of your website to ensure that you don’t lose any data in case of a technical issue.
Step 10: Getting a Professional Email Address
Final step is to have a professional email address that matches your website’s domain for receiving and sending communication.
Why You Need a Professional Email Address?
There are several benefits of having an email address that’s tied to your domain:
- A custom email address reinforces your brand and ensures that your communications are aligned with your website.
- People are more likely to trust communications from a branded email rather than a generic one like [email protected].
- A professional email address makes your communications look cohesive, especially for businesses. It shows that you are serious about your online presence.
How to Get a Professional Email Address?
There are a few methods you can use to get a professional email address, depending on your web hosting provider or whether you prefer a dedicated email service.
- Email via Your Web Hosting Provider: Many web hosting providers offer free or affordable email hosting as part of their plans. Verify whether your hosting plan includes email services. Providers like SiteGround often include email hosting in their basic plans. Once your email is set up, you can access it through the hosting provider’s webmail service or configure it to work with an email client like Gmail, Outlook, or Apple Mail by using the server settings provided by your host.
- Google Workspace (formerly G Suite): Google Workspace is a popular choice for setting up a professional email address with Gmail. In addition to Gmail, Google Workspace provides access to other tools like Google Drive, Docs, and Calendar, making it a great all-in-one solution for businesses.
- Microsoft 365: Microsoft 365 (formerly Office 365) is another popular option for getting a professional email address. It’s ideal if you prefer using Microsoft’s productivity tools such as Outlook, Word, Excel, and Teams.

Conclusion
Creating your first website is much more accessible than it used to be. You can use a website builder, WordPress, or traditional web development depending on your needs and technical experience. Start with a simple website that does its main job well. As you become more familiar with website management, you can gradually add new features, improve the design, expand your content, and grow your online presence. The work does not end when the website goes live. A successful website needs regular updates, security maintenance, useful content, and ongoing improvements.
Good luck with your first website, and welcome to the digital world!