By default, Windows will automatically put your system into sleep mode after being inactive for certain time. Sleep mode is designed to save energy when not in use and allow your computer to quickly resume operations when you want to use. However, it will be frustrating if your PC doesn’t wake from sleep mode or need multiple times to press the keyboard / mouse. The issue could be related to hardware, software, or system settings. In this article, we will explore the common causes and solutions to help you fix the problem.
Common Causes of Sleep Mode Issues
Here are some of the common reasons why PC is not waking up from sleep:
- Incorrect power settings in the operating system might interfere with wake-up functions.
- An outdated BIOS or firmware may not handle sleep and wake functions correctly.
- Outdated or incompatible drivers can prevent your PC from waking properly.
- External devices such as keyboards, mice, or USB drives may cause conflicts, preventing the system from responding.
- Corrupt system files or improper shutdowns can disrupt the sleep function.
How to Fix a PC That Won’t Wake From Sleep?
Follow the solutions step by step and see which option works best for you. Be sure to back up your data or create a restore point to safeguard against any unexpected issues.
1. Check Power Options Settings
Incorrect power settings often cause sleep mode issues.
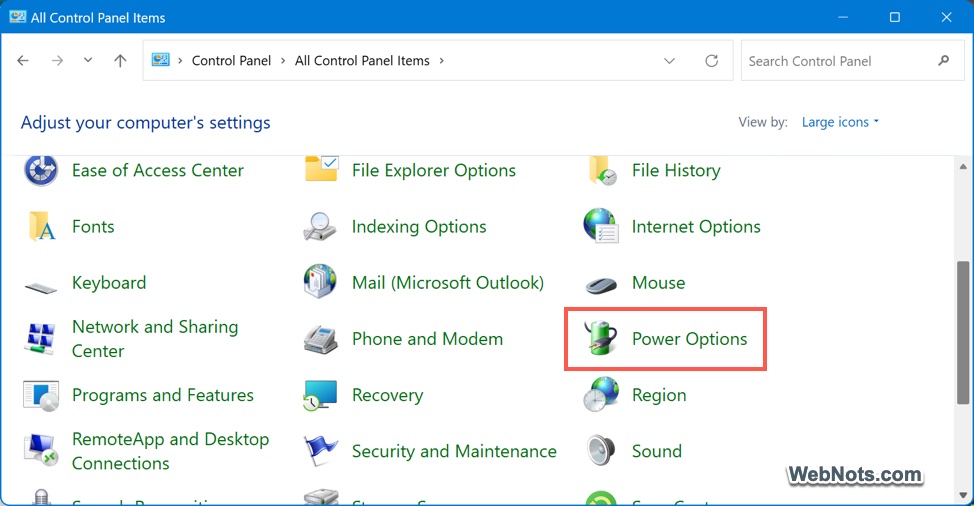
- Open Control Panel and navigate to “Power Options” section.
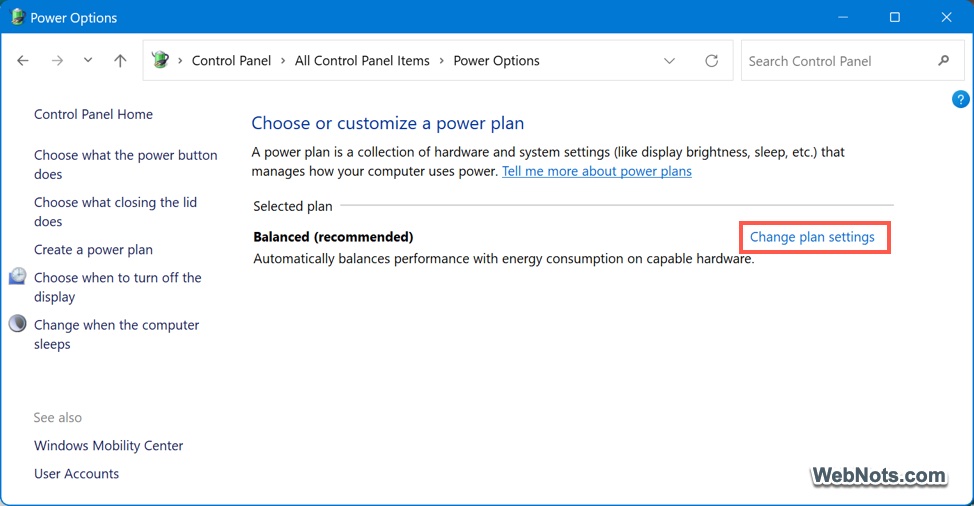
- Click “Change Plan Settings” link against your current power plan.
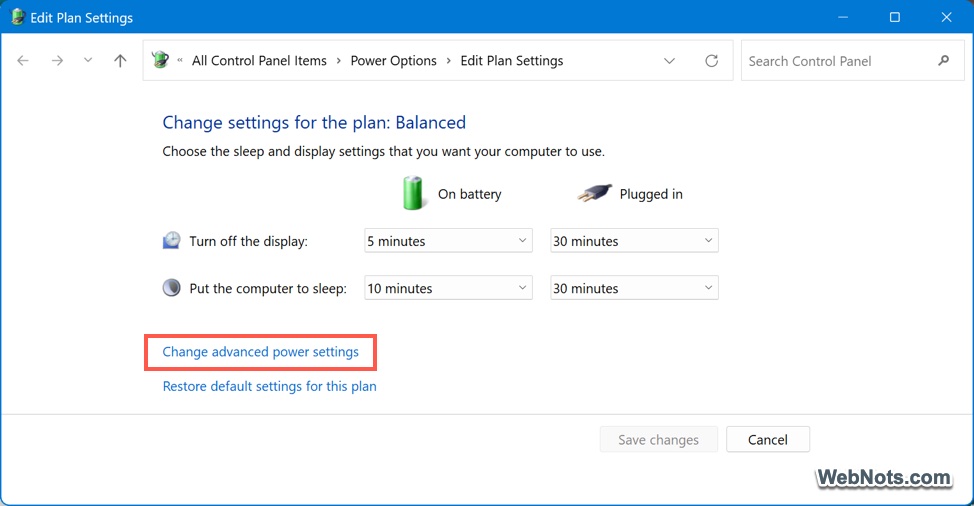
- Click “Change Advanced Power Settings” link.
- Expand the “Sleep” section and then expand “Allow wake timers” option.
- Make sure to select “Enable” option for “On battery” and “Plugged in” options. Click “Apply” button for the changes to take effect.
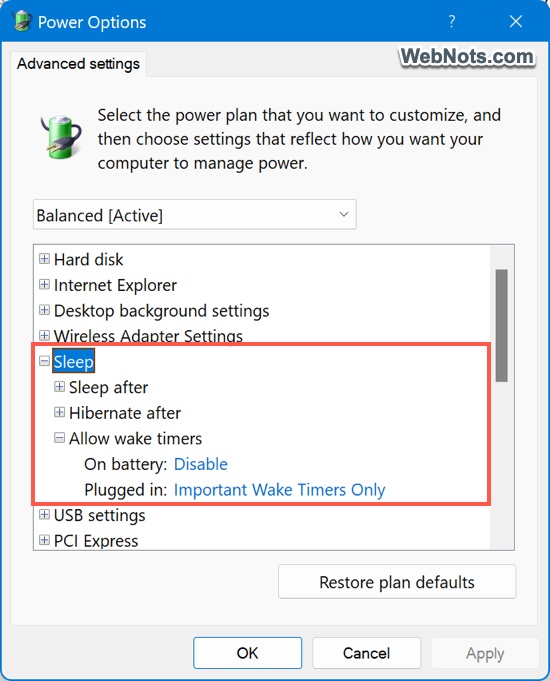
This will make sure the system will wake up when detecting any events.
2. Update or Roll Back Drivers
Driver issues are one of the most common culprits for system related issues. If you have recently changed any hardware, make sure to update the driver properly. Otherwise, run system level scan to detect hardware changes and update the required drivers.
- Open Device Manager app by right-clicking the Start button.
- Go to “Action” menu and select “Scan for hardware changes” option.
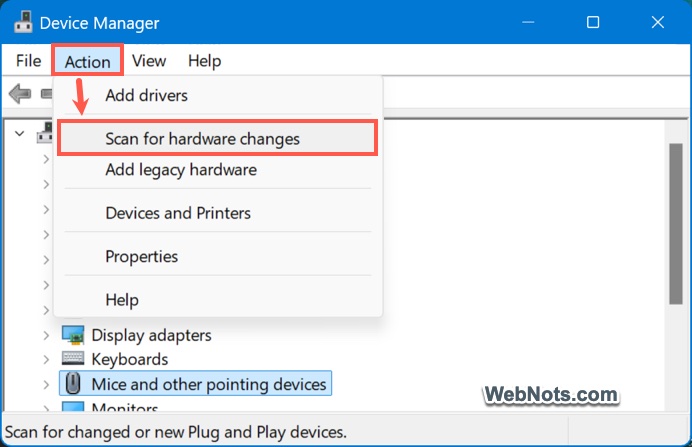
- If there are any items detected, find that item by expanding the corresponding category in the list.
- Right-click on the device and select “Update Driver” option.
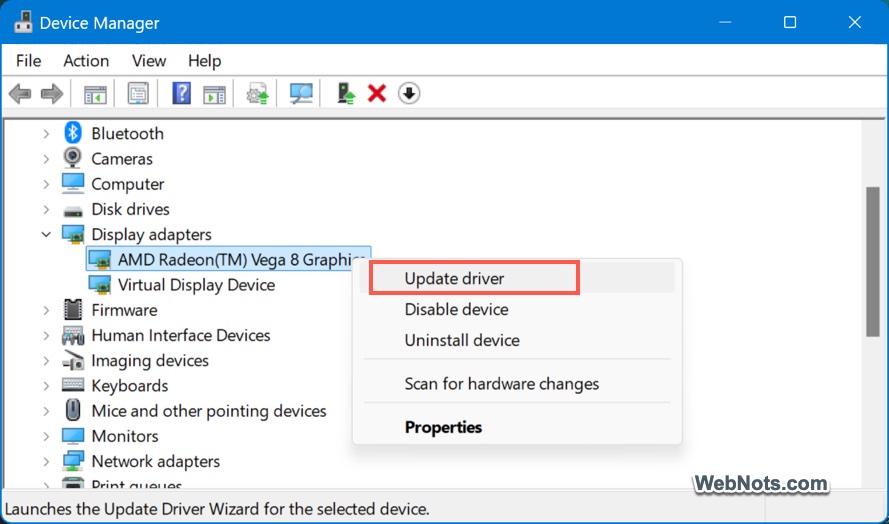
- Follow the wizard to automatically update the driver from internet or manually locate and upload from your PC.

If you suspect the issue happens due to recently updated driver, then right-click the problematic device in Device Manager. Select “Properties” to go to the “Driver” tab and click “Roll Back Driver” option. This option will be enabled only on certain devices, otherwise, you can use “Update Driver” option.
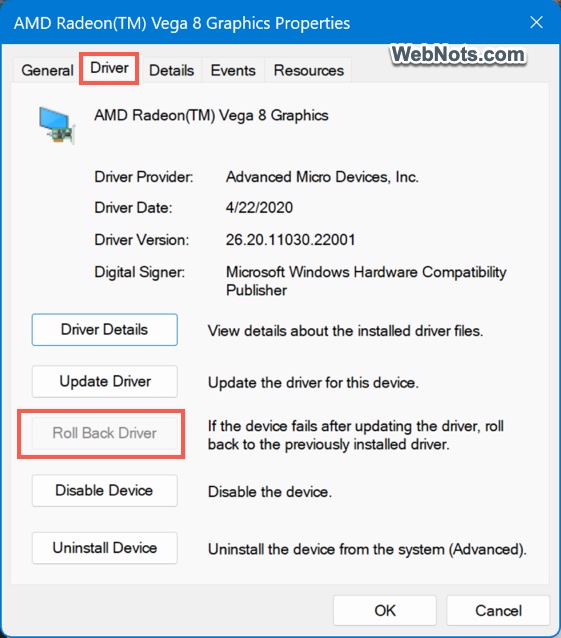
3. Check Network Adapter Settings
If you want the network activities to wake up your system, then you need to enable the setting for your network adapter.
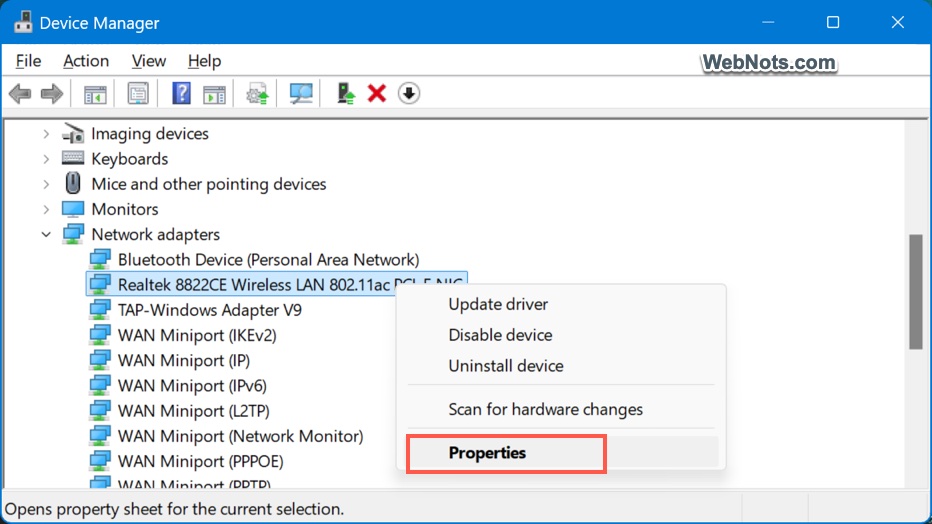
- Open Device Manager and expand the “Network adapters” section.
- Right-click on your adapter and select “Properties”.
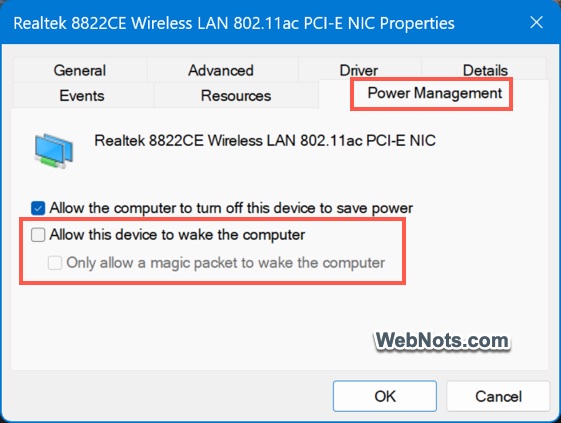
- Navigate to the “Power Management” tab.
- Check the box for “Allow this device to wake the computer” and click “OK” button.
4. Run Power Troubleshooter
Windows has a built-in troubleshooter to fix power-related issues.
- Open Settings (right-click on Start menu icon and select “Settings”) and go to “System > Troubleshoot” section.
- Click “Other Troubleshooters” and check if you can find “Power” option.
- If yes, click on the “Run” button showing against “Power” option.
Note that the power troubleshooter will NOT appear on all devices.
5. Reset BIOS Settings
If the problem persists, resetting the BIOS may help resolve firmware-related conflicts.
- Restart your computer and press the appropriate key (e.g., F2, F12, DEL) to enter the BIOS or UEFI settings page.
- Look for an option to “Load Default Settings” or “Reset to Default”.
- Save changes and exit the BIOS.
Also, check your current BIOS version to confirm whether it is up to date as per the manufacturer’s website details. If you are using outdated BIOS version, follow the instructions on manufacturer’s website to download and install the latest BIOS version.
6. Disable Fast Startup
Fast Startup can sometime interfere with sleep mode functionality.
- Open Control Panel and go to “Power Options”.
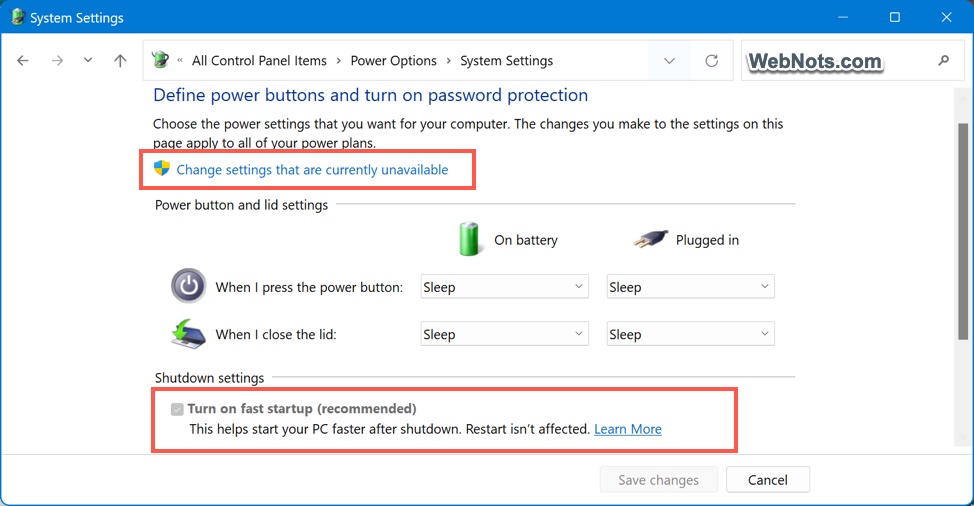
- Click “Choose what the power buttons do” from the left sidebar.
- Select “Change settings that are currently unavailable” link.
- Uncheck the box for “Turn on fast startup (recommended)” and click “Save changes” button.
7. Perform a System File Check
Corrupted system files might another reason why your system is not waking from sleep mode .
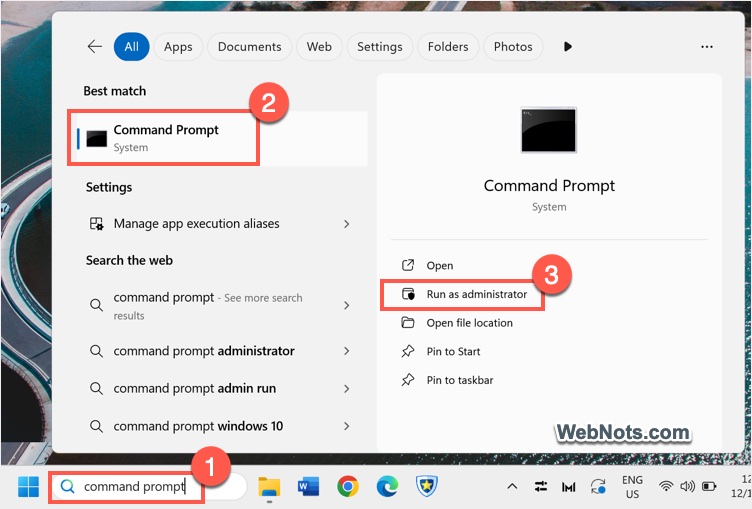
- Search Command Prompt using Windows Search box and select “Run as administrator” option.
- Type sfc /scannow and press enter.
- Wait for the scan to complete.
- If there are any corrupted files, Windows will scan and repair them.

8. Disconnect Peripherals
If you are always connecting to external devices, they may be interfering with the wake process.
- Properly eject and unplug all devices like USB drives, printers, external hard drives, etc.
- Restart your computer and then test waking from the sleep mode to see if the issue is resolved.
9. Update Windows
Keeping your system updated can resolve if there any compatibility issues.
- Press “Windows Logo + I” keys to open Windows Settings app.
- Go to “Windows Update” section.
- Click “Check for Updates” button to download and install all available updates.

Final Words
If none of the above solutions work, the issue could be hardware-related or more complex than typical software fixes. Contacting a professional technician may be necessary, especially if the problem started after a hardware upgrade or you suspect physical damage to system components.