
Parallels Desktop for Mac is the most popular and easiest way to install Windows on Mac machine. Whenever you connect a USB drive/device with Parallels virtual machine setup, you have an option to Windows or Mac setup. In this article, we will explain all possible options and how to switch the connection when needed.
Accessing Files in Parallels Desktop for Mac
Regardless of whether you connect the USB to Windows or Mac, it is possible to access Windows files from Mac and vice versa with Parallels Desktop for Mac app. However, this works only with the Standard and other premium versions of the app purchased from the website. You can’t access Windows drives from Mac with the App Store edition. So, make sure you are using the Parallels app from their website and not from the Mac App Store.
Selecting Default Device for USB Connection
When you connect a USB device like external USB, hard drive or an iPhone, Parallels will show a prompt asking to choose the Windows or Mac setup. Click on Mac or Windows to connect your USB to that setup. If you want to avoid the prompt popping up every time and save your choice as default, first check “Remember my choice” box and then click on Mac or Windows as you need.
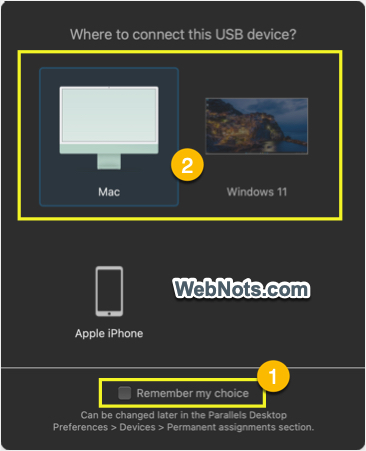
The remembered drives are called “Permanent assignments” and all those remembered USB drive names will be saved in Parallels settings. You will no longer see the prompt for permanently assigned USB drives and USB will be connected automatically to the selected Mac or Windows setup.
Disable Pop-up and Set Default Device
If you are using multiple USB drives, seeing the pop-up every time will be annoying. You can set the default option to connect a specific or all USB drives so that you do not need to do that each time.
Go to “Parallels Desktop > Preferences…” menu or click the Parallels icon showing on top menu bar in Mac and select “Preferences…” menu.
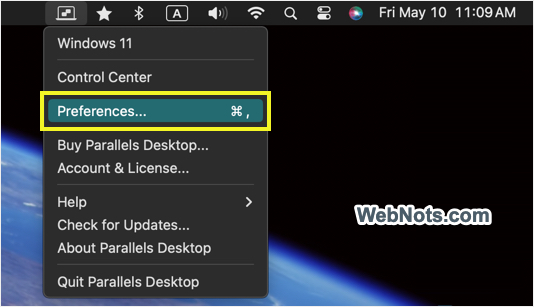
Go to “Devices” section where you can find the options to set a default behavior under “When a new external drive is detected:” heading:
- Connect it to my Mac.
- Connect it to the active virtual machine.
- Ask me what to do.
Last option is selected as default and Parallels will always show you the prompt whenever connecting a USB drive. Select the first or second option to disable the pop-up and the selected option will be used for any USB device you connect in the future.

Changing Permanently Assigned Default Devices
Let’s say, you have checked “Remember my choice” box and connected your iPhone to Mac setup. After some time, you have changed your mind and wanted to connect the iPhone to Windows 11. Follow the below steps in such a case:
- Go to “Parallels Desktop > Preferences…” menu and navigate to “Devices” section.
- All your previously remembered devices are shown under “Permanent assignments:” section.
- Select the device and click the pencil edit icon.
- Now, you can select “Your Mac” or “Windows 11” under “Connect To” column’s dropdown to change your default connection for that device.


Parallels Desktop for Mac
Get Parallels Desktop for Mac students edition with 50% discount to create unlimited virtual machines and install Windows 11 or Linux.
Remove a Permanent Assignment
If you want the device to follow default option, then simply select it and click on the – icon to remove it from the list. This is useful when you have multiple virtual machine setups. You can then connect to active machine by selecting the default to “Connect it to the active virtual machine” option.
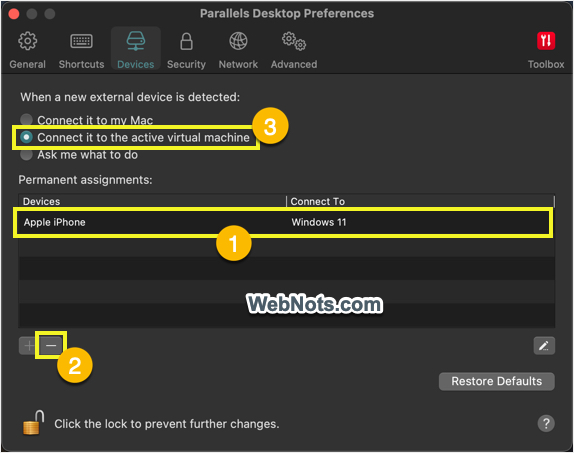
If you want to remove multiple devices at once, simply click on the “Restore Defaults” button. This will remove all permanent assignments and set the default to “Ask me what to do”. You can change the default to connect to Mac or active virtual machine if needed.
Note: If the Preferences screen is locked, click the padlock icon showing on bottom left corner and unlock it with your Mac’s administrator user account.
Accessing Files from External Devices
- On Mac – connected drive or device will show as a mounted item in Finder sidebar.
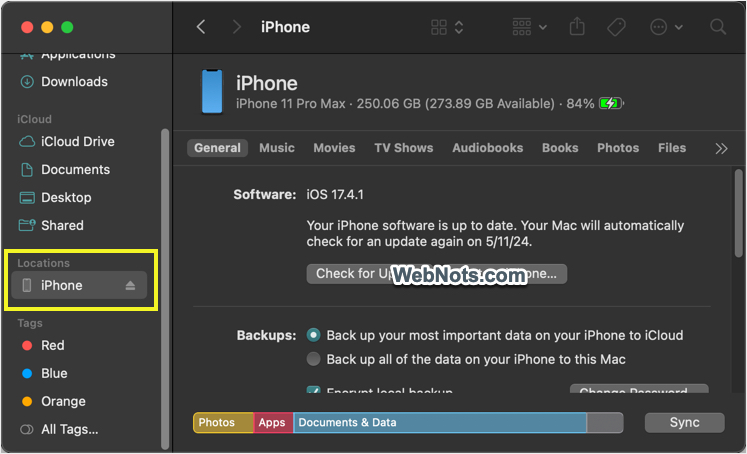
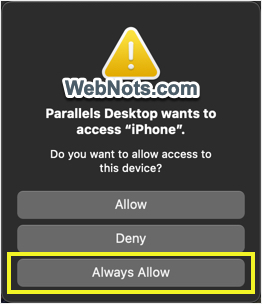
- On Windows – File Explorer will show the connected drive, select it to view and browse through the files. As mentioned, this works only on Standard or other premium editions (not on Mac App Store edition). You will be prompted to provide access during first time and select “Always Allow” button.


Somehow my iphone got associated with my MacBook and now it automatically attaches to the MacBook and Parallels does not prompt me to choose “Mac” or “Windows”. How can I reset this so that Parallels WILL prompt me so I can get the thing connected to my Windows session?
It is already explained in the article, check “Changing Permanently Assigned Default Devices” and “Remove a Permanent Assignment” sections.