WPS Office is one of the best alternatives for Microsoft Office apps. Though the app comes with a single interface to manage documents, spreadsheets, presentations, and PDFs, the interface is similar to Microsoft Office apps. You can insert symbols and special characters in WPS the same way like Word or PowerPoint. Good thing is that you can use shortcuts to insert your favorite symbols using keyboard without going through the menu items.
Insert Symbols in WPS
Here, we explain with the Document (also called Writer), and the same process can be followed on Spreadsheets and Presentations.
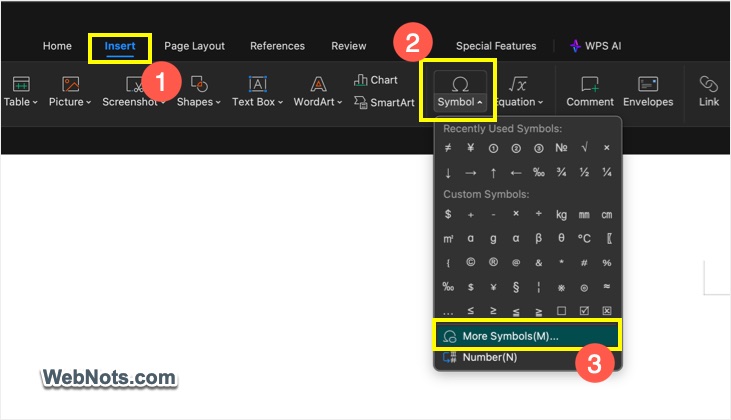
- Open your document in WPS app and go to “Insert” menu.
- Click the “Symbol” dropdown to view a list of all frequently used and custom symbols. Click “More Symbols…” menu to view the “Symbol” dialog box with additional options. Alternatively, directly click on the “Symbol” button (instead of the dropdown arrow) to open more symbols.
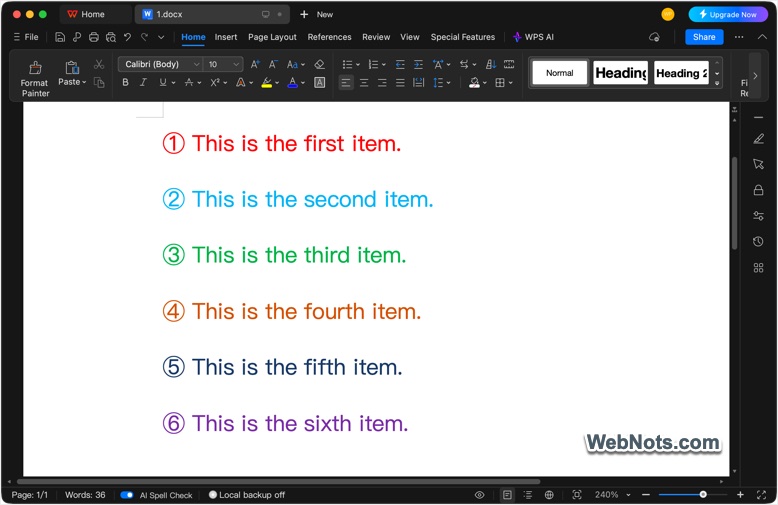
- Select “Unicode (hex)” and to view all Unicode symbols. Use “Subset” dropdown to filter the items based on default Unicode categories. For example, select “Enclosed Alphanumerics” to view all number symbols enclosed with circles.
- You can also type the Unicode value of the symbol (if you know) in the “Character Code” box and press enter to find it quickly.
- Once you find the symbol, click the “Insert” button or double-click on it to insert in your document.

You can change the inserted symbol’s size and apply formatting like any other text content in your document.
Inserting Symbols with Shortcuts
As you can see, the Symbol dialog does not have a search box for filtering with symbol’s name. So, finding your favorite symbols is a difficult task from the huge lists. WPS offers a quick solution for this.
- Once you find a symbol, click on the “Insert to Custom Symbols” button.
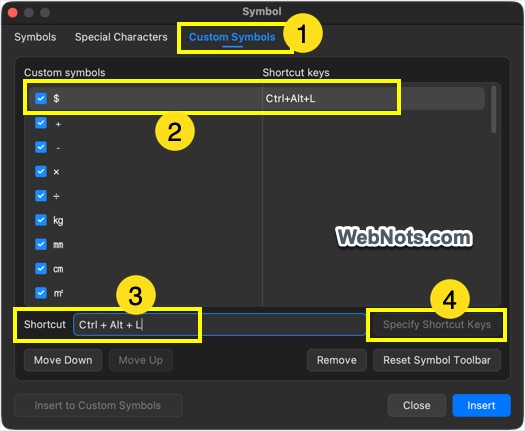
- Now, go to “Custom Symbols” tab where you can find the added item.
- Select the item, click on the “Shortcut” box and press the keys you wan to use as a shortcut.
- Click the “Specify Shortcut Key” button to assign your shortcut to the symbol. Make sure to use a combination without conflicting with existing shortcuts like Ctrl + A or Command + A.
- Hereafter, you can simply press the assigned shortcut keys to insert the corresponding symbols from the “Custom Symbols” list.
Since you will be using only a few symbols frequently, add them to the custom list and assign shortcuts. Move the symbols up or down in the list and that will appear in the same sequence under “Symbol > Custom Symbols” area. You can either use the shortcuts with keyboard or select from menu with the mouse.
Note: You can anytime remove the added symbol from custom list or click the “Reset Symbol Toolbar” to remove all added items with single click. Default items will be always there without any shortcuts assigned and they will also appear under “Symbol” dropdown.
Other Options to Insert Symbols
There are few other options to insert symbols in WPS Office documents:
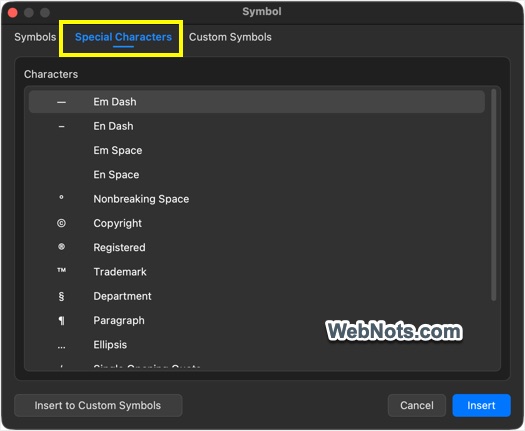
- In the “Symbol” dialog, go to “Special Characters” to find and insert symbols like copyright, em dash, ellipsis, etc.
- Use alt key shortcuts in Windows PC and option code shortcuts on Mac. For example, Option + 00BE on Mac and Alt + 0190 on Windows will produce ¾.
- You can also use the in-built emoji keyboard or Character Map on Windows PC and Character Viewer app on Mac to insert any Unicode symbols.