Many Windows users prefer third-party partition manager or drive management utilities for changing the storage space of hard disk volumes. However, this is no more needed with Windows 11 and you can easily adjust the storage of volumes using various methods. In this article, we will explain how you can increase or decrease volume size of hard disk in Windows 11 along with the conditions.
Adjusting Disk Volume Storage
Here are some of the things you should understand before proceeding further:
- For decreasing storage (shrinking) – removed space from the volume will be moved to unallocated space on hard disk.
- For increasing storage (extending) – you should have unallocated space next to the volume which you want to extend. There should be no other volumes or empty space between unallocated space and target volume.
Unallocated means, there should be no file system setup on that storage space. If you have raw files, they will be deleted when allocating the space. Also, the target volume should be formatted with NTFS or ReFS file system.
Let’s explain both cases in detail using various options.
1. Using Disk Management App
Follow the below steps to shrink or extend a volume using the in-built Disk Management app.
1.1. Create Unallocated Space by Shrinking a Volume
In our example, we will create unallocated space of 70 GB from D: drive.
- Search and open “Disk Management” app which will show all available partitions on your hard disk.
- Right-click on the volume and select “Shrink Volume…” option.

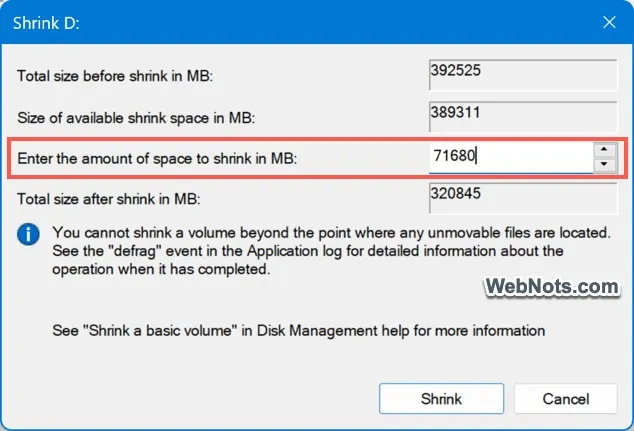
- System will query the available space and show you the details in MB.
- Since we want to move 70 GB, type 71680 in “Enter the amount of space to shrink in MB” box (70 GB * 1024 = 71680 MB). You can find the remaining size is automatically calculated and make sure it is sufficient for that drive.
- When you are sure, click on the “Shrink” button.
- This will take few seconds and you will see a new unallocated partition is created (with the mentioned size 70 GB).
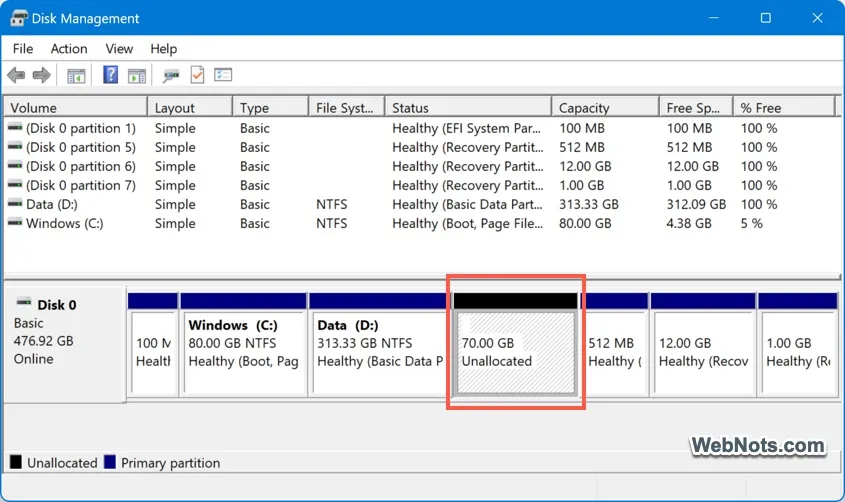
Now, you can format that unallocated space and use it as a new volume on your drive. Simply, right-click and select “Format” option and then use “Change Drive Letter and Paths” if needed.

1.2. Extend a Volume with Unallocated Space
As mentioned, extending will work only if there is an immediate unallocated space on the drive.
- Right-click on the volume and select “Extend Volume…” option.
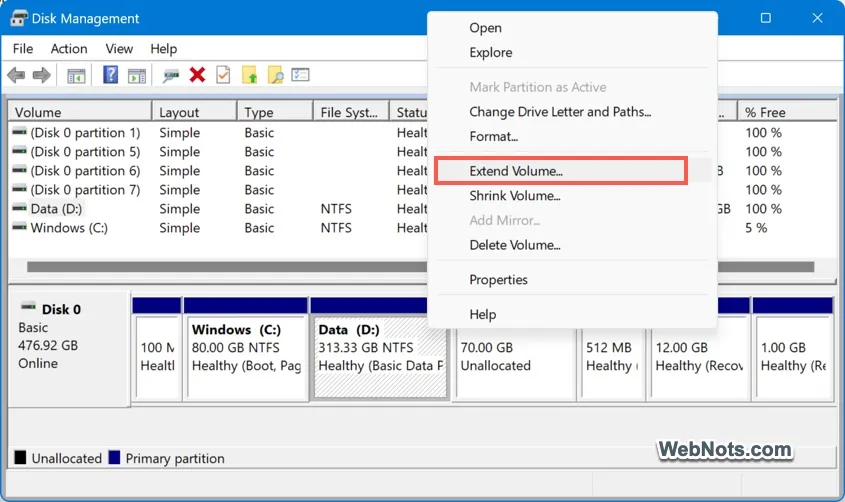
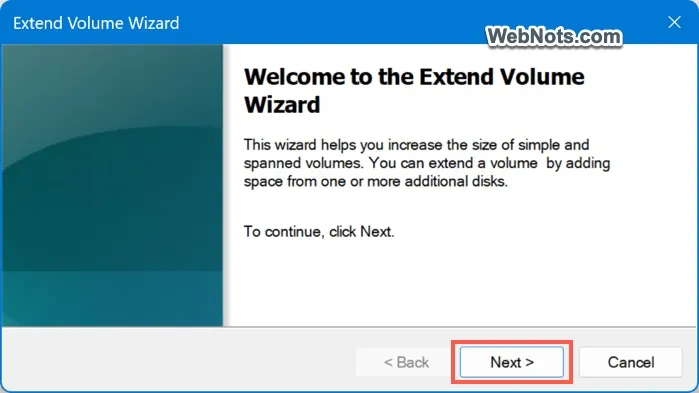
- This will open a “Extend Volume Wizard” and click on “Next” button.
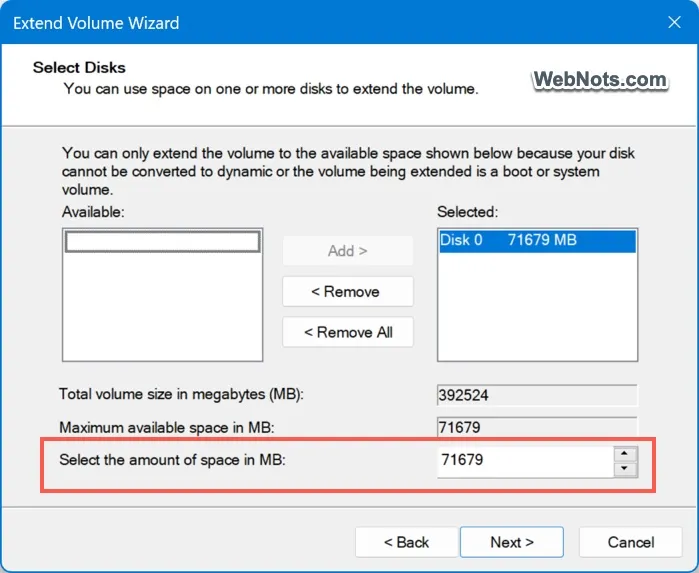
- Windows will automatically allocate all unallocated space next to the selected volume. If you want to reduce the size, enter the applicable size in “Select the amount of space in MB” box and click “Next” button.
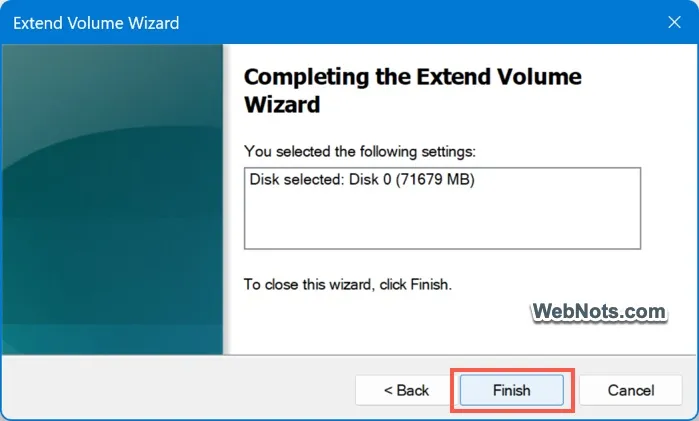
- Click “Finish” button to extend the selected volume.
- This will instantly increase the size of the selected volume which you can see in the list.

2. Using Windows Settings App
Using Disk Management app is highly recommended as you can see the unallocated size and positions visually. However, using Settings app will be the easier option especially for reducing the size (shrinking).
- Right-click on Start menu icon and select “Settings” from the menu that appears.
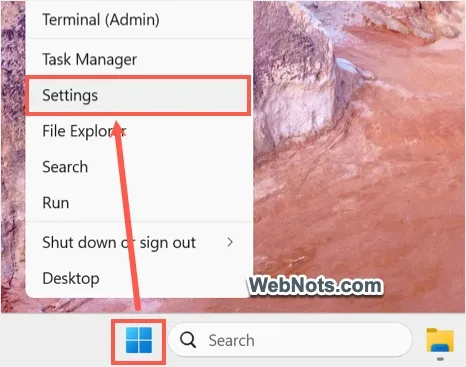
- This will open Windows Settings app and navigate to “System” section from left sidebar.
- Scroll down on the right-pane and click on “Storage” option.

- Here, you can view the category wise current storage situation.
- Scroll down on the page and click on “Advanced storage settings” option under “Storage management” section.
- This will expand the section and click on “Disks & volumes” option.
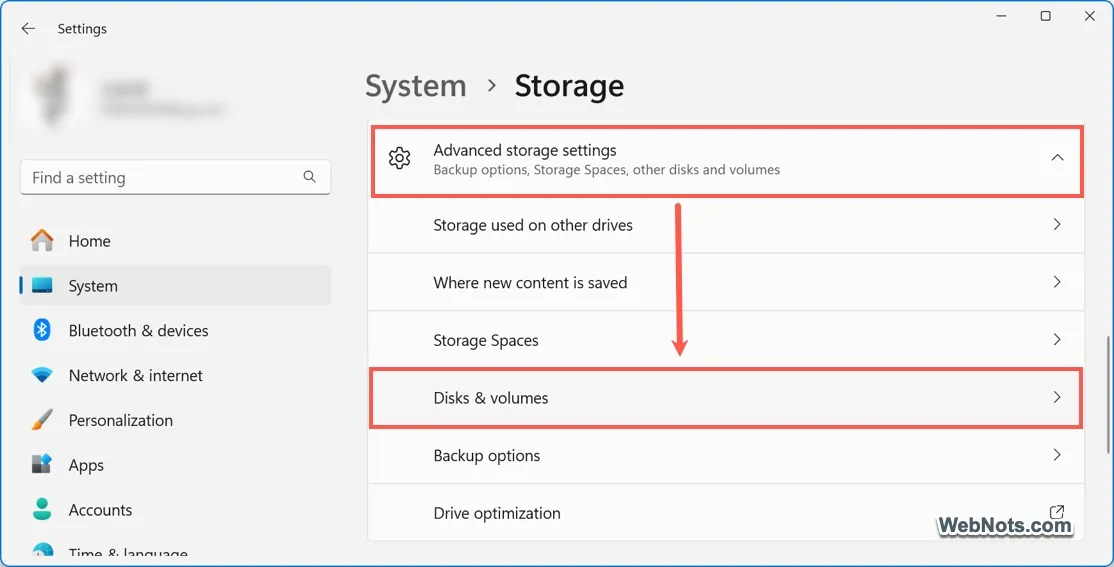
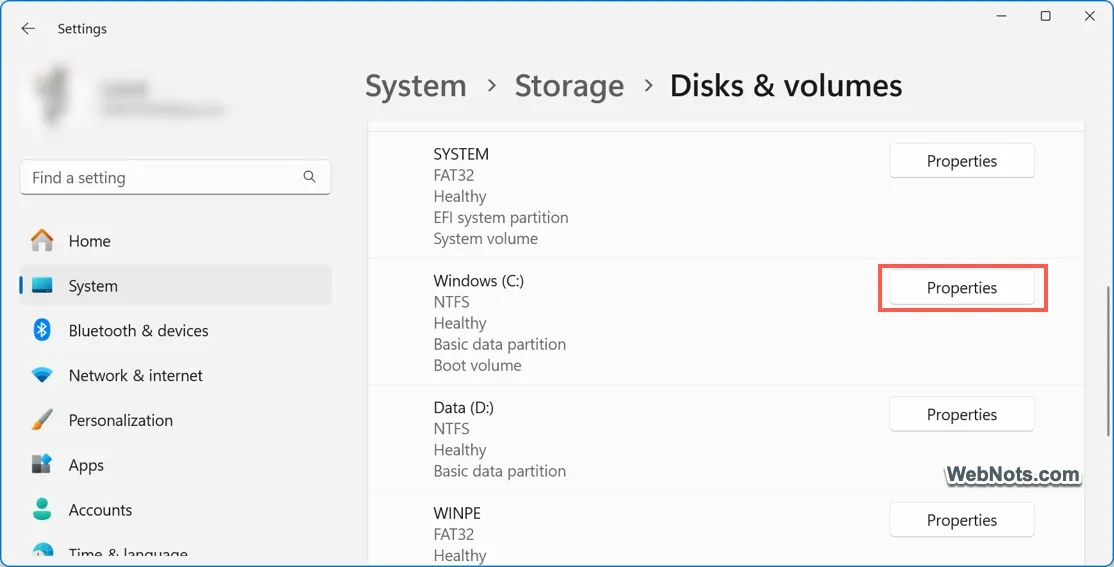
- You can find the status of all available disks and volumes and click on the “Properties” button against the volume you want to shrink or extend.
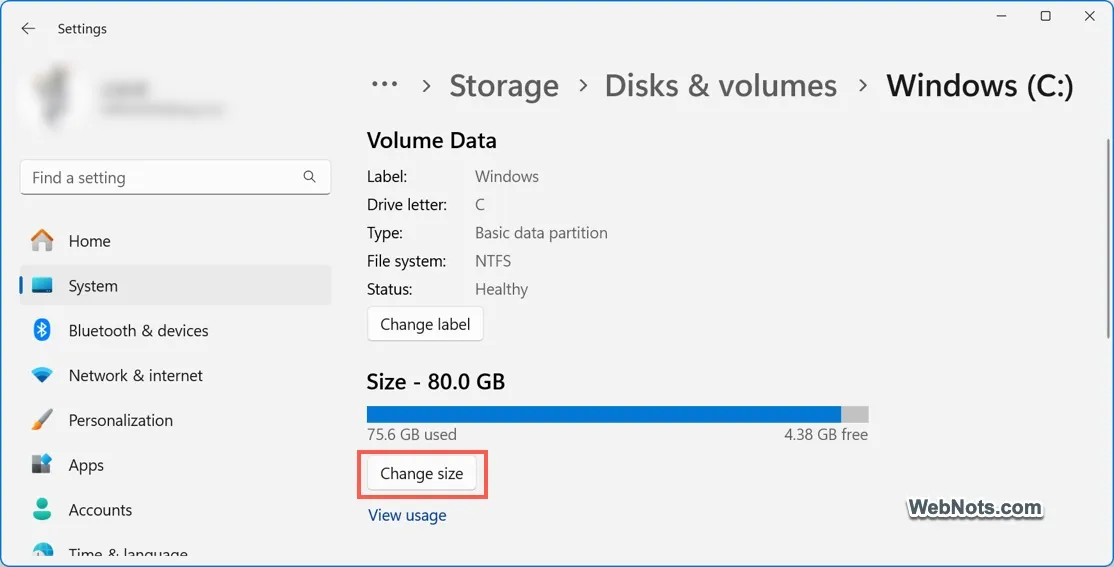
- Click the “Change size” button showing below the Size heading.
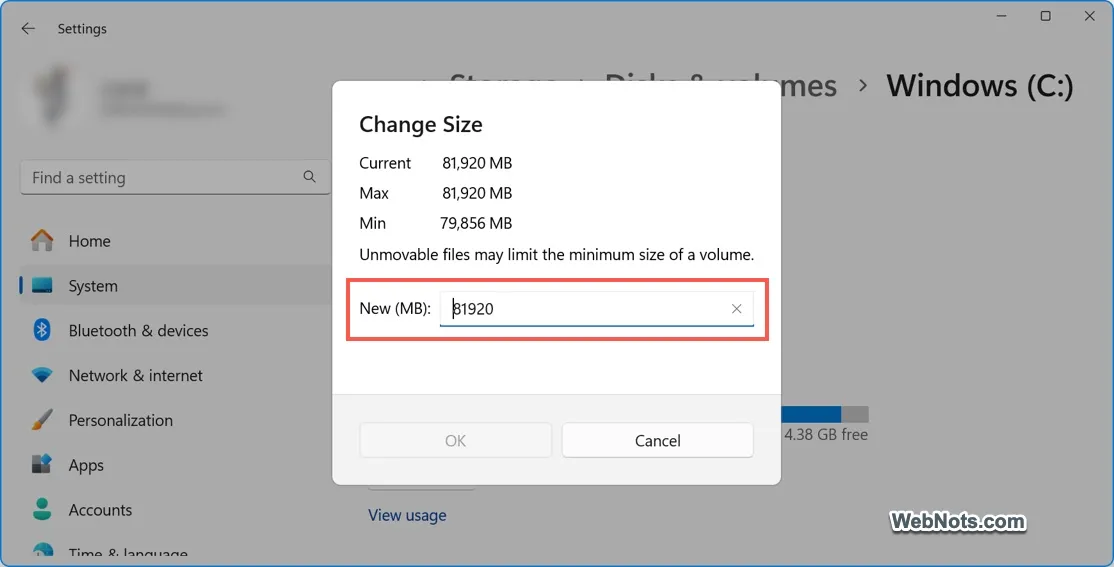
- This will open “Change Size” pop-up and take few seconds to load the current details. You can find the current, maximum and minimum storage sizes in MB.
- Make sure to calculate the new total size you want in MB and enter it in “New (MB)” text box. Press “OK” button to allocate or remove the space.
3. Shrink Using Command Prompt
Windows also offers a command to shrink the volume.
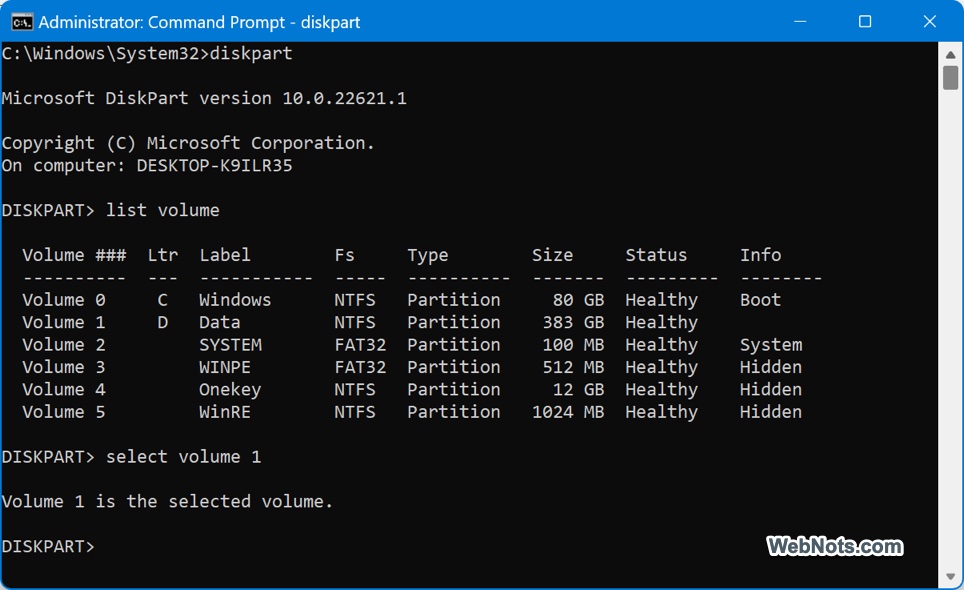
- Open the Command Prompt app in administrator mode.
- Type diskpart and enter to change the prompt.
- Type list volume and press enter to view all the volumes on your hard drive and note down the volume number showing in the first column.
- Now, type select volume volume_number and press enter. You will see a notification saying “Volume # is the selected volume”.
- Type shrink desired=100 and press enter to reduce 100 MB from the selected volume.
4. Extend Volume Using Windows PowerShell
Similar to shrinking with Command Prompt, you can extend a volume using Windows PowerShell to its maximum size.
- Open Windows PowerShell in administrator mode.
- Type the following script and press enter. This will extend the volume D to its maximum size. You can change the volume letter as you need.
$drive = "D"
$newsize = (Get-PartitionSupportedSize -DriveLetter $drive)
Resize-Partition -DriveLetter $drive -Size $newsize.SizeMax
Final Words
It is easy to decrease or shrink the storage space of a hard disk volume using Disk Management or Windows Settings app. However, there are plenty of limitations for extending the volume with unallocated space. Make sure to understand the conditions mentioned above for extending a volume. For example, when your volume C: drive is running out of storage, you simply can’t allocate space from D: even though it has large amount of free space.