Most users think using a VPN or proxy will change their location. However, this is not true, as browsers like Google Chrome use your geolocation to determine the approximate location. This geolocation is determined based on your browsing history, Wi-Fi signals, GPS, etc., (using Geolocation API) and in most cases differs from the actual IP address’s location.
Why Should You Change the Browser Location?
Have you ever seen advertisements on the websites you visit are shown in your native language even though you use a VPN to change your location? For example, you are in Germany using a VPN to show your location as the USA but still seeing advertisements in German. This happens because Chrome knows you are physically located in Germany based on the geolocation signals and continues showing relevant ads regardless of your IP address.
So, you need to change both the public IP address and your browser’s geolocation in many cases, like verifying on video calls, accessing restricted content, and unblocking websites.
Step 1 – Provide Location Permission for Chrome
This is the first step to be done in your operating system and on Chrome; otherwise, you will be prevented from accessing location-relevant content.
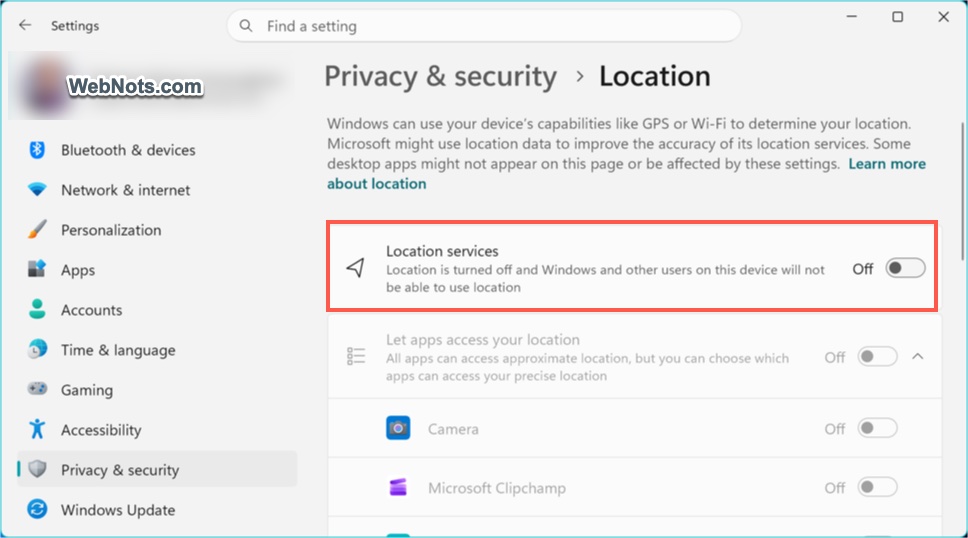
- On Windows: Go to “Windows Settings > Privacy & security > Location” and turn on “Location Services”.
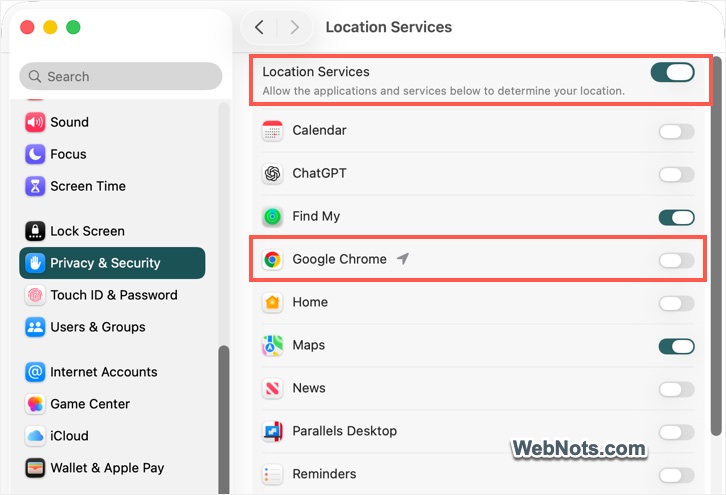
- On Mac: Go to “Apple Menu > System Settings… > Privacy & Security > Location Services”. Turn on “Location Services” and “Google Chrome”.
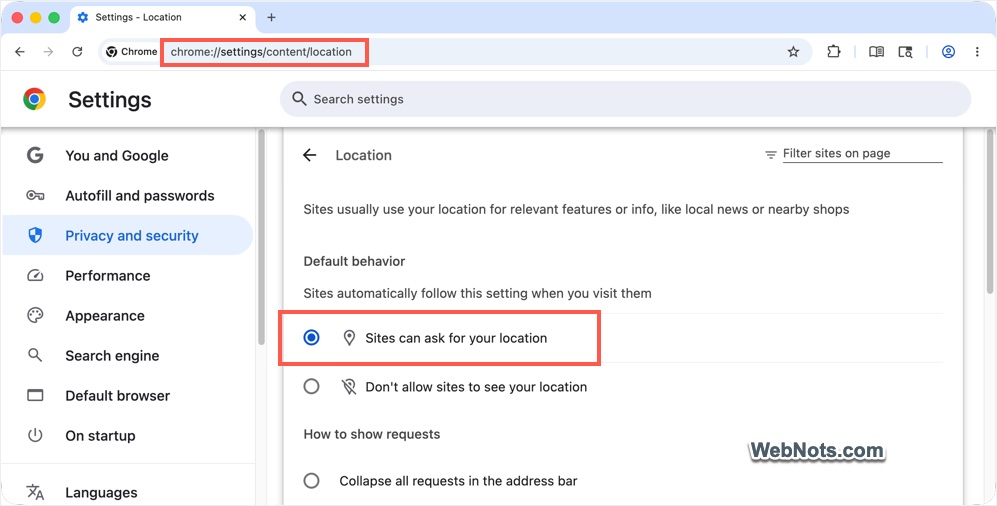
After that, go to chrome://settings/content/location in Chrome and select “Sites can ask your location” as a “Default behavior”.
Step 2 – Connect a VPN or Proxy
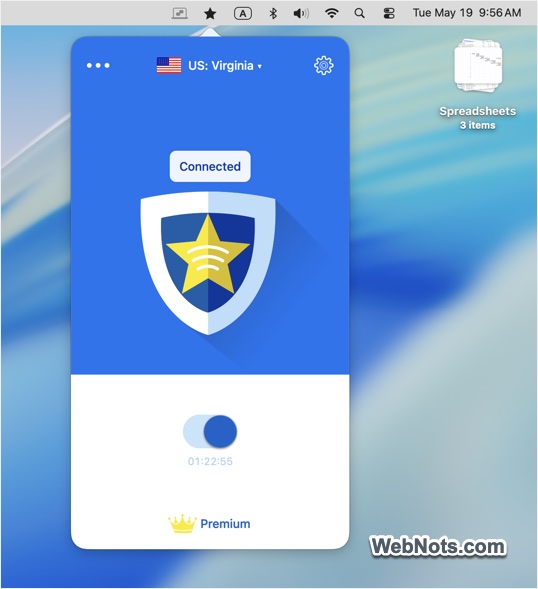
If you are using a VPN or proxy, make sure it is turned on and connected to the required server. Otherwise, your real IP address will be used as the public IP address.
Step 3 – Check Your Current Location
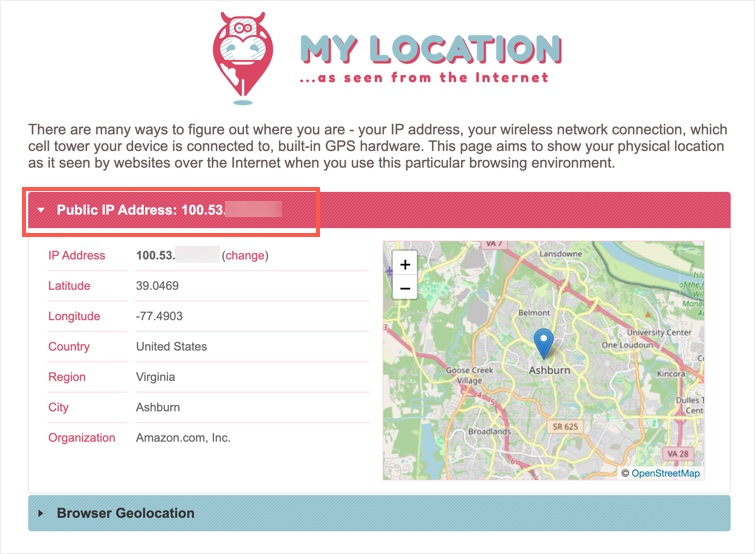
- Go to My Location website and check your “Public IP Address”, which should be your VPN or real IP. Note down the latitude and longitude attributes shown.
- Expand the “Browser Geolocation” tab, click the “Start Test” button and allow Chrome to access your location. If you have not provided the permission for Chrome in step 1, you will be prompted here and need to provide the permission. The test will show the latitude and longitude of the browser’s geolocation.
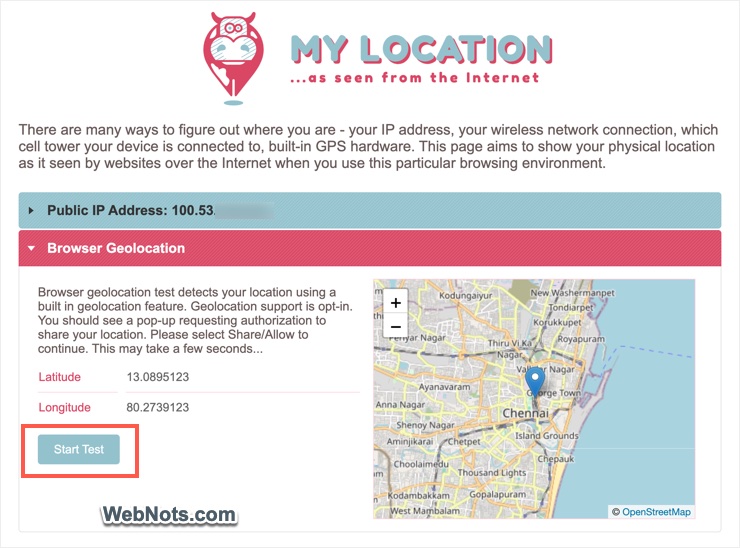
As you can see, the public IP and the browser’s location are different. Most online verification services will fail due to this location difference.
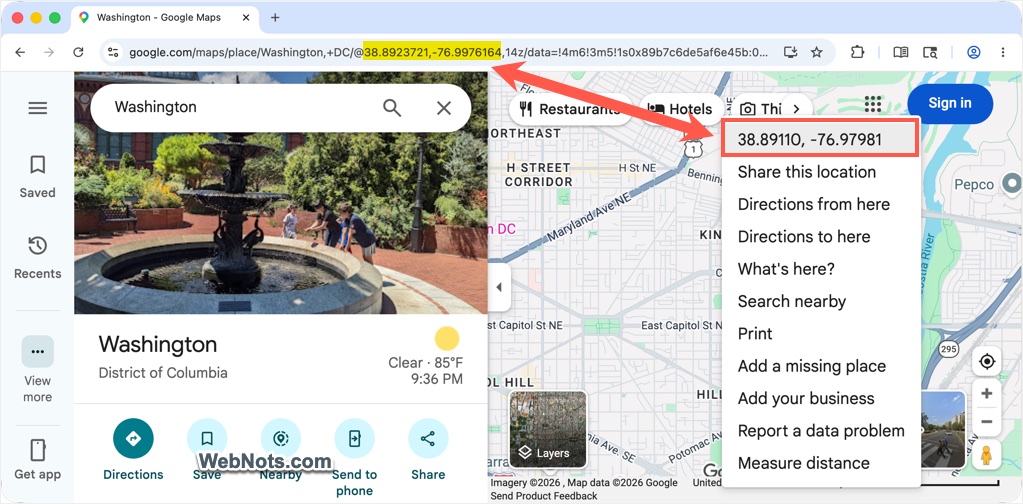
Note: You can also get the latitude and longitude of any location from Google Maps. Simply select your location and get the parameters from the address bar, or right-click on a location and get the details. Make sure the attributes have 5 digits or more after the decimal for them to work properly.
Step 4 – Change Browser’s Geolocation
Since the public IP is changed with the VPN, you have to change (spoof) the Chrome browser’s location to match it.
- Open Chrome, right-click and select “Inspect” option.
- When the Developer Tools open, click the gear Settings icon.
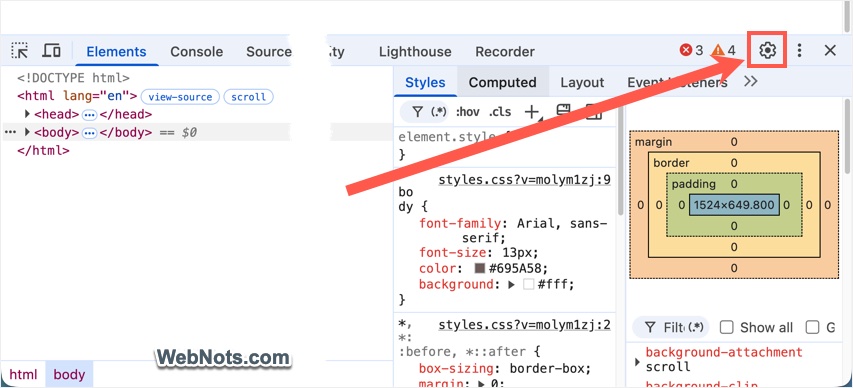
- Go to the “Locations” tab, where you can find a list of geolocations recorded in Chrome and you can add a custom location to the list by clicking the “Add location” button.
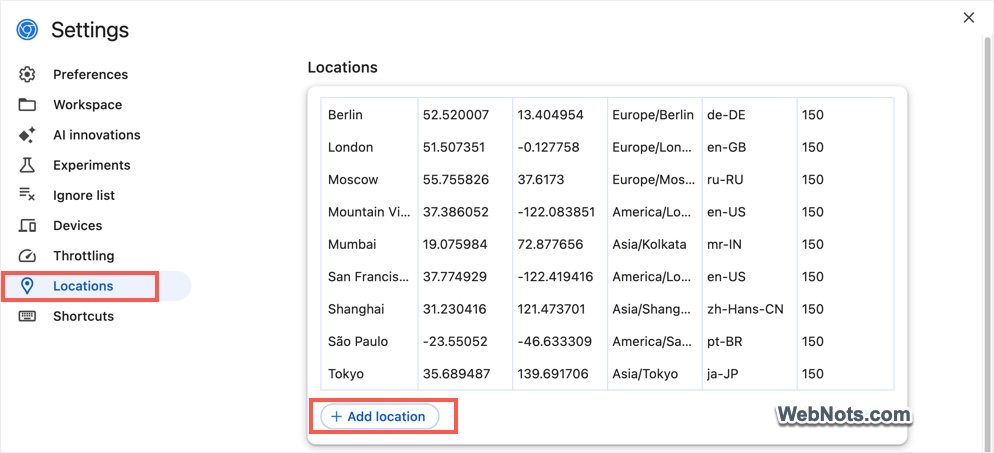
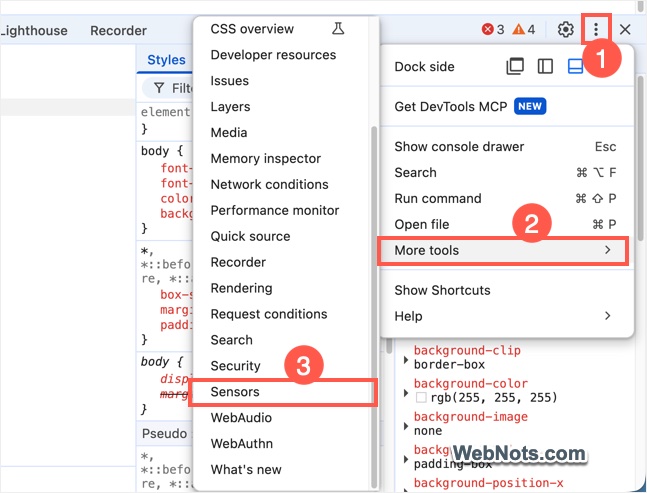
- Close the Developer Tools Settings and click the three dots icon on the Developer Tools (it will say “Customize and control Developer Tools”).
- Go to “More Tools > Sensors” section.
- Click the “Location” dropdown and you will see a list of items from the “Locations” tab.
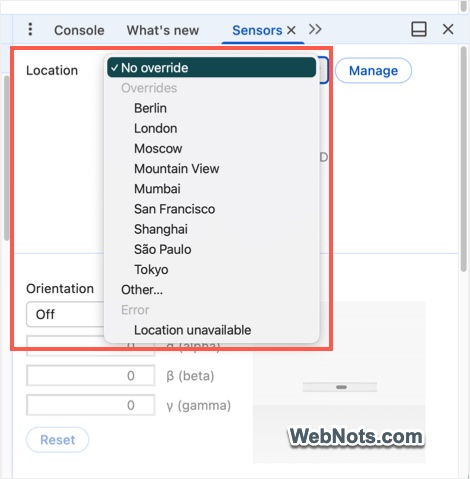
- Select your custom location or select any item and edit the latitude and longitude parameters as you have noted down in step 3.
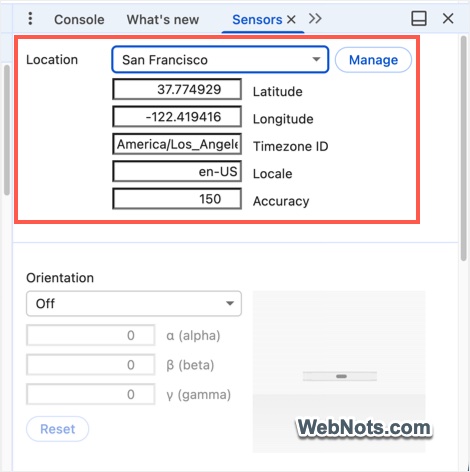
- Now, go back to the mylocation.org website and confirm the IP location and browser location are the same.
Step 4.1 – Using Browser Extensions
Chrome offers extensions for changing public IP as well as browser geolocation. You can make use of them, instead of using a VPN / proxy and changing geolocation in Developer Tools.
- Open Chrome and click the three dots icon on the top right corner.
- Go to “Extensions > Visit Chrome Web Store” and install the My IP Hider VPN extension.
- This extension offers limited free servers with 3 days access to premium servers. After that you should pay for accessing the premium servers. Click the extension icon and select the server that you want to connect to.
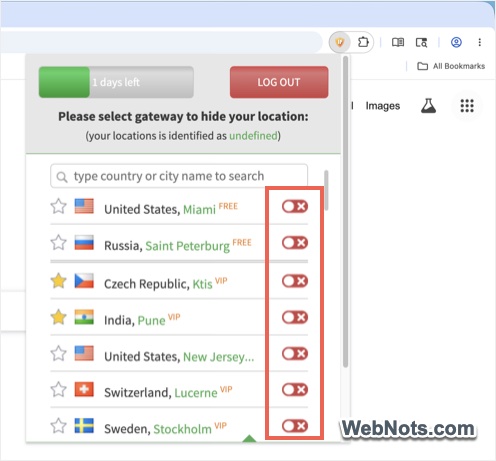
- Go back to Chrome Web Store and install the Change Geolocation (Location Guard) extension.
- Click the extensions icon and go to the extension’s “Options” page.
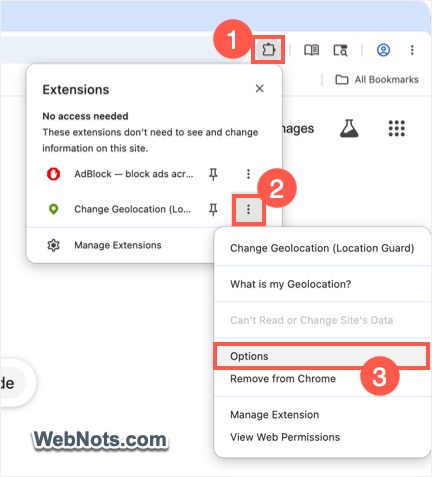
- Add the correct latitude and longitude parameters as noted down from step 3 or from Google Maps.
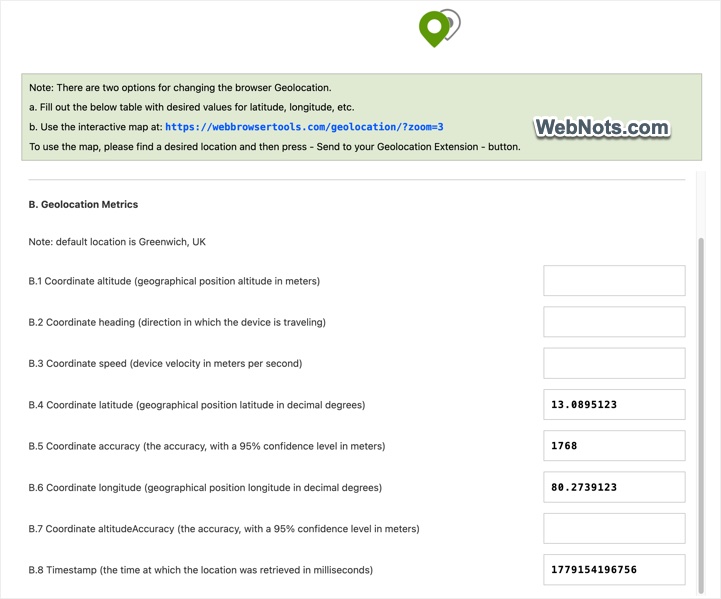
- Now, test your IP and location on the mylocation.org site to confirm the correct details are shown.
The advantage is that you can simply click the Change Geolocation extension icon to activate or deactivate it only on the required pages. This way you can use the real location or the spoofed location as needed without hassle.
Final Words
Now that you know how to check the latitude/longitude values for a location, check your IP/location, and change them in Google Chrome. This will help you attend verification calls and access restricted content hidden behind the browser’s geolocation service. As you can also see, your device’s regional settings neither affect the IP address nor affect the browser’s geolocation.