Did you ever wonder how to type a letter if that key is broken or not working on your Mac’s keyboard? Or having problem with using a physical keyboard and wanted to use a virtual keyboard on the screen using mouse? Mac comes with an in-built tool called accessibility keyboard. You can make use of this virtual keyboard whenever having problem with the physical keyboard and type with mouse.
Enabling Accessibility Keyboard in Mac
It is also called with different names like soft or on-screen keyboard, though the purpose is same.
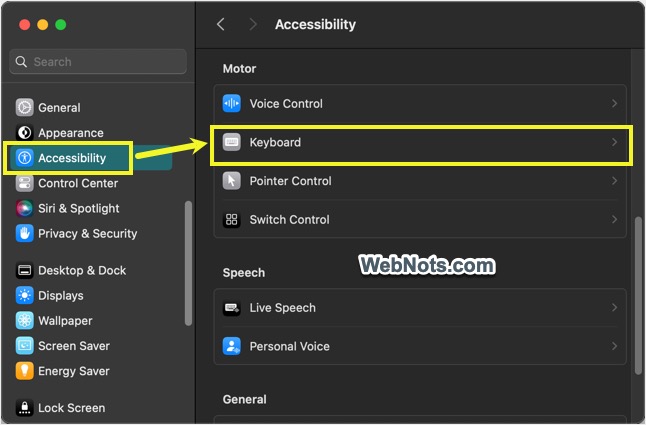
- Click the Apple icon on top right corner and select “System Settings…” menu.
- Go to “Accessibility” section from left sidebar.
- Scroll down on the right pane and select “Keyboard” option showing under “Motor” section.
- Scroll to bottom of the page and turn on “Accessibility Keyboard” option.

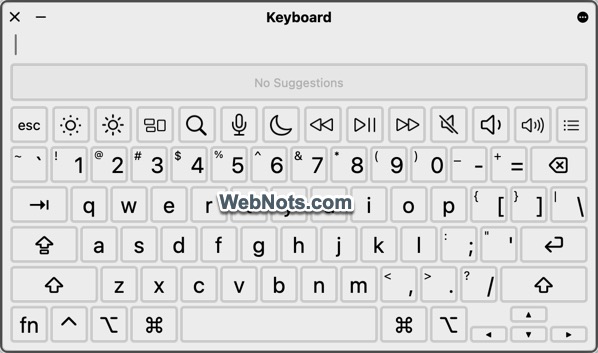
- You will instantly see a virtual keyboard appears which you can use for typing with the mouse.
Once done, click the close button or disable the option in settings page.
Using Accessibility Keyboard in Mac
If you are familiar with On-screen keyboard in Windows, using accessibility keyboard in Mac is somewhat different.
- It will highlight the keys you press and show the content you type along with the text predictions.
- Instead of key names, you will see symbols for modifier and other macOS specific keys. For example, Option key will show as ⌥. So, you should understand Mac keyboard and macOS symbols to use the keyboard.
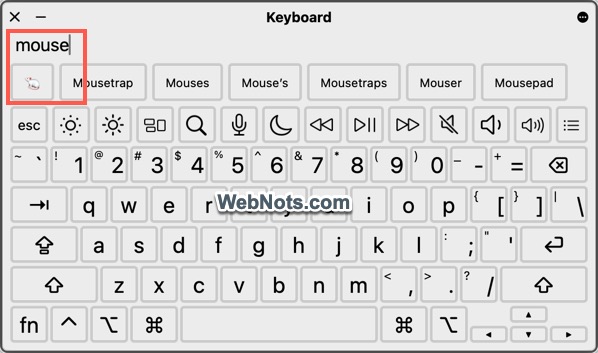
- You will also find emoji and other symbols in text prediction. For example, type “mouse” to find the mouse emoji appears for insertion.
Customizing Accessibility Keyboard Settings
Click the three dots icon (Panel Options) showing on top right corner of the keyboard. From the menu that appears, you can customize the appearance, zoom, fading, dwell, typing and toolbar options.

Besides other stuffs, here are the three important things you can do:
1. Using Dwell Actions
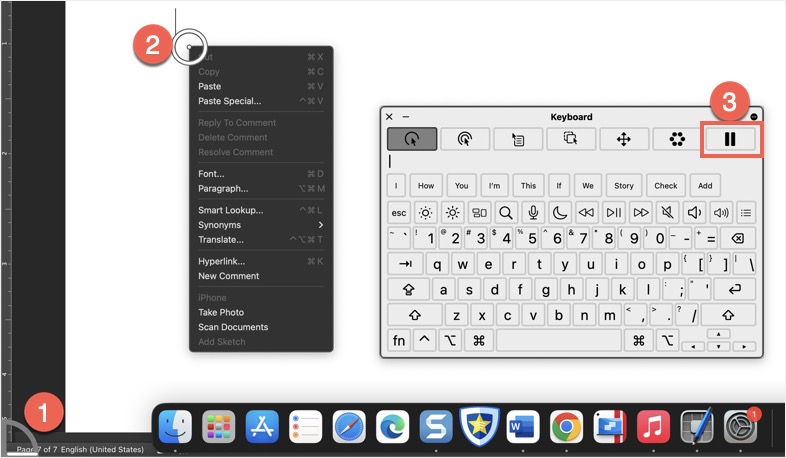
Dwell is a predefined list of actions that you can use to trigger based on mouse pointer movement. Go to “Panel Options > Dwell” and enable “Allow Dwell actions toolbar in panels”. This will show a list of action buttons on top row of the accessibility keyboard as shown in the below picture. As you can see the actions include Left Click, Double Click, Right Click, Drag & Drop, Scroll Menu, Options Menu and Pause Dwell.
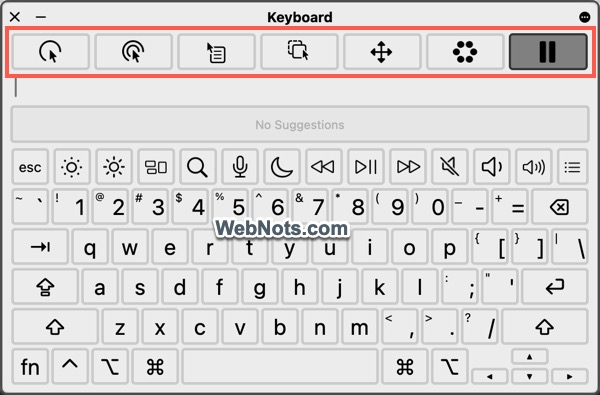
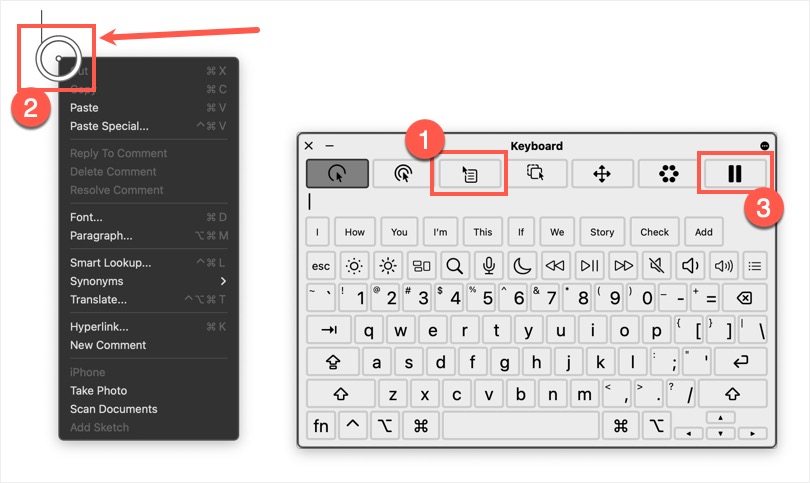
You can use any of these dwell actions with mouse pointer tracking. For example, click on the “Right Click” action button and move your mouse pointer to any other application. You will see a circular progress bar running and when the progress bar finishes the circle, it will trigger the right-click and show the context menu. You can move the mouse pointer to another app or location and trigger the menu again. Click the “Pause Dwell” button to terminate triggering of action and return to normal typing mode.
2. Adding Hot Corners for Dwell Actions
You may know creating hot corners for Mac display. With accessibility keyboard, you can also create a hot corner for any of the dwell action.
- Click “Panel Options” icon and select “Settings” menu to open macOS Settings app with accessibility keyboard section.
- Scroll down to “Hot Corners” section and select the dwell action for each corner of the screen.
- Click “Done” button to apply your changes.
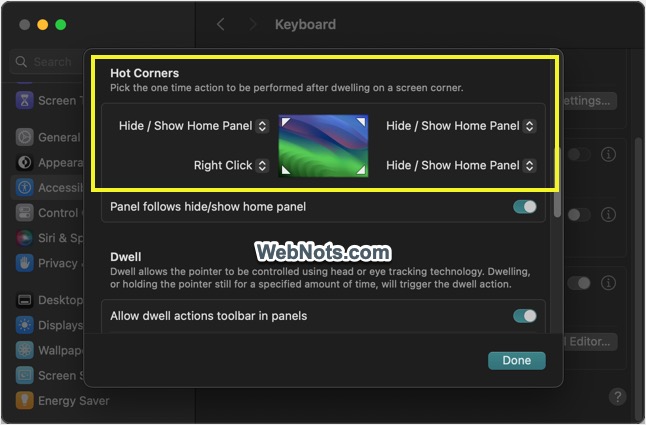
For example, we selected “Right Click” dwell action for lower left corner. Now, when we move the mouse pointer to that corner, Mac will show an angular section indicating the dwell action is activated. You can move the pointer to any location to trigger the right-click context menu. Finally, click on the “Pause Dwell” button to stop the action.
3. Creating Custom Panels
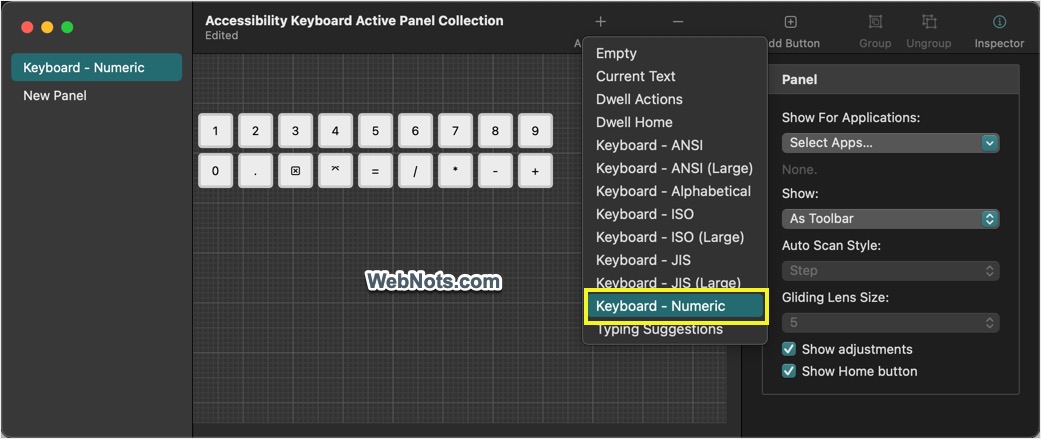
Go to “Panel Options > Customize…” menu to open Panel Editor. From here, you can create custom panels and use along with accessibility keyboard. Click the “Add Panel” option and select the panel that you want to add it to the keyboard. For example, let us select “Keyboard – Numeric” to add number pad to the accessibility keyboard. We will select “As Toolbar” option from the “Show” dropdown menu on the right sidebar.
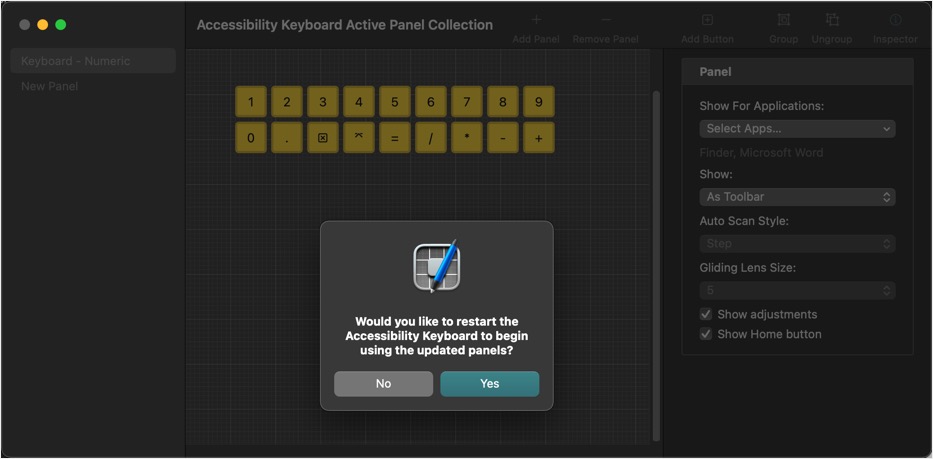
Press “Command + S” to save the panel and you will be prompted to quit and reopen the keyboard.
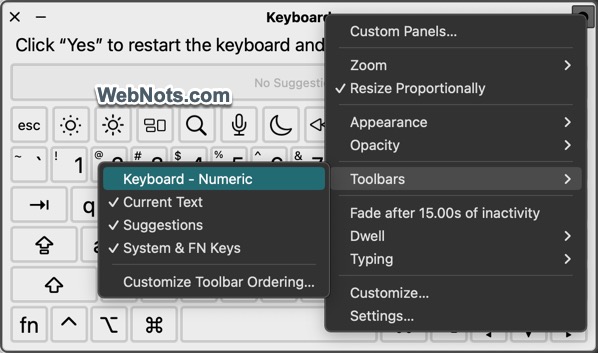
Click “Yes” to restart the keyboard, go to “Panel Options > Toolbars” and select “Keyboard – Numeric” option. Since we have created the panel as a toolbar, you can find it in this list.
Now, you can find the numeric pad appears on top of the accessibility keyboard.

In this manner, you can add additional panels to your existing accessibility keyboard using Panel Editor.
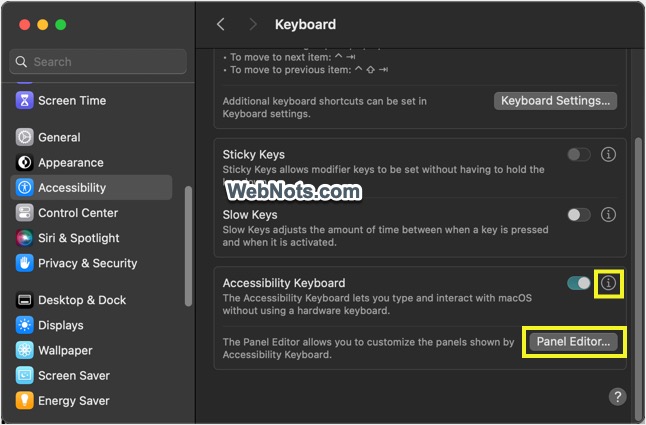
Note: You can also open Panel Editor from macOS settings page by navigating to “Accessibility > Keyboard” section. Also, clicking on the information icon showing next to “Accessibility Keyboard” toggle button will open additional customization page where you can configure dwell, hot corners and general appearance.