Apple’s ecosystem is designed for seamless integration between devices, making it easy to switch between your iPhone and Mac. Whether you’re working, browsing, or messaging, the synergy between these two devices enhances productivity and convenience. In this guide, we’ll explore all the ways to maximize your iPhone and Mac connectivity.
Requirements for Connecting iPhone with Mac
Before utilizing these features (except the 11th item), there are a few requirements to ensure seamless connectivity between your iPhone and Mac:
- Both devices must be signed into the same Apple account.
- iCloud sync should be enabled for file sharing, contacts, calendars, and more.
- Both devices need to be on the same Wi-Fi network for most wireless features (Handoff, AirDrop, iCloud, etc.).
- For features like Handoff and Universal Clipboard, Bluetooth should be enabled.
- Wired connections (via USB-C or lightning cable) can be used for certain features like Sidecar, Continuity Camera, and iPhone backup.
Once these basic settings are configured, you’ll be ready to take full advantage of the seamless integration.
1. Handoff: Continue Tasks Across Devices
Handoff lets you start a task on one Apple device and pick it up on another. For example, if you’re reading an article on Safari on your iPhone, you can continue reading it on your Mac seamlessly.
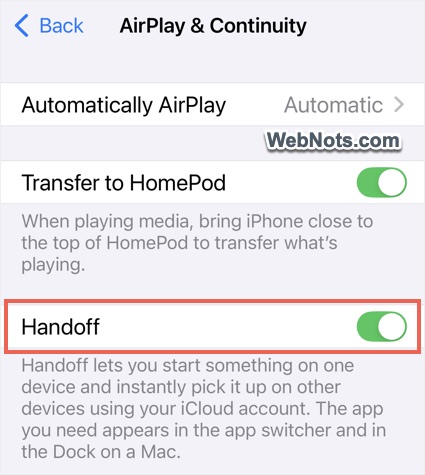
- On your iPhone, go to “Settings > General > AirPlay & Continuity” and enable “Handoff” option.
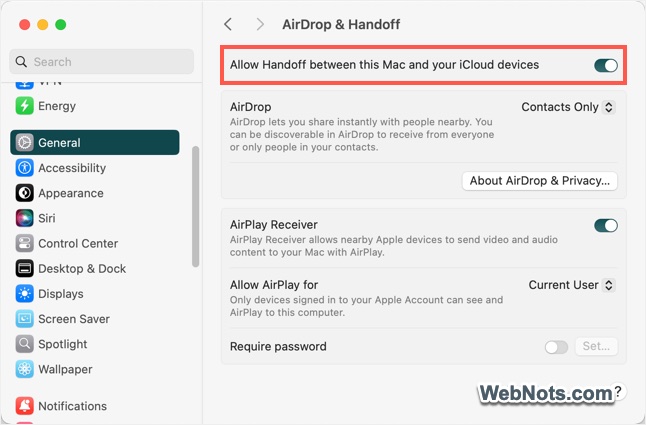
- On your Mac, go to “Apple Menu > System Settings… > General > AirDrop & Handoff, then enable “Allow Handoff between this Mac and your iCloud devices” option.
2. Universal Clipboard: Copy and Paste Across Devices
This allows you to copy text, images, or videos on your iPhone and paste them on your Mac – and vice versa. Simply copy content on one device and paste it on another as long as both are logged into the same iCloud account with Bluetooth and Wi-Fi enabled.
3. AirDrop: Wirelessly Share Files
AirDrop allows you to send files and photos between your iPhone and Mac instantly. First, enable Wi-Fi and Bluetooth on both devices.
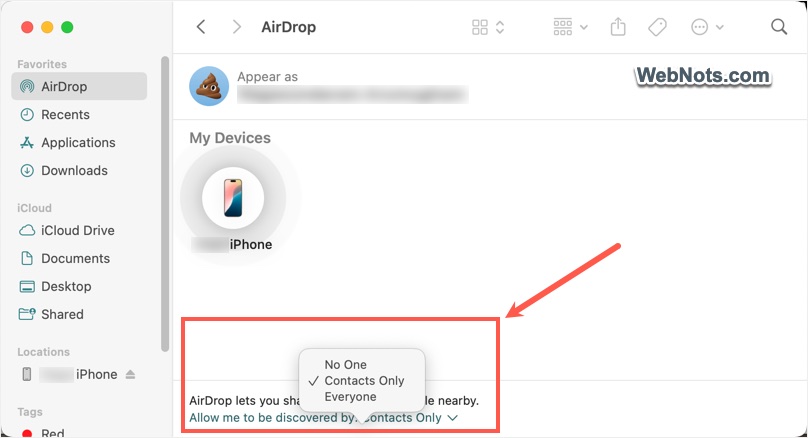
- Open Finder and go to “AirDrop” section on your Mac. Click on the “Allow me to be discovered by” link and set it to “Everyone” or “Contacts Only.”
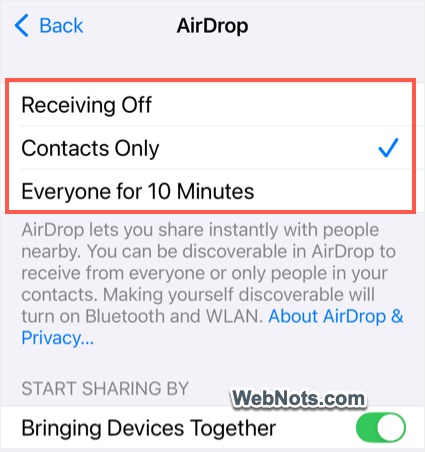
- On your iPhone, go to “Settings > General > AirDrop” and select “Contacts Only” or “Everyone for 10 Minutes” option.
Once turned on, select one multiple files and tap “Share” icon. Select “AirDrop” option and then choose your iPhone or Mac’s name to send the copy of the file(s). Received files will go to “Downloads” folder on your Mac while it will go to the corresponding apps on iPhone.
4. Receive Phone Calls on Mac
Make and receive calls or send text messages from your Mac using your iPhone’s cellular connection.
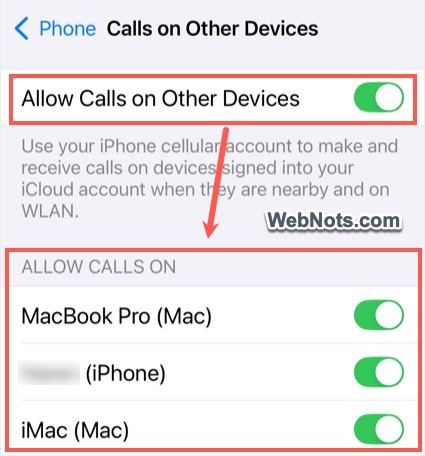
- On your iPhone, go to “Settings > Apps > Phone > Calls on Other Devices” and enable “Allow Calls on Other Devices” option. Turn on your devices from the list under “Allow Calls On” section.
- On your Mac, open the FaceTime app, go to “Settings > General”, and enable “Calls from iPhone”.
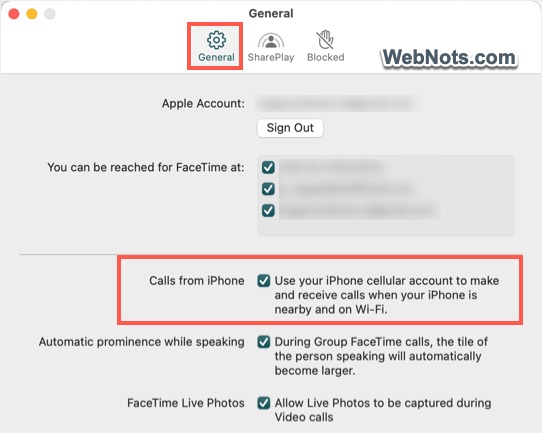
Note: For using iMessages from supported apps, go to “Settings > Apps > Messages” on your iPhone. First, turn on “iMessages” option and then tap on “iMessage Apps” and turn on supported apps.
5. iCloud Drive: Sync Files Across Devices
Access all your documents, photos, and files on both devices with iCloud, especially when you have paid iCloud+ subscription.
- On your iPhone, go to “Settings > Your Apple Account > iCloud > Save to iCloud (See All)” and turn on the required items.
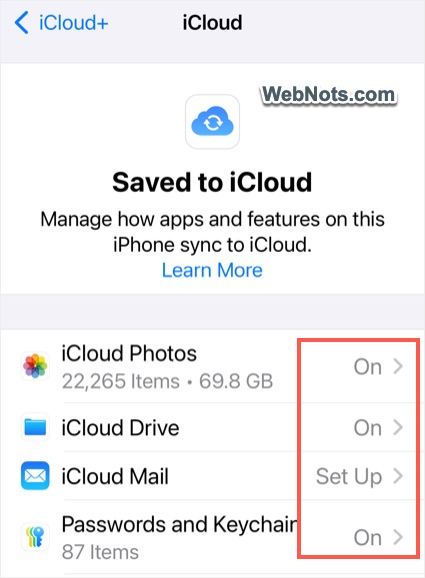
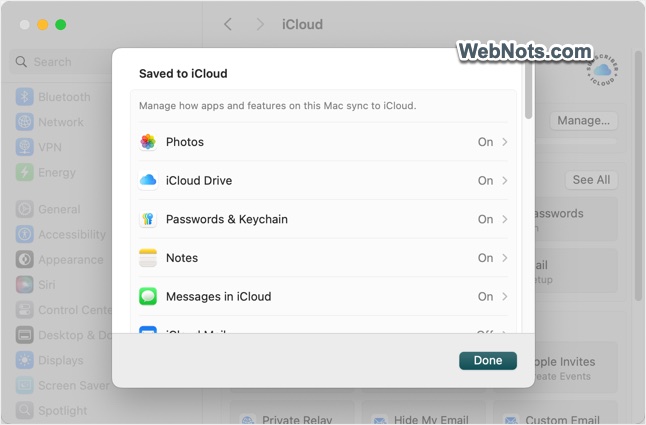
- On your Mac, go to “Apple Menu > System Settings… > Your Apple Account > iCloud > Save to iCloud (See All)” and then turn on the required items.
6. Use iPhone Camera as Webcam on Mac
Though Mac has a dedicated iPhone Mirroring app (as explained in next section), you can still use your iPhone’s camera as a webcam for Mac using QuickTime Player.
- Keep your iPhone and Mac nearer on the same network. On iPhone, go to “Settings > General > AirPlay & Continuity” section and turn on “Continuity Camera” option.
- On Mac, open QuickTime Player and go to “File > New Movie Recording” menu.
- Click the dropdown arrow next to the record button and select your iPhone camera.
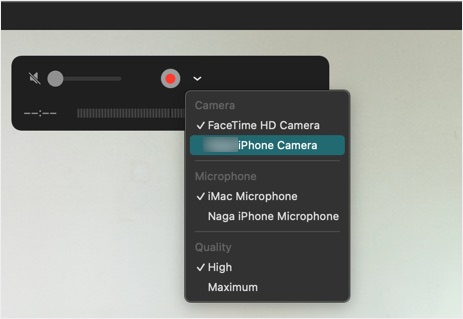
For FaceTime, go to “Video > iPhone Camera” option to select your iPhone as the camera source.
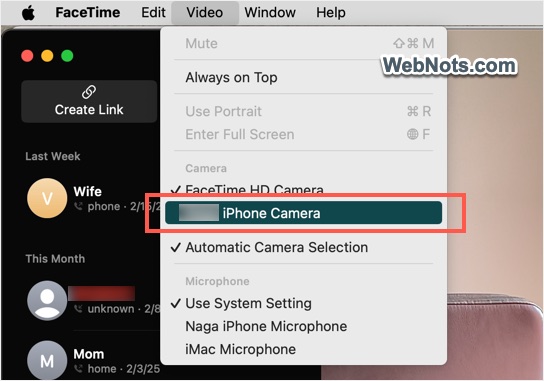
For third-party apps like Zoom, you may need to switch the camera source from the app’s settings.
7. Use iPhone Mirroring App on Mac
With macOS Sequoia (version 15.0) and iOS 18 or later versions, you can unlock iPhone from Mac and access all content using an iPhone Mirroring app. This app comes as part of macOS, so you don’t need to install it separately.
- Search and open iPhone Mirroring app on your Mac.
- The app will automatically find your iPhone connected on the same network.
- Unlock the screen on your iPhone allowing access from Mac.
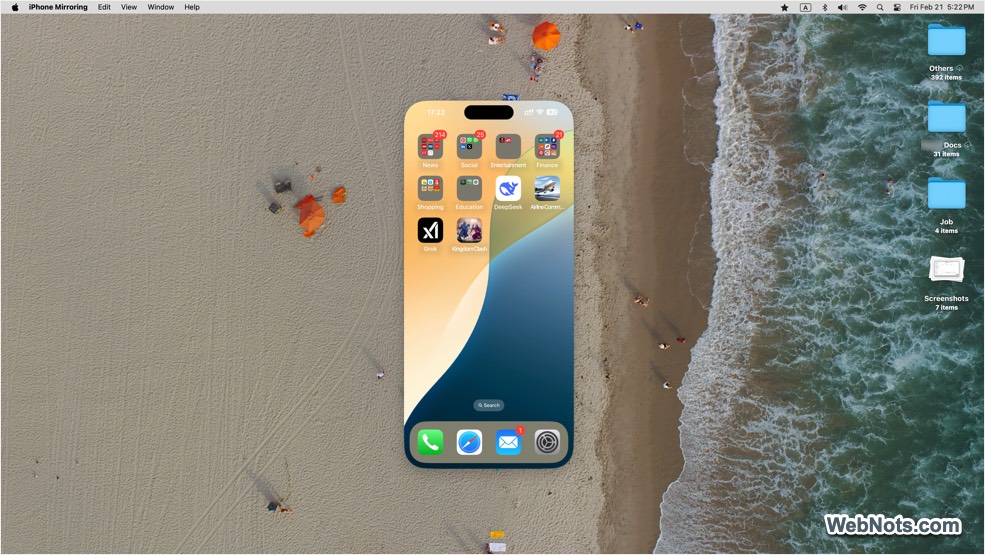
You can also enable receiving all iPhone notifications on your Mac with iPhone Mirroring.
8. Install iPhone & iPad Apps on Mac
If you are frustrated with the limited number of games and apps available on Mac’s App Store, then it is possible to install all iPhone & iPad apps on Mac. This automatically works on all Macs with Apple M series processor (not with the old Intel chips).
Simply open Mac App Store and search for an app you want to install. Go to “iPhone & iPad Apps” section and install the iPhone version on your Mac. For example, you can use Twitter (X) app on your Mac in this way though there is no official Mac version available.

9. Apple Pay on Mac via iPhone
Use your iPhone’s Face ID or Touch ID to approve Apple Pay transactions on your Mac.
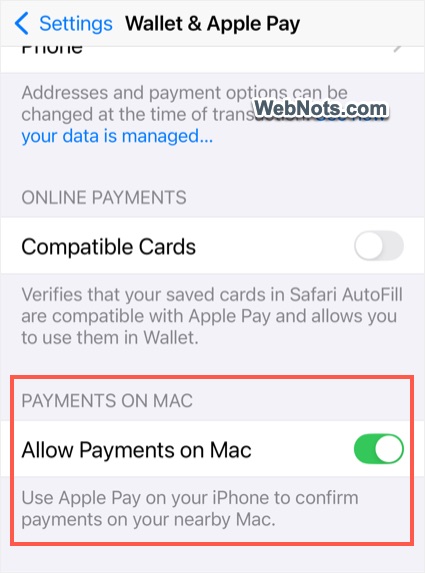
- On your iPhone, go to “Settings > Wallet & Apple Pay” and enable “Allow Payments on Mac” option.
- When making a purchase on your Mac, select Apple Pay and authenticate with your iPhone.
10. Find My: Locate Devices Instantly
If you misplace your iPhone, you can locate it from your Mac.
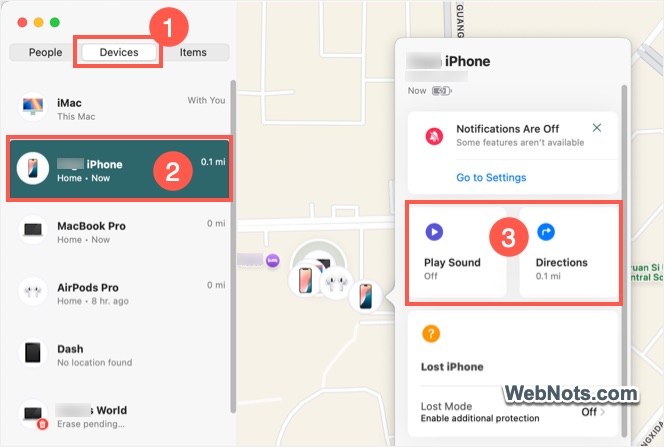
- Open the Find My app on your Mac.
- Go to “Devices” tab and select your iPhone from the list to see its location.
- Click on the information icon showing in the tooltip against your iPhone to play a sound.
11. Backup and Other Actions with Cable Connection
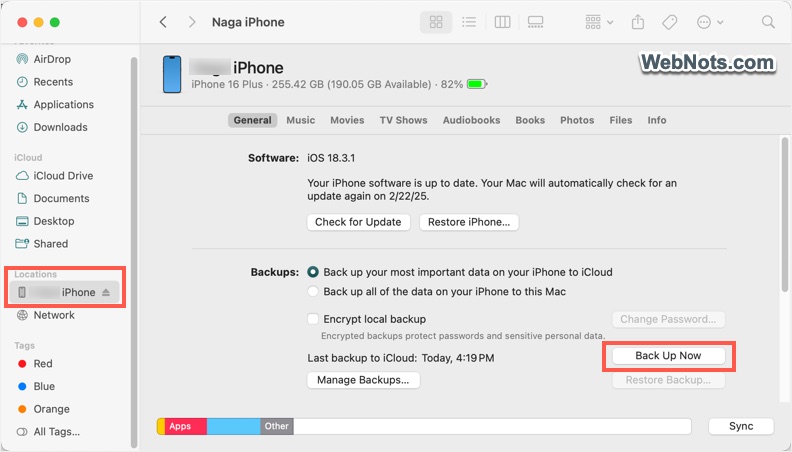
All the above options don’t need you to use cable connection. However, connecting your iPhone to your Mac with a cable opens up additional features, especially for device management and backup.
- After connecting the devices with cable, open Finder on Mac and select your iPhone from the sidebar.
- Select “Back up all of the data on your iPhone to this Mac” under “General” tab.
- Click “Back Up Now” button to create a manual backup of your iPhone.
Other Actions You Can Perform with a Cable Connection:
- Sync your music, photos, and videos between iPhone and Mac.
- Update or restore your iPhone from a previous backup.
- Transfer files to your iPhone from Finder.
This wired connection is also essential for iPhone recovery if something goes wrong or if you need to reset the device to factory settings.
Conclusion
Apple’s ecosystem makes using an iPhone and Mac together incredibly seamless. From file sharing to phone calls and even using your iPhone as a webcam, these features enhance productivity and convenience. By enabling these settings, you can unlock the full potential of your Apple devices and enjoy a more integrated experience. So, if you are using Mac, make sure to have an iPhone (instead if Android) to work like a pro.