Weebly introduced a new “Section” element as part of the fourth generation Weebly 4 upgrade. It was one of the much expected features to create full width and parallax sections anywhere on the page. Unfortunately, Section element is only available on new responsive themes and none of the old themes will have this element enabled on the editor. In this article, let us discuss the followings:
- Using section element on responsive theme.
- Using section element on non-responsive or custom theme.
Learn more about using responsive and non-responsive themes in Weebly.
1. Using Section Element in Responsive Themes
By default, section element is available under “Build” tab of Weebly site editor and grouped under “Structure” category along with Divider and Spacer elements. You can see the element only on responsive themes. If you have modified the theme or purchased a theme from third-parties, then the element will not be available.

- Drag and drop the Section element or click the “Add Section” on the content area.
- You will be prompted to choose the layout to be added inside the section. Select one of the available options from Gallery, Team, Featured, Menu or Contact.

- View the available layouts and choose the one you want to insert.
- Preview the inserted sectional layout and save the changes.
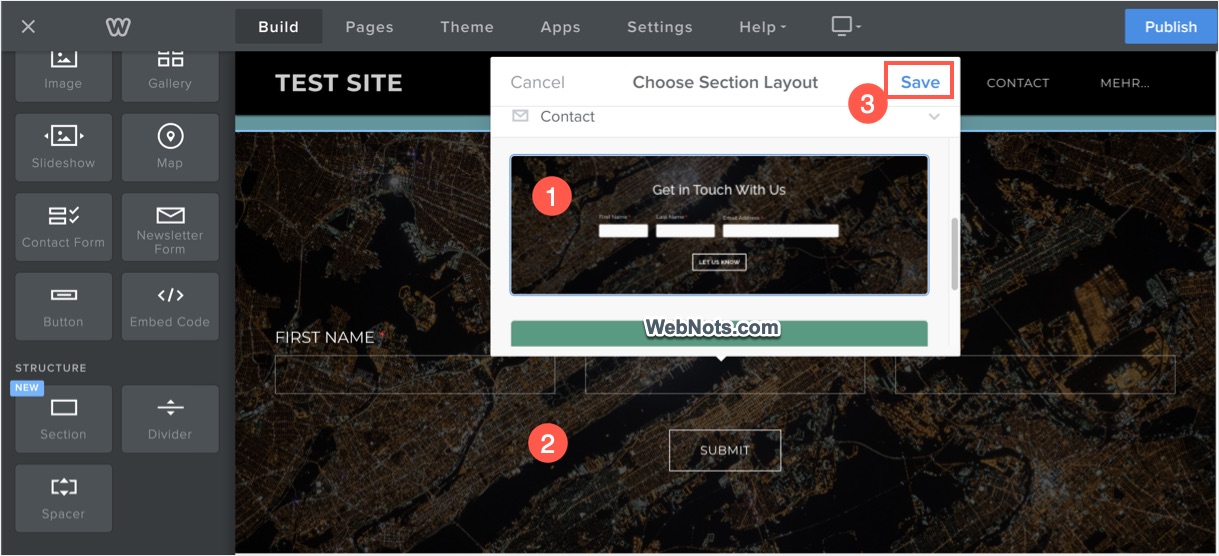
Customizing Section Layout
Click on the inserted layout and you will have the following customizing options.

Drag & Drop Elements
Drag and drop any element to the section area similar to content area. By default, the width of the section element will occupy the full width of the screen. But the elements can be customized independently or you can use the Spacer element to create a columned layout.
Resize Section Area
Drag the bottom border of the section to resize the section area’s height.
Delete
Click on the “Delete” option to remove the complete section area including all inside elements.
Move
Move the element up or down on the same page or to any other page on your site. Similarly, your can also copy the section to another page on your site.

Editing Section Background
Like flexible header, section area’s background can be an image, color, gradient or video. You can edit the background before or after adding the layout.
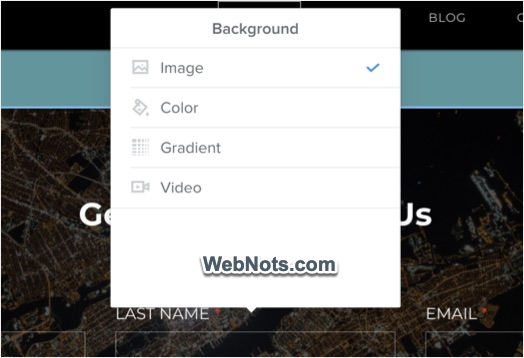
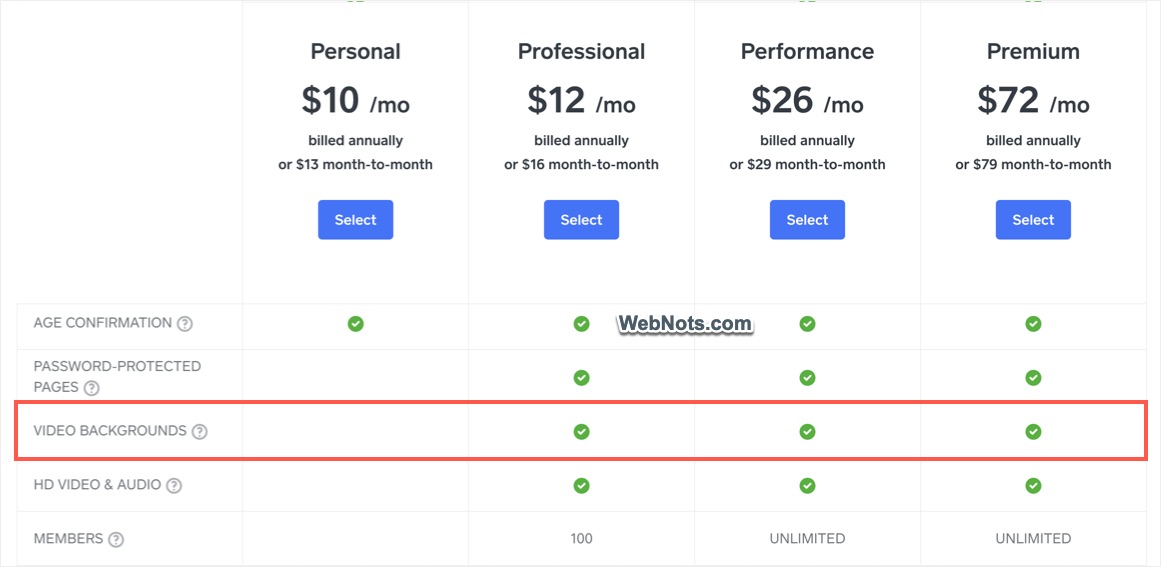
Free and Personal plan users can set image, gradient and color for the background. Professional, Performance and Premium plan users can set video backgrounds in addition to other options.
You can edit the background image with the default Weebly image editor to change the zoom, blur, darkness and apply filters. It is also possible to add parallax or reveal scrolling effect to your background. Video background will have an option to set the playing mode in loop. The content on section area can be aligned top, middle or bottom using “Advanced” option.

2. Using Section Element in Custom and Non-responsive Themes
We do not get the point of introducing a default element only on responsive themes since this is a mere modification on the header type (page layouts). As sections and flexible header works similar manner, adding a piece of code from new theme’s header type to your old existing header types will bring section element to the editor. Let us show you how to do it step by step.
Step 1 – Create a New Site to Check Section Element Code
As section element is available only on responsive themes, first create a new dummy site. Edit the source HTML by navigating to “Theme > Edit HTML / CSS”. You will see three header types – header.html, no-header.html and splash.html (some themes will not have splash)
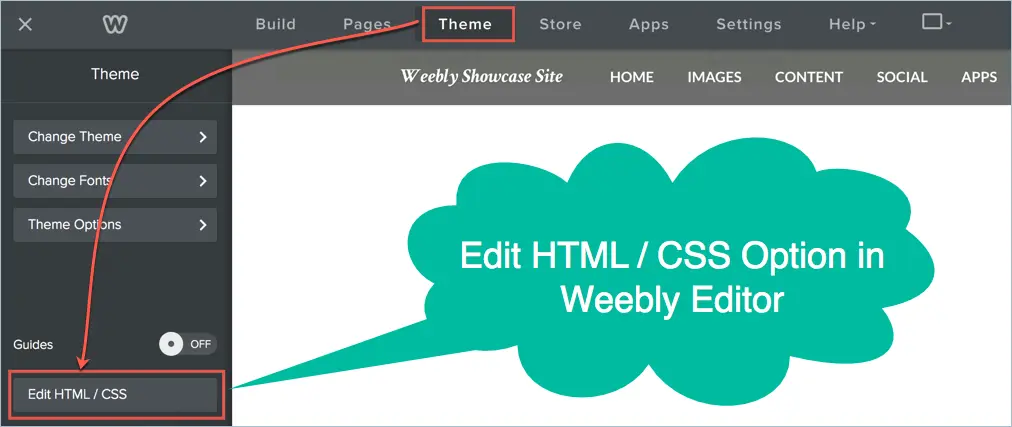
Click on the no-header.html and check the code of “content-wrapper”. It should be something like below:
<div id="content-wrapper">
{{#sections}}
<div class="container">{content}</div>
{{/sections}}
</div>
Section element is appearing on the editor with the use of the code {{#sections}}…{{/sections}}.
Step 2 – Modify Your Live Site With Custom Theme
Now that you know it’s a simple {{#sections}}…{{/sections}} code that populates the section element. The next step is to open your live site with custom or non-responsive theme and add the code to all the header types. Edit your live site and navigate to code editor under “Theme > Edit HTML / CSS” section. Find out the div tag for the {content} section of the main wrapper and add section element code like below:

{{#sections}}
<div id="main-content" class="container">{content}</div>
{{/sections}}
Ensure to add the code above and below the main content area and not on the banner area. Save your changes and check the site editor. If this is first time you are changing the source code, you need to provide a name and save as a custom theme. Now, you should see the “Section” element which can be used to create full width sections on your custom theme.

Add the sections code in all header types to enable full width Section element for all page layouts. If you don’t add the code in any of the header type and choose that header type for your page, it will show you the following error when you drop section element.