There are two ways to create a localhost WordPress setup – one is to create a fresh installation and another is to move your live site’s content to local computer. For both cases, you can use the apps like MAMP, WAMP, or Local. Though the fresh setup works fine in most cases, file permission issues are common in migrated setup. If you face file permissions error on your localhost, here is how to fix them quickly.
Why File Permission Errors Occur on Localhost?
Media upload path is the major reason for permission errors on localhost. Though you might have replaced all live site’s URL with the localhost URL, the default media upload folder will not change. All images uploaded on a live site will be saved under https://www.yoursite.com/wp-content/uploads/ folder. You will see a file permission error when your localhost site tries to upload content to this folder on a liver server.
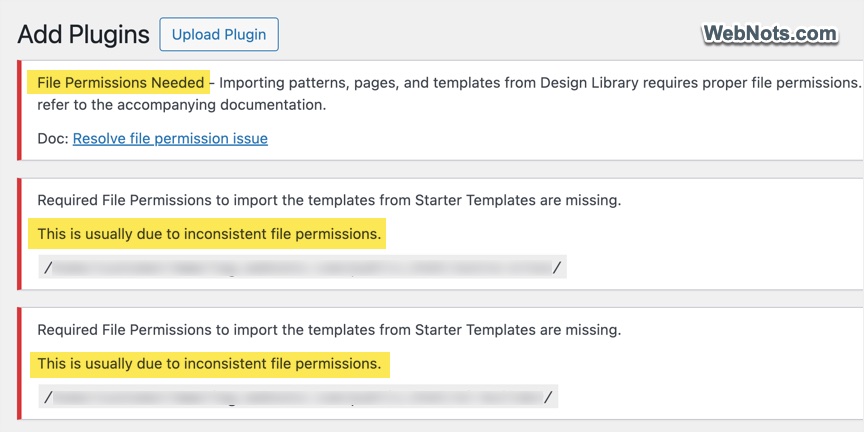
Let’s take an example with a Starter Template plugin from the Astra theme’s developer. After installing, the plugin will try to import demo templates to the default uploads folder /wp-content/uploads/. Since this folder is located on your live hosting server, the plugin can’t access it and will show permission errors.
Fixing Localhost File Permission Errors
The solution in this case is to change the default uploads of your localhost site. You can do that in the following two ways:
1. Using a Plugin
- Login to your localhost site’s admin panel and go to “Plugins > Add Plugin” section.
- Search for “media path” and find WP Original Media Path plugin.
- Install and activate the plugin on your site.
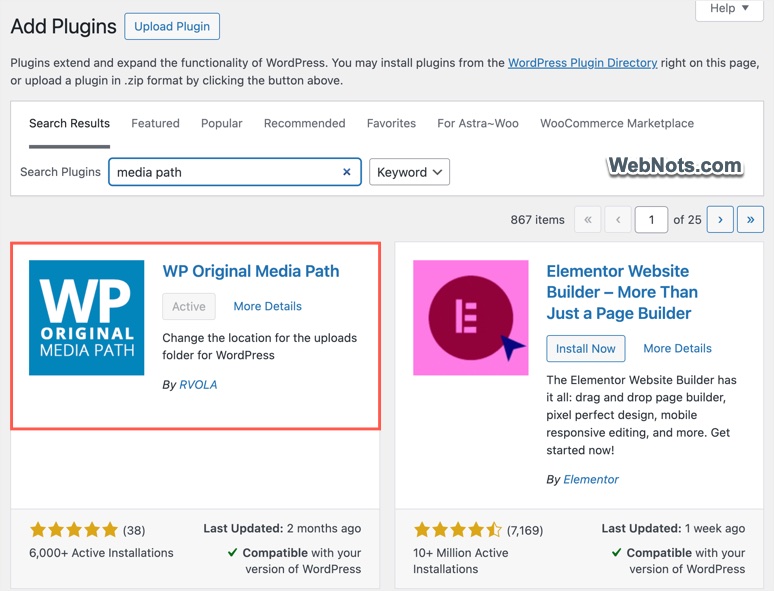
- Go to “Settings > WP Original Media Path” menu.
- You will see the live site’s uploads path in “Full URL path to files” textbox.
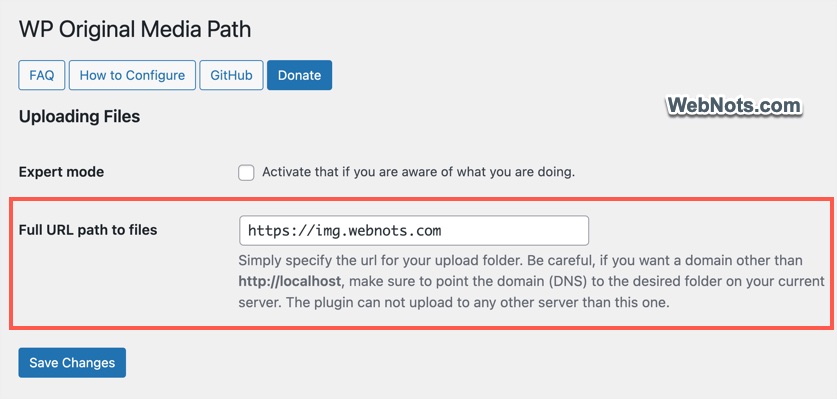
- Simply delete the live path and save your changes. The plugin will automatically assign https://localhost/wp-content/uploads as a file path.
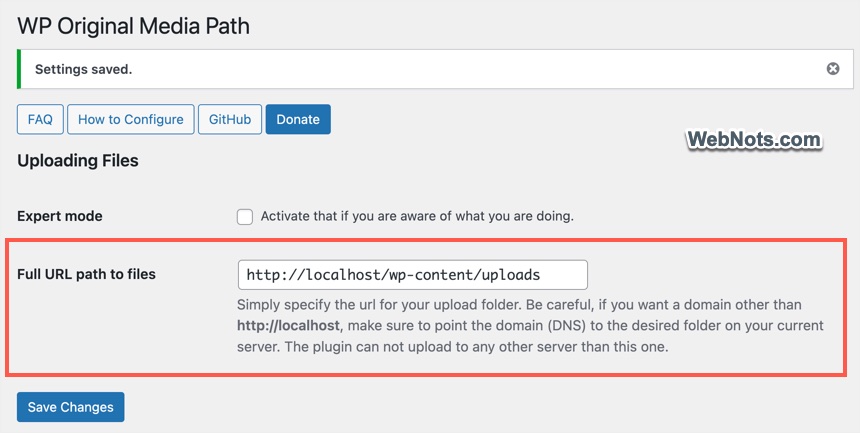
Now, you should be able to use any plugin for importing demo templates as the content will be stored on your local computer.
2. Changing Path Using options.php
If you don’t want to use a plugin, follow the below method.
- Login to your localhost site’s admin panel.
- Paste this URL https://localhost/wp-admin/options.php in the address bar and press enter.
- Scroll down and find upload_path and upload_url_path options (items are arranged in alphabetical order for quicker finding).
- Remove the live server’s path from these two fields.
- Scroll down to the bottom and click “Save Changes” button.
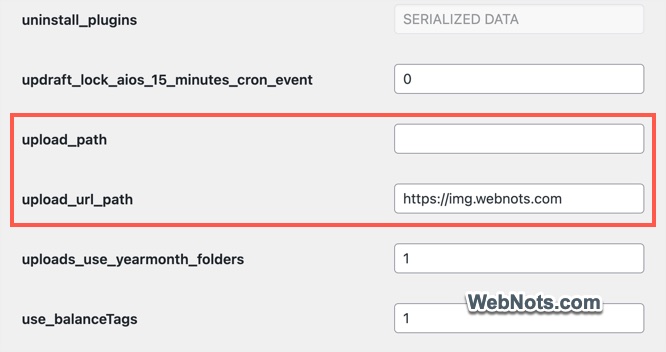
You can also edit these parameters in wp_options table of your database using the tools like phpMyAdmin or Adminer.
If changing media upload file path does not fix the issue, follow the below suggestions.
3. Change File System Method
Some plugin on local setup needs the file system to set as “Direct” for working and receiving updates.
- Edit wp-config.php file of your localhost in a text editor app like VS Code.
- Add the following code just before the line that says, “* That’s all, stop editing! Happy blogging. */”.
define( 'FS_METHOD', 'direct' );- Save your changes and check if the permission error is fixed.
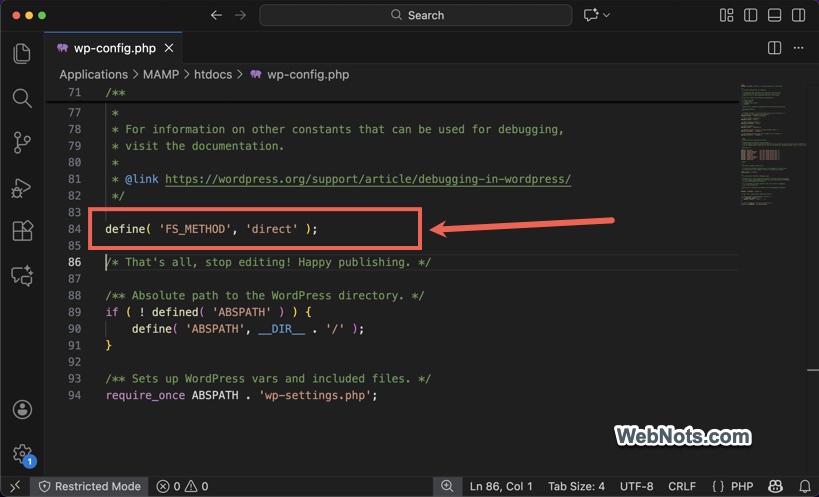
4. Check File Access for Folder
Make sure the local site’s files and folders are having read / write access on your computer. For example, MAMP will store the local site’s files under “Applications > MAMP > htdocs” on Mac. Go to this folder, right-click on it and select “Get Info” to open its properties. Make sure you as an administrator have read / write privilege.
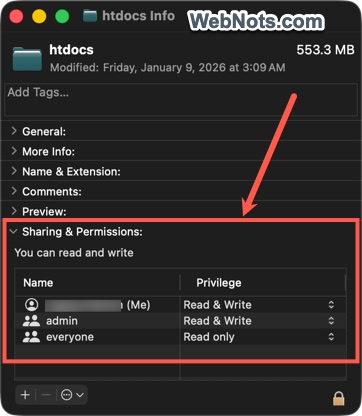
You can follow similar steps on Windows to open properties and check the permissions.
5. Exclude Localhost from Hotlinking
Although this issue is not related to file or folder permissions, you will not see live media content on a localhost site. Instead, images and other media files may appear as broken icons, which can be mistaken for a permissions problem. This behavior typically occurs when hotlink protection is enabledon the live site to block direct linking of images from external domains.
Hotlink protection can be configured through a security plugin, your hosting control panel, or a service such as Cloudflare. When this protection is active, requests originating from localhost are treated as unauthorized external sources, causing media files to be blocked.
To resolve this, update your hotlink protection settings to explicitly allow localhost. Depending on how the protection is configured, this may involve whitelisting localhost or disabling hotlink protection temporarily during local development. This change will allow images and other media assets to load correctly on the localhost environment.

Final Words
In most cases, changing the media upload path resolves file permission errors on a localhost environment. However, this approach can introduce another issue if your images exist only on the live server. In that situation, media files will not display locally unless they are also copied to the local /wp-content/uploads/ directory. If you don’t want to copy images to local setup, make sure to revert the upload path to live server after the plugin / theme imported the content to local path.
Additionally, verify your operating system’s file and folder permissions on the local machine, as incorrect local permissions can also cause media upload issues.