Have you ever tried to view your own website, only to find yourself stuck on a Cloudflare verification page? Normally, Cloudflare shows messages like “Verifying you are human…” or “Performing security verification…” Sometimes, the verification process keeps repeating, leaving you unable to access your website even after waiting several minutes. In this article, we will explain how website owners can troubleshoot Cloudflare verification problems, regain access to their sites, and prevent the same issue from happening again.


Why Cloudflare Blocks You?
Although you might have configured Cloudflare to protect your website, the platform does not automatically recognize every website owner as a trusted visitor. Cloudflare may repeatedly challenge your requests if your browser cannot complete the verification, your connection triggers a security rule, or your IP address has a suspicious reputation. Browser extensions, disabled JavaScript, blocked cookies, VPNs, and overly restrictive security settings can all contribute to the problem.
Follow the solutions below to regain access.
1. Disable All Browser Extensions
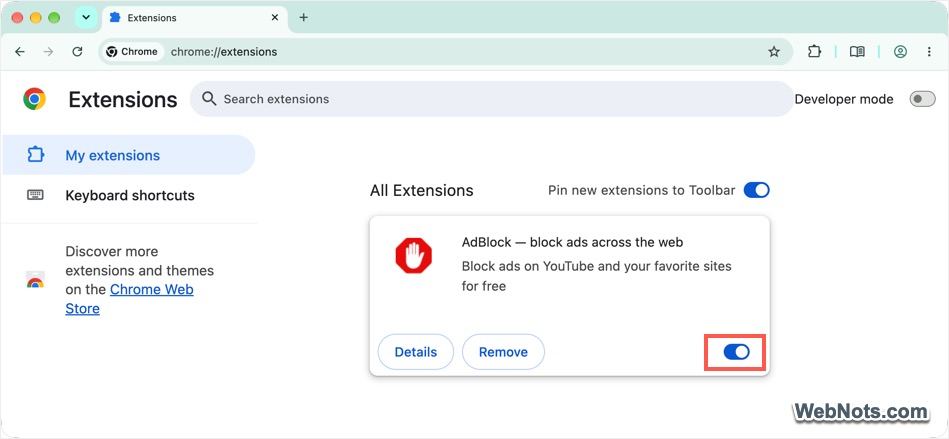
If the problem is browser related, Cloudflare may show a verification message like “Incompatible browser extension or network configuration”.

- Open your website in a private or incognito window, which generally disables all installed extensions.
- If the website loads correctly, the problem may involve a browser extension.
- You can also temporarily disable extensions that block scripts, advertisements, or tracking elements. Test the site again after disabling them.
- If this resolves the issue, re-enable your extensions one at a time to identify the cause.
2. Clear Your Browser’s Cookies and Cache
If extensions are not causing the issue, clearing your browser’s data may help.
- Open your browser settings and press “Command + Shift + Delete” on Mac or “Control + Shift + Delete” on Windows. This works on most popular browsers like Chrome, Edge, and Firefox.
- Select the required time range, check “Cookies and all site data”, and “Cached images and files” (or similar options in your browser).
- Delete the data to remove the stored data for your browser.
- If you are using Safari on Mac, go to “History > Clear History” menu in Safari browser and select “Clear History…” option.

Now, reopen the site and check the verification is not appearing or can be successfully passed. If clearing site data fixes the problem, the cause may have been stale or conflicting browser data.
Note: Be aware that clearing cookies may sign you out of your accounts. Make sure you have your login credentials available before proceeding. It’s also a good idea to try a different browser (for example, on your mobile if you are blocked on a desktop device). This helps to determine whether the problem is limited to your current browser.
3. Disable Your VPN or Proxy Temporarily
Slowness in your network can stop Cloudflare from even showing the verification box. You may see a message mentioning the verification is taking longer time along with the list of items to check.

If you are using a VPN or proxy, disconnect from it and try accessing your website through your regular internet connection. If the verification loop disappears, your VPN or proxy connection may be contributing to the problem. You can also try switching to another VPN server, although this is not guaranteed to help. If you really need to use a VPN, you can add the servers IP addresses to an exception rule in Cloudflare (check step 6). However, this is not recommended because VPN servers often use shared IP addresses, meaning other users connected to the same server may also benefit from the exception.
4. Check Your Cloudflare Security Events
If the basic troubleshooting steps do not work, investigate the problem through your Cloudflare dashboard.
- Sign in to Cloudflare and select the affected website.
- Go to “Security > Analytics” section and select “Events” tab. This section provides information about security actions taken against incoming requests.

- Look for requests matching the time when you attempted to access your site.
- Click the request to expand and check the following details:
- Your source IP address and the URL or path you attempted to access.
- The action taken like Block, Managed Challenge, or another challenge action.
- The rule or security service responsible for the action.
- Any available rule identifiers or request details.
These details can help you determine whether Cloudflare is deliberately challenging your connection or whether the verification process is failing for another reason.

As you can see an example request in the above screenshot, the events show that a custom firewall rule was blocking the IP address. You can investigate such rules and fix the issue.
5. Review Your Cloudflare Security Rules
If you identify a security rule that is unnecessarily challenging your connection, review its conditions and scope. For example, suppose you created a rule that challenges every request from a particular country. If you are currently connecting from that country, the rule may be affecting you as well. Similarly, a custom WAF rule that challenges requests containing particular URL patterns may interfere with your attempts to access certain pages.
To troubleshoot the problem:
- Go to “Security > Security rules” section of your domain in Cloudflare account.
- Open the rule associated with the challenged request (as found in the previous step).
- Adjust the rule to target the intended traffic more accurately.

Avoid disabling all security rules just to regain access. This can expose your website to unwanted traffic and attacks. Instead, make the smallest necessary change or exception and test whether it resolves the problem.
6. Check Your IP Address Access Rules
Cloudflare provides IP access controls that allow website owners to manage traffic from specific IP addresses or ranges. If your IP address has been blocked or challenged unintentionally, review the applicable rules. If you have confirmed that your current IP address is trusted and the restriction is unnecessary, consider creating a narrowly scoped exception or correcting the existing rule.
- Go to “Security > Security rules” section of your website.
- Click the “Create rule” button and select “IP access rule” option.
- Enter your IP address or range, select the action as allow, and apply the rule only for the current site or entire account (applied to all sites in your Cloudflare account).

Before making changes, verify that you are using the correct public IP address. Your device’s local address, such as an address beginning with 192.168 or 10, is not the public IP address Cloudflare normally sees. If your internet connection uses a dynamic IP address, set a range or ASN to provide a broader exception.
Note: “Bot Fight Mode” (under “Security > Settings” section) can also block your access. You can temporarily disable that option and test whether you can view your site.
7. Disable or Pause Cloudflare
If multiple authors and editors accessing your site are blocked, you may temporarily bypass or completely disable the Cloudflare setup.
- Temporarily pausing: Log in to your Cloudflare dashboard and select your site. Scroll down to the bottom and check the right corner under “Advanced actions” section. Select “Pause Cloudflare” and confirm your action.

- Completely disabling: Instead of pausing, select “Remove from Cloudflare” option and confirm your action. After that, access your DNS settings and change the nameservers to your origin hosting server’s IP address.

Although both actions will disable Cloudflare and the visitors will be served directly from your origin server, removing will cancel your subscription (with no refund for premium plans). Pausing will also send you a warning after a week that the site is not using Cloudflare. By that time, you should troubleshoot and fix the issue or protect your site with another service.
Final Words
A verification loop does not automatically indicate that your website has been compromised. It is often caused by security rules, browser issues, or the reputation of an IP address. If you are not able to access the site with the basic steps explained above, consider bypassing or disabling the setup as explained in the last step.