You may already know that WordPress comes with a default function to password protect individual post or page. However, you can’t set a password for accessing the entire site. There are plugins out there, but you do not need them. You can simply use existing .htaccess file to password protect entire WordPress site.
.htaccess File in WordPress
WordPress needs a file called .htaccess to save the permalink structure and work properly. This file is automatically generated during installation or when you save permalink structure. Since this is a server configuration file, you can’t access it from the browser.
Also, .htaccess is the file extension and the file has no actual name which means the file is hidden by default when viewing from FTP client. So, make sure to enable viewing hidden files option in your FTP client and on your computer. Alternatively, use File Manager from your hosting account to edit .htaccess file.
Learn more on how to view hidden files in Mac and Windows PC.
Step 1 – Create a Password File
- Open a plain text editor on your computer. You can use Notepad in PC and TextEdit in Mac for this purpose.
- Type your username and password separated by a colon. For example, if your username is WebNots and password is mypassword, then type WebNots:mypassword.
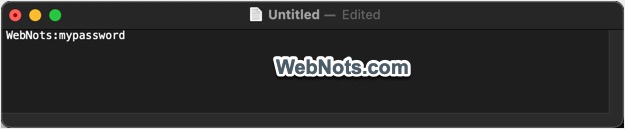
- Save the file and provide the name as .htpasswd.

- Your text editor may warn you that files starting with dot are reserved for system files and will be hidden by default. Confirm the action to use .htpasswd as the file name.

Step 2 – Upload .htpasswd File on Server
- Login to your hosting account and open File Manager or remotely access your server through FTP.
- Locate your WordPress installation which is generally under /public_html folder and upload your .htpasswd file. In this case, your .htaccess and .htpasswd files will be in the same location.
Remember, you can upload the file anywhere on the server which is not publicly accessible. For example, if you have a directory structure like “/user/home/WordPress_site” then upload the file under “/user/home/” folder.
Step 3 – Adding Directives in .htaccess File
- Go to your WordPress installation folder (generally /public_html).
- Locate .htaccess file and download it as a backup.
- Then open the file for editing and delete all its existing content.
- Add the following lines in the file and save it. Reupload the file if you are using FTP.
AuthType Basic
AuthName "Password Protected Site"
AuthUserFile /file_path_of_.htpasswd
require valid-user
If you have the .htpasswd and .htaccess files on the same location, then you can simply use the .htpasswd as AuthUserFile as shown below. Otherwise, make sure to provide the location where you have uploaded .htpasswd file on the server.
AuthType Basic
AuthName "Password Protected Site"
AuthUserFile .htpasswd
require valid-user
Step 4 – Testing the Site
Open your site’s home page or any other page in a browser and you should see an authentication prompt asking to enter username and password. Type the credentials as you provided in .htpasswd file and the site will open.
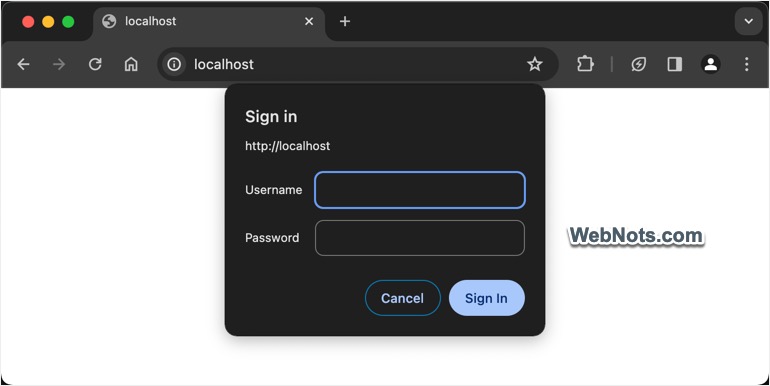
Generally, browser remembers the authentication and allows you to browse through all pages (will not prompt password for each page). Also, will not ask password when you close the site and reopens again. The problem comes when you enter the password wrongly (will see 401 unauthorized error) or some mistakes happened in your setup (will see 500 internal server error). In these cases, simply clear your browsing history and open the site. Now, you will see the password prompt again.


Points to Remember When Using Password Protection
Though this method works well, make sure to have some precautions to avoid security problems.
- Instead of using plain password in the .htpasswd file, you can also use the encrypted password. You can use any online tools to generate encrypted passwords. Though the password is encrypted in the files, you will still need to use the original password (like mypassword) in the browser frontend when accessing the site.
- It is possible to add multiple usernames and passwords in the file one per line. You can use any of the username / password to access your site.
- Make sure to upload .htpasswd file in a location where it can be accessed from the frontend.
- .htpasswd is the standard password management file in Apace server setup. You can learn more about how to use the file here.