Content management systems like Wix, Squarespace, and Weebly do not provide access to the backend server. Though this poses as a restriction, it eliminates many problems like access or file permission errors. Since self-hosted WordPress sites need a paid hosting server, you need to be aware of the basic file access setup. This works exactly like in the Windows or macOS computer to protect files and folders from unauthorized access. However, in WordPress, it will create problems like theme or plugin installation failure. Even your site will become inaccessible if read / write access to important files are changed. So, it is important to understand the basics of file permission, which will help in quick troubleshooting whenever there are issues in your WordPress setup.
Basic WordPress Structure
A WordPress site needs to assemble information using three primary sources for each page load:
- Content from database.
- Configuration and backend files from core WordPress software.
- Layouts and additional features from your theme and plugins.
While the database is located separately outside your WordPress installation, all other files are stored under the root directory of your site (generally /public_html/). Every file and folder on this root directory has permissions allowing who can read, write, or execute. By default, WordPress software and the hosting companies take care of all these permissions and you don’t need to worry anything. When permissions are incorrect, WordPress can’t assemble the content and show a relevant error in frontend or in the admin panel.
Checking File Permission Errors
The error depends on the file / folder missing permission and here are some common scenarios:
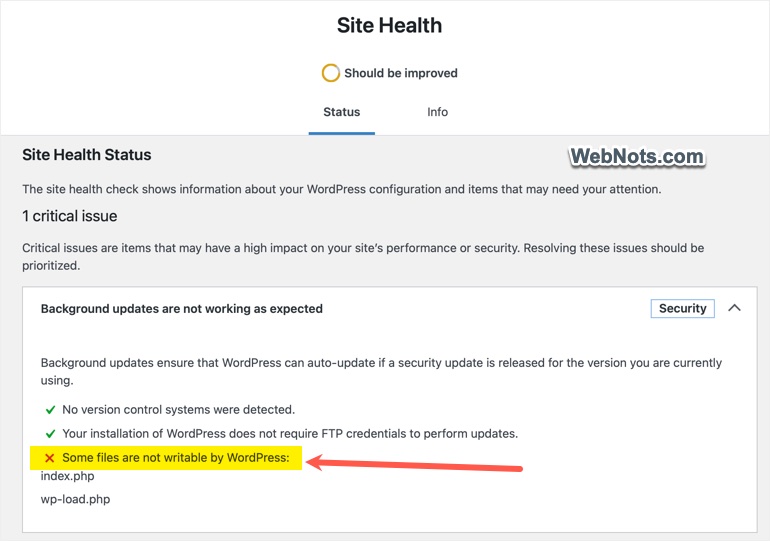
- For any errors in the background activities, go to “Tools > Site Health” section in your admin panel (if you can access). Here, you will find a list of files with incorrect permission.
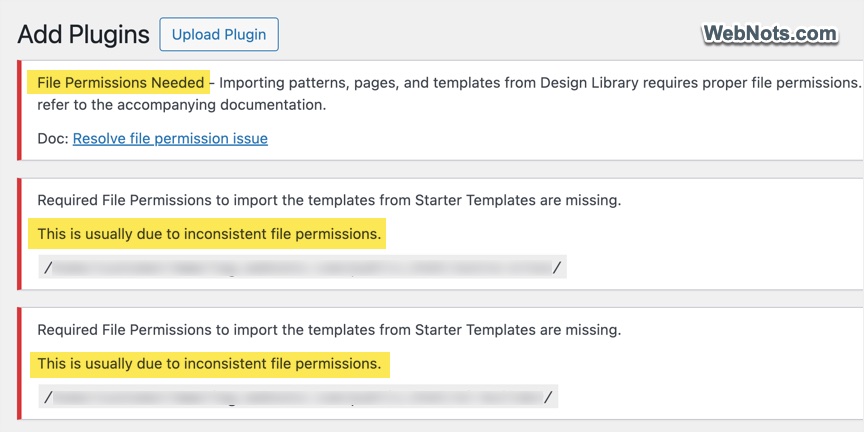
- In most cases, you will see an error immediately after activating a plugin or theme as the plugin / theme can’t access or create new folders under /wp-content/uploads/ or in your media uploads directory.
- Some plugins (caching, security, and SEO) change the files on root directory like robots.txt and .htaccess. Even WordPress needs to insert a code block in .htaccess file if you are using permalinks. You will see an error if those files don’t have read and write access.
WordPress File Permissions Setup
There are two things to consider for file permissions: user and permission mode. There are three user types:
- Owner: the account that owns the file.
- Group: users in the same group as the owner (used for activities like auto updating WordPress).
- Public: everyone else.
Unix and the modern Linux systems use four digits for a file permission mode like 0755, 1644, or 4600. However, WordPress uses last three digits number like 755, 644, or 400. Each number defines the sum of all three permission modes:
- 4 means read access (r).
- 2 means write access (w).
- 1 means execute access (x).
- 0 means no access (–).
So, here is how it works if the file permission is set as 755.
| User / Permission | Read (4) | Write (2) | Execute (1) | Value |
|---|---|---|---|---|
| Owner | ✅ | ✅ | ✅ | =4+2+1=7 |
| Group | ✅ | ❌ | ✅ | =4+1=5 |
| Public | ✅ | ❌ | ✅ | =4+1=5 |
This means the file owner has read / write / execute access while group and other public users have read / write access.
By default, WordPress sets 644 permission for most files and 755 for folders. You can change the permission to 600 or 640 for specific files like wp-config.php to add extra security. There are multiple ways to do that including SSH command line. However, that will be for advanced users and here we will show with FTP client FileZilla and through File Manager app in your hosting account.
Change File Permissions with File Manager
File Manager is one of the default apps in cPanel and most other custom hosting panels.
- Log in to your hosting account, find and open the File Manager app.
- Go to the root of your WordPress installation (/public_html/).
- Check under the “Permissions” column to find the current value.
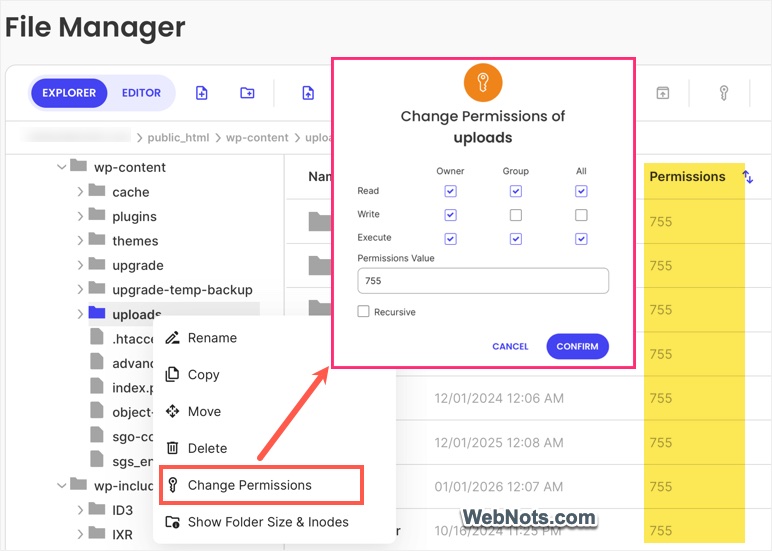
- Right-click the file or folder that you want to change the permission and select “Change Permissions” option.
- Check the necessary options for each user type and confirm the correct permission value is shown.
- If you have selected the folder, check the “Recursive” option if you want to apply the same permission level to all files and sub-folders inside the selected folder.
- Click “Confirm” or “Apply” button.
Change Permissions using FTP
FTP access gives more control and works on most hosting environments.
- Connect to your site using an FTP client such as FileZilla.
- Go to the folder or file which you want to change the permission.
- Right-click and select “File permissions…” or similar option.
- Directly set the permission value or select access level for each user type (the value will be automatically calculated as explained above).
- Select the recursive option if needed and apply the changes.
- Check the new value under the “Permissions” column.
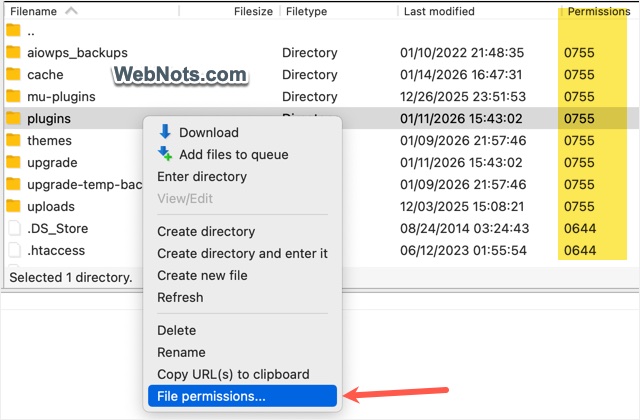
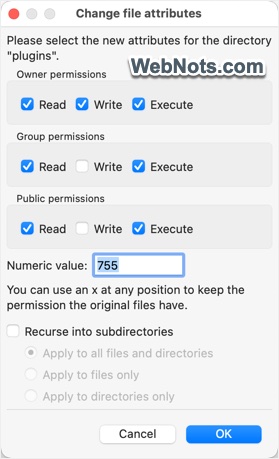
This should resolve all file upload errors in your admin panel (you need to set 755 for /wp-content/uploads/ folder).
Note: As you can see, the permission shows in four digits in FileZilla while it shows three digits in File Manager.
Using Firewall and Security Plugin
It is a difficult task to manually check and set recommended permissions for all files in your installation. There are two options available for you:
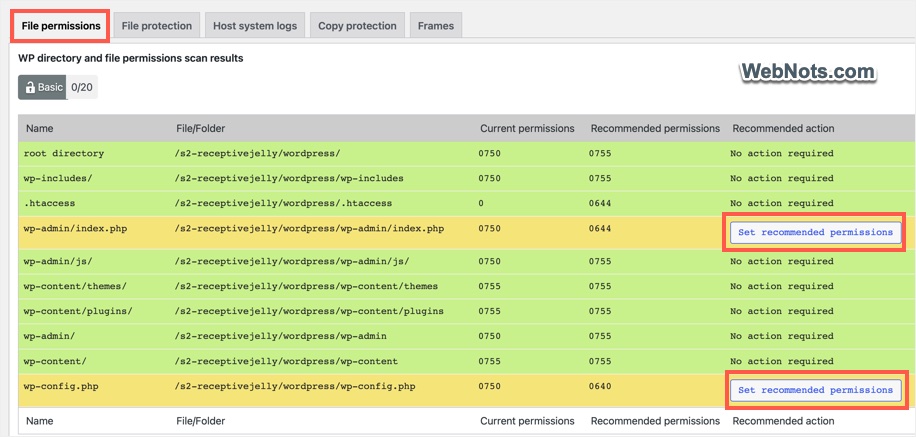
- Use a Security Plugin like All-in-One Security: After activating the plugin, go to “AIOS > File Security > File Permissions” section. The plugin will automatically scan WordPress core files / folders and recommend any action needed. Simply click on the “Set recommended permissions” button against a file / folder to change the permission value.
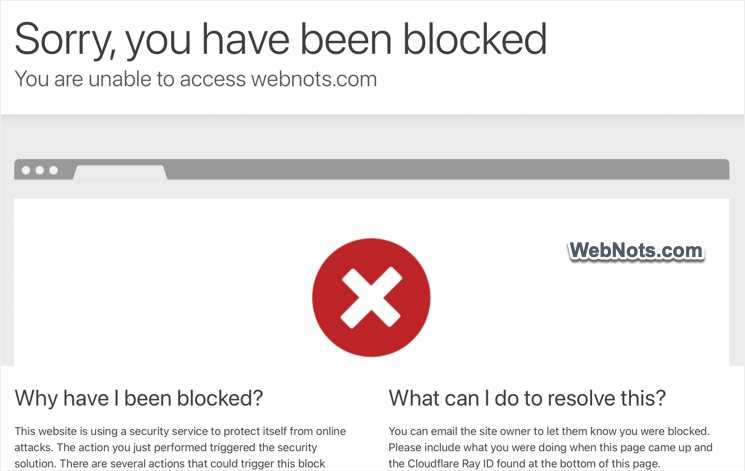
- Using Web Application Firewall like Cloudflare: This is the easiest option to apply the Web Application Firewall (WAF) to protect your site. Since the traffic is routed through Cloudflare DNS, entire site will be protected even before someone trying to access the sensitive files.
Conclusion
We hope this article provided an overview of checking and changing the file permissions in WordPress sites. Make sure to never use 777 for permission as this will grant full read/write/execute access to everyone creating a major security risk. As mentioned, using a security plugin to regularly scan your site for setting recommended permissions for all files and folders.
If permission errors persist despite correct settings, the issue may be server level restrictions such as SELinux, hardened PHP settings, or locked ownership. In these cases, contact your hosting company’s support to resolve the issue quickly without risking site stability.