Mac comes with a system app called Terminal which is a command-line interface (CLI) for macOS. This is similar to the Windows Terminal app that includes Command Prompt and Windows PowerShell. By default, you will be getting things done using the graphical user interface with your mouse to click through menus and windows. Have you ever wondered, what lies beneath that graphical layer? Beneath the surface, your Mac runs on Unix operating system and Terminal app allows you to interact directly with Unix using text-based commands (primarily with the keyboard). This guide will introduce you to the Mac Terminal app, helping you to understand its purpose, essential commands, and how to harness it for everyday tasks.
Why to Use Terminal?
You might ask, “Why bother with Terminal when my Mac’s interface is so user-friendly?” Here are some compelling reasons:
- Many tasks can be completed faster with a few keystrokes than through graphical interface.
- Some features and files are only accessible or modifiable via the command line.
- Repetitive tasks can be scripted, saving your huge time and effort.
- Understanding Terminal can deepen your knowledge of how computers work, making you a more capable and confident user.
Opening Terminal App
To launch Terminal, first open Finder and navigate to “Applications > Utilities” folder. There you can find the Terminal app and double-click on it. Alternatively, press “Command (⌘) + Space” keys to open Spotlight, then type “Terminal” to search and find the app. You can also open Terminal directly from Finder app.

When Terminal opens, you will see a window with some text and a thick cursor as shown below (iMac and MacBook Pro). This is your command prompt, ready to receive instructions.


Note: Type quit in the prompt (or press q in some cases) to terminate the running process. For closing the app, go to “Terminal > Quit Terminal” menu.
Understanding the Terminal Window
Terminal window shows the last login information and a unique pseudo teletype (pty) like ttys000 in the first line. You may also find console or base instead of ttys000. After that the prompt appears, which typically looks like username@computername ~ %.
Here:
- username is your Mac account name.
- computername is the name of your Mac.
- ~ represents your home directory.
- % (or $ in some setups) indicates that Terminal is ready to accept commands.
Terminal will open with zsh shell window as a default Unix command interpreter. If required, you can change it as explained below in “Customizing Terminal App” section. It is also possible to split the window to two panes by clicking on the “Split pane” icon showing below the + icon (remove the splitting by clicking on the “Close split-pane” icon that appears below the Split-pane icon).

You can open multiple tabs (press the + icon on top right corner or press “Command + T” keys) or use multiple windows (multiple instances each with unique ttys number) to work on multiple tasks.
Running Terminal Commands
Terminal deals with files and folders (directories) using commands. The macOS file system is hierarchical with the root of the system is / and your user files live in /Users/yourusername (called Home directory (~)). You can simply type or paste a command and press enter to run it. For example, type pwd and press enter to display the current working folder. PWD stands for “Print Working Directory” which tells you where you are in the file system (generally, it will be your user account folder).

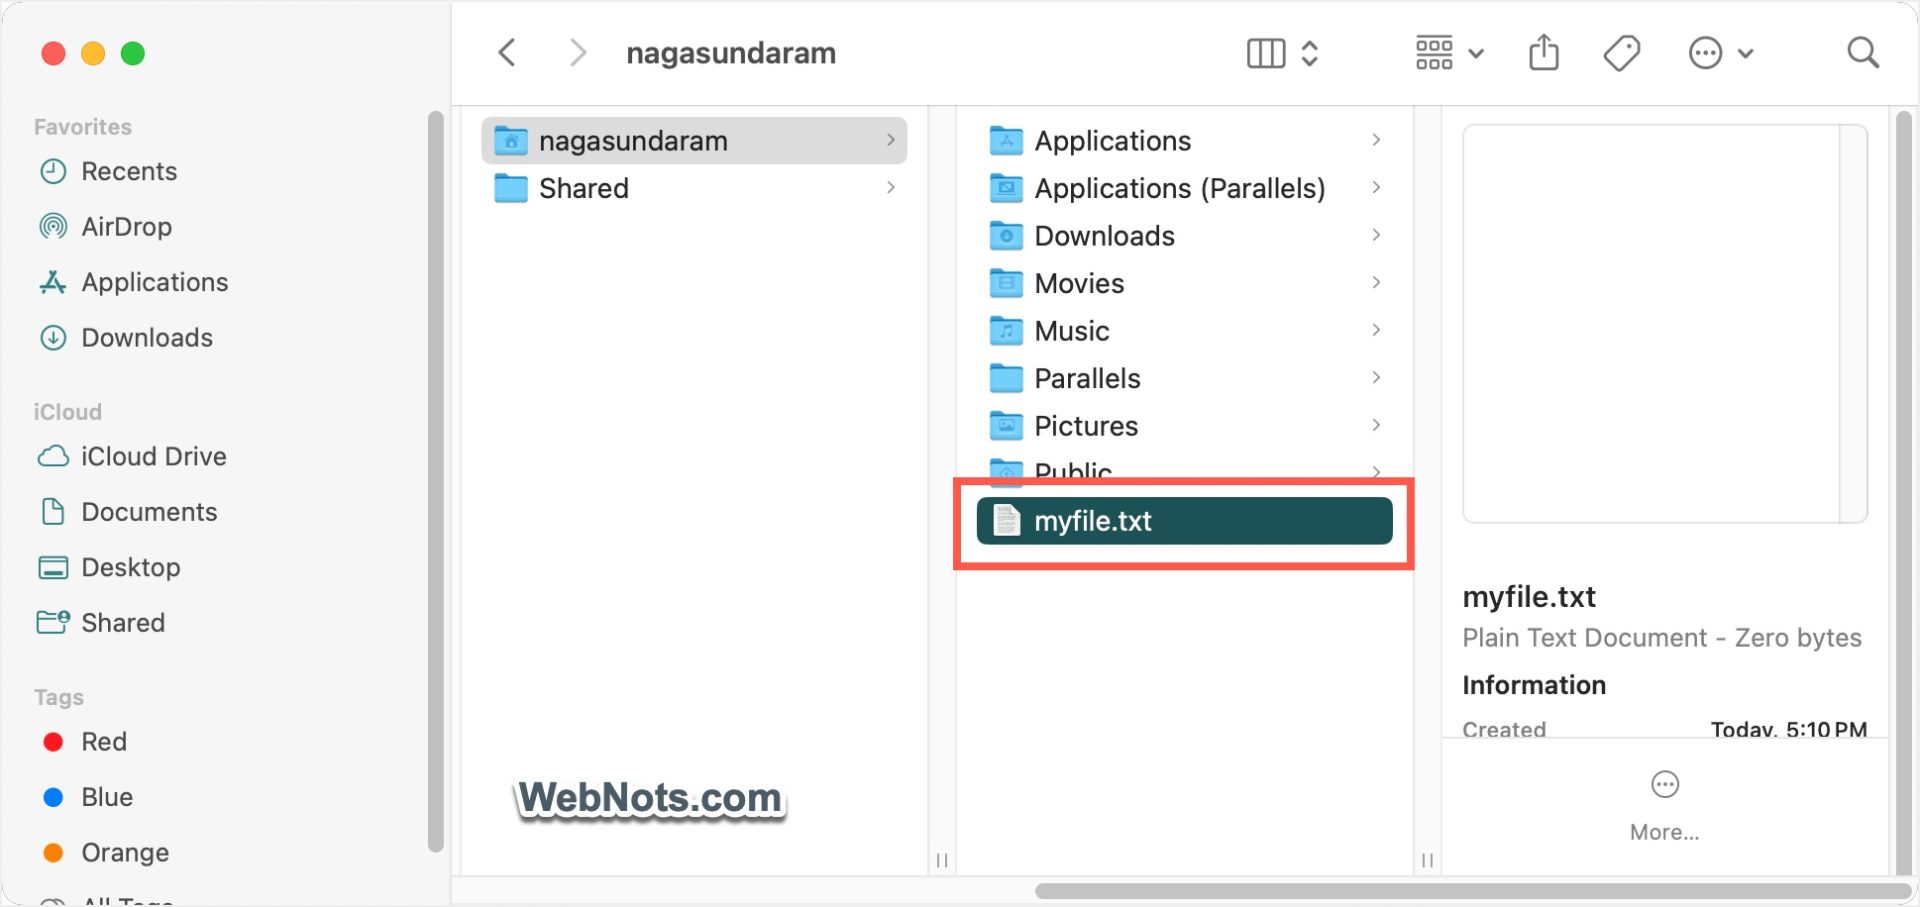
Another example is – type touch myfile.txt and press enter to create a new text file in your current directory.

If you are in the Home directory, open Finder and go to “Go > Home” or press “Command + Shift + H” to open your Home directory. There you can find the new text “myfile.txt” is available.
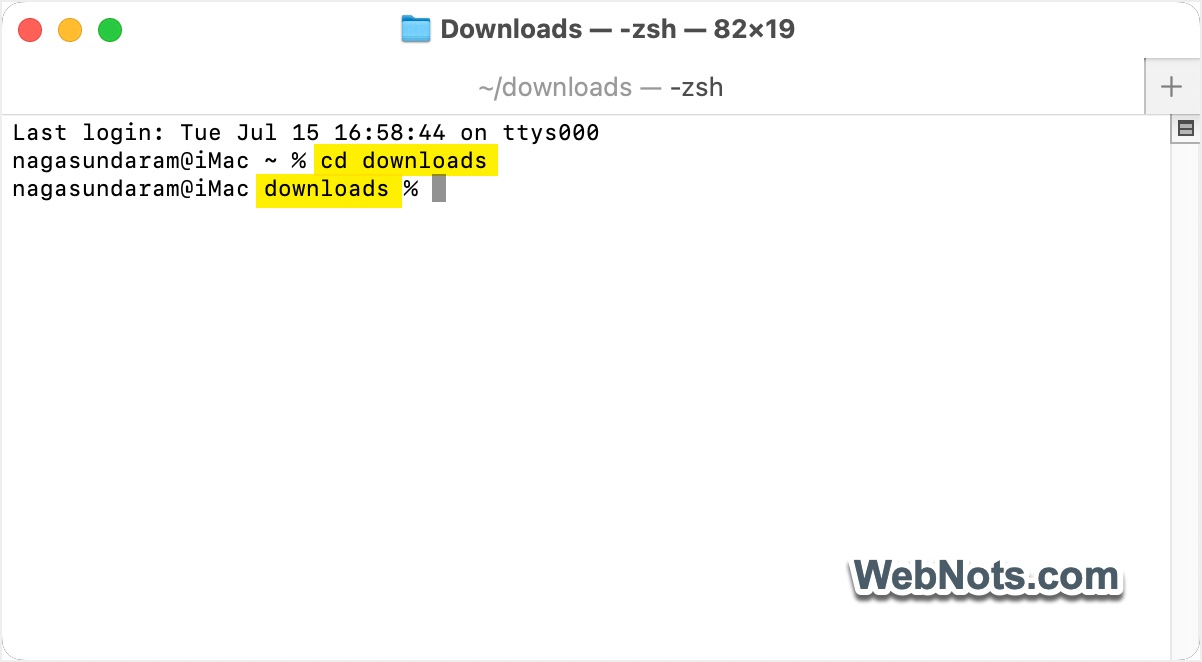
For changing the prompt, use cd directoryname and press enter. For example, cd downloads will change the prompt to your Downloads folder.
Here are some more frequently used commands for Mac and you can check our detailed article on 50 useful macOS Terminal commands.
| Command | Description | Example |
|---|---|---|
| ls | Shows what files and folders are in the current directory | |
| mkdir | Creates a new folder | mkdir MyFolder |
| cp | Duplicates files or folders | cp myfile.txt copy.txt |
| mv | Moves or renames files and folders | mv myfile.txt Documents/ or mv oldname.txt newname.txt |
| rm | Permanently deletes files. | rm myfile.txt |
| clear | Clears the Terminal window of previous commands | |
| cd ~ | Returns you to your home directory | |
| cd .. | Moves up one level in the directory tree | |
| cd / | Takes you to the root directory of your Mac | |
| cat filename.txt | Shows the entire content of a file | |
| open filename.txt | Opens the file in the default application (for example, TextEdit) | |
| say “text” | Your Mac will speak the text aloud | Quote is optional for the text, also works with single quote. |
| open . | Opens the current directory in Finder. | |
| history | Displays your command history. | Use up arrow to scroll through previous history. |
Go to “Edit > Clear Screen” menu to clean the app window (all previous command can be accessed by scrolling up). If you completely want to wipe off the app window, go to “Edit > Clear Scrollback” menu.
Check out the complete list of keyboard shortcuts for Terminal app to boost your command-line productivity on Mac.
Customizing Terminal App
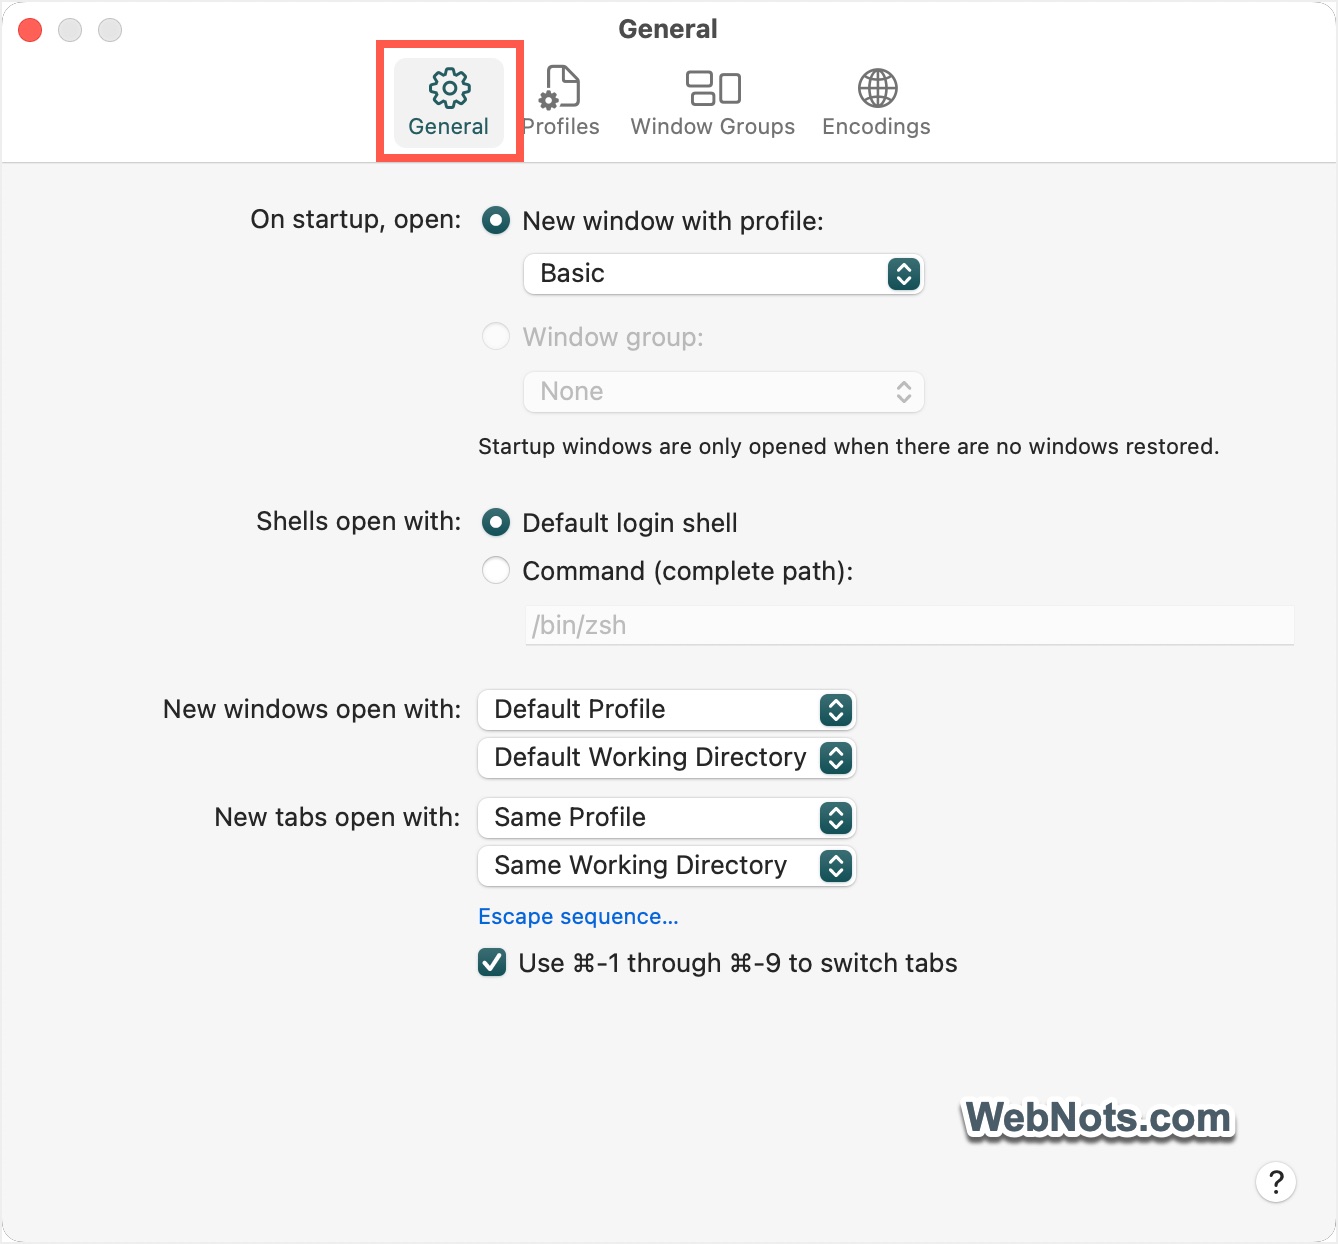
Terminal – like other Mac apps – will follow light or dark mode from macOS level setting. You can make the app more comfortable by going to “Terminal > Settings” menu.
- General: Change the default profile, login shell (zsh) to other command, working directory and the new window / tab behaviors.
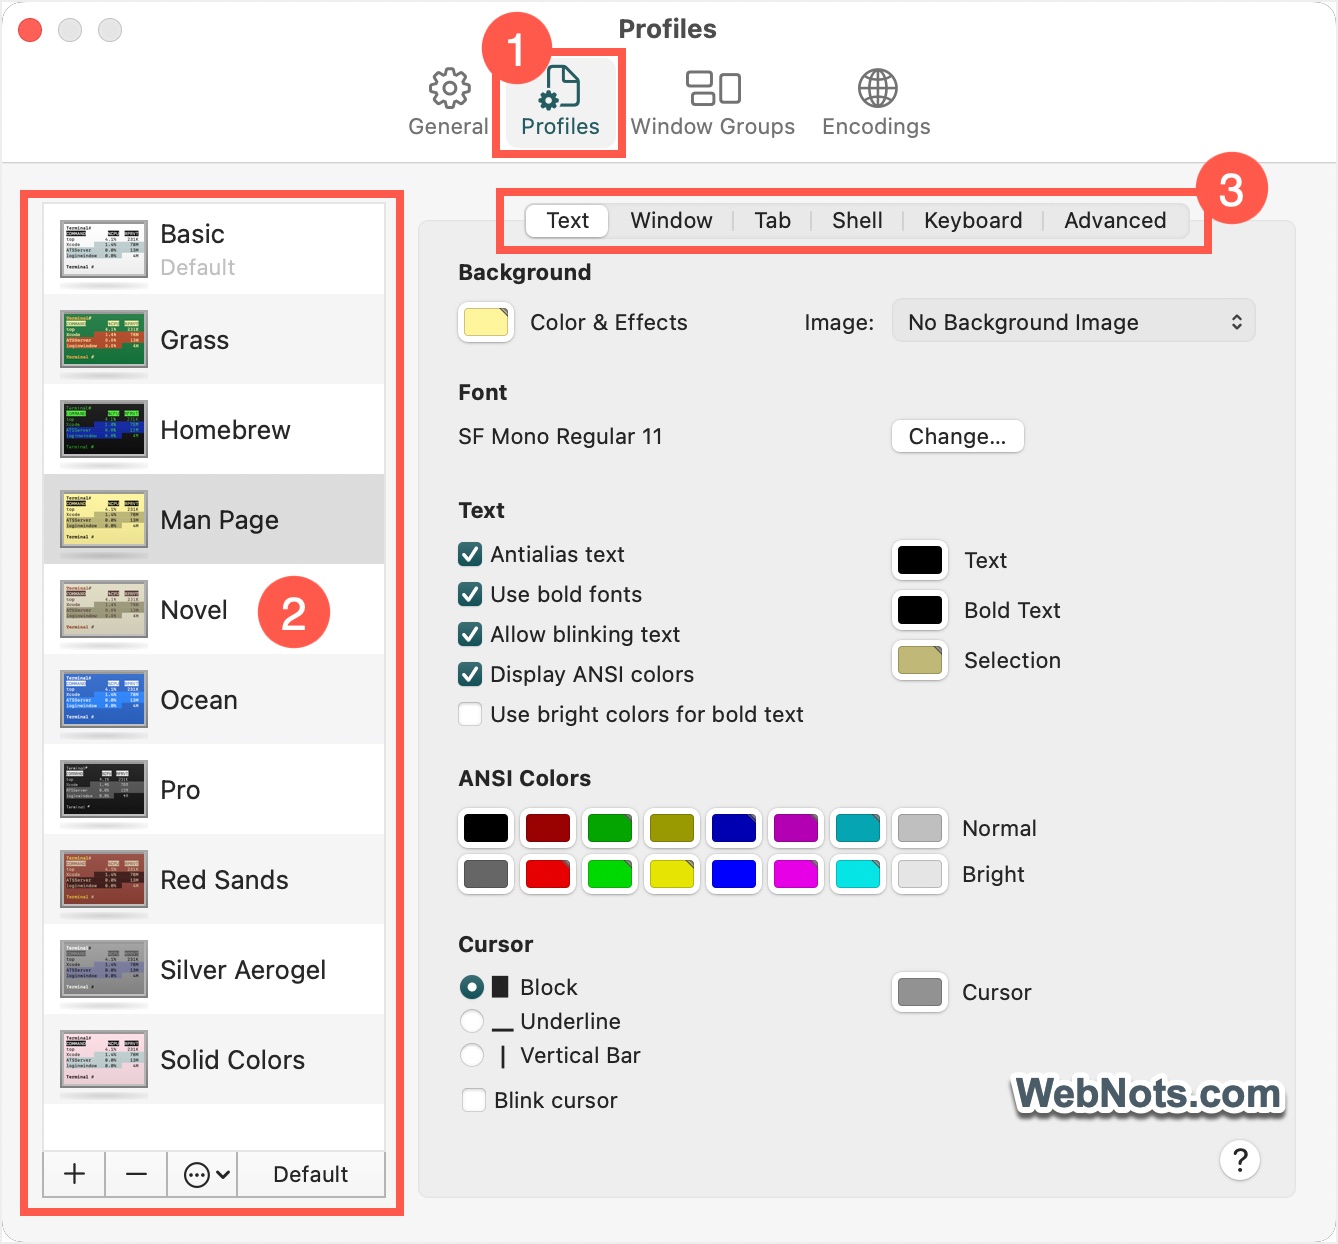
- Profiles: Choose one of the existing profiles or create a new one to change the appearance of Terminal app. You can change the font size, font family, background color scheme, default window size (rows & columns), key functions, text encoding, etc. to change the app for your convenient use.
- Windows Groups: Go to “Window > Save Windows as Group…” to group the frequently used windows and open them automatically when you launch Terminal app.
- Encodings: Enable or disable the available text encoding standards.
Below is how the app will look with Ocean and Homebrew profiles using the default settings.


Scripting and Automation
Once you’re comfortable, you can begin automating tasks using simple scripts. We are not covering this in detail but below are some simple steps:
- Create a text file with a .sh extension (e.g., myscript.sh).
- Add commands to the file. For example:
#!/bin/bash
echo "Hello, world!"- Make it executable with chmod +x myscript.sh.
- Run it with ./myscript.sh.
Scripting can save you time, especially for repetitive workflows.
Safety First: Tips for Avoiding Mistakes
Terminal is powerful, but with great power comes responsibility. Here are safe practices:
- Remember that the Terminal does not have an “undo” button. So, be wary of commands copied from the internet – always understand what they do first.
- Avoid using sudo (administrator), rm (delete), or any similar command that recursively deletes files. This can erase your entire system.
- Use man command for manuals (for example – man ls shows help for ls command).
Final Thoughts
The Mac Terminal app is a window into the heart of your computer – a place where you can unlock efficiency, automation, and a deeper understanding of your Mac. Though it may feel daunting at first, with practice, you will find the command line is easier and quicker for finishing tasks.