It’s easy to rename single file and folder on Mac. However, sometimes you need to rename many files at once and doing it one by one can take a lot of time and effort. So, you might be wondering how to rename multiple files at once easily. Good thing is that there are several ways to bulk or batch rename Mac files for different skill levels and needs. In this article, we will explore all the available options along with common mistakes to avoid when renaming your files.
Rename Multiple Files on Mac
You can use the built-in macOS options available in Finder, Automator, or Terminal, or choose a third-party app such as Tenorshare Cleamio. Select the option that best fits your needs.
1. Batch Renaming Files in Finder
Many users don’t know the Finder app in macOS comes with a hidden batch rename feature allowing you to rename multiple files without command-line (Terminal) or installing another app. You can replace text, prefix or suffix text, add counters (number) and dates to files automatically, and it also lets you preview and undo changes.
- Locate your files in Finder and select the items you want to rename. Use Command + A keys to select all files, Shift + Click to select a block or Command + Click to select separate files.
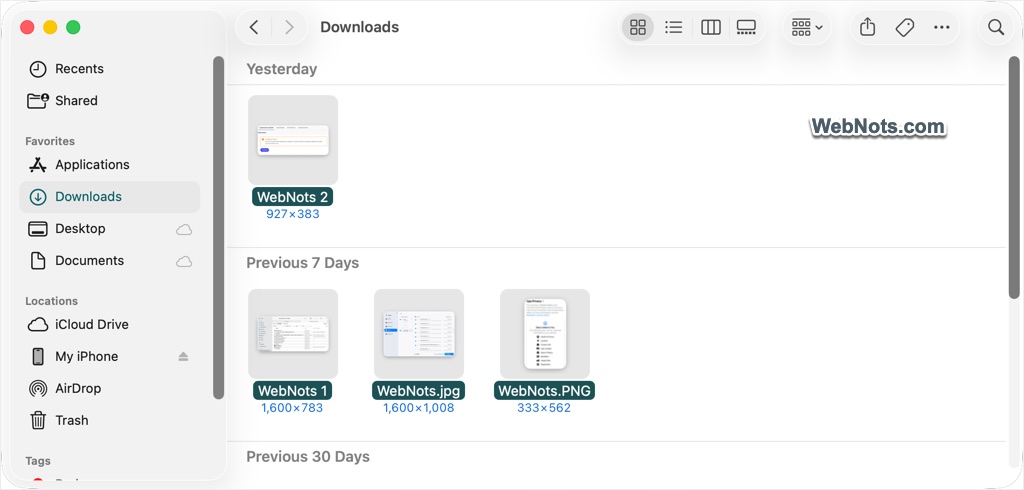
- After selecting the required files, go to “File” menu from top menu bar and select “Rename…” option.
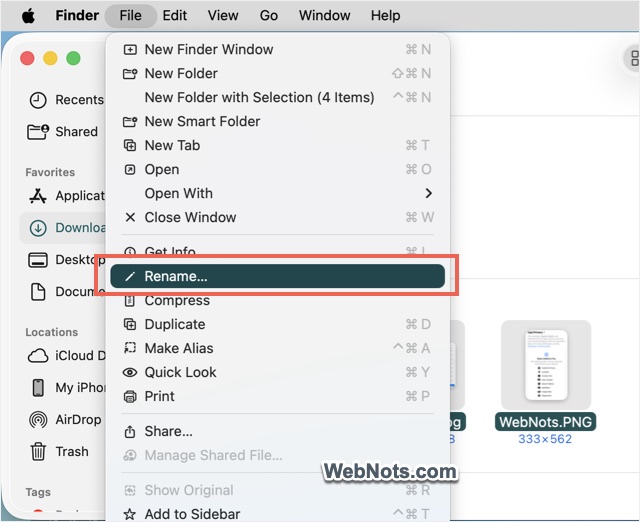
- It will show you the “Rename Finder Items” pop-up allowing you to select the one of the following logic for renaming the files. Note that the options displayed will change based on the logic you select.
- Replace Text: Change specific words or file extensions in the name by providing inputs in the “Find” and “Replace with” boxes.
- Add Text: Include text before or after the existing name.
- Format: Add a counter, index, or date before or after the file name.


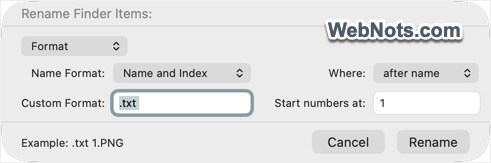
- After selecting the logic, click “Rename” button to apply changes.
If you made a mistake in renaming the files, and wish to undo, simply press Command + Z keys or for select “Undo Rename” from “Edit” menu.
2. Using a Batch File Renamer App
Though it’s easier to use Finder, it doesn’t support advanced renaming options and is best only with same file types (for example – multiple text files or JPEG images). If you need to rename files frequently without mistakes, third-party apps like Tenorshare Cleamio’s AI File Renamer can help you with that. It automatically gives your files clear and consistent names based on the content type, making it easier to stay organized and save time. You can choose different languages for file names and preview the new names before saving them.
- Download and install the app from their official website. It’s an all-in-one app for cleaning up your Mac and comes with a free 7-days free trial.
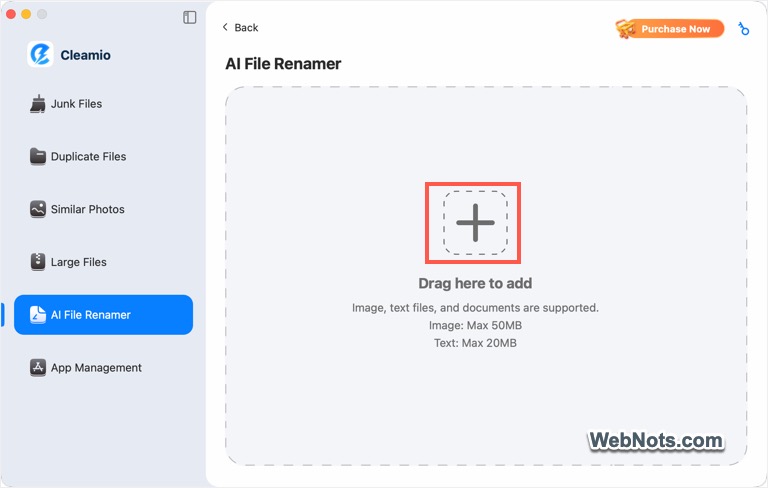
- Launch the app, go to “AI File Renamer” option from the left menu and click “Start” button.

- Click the “+” button or drag and drop files which you want to batch rename. The allowed maximum file size is 50 MB for images and 20 MB for text files.
- After adding the files, click the “Gear” icon on the bottom and select the language. The app supports most popular languages like English, Japanese, Korean, Chinese, etc.
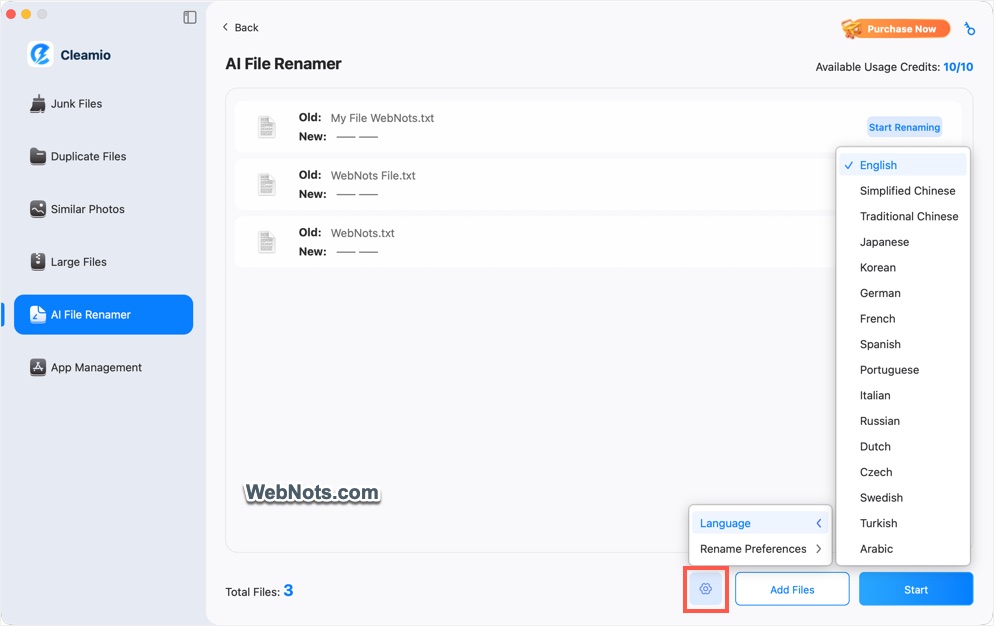
- Go to “Rename Preferences” and select one of the naming combinations using Content, Owner and Date.
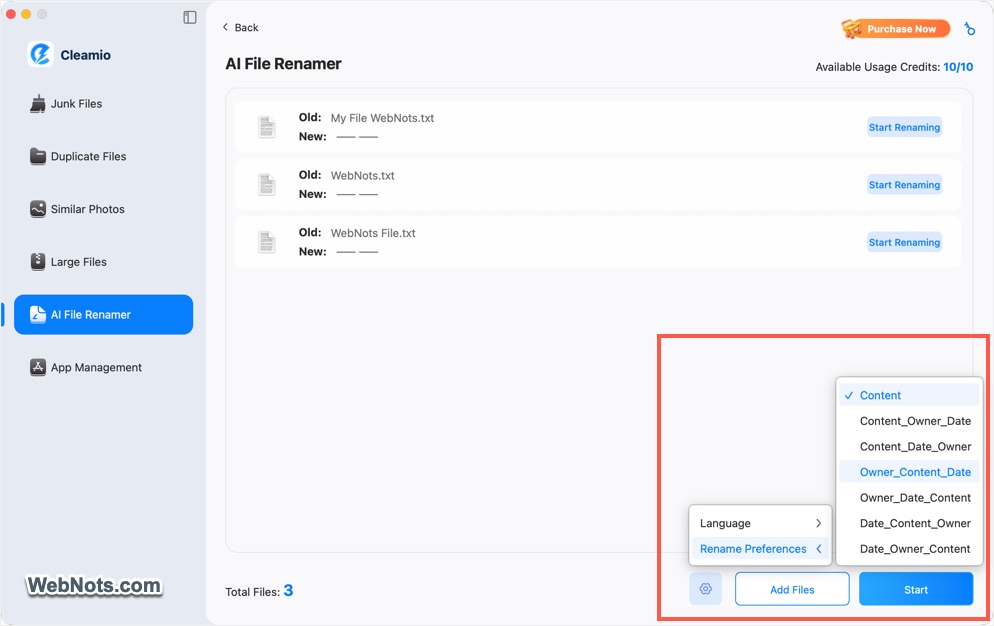
- Click “Start” to let the AI scan and batch change file names.
- Check the new names and click “Confirm” to save or “Regenerate” to try different names.
If you like the app, you can purchase it with a one-time fee of $69.95 or subscribe monthly for $24.95 or yearly for $59.95.
3. Using Automator Workflow
Though “Automator” app is not primarily used nowadays, you can still the app to rename multiple files on Mac by creating a workflow. This is a flexible method for saving time for repeated tasks and can be reused. However, it may be challenging for beginners and can change the original details files if used incorrectly. So, use it with care.
- Open Finder and launch the “Automator” app from “Applications” folder.
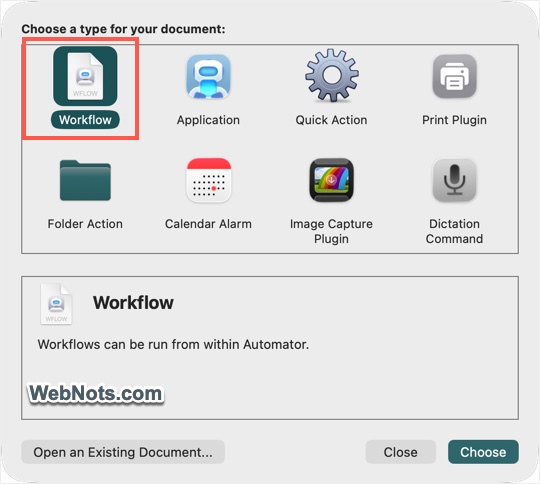
- Go to “File > New” menu and choose “Workflow” option for the type of document.
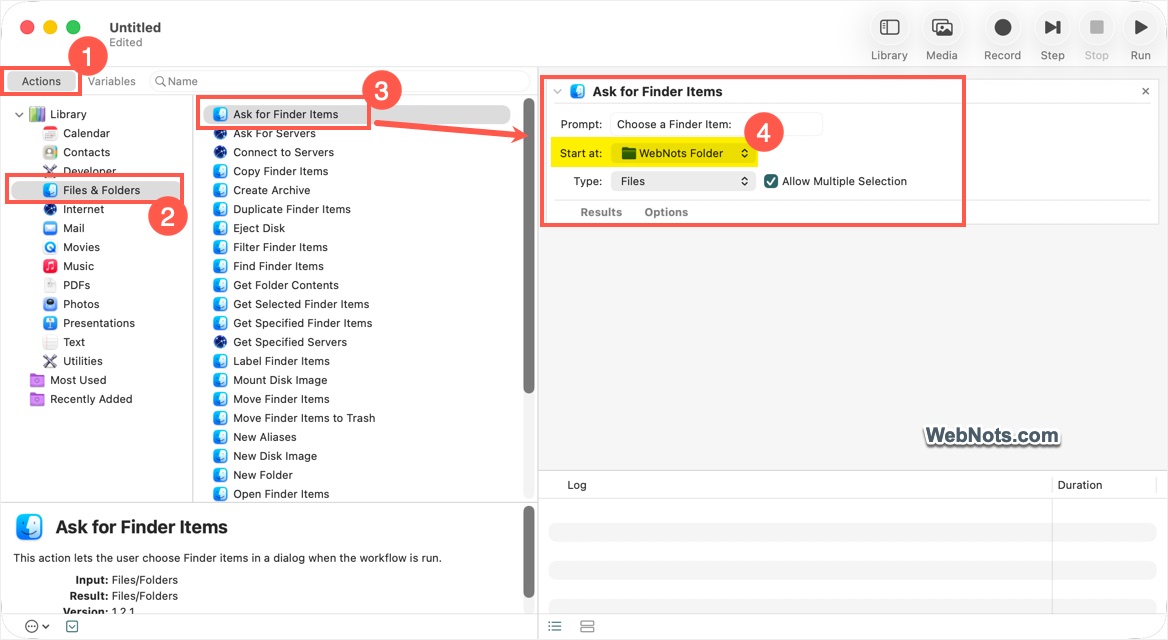
- Select “Files & Folders” action from the “Library” under “Actions” tab.
- Drag “Ask for Finder Items” item and drop into the workflow window. Click the “Start at” drop-down, select “Other…” option and choose the folder that contains your files.
- Make sure the check “Allow Multiple Selection” check box.
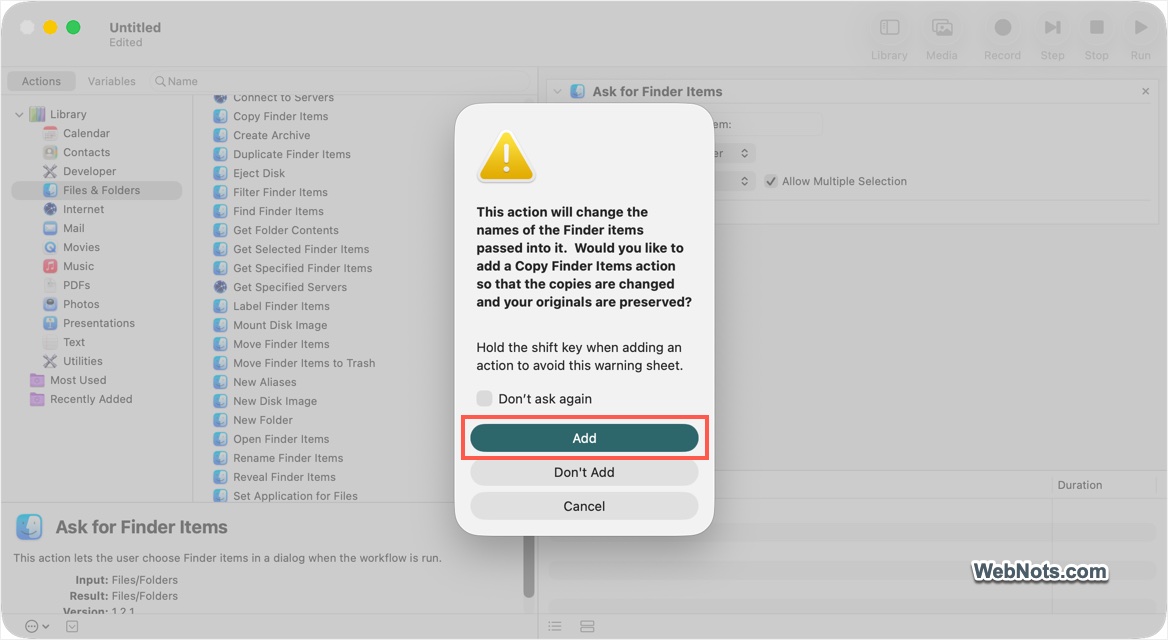
- Next, drag “Rename Finder Items” into the workflow. It will suggest copying files first to protect originals and click “Add” (this will add “Copy Finder Items” action in the workflow).
- Select the renaming logic like adding date, adding / replacing text, change case or make sequential.
- Click “Run” button on top right corner to rename the files as per the logic.
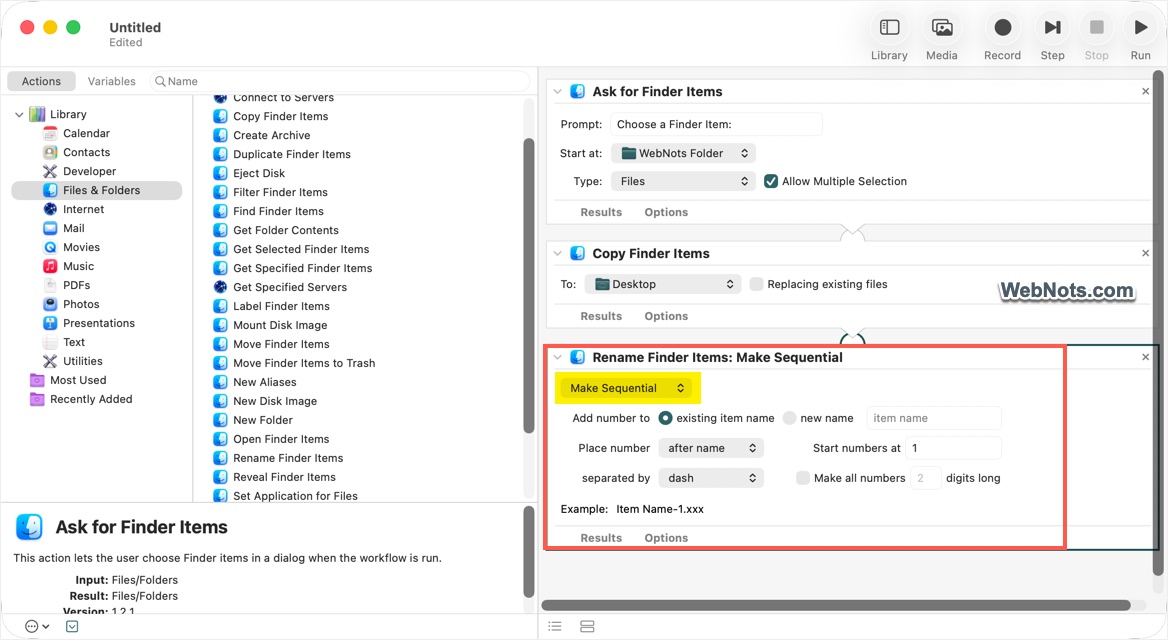
As mentioned, you can save the workflow and reuse whenever required to rename the files in the selected folder. Otherwise, every time you can choose a different folder before running the workflow.
4. Using Terminal for Bulk Renaming Files
Terminal is the default command-line interface on macOS, which you can use to rename multiple files at once. By using commands like mv and a for loop, you can apply the same naming rule to multiple files, which gives you more control and consistent results. You can also rename files based on patterns, add prefixes or suffixes and change file extensions.
- Go to “Finder > Applications > Utilities” and open the Terminal app.
- Use CD command to change the prompt to the folder that contains your files. For example, below command will change the path to “Downloads > WebNots Folder” in your current user directory.
cd Downloads/WebNots\ Folder- You can use the “for” loop to add a suffix to multiple files. For example, the below command will automatically add -new as suffix to all files in “WebNots Folder”.
for file in *; do mv "$file" "${file%}-new"; done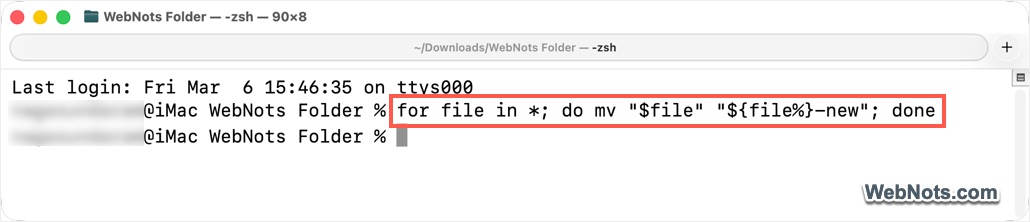
- Similarly, use the following command to add a prefix like old- to all files in a folder:
for file in *; do mv "$file" "old-${file%}"; done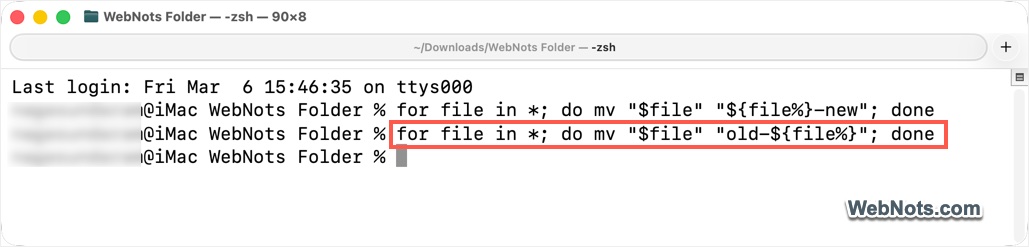
You can use complex commands to replace text and add other prefixes / suffixes (like date). Remember Terminal has no undo option, which means mistakes can overwrite files or cause errors. So, use it with caution and only if you know basic knowledge of command-line interface. Always preview the files in Finder and make sure they are properly renamed as per your logic.
Common Mistakes to Avoid When Renaming Multiple Files
As small mistakes can cause big problems when renaming files on bulk, here are some precautions to avoid unforeseen results:
- Avoid replacing files accidentally by not assigning the same name to different filetypes, which can overwrite existing ones (for example webnots.txt, webnots.png, and webnots.jpg).
- Do not use unclear or random names that make files difficult to identify later.
- Keep file extensions such as .jpg or .pdf unchanged, otherwise the file may not open correctly.
- Check the preview of new file names before confirming the changes.
- Use a reliable file renaming tool to reduce errors and save time.
Conclusion
As you can see, using Finder is the simpler option and you can undo the mistakes quickly. Though Automator and Terminal are more powerful but not beginner-friendly as you might overwrite the files mistakenly. For a quicker and automated solution, especially if you are not much worrying about the file names, AI renaming tools like Tenorshare Cleamio do the good job. This helps you to stay organized without complicated steps and keep consistent names based on file content.