There are so many photo editing apps available for Mac to edit your pictures. It is also possible to install iPhone / iPad apps on Macs with Apple chip making photo editing a kid’s task. However, in most situation all you need is to simply crop an image and resize. Perhaps you have taken a screenshot with black edges or a personal picture has blurry edges that you want to remove. Good thing is that you don’t need to install any third-party apps as Mac offers several built-in tools to crop images quickly and easily.
Before Cropping Images
Remember the following points before you edit an image:
- Always save the cropped image as a new file to preserve the original. You can later delete the original if not required.
- When cropping, consider the aspect ratio to avoid distorting the image. Most tools allow you to lock the aspect ratio.
- Use grid lines to help align your crop with the rule of thirds or other compositional guidelines.
1. Cropping Your Screenshots
Follow the below steps if you want to crop a captured screenshot.
- First, make sure the app window you want to capture is visible on the screen.
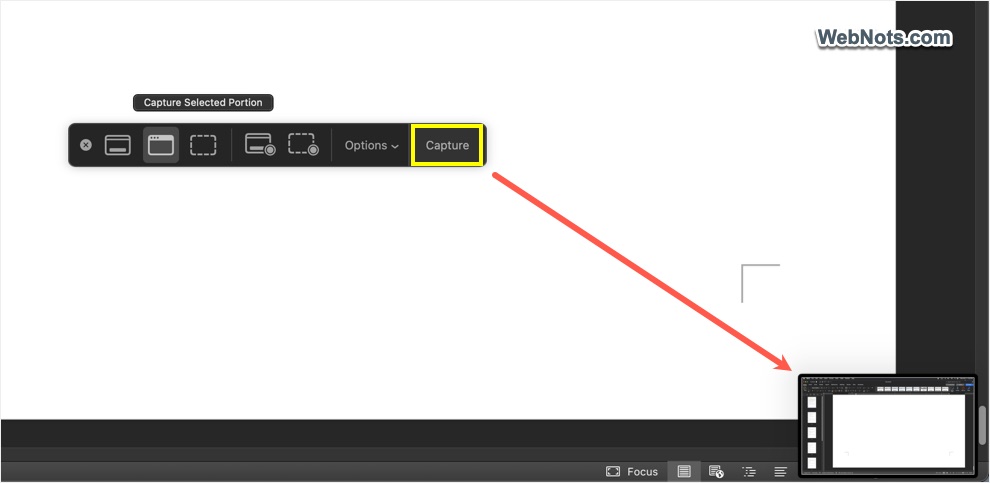
- Press “Command + Shift + 5” or search and open Screenshot app.
- Select the mode and click “Capture” button to take a screenshot.
- You will see a floating window on bottom right corner showing your captured image and click on it. Note that you need to click on the floating image quickly before it disappears.
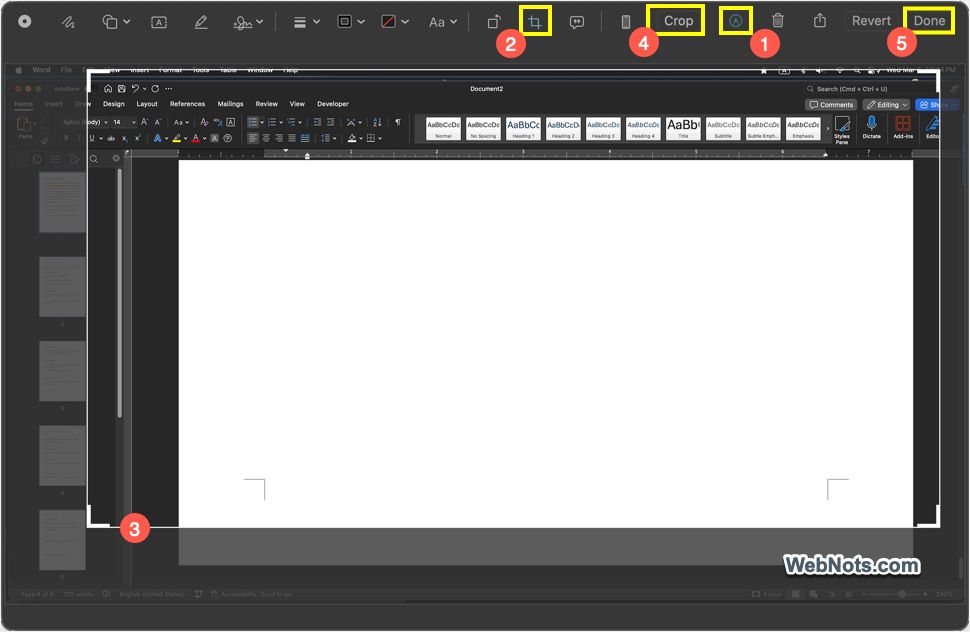
- Now, the screenshot will open in a Markup editor tool. Click on the “Markup” icon (looks like a pencil on top right corner) and then the “Crop” icon.
- You will see the cropping option on the corners of the image. Drag and adjust the corners to crop your image to required size and portion.
- Click “Crop” / “Done” buttons and the image will be automatically saved in your Desktop folder (or the default location you have selected in Screenshot utility).
2. Cropping Images from Finder
Though the above method is easy, it is only useful for your own screenshots. Good thing is that the Markup editor you see in the above option is an extension on Mac which you can directly use from the Finder app. This means you can edit any image (including captured screenshots) from Finder.
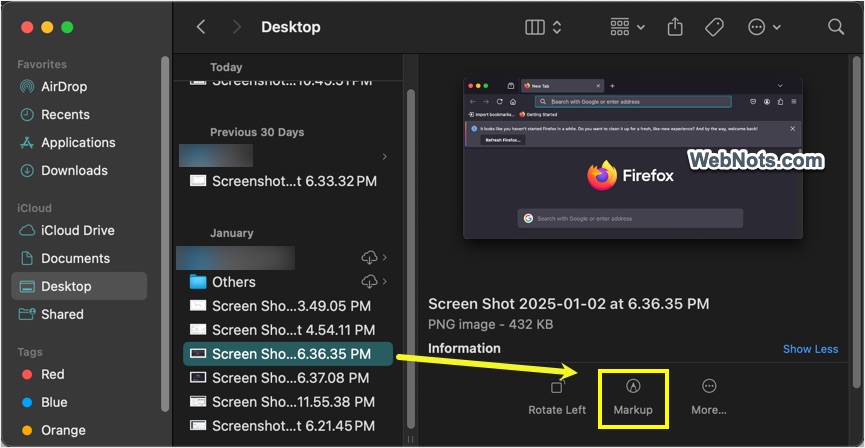
- Open Finder and select the image you want to edit.
- If you are not seeing the image preview on the right side, go to “View” menu and select “Show Preview” option or press “Command + Shift + P” shortcut keys.
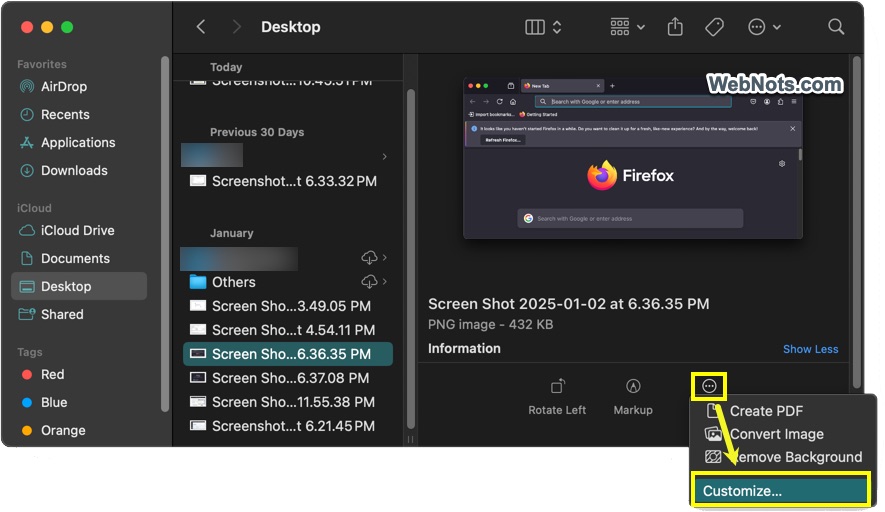
- Under the image preview, click on the “Markup” extension icon.
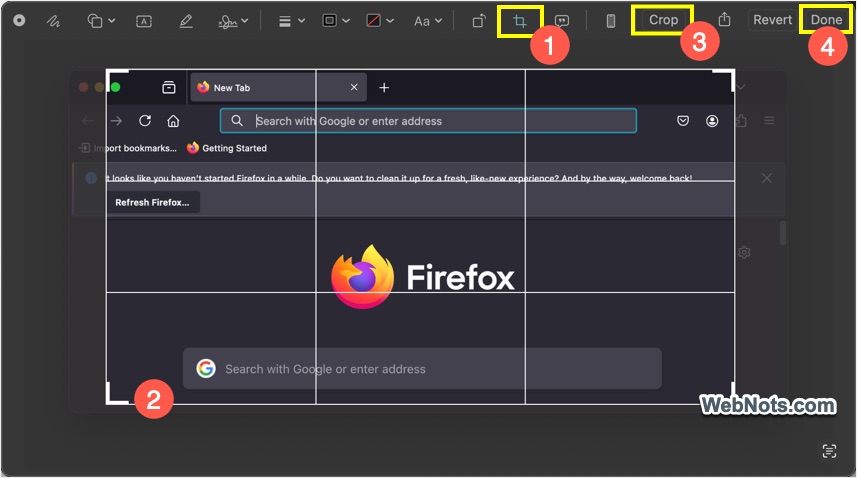
- This will open the Markup editor and click the “Crop” icon.
- Resize your image to the required size and click “Crop” / “Done” buttons.
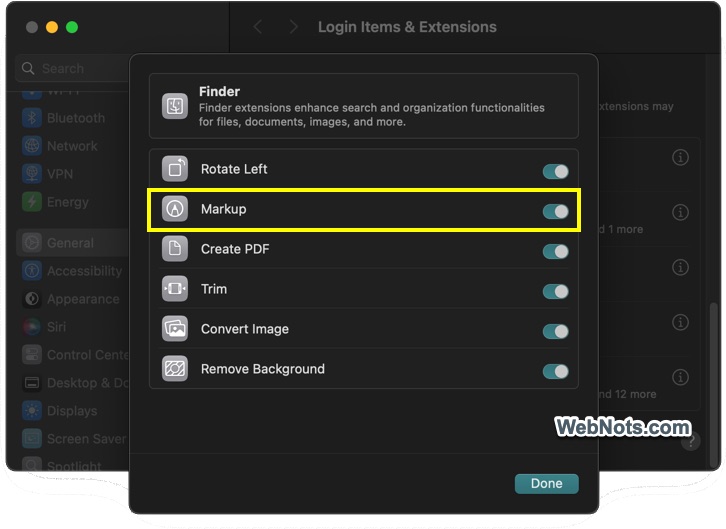
Note: If you are not seeing “Markup” extension icon in Finder, click on the “More” option and then select “Customize…”. This will take you to “Settings > General > Login items & Extensions > Finder”. Turn on “Markup” option to show it in Finder.
3. Crop Images Using Preview
Preview is a versatile app that comes pre-installed on every Mac. It’s perfect for basic image editing, including cropping.
- Locate the image you want to crop in Finder.
- Right-click on the image and select “Open With > Preview” option.
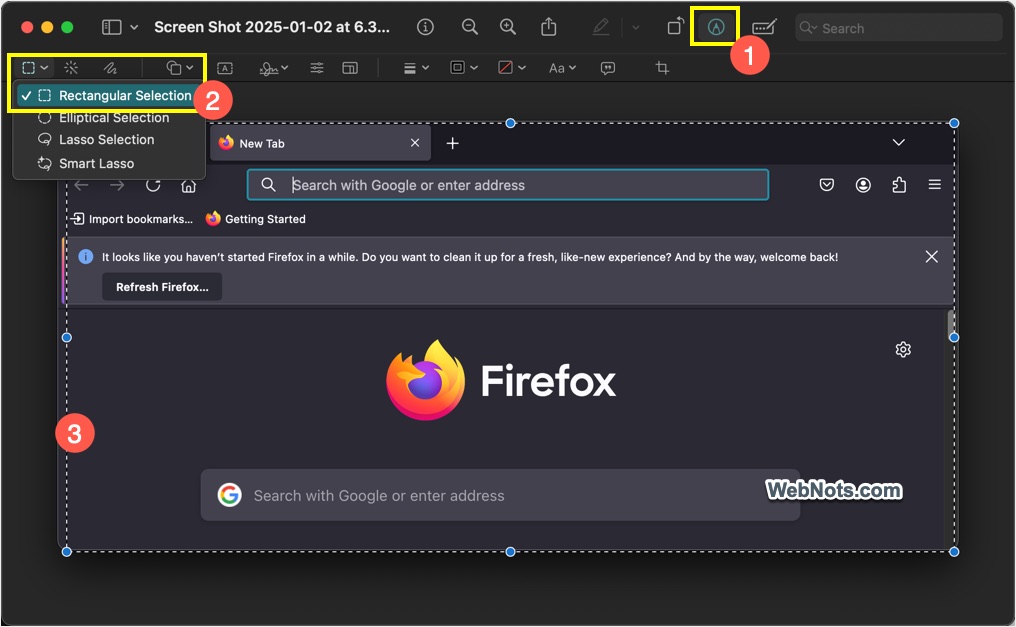
- In the Preview toolbar, click the “Show Markup Toolbar” icon.
- Click the “Selection Tools” icon (a dotted square) and then select “Rectangular Selection” tool.
- Click and drag your mouse to select the area you want to keep. You can adjust the edges of the selection by dragging the corners or sides.
- Once you have selected the desired area, click “Tools > Crop” in the menu bar or press “Command + K” keys. The image will be cropped to the selected area.
- Go to “File > Save” or File > Export” to save the cropped image in your preferred format.
4. Cropping Images Using the Photos App
If you manage your images using the Photos app, you can also crop them directly within the app.
- Launch the Photos app and locate the image you want to crop.
- Double-click the image to open it, then click “Edit” button in the top-right corner.
- In the editing toolbar, go to “Crop” tab.
- Drag the corners of the “Crop” button to adjust the area you want to keep.
- You can also use the aspect ratio options from the right sidebar (for example – Square, 16:9 or 4:3) to crop the image to a specific size.
- Once you are satisfied with the crop, click “Done” to save the changes.

Conclusion
Cropping images on a Mac is a simple process, whether you use Preview, Photos or Markup extension. With these tools at your disposal, you can easily enhance your photos, remove distractions, and create visually appealing compositions. If you need more advanced tools for complex edits, consider using third-party apps like Adobe Photoshop, Pixelmator Pro or GIMP.