Apple’s iWork package comes with three neat apps – Pages, Numbers and Keynote. We have explained useful tips for Pages and Keynote apps in our earlier articles. Numbers is a free and powerful spreadsheet tool that offers a sleek and intuitive alternative to Microsoft Excel. Whether you’re a beginner or an experienced user, understanding how to maximize its features can boost productivity and simplify data management. Here are 10 essential tips to help you master Numbers on Mac.
Installing Numbers on Mac
The app is part of macOS and should come with preinstalled. If you are not finding it, simply go to App Store and install the app.
1. Use Templates to Save Time
Numbers provides a variety of pre-designed templates for finance, personal, business and education purposes. Instead of starting from scratch, browse the template gallery by going to “File > New” to find a format that suits your needs. The template gallery also will open whenever you launch the app.
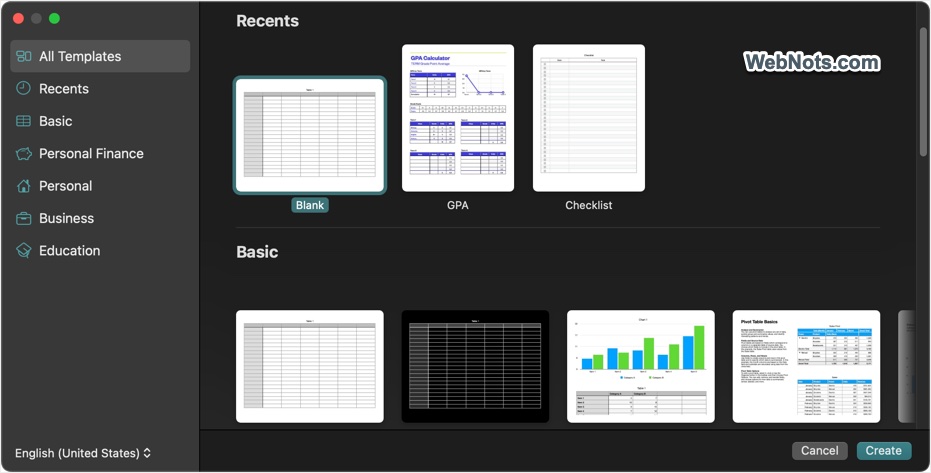
If you have created a highly customized template that you want to reuse, go to “File > Save as Template…” menu and save your document as a template. You can find that document in the template gallery along with other Apple provided items.
2. Customize Table Styles for Better Readability
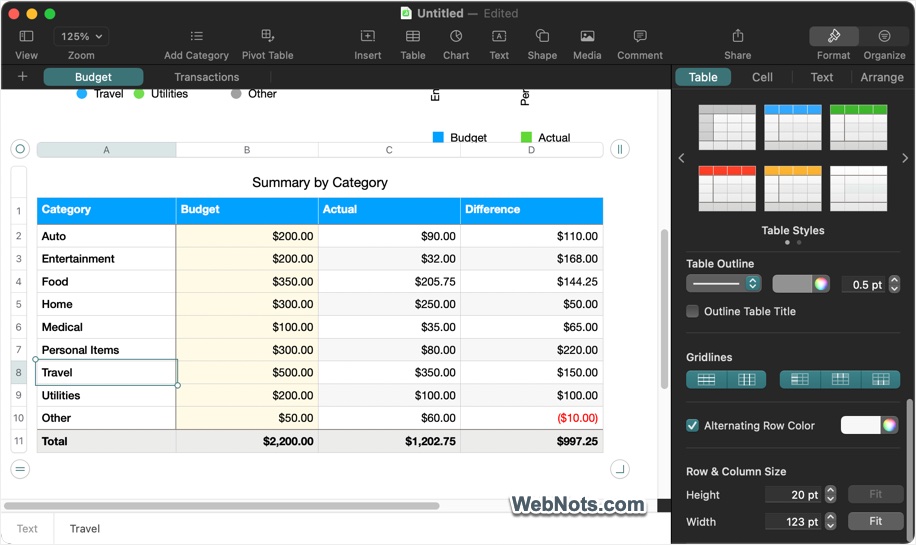
Unlike Excel, where a spreadsheet consists of a single grid, Numbers allows you to have multiple independent tables on a single sheet. You can adjust table styles, fonts, and colors by selecting a table and using the Format sidebar to improve clarity. For example, you can easily add alternate colors to rows by enabling that option under “Format > Table” from right-sidebar.
3. Use Smart Categories for Easy Data Organization
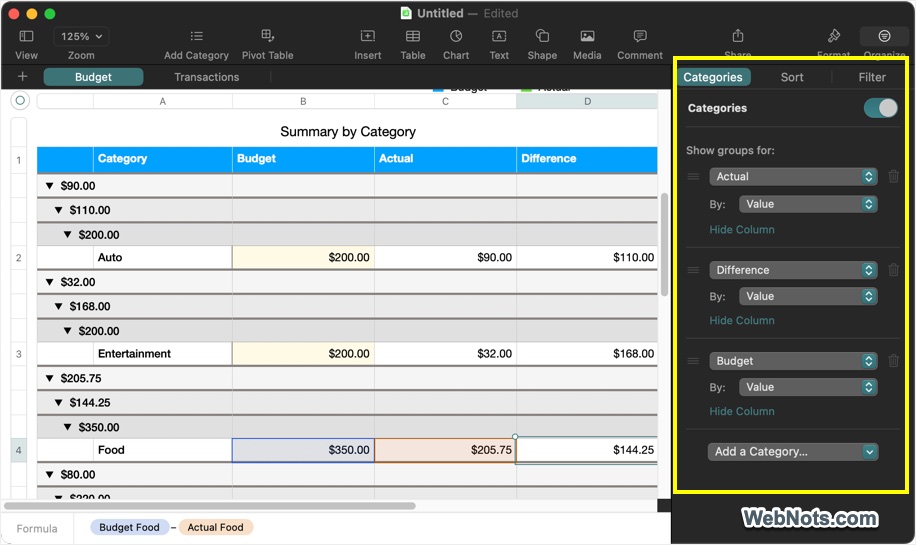
Smart Categories automatically group and summarize data, making analysis easier.
- Click on your table and then go to “Organize > Show Category Options”.
- On the right-sidebar under “Organize” tab, click on the “Add a Category…” dropdown.
- Select one of the columns heading from the list.
- Numbers app will automatically group the data as per the selected category.
- You can add or deleted categories to change the table data display.
4. Leverage Interactive Charts for Visual Insights
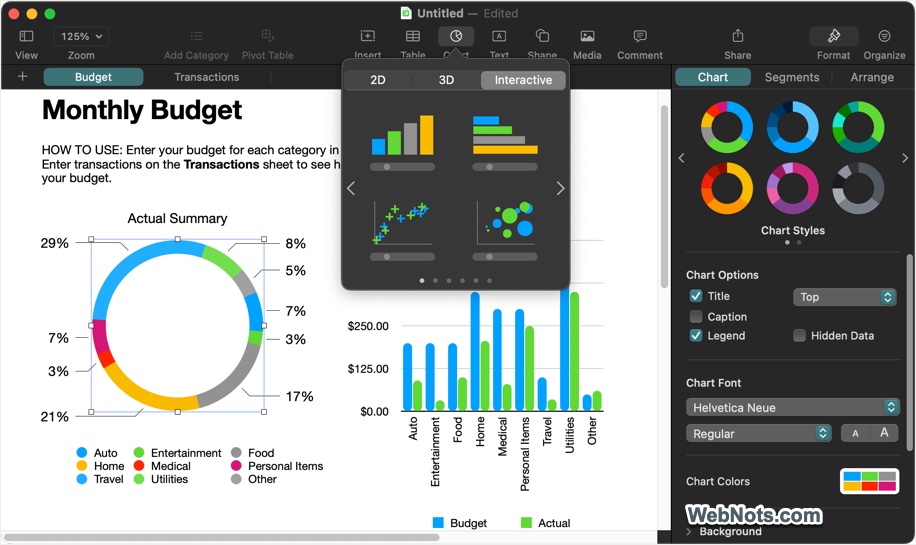
Numbers lets you create interactive charts that allow you to visualize trends dynamically. Select your data, click “Chart” in the toolbar, and choose 2D, 3D or Interactive Chart option to create a visually engaging way to analyze numbers over time. You can customize the appearance of chart and segments using the available options from right-sidebar.
5. Utilize Conditional Highlighting for Quick Analysis
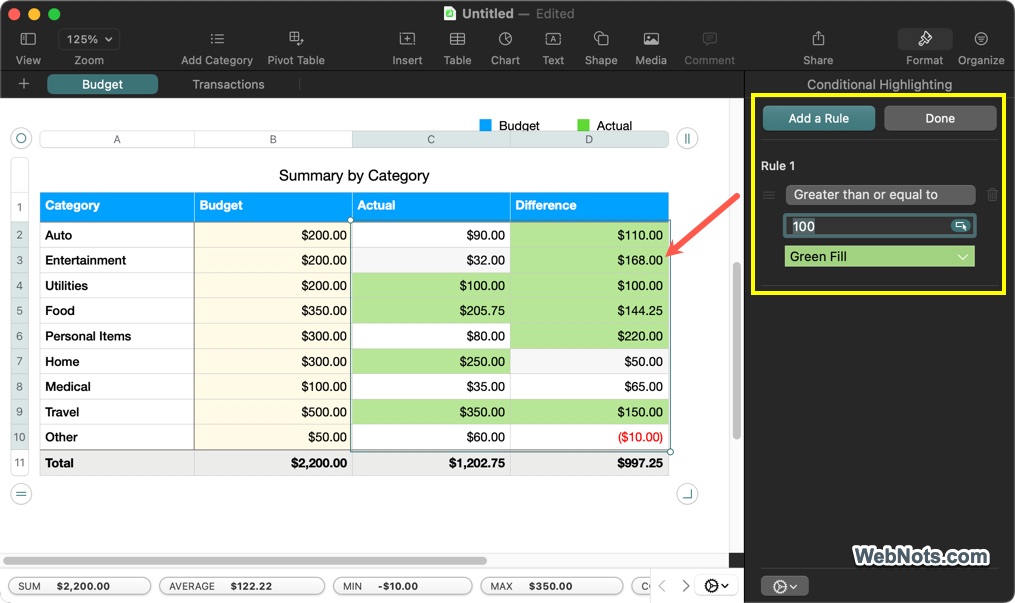
To highlight important data, use conditional formatting by selecting a range of cells, then go to “Format > Conditional Highlighting” menu. Now, click on the “Add a Rule” button to create a rule and apply a color. This feature helps color-code cells based on values, making it easy to spot trends and outliers.
6. Compress File Size
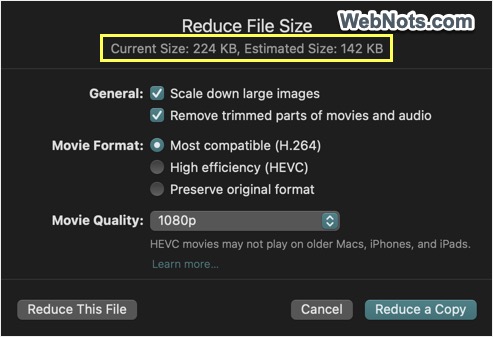
If you need to insert images or video files in your Numbers sheet, make sure to compress the document to reduce file size. Simply go to “File > Reduce File Size…” menu and select your options. You will see the estimated size and click on “Reduce This File” or “Reduce a Copy” button.
7. Lock Objects to Prevent Accidental Edits
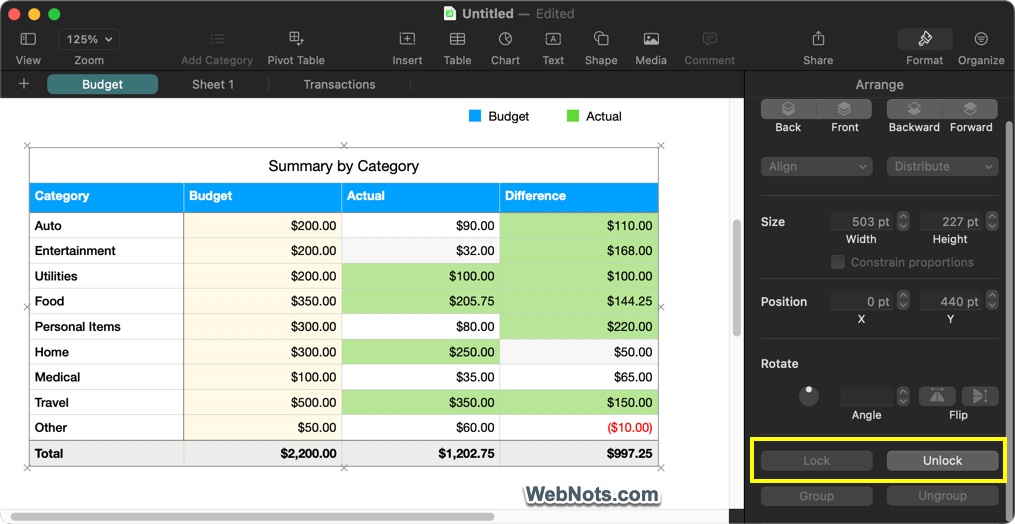
To protect critical data, you can lock objects on your sheet so they can’t be modified accidentally. For example, select a table and go to “Arrange > Lock” menu. The table will be locked and you can lock it by going to “Arrange > Unlock” menu. Note that this is not setting a password, this is used to simply avoid unintentional editing.
8. Collaborate in Real-Time with iCloud
Numbers integrates seamlessly with iCloud, allowing multiple users to edit a spreadsheet at the same time.
- First, make sure to save the file in your iCloud Drive.
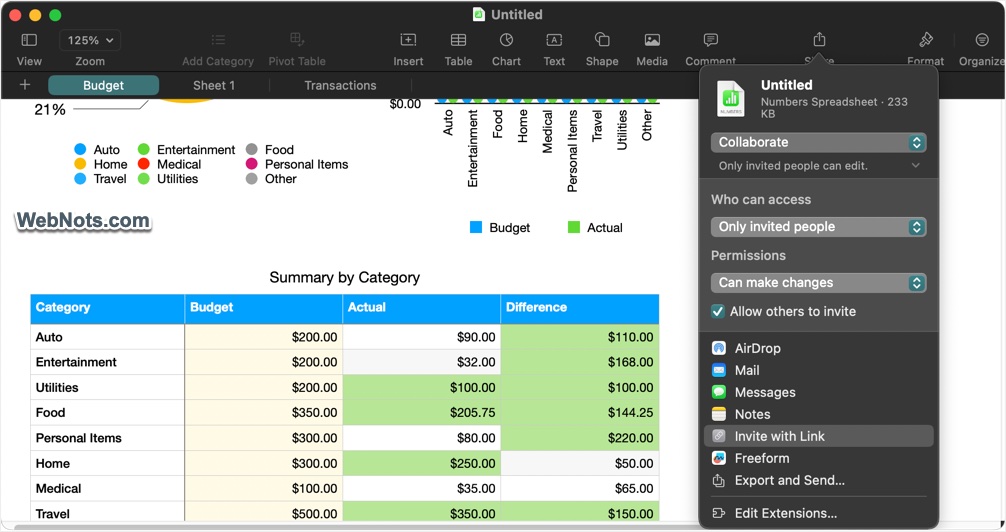
- Click “Share” icon on the toolbar and select “Collaborate” from the drop-down.
- Set the required access / permissions and click “Invite with Link” option.
- Send the link to recipients so that they can edit the content. Any changes will appear instantly for all users.
9. Use Pivot Tables for Advanced Data Analysis
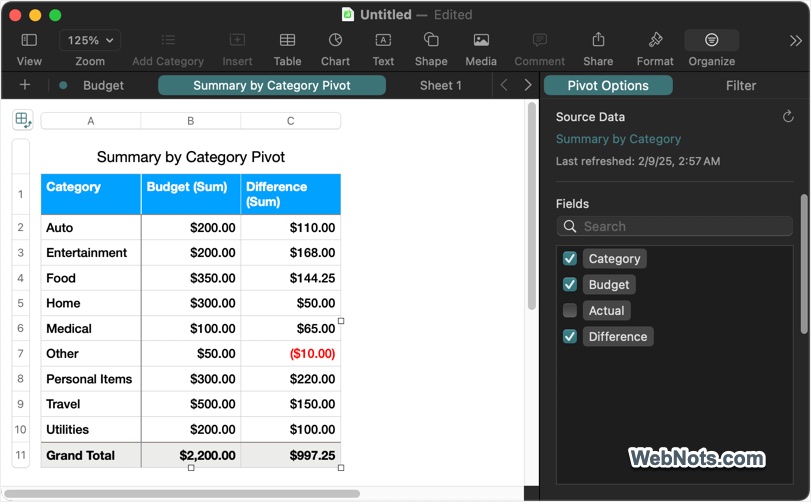
Numbers now includes Pivot Tables, a feature previously limited to Excel. To create one, select your data and go to “Organize > Create Pivot Table > On New / Current Sheet” option. You can use “Pivot Options” and “Filter” to customize the table display.
10. Export and Convert Easily
While Numbers uses .numbers as its default file format, you can easily convert files for compatibility with Excel and other programs. Go to “File > Export To” menu, then choose Excel, PDF, or CSV depending on your needs.
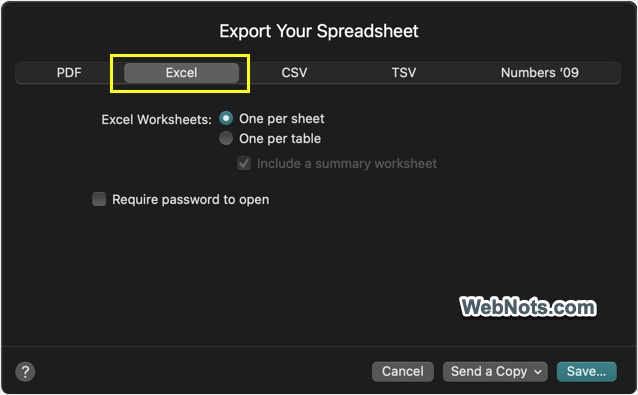
You can also easily set a password to protect your converted Excel file from unauthorized access.
Final Thoughts
Numbers on Mac is a versatile and user-friendly spreadsheet application with powerful features. By applying these tips, you can increase efficiency, improve data organization, and make the most of Numbers’ unique capabilities. Though it needs some time to move out of Excel mindset, you will definitely love the app once getting hands on it.