It is unfortunate that CAPTCHA verification has become part of any form submission in internet. Otherwise, you will receive hundreds of spam contact form submissions wasting your time in checking and deleting them. Though plugins like Akismet does a good job, it will not be sufficient when people are manually submitting spam content through your contact forms. On other hand, options like Google reCAPTCHA will stop the real users and show annoying image verification. The best option is to use Cloudflare Turnstile which will automatically check the submission when the form is being filled by user and protect your site.
Setting Up Cloudflare Turnstile in WordPress
You need the following to setup:
- Get site / secret keys from Cloudflare which means your site is already added in Cloudflare account.
- Using a contact form plugin that supports Cloudflare Turnstile setup. In this article, we will explain with free WPForms plugin.
Step 1 – Getting Site & Secret Keys
- Login to your Cloudflare account and go to “Turnstile” section from the dashboard.

- As you can see, Turnstile will use smart detection without sending traffic to Cloudflare. Click the “Add site” button.

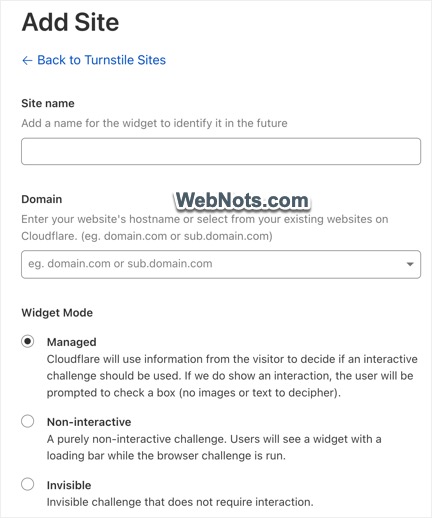
- Next step is to provide a name for your site and select the domain from the list. Click the dropdown under “Domain” section to view all your sites in the account and select the correct one which you want to protect with Turnstile.
- You have three “Widget Mode” options and “Managed” is the best one which allows Cloudflare to decide whether to show the challenge box or not. The challenge box is a simple checkbox user needs to click instead of verifying complicated text or image. You can also select “Non-interactive” or “Invisible” option if that is what you want on your site.
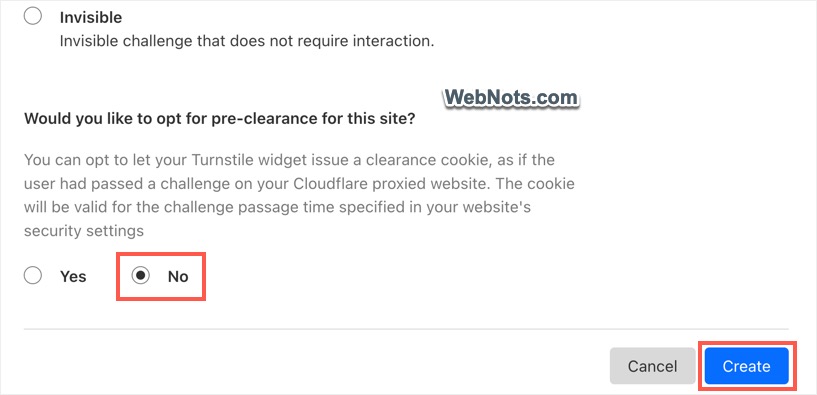
- Select “No” for pre-clearance check and click “Create” button.
- Finally, you will get site and secret keys and copy them in a text file.

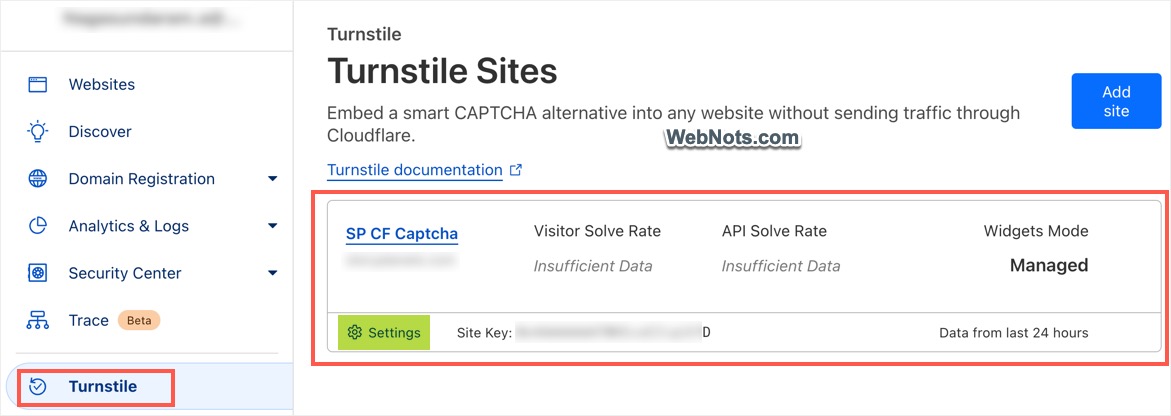
You can anytime go to “Turnstile” section and click on the “Settings” link below the site to get the site / secret keys again. Turnstile section will also show Visitor / API Solve Rate % to find the usage of the verification box on your form.
Step 2 – Adding Keys in WPForms Plugin
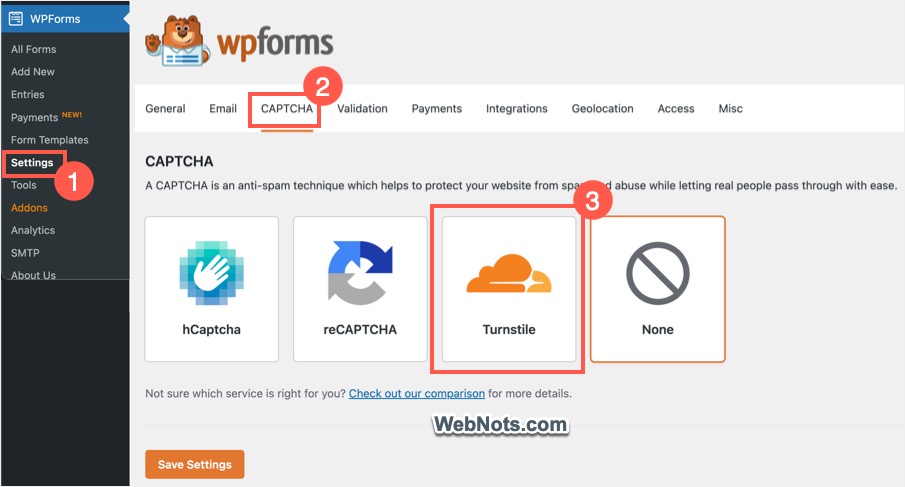
- Login to your WordPress dashboard and navigate to “WPForms > Settings” section. Go to “CAPTCHA” tab and click on the “Turnstile” option.
- Paste your site and secret keys in the corresponding boxes and change the “Failed Message” if required. This is the message user will see when trying to submit the form without checking the verification box.
- Select the style of the verification box from “Type” dropdown – you have Auto, Light or Dark mode options to choose from.
- Turn off “Non-Conflict” mode and click “Save Settings” button.
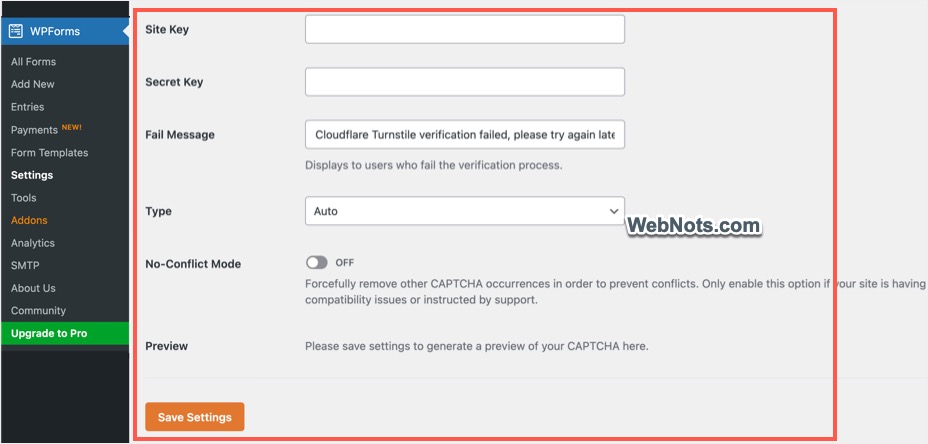
- The plugin will check the keys and show the preview if everything goes fine. If you see any error, make sure to check or regenerate new site / secrets keys and use in the plugin’s setup.

Step 3 – Using Captcha in Form
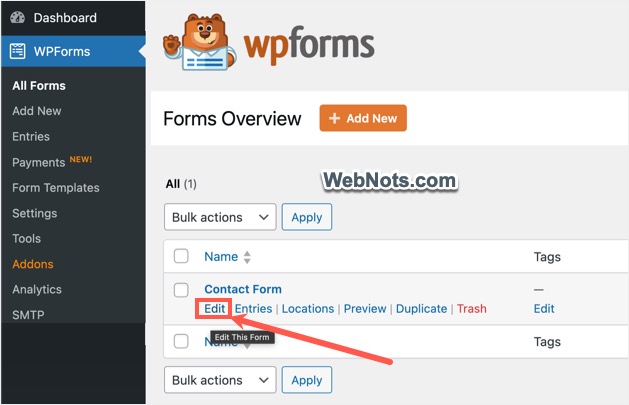
- Go to “WPForms > Add New” to create a new form or go to “WPForms > All Forms” and edit any existing form in which you want to add Cloudflare Turnstile protection.
- Under “Fields > Standard Fields” section, simply click on the “Turnstile” button.

- You will see a success message showing Cloudflare Turnstile is added to the form and click “OK” button to close the pop-up.

- The form will show a “Turnstile Enabled” batch on top right corner of the preview. Click “Save” button to apply your changes.

Step 4 – Testing Cloudflare Turnstile on Your Contact Form
- Now, open you site and go to the contact form page.
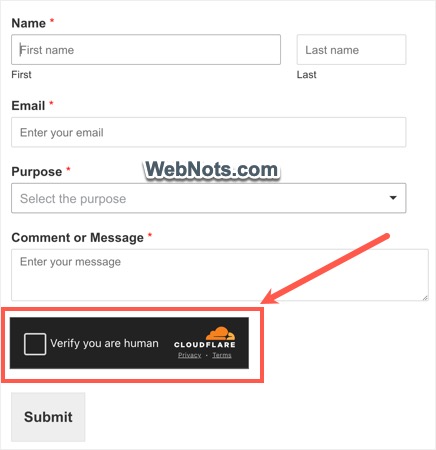
- Depending upon your IP address, browser and other parameters, you will see a Cloudflare Turnstile verification box is showing above the “Submit” button.
Removing Turnstile Integration in WPForms
For any reason, if you want to remove the Turnstile integration in WPForms, go to “WPForms > All Forms” menu and edit the required form. Simply click on the “Turnstile” button under “Settings > Standard Fields” section. The plugin will show a pop-up asking you to confirm removal of Cloudflare Turnstile from your form. Click “OK” button to remove the protection and save your changes.

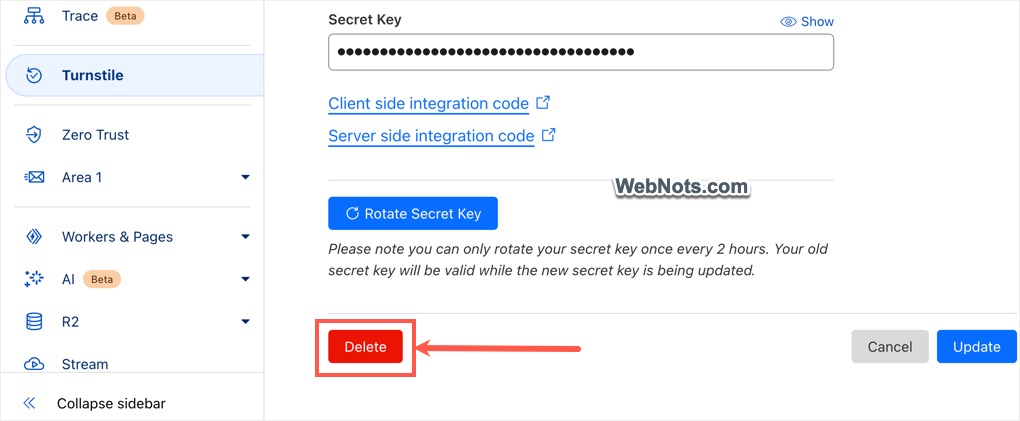
After that go to Cloudflare account, navigate “Turnstile” section and click the “Settings” link showing below your site. Scroll down to bottom of the page and click “Delete” button to permanently delete site and secret keys.
Final Words
Frankly, Cloudflare Turnstile is a clean and easy way to protect your WordPress contact form without annoying image or complicated text verification. Turnstile uses Cloudflare’s challenging platform to verify IP address, check blocked countries setup in your account and verify user’s behavior when submitting the form to decide whether to show the verification checkbox. Anyway, you need a plugin like WPForms to create contact form in WordPress site and hence adding site/secret keys is matter of additional few minutes to stop automated bots and spam submissions.