Microsoft’s PowerPoint is a simple tool for converting your presentations into a simple video. You can convert your images into a video slideshow by adding text and various effects to it and the option is available from PowerPoint 2010 onwards. This article explains how to create a presentation with various effects and converts that presentation to a video using PowerPoint app in Microsoft 365. You can use the same process both in Windows and Mac PowerPoint versions.
Prepare Your Slides
First, copy and paste all your images into a presentation. Make sure to use one image per slide and resize the images to fit into the slide area. You can add a starting slide and ending slide showing titles and credits for your video.
Step 1 – Choose Your Page Design
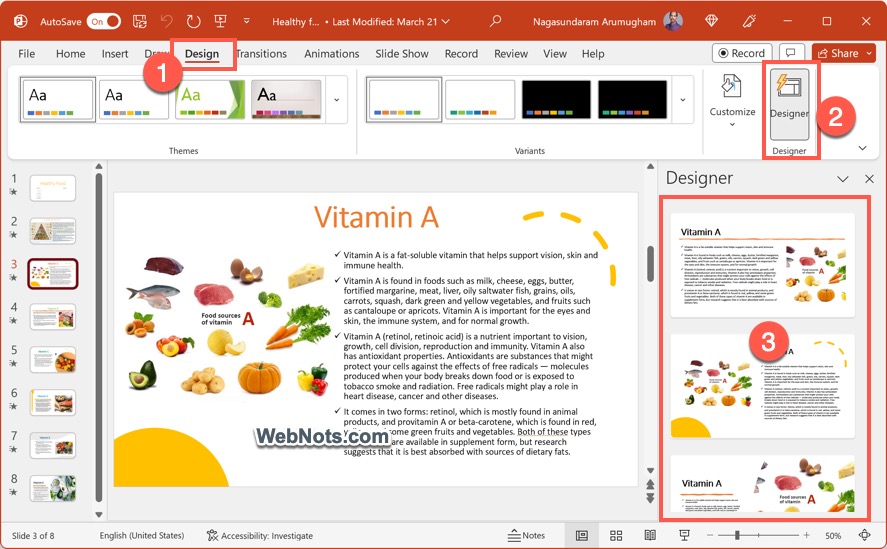
Select an appropriate page design under “Design” menu. If you are going to use a full slide image then page design does not really matter since all the designs will be covered by the full scale image. But if you are planning to use the slide content in your video then the page design really helps you to add more professional look to your video. Microsoft 365 also offers AI Designer option to automatically suggest design layout options to make your task easier.
Step 2 – Transitions and Animations
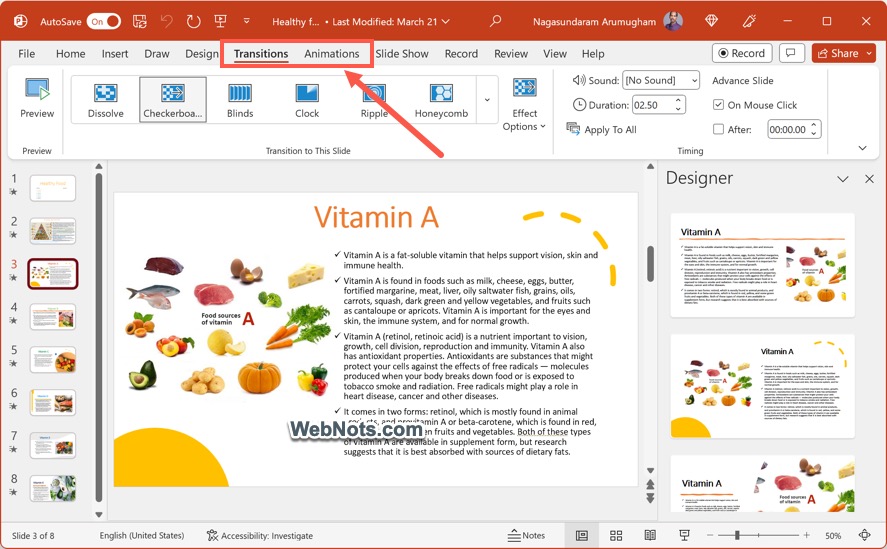
“Transitions” menu offers various options to choose how each slide should move and “Animations” menu offers options to choose animations for each items in any particular slide. Transitions and Animations together will give your video a stunning look. Choose your options carefully and check the timings between each item or slide by looking it in the full screen preview under “Slide Show” menu.
Step 3 – Inserting Audio
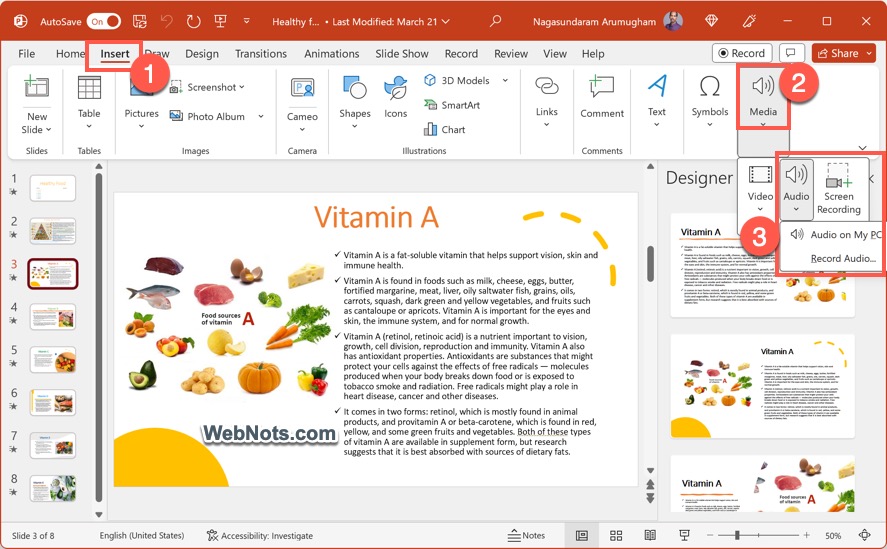
Add audio to each slide using the “Audio” option in “Insert” menu under” Media” group. The audio option allows you to add an audio file from your PC or record your own voice for each slide.
Step 4 – Choose the Video Size
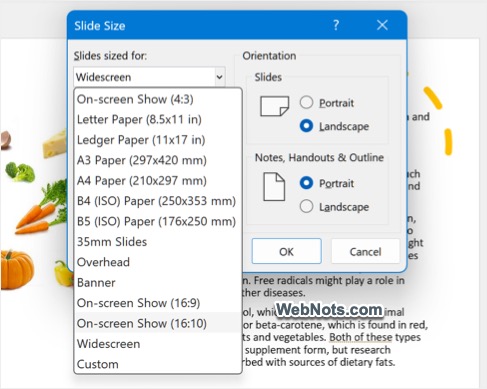
Go to “Design” menu and select “Slide Size” option under “Customize” group which allows you to choose your video size. You can select any available options like 4:3 or 16:9 or choose custom option to define the height and width of your video.
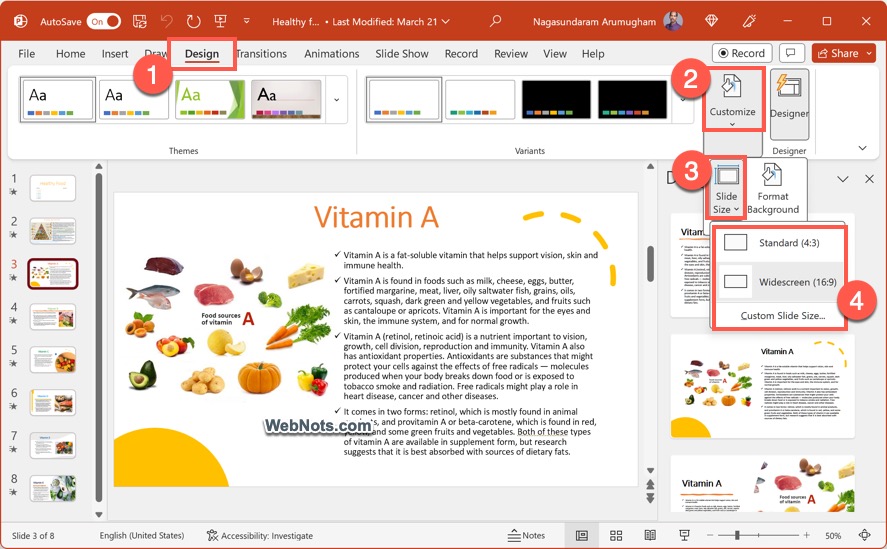
You can choose custom sizes like 16:10, but it is good to select one of the standard sized like 4:3 or 16:9.
Step 5 – Save as Video
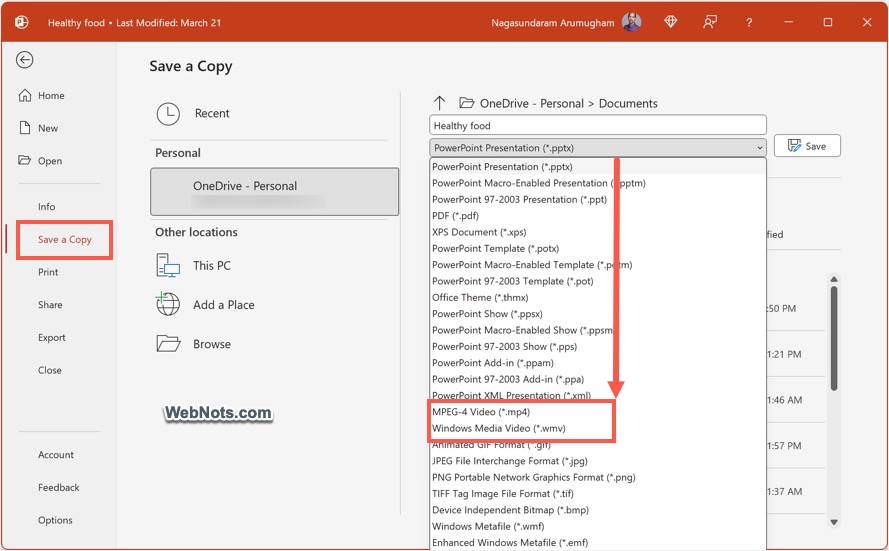
The final step is to save your presentation into a video format. Go to “File” menu and select “Save a Copy” option. Select your location and change the file format to either “MPEG-4 Video (*.mp4)” or “Windows Media Video (*.wmv)”. Click the “Save” button to convert your presentation into a video file.
Step 6 – Open Converted Video
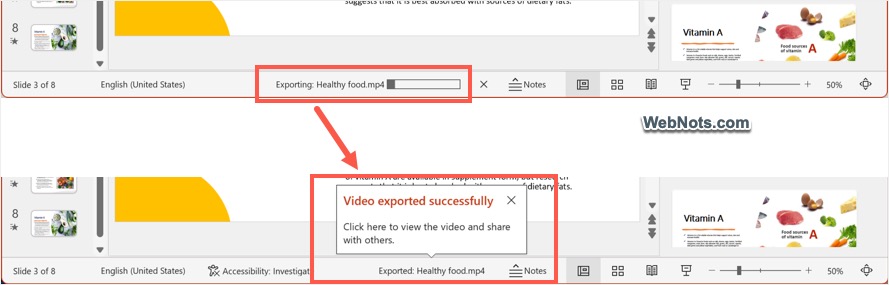
The video conversion process may take few minutes depending upon number of your slides in your PowerPoint presentation. You can see the progress of exporting in the status bar. When the process is finished, PowerPoint will show a message in status bar and click on it.
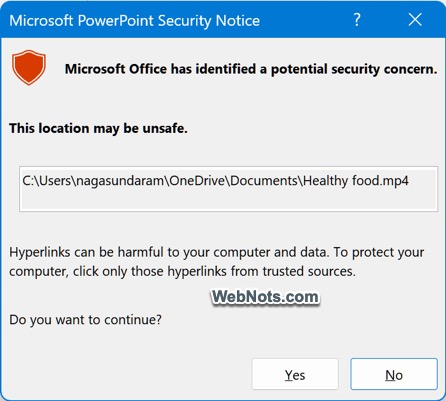
You may see a security warning showing the hyperlinks can harm and the location is not safe (if you have saved the file on OneDrive). Ignore that warning as it is your own video and click “Yes” button to proceed further.
The video will open and start playing in Windows Media Player. You can check everything is fine as per your presentation.

Final Words
If you need any adjustments, simply correct the PowerPoint slides and save it again in the video format. All your transitions, animations and audio should be part of the converted video. Another cool option is that you can convert any existing video into .wmv or .mp4 format using PowerPoint. Simply insert your video to your presentation from “Insert > Video” menu under “Media” group and save the presentation as Windows Media Video or MPEG-4 format. Remember, the converted video quality may not look fine in some players. So, make sure to play the video in different players or check the final quality by uploading the video into your website.