Sometimes you may need to give administrator access to your WordPress site to someone but only for a short time. Maybe you want the plugin or theme developer to troubleshoot an issue or your designer wants to make a few changes. Though you can easily create a new admin user (from “Users > Add User” section in your WordPress admin panel), it is risky if you forget to delete the account. So, a temporary admin account with self-expiring login will solve these problems. Though it gives full access when needed, it will automatically expire after the set duration to avoid any further access.
Caution Before Proceeding
Even if it is a temporary access, administrator has full access to your content including installing or deleting plugins and themes. For example, an administrator can install File Manager plugin and browse through your hosting files or install Database Manager – WP Adminer plugin to download your database. Since most website owners do not use activities tracking, you will have no idea what the administrator had done with the provided access. So, make sure to give the credentials only to the required and reliable persons.
1. Create a Temporary Admin Login Using a Plugin
The easiest and safest approach is using a plugin designed specifically for this purpose.
- Go to “Plugins > Add New” section in your WordPress admin panel.
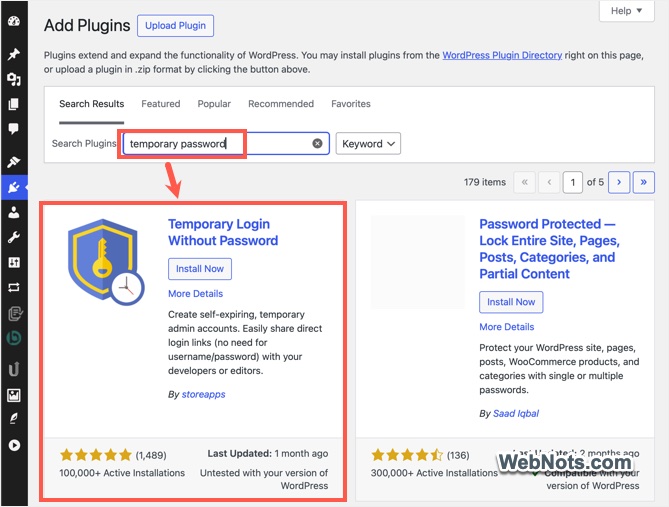
- Search for “temporary password” and find “Temporary Login without Password” plugin.
- Install the plugin and activate it on your plugin.
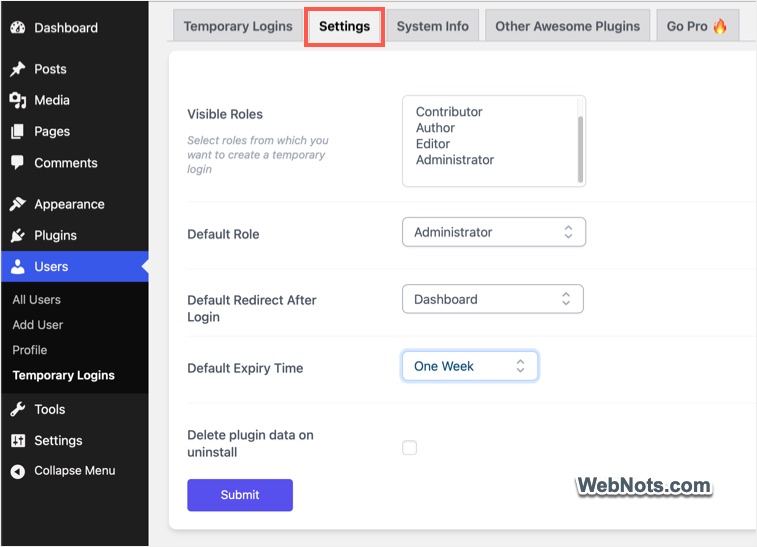
- After that, go to “Users > Temporary Logins” section and then to “Settings” tab. Enable the visible role (use Control or Command key to select multiple roles) and the default role / expiry time / redirect after login page.
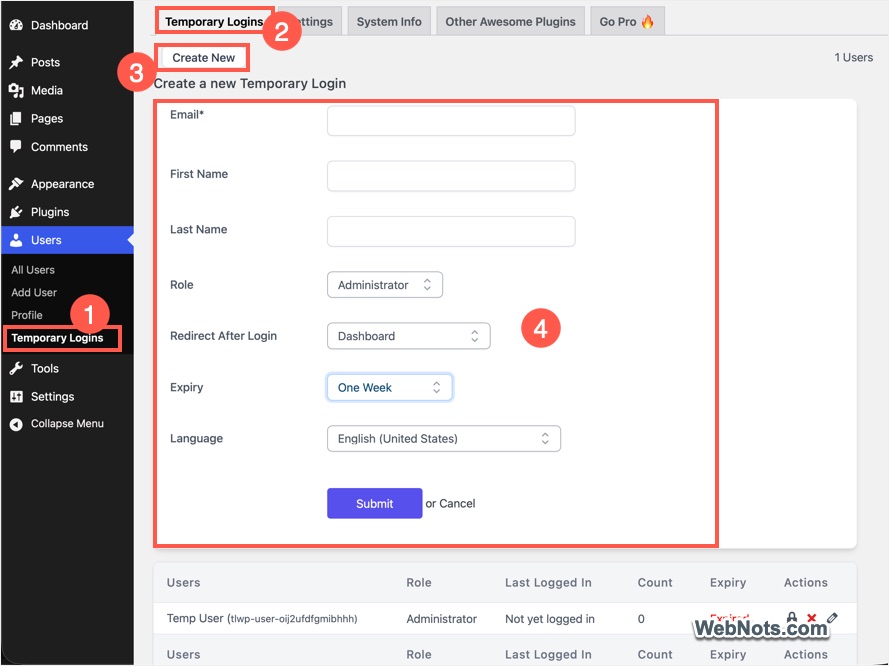
- Go to “Temporary Logins” tab and click the “Create New” button.
- Provide the email, first / last names, and select the language.
- Other details like role, redirect after login, and expiry will be automatically selected as per the default values from “Settings” tab. If needed, change those values from the corresponding drop-downs.
- Expiry time can start immediately after creating the account or after the access. For example, selecting one day after the account access will force the account to expire a day after first login.
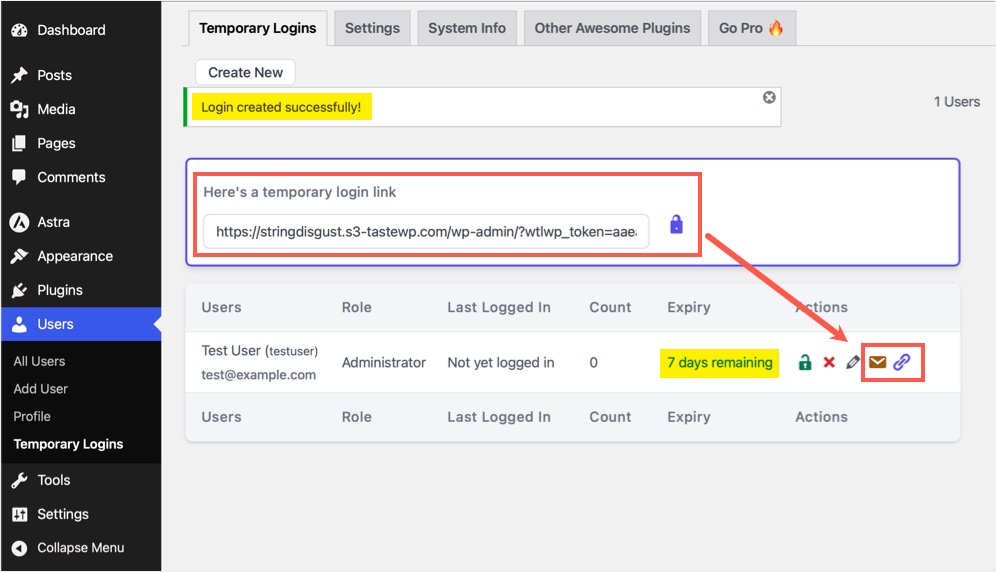
- The plugin will instantly generate and show a secure login URL. You can copy and send this link to the person who needs access. Since the URL has a secure token attached, it does not need a username / password to be entered and directly open the /wp-admin/ section of your site.
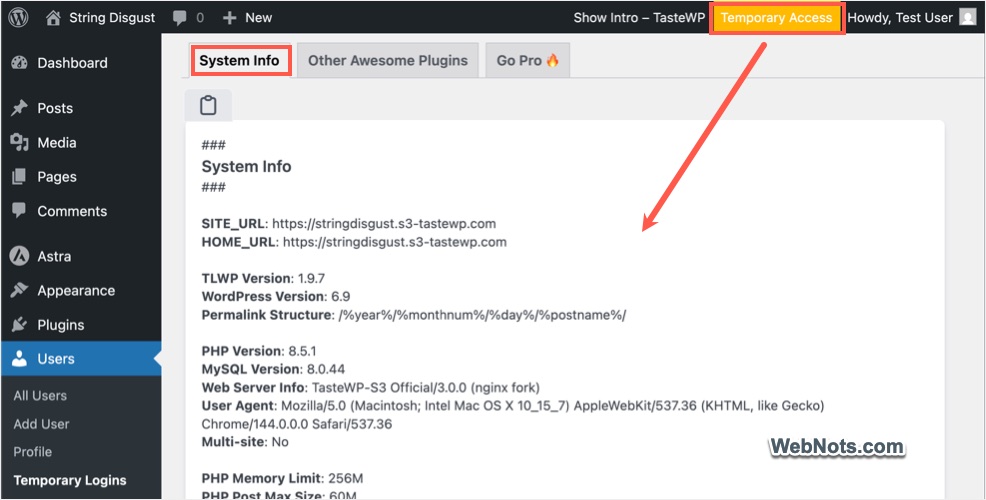
The only problem is that you will see a “Temporary Access” notification on the admin bar when using the URL and clicking on that will take to the plugin’s “System Info” tab showing all details about your WordPress installation. Unfortunately, we don’t see any options to disable this feature.
Deleting Temporary Access
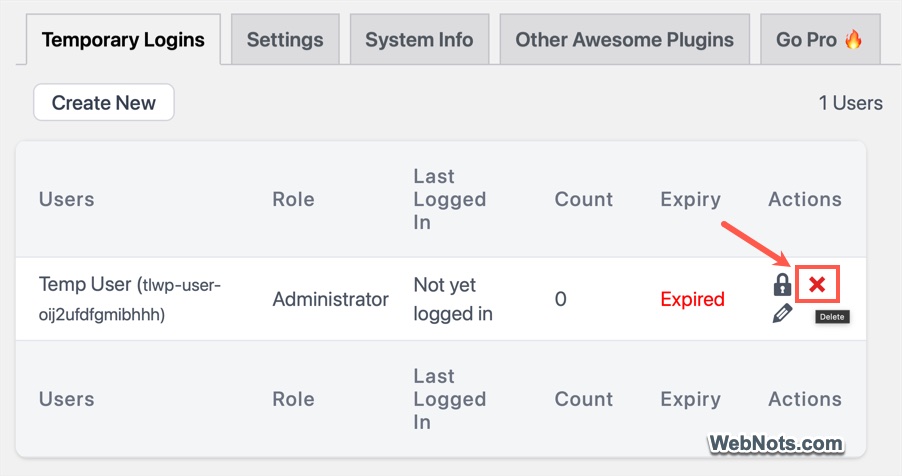
Once expiry time is reached, the login link will stop working and you can see the status of the expiry, last login time, and number of logins against the username under “Temporary Logins” tab. The plugin will create a username based on the first and last names provided. After expiry, the username will NOT be deleted automatically. You can anytime reactivate the same username and extend the expiry date without creating afresh account every time when needed. If not needed, you should manually delete the user by clicking on the X icon under “Actions” column or go to “Users > All Users” to find and delete the username.
Note: The premium version of the plugin allows to track activity logs, link usage, and get alerts whenever someone login to your site.
2. Manually Creating a Temporary Admin User
If you don’t want to use a plugin or reveal system information, as mentioned, you can always create an admin account by going to “Users > Add User” section.
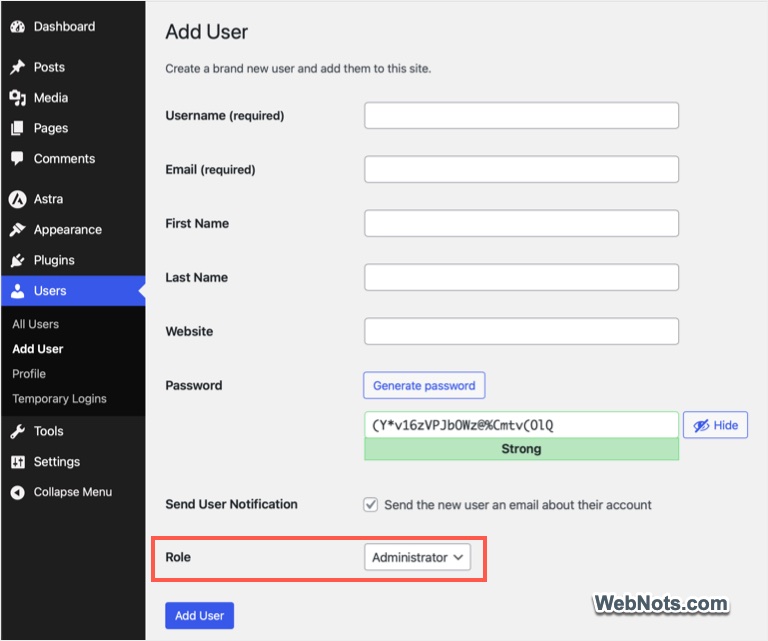
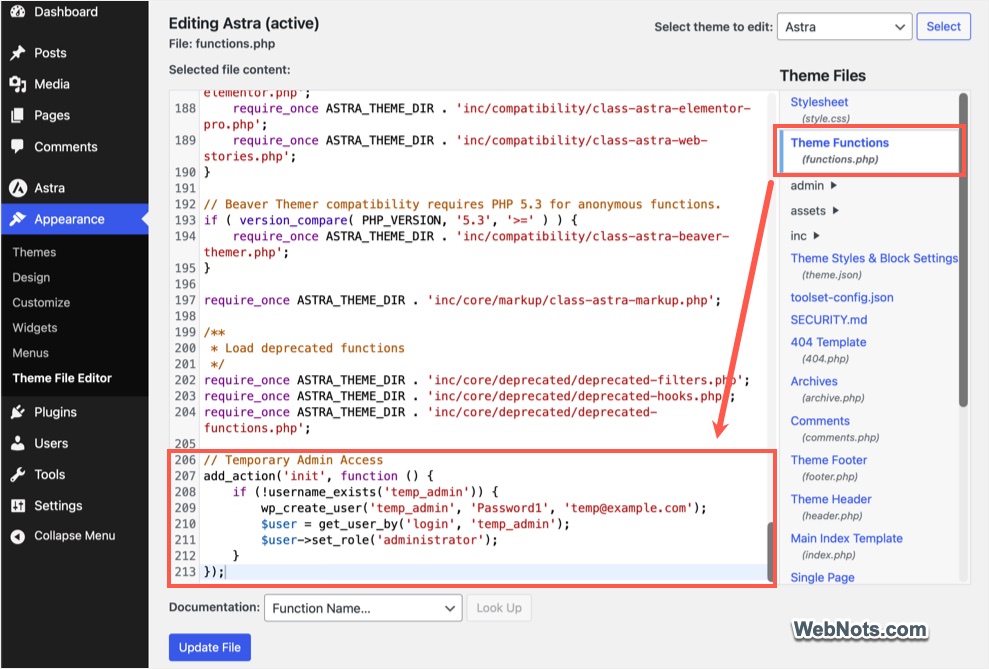
Otherwise, you can simply add the following code at the end of your theme’s functions.php file (Appearance > Theme File Editor) to create an admin user. Make sure to remove the code immediately after use and delete the username (Users > All Users).
// Temporary Admin Access
add_action('init', function () {
    if (!username_exists('temp_admin')) {
        wp_create_user('temp_admin', 'Password1', '[email protected]');
        $user = get_user_by('login', 'temp_admin');
        $user->set_role('administrator');
    }
});
3. Using a Dummy Site
If you can replicate the issue on any site, then there is no need of creating admin access on your site for troubleshooting. The best option in this case is to create a dummy site and request your developer to check on that site. Though there are multiple options available to create a temporary site, TasteWP is the simplest among all.
- Go to TasteWP site, create your site and access it.
- Install the required plugins or theme.
- Click the “Show Intro – TasteWP” text on the top admin bar.
- Copy the admin URL, password, and username details to share with anyone.
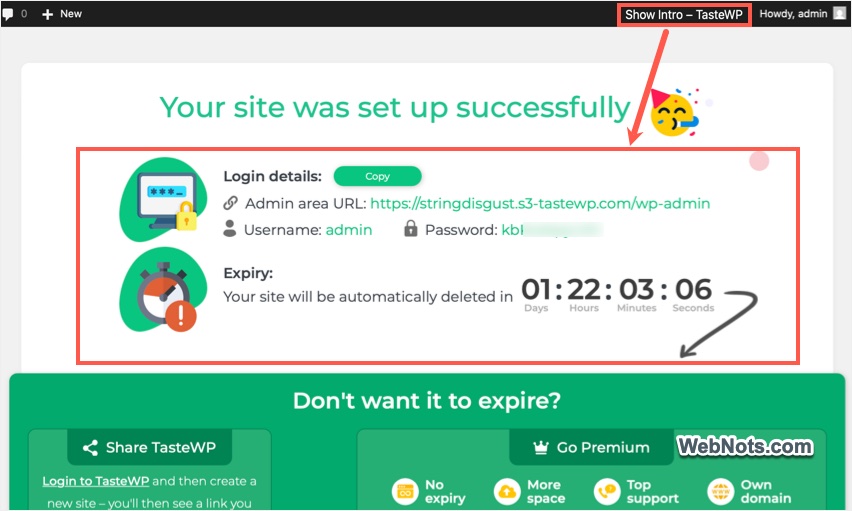
The entire site will be automatically deleted after 2 days. So, you don’t need to worry about anything.
Final Words
If you frequently work with contractors or support teams, using a plugin is the easiest option as the admin user account will expire automatically. If you don’t want to use a plugin, manually create an admin account on your site or create a temporary site if that helps.