
You might have got approval from Google for showing AdSense ads on your site. But getting approved for Google AdSense does not mean that you have succeeded with starting an online income from your content. The success of your online presence depends on patiently understanding things and following appropriate guidelines with AdSense. The major factor of revenue is the click through rate which directly depends on the type and placement of ad units displayed. In this article, we will discuss how to create an AdSense ad unit along with various possibilities of customizing it to suit your site’s design.
Create an AdSense Ad Unit
There are two ways of using AdSense ads on your site:
- Using automatic placements with Auto Ads
- Create ad units manually and place it on a suitable place like sidebar, above the fold, below the fold, in-between feed, etc.
This article explains creating ad unit manually. If you are looking for Auto Ads, check our separate article on using Auto Ads on your site.
Step 1 – Creating Ad Unit
- Login to your AdSense account and navigate to “Ads” tab.
- Go to “By ad units” section to find the types of available ad units for your account.
Step 2 – Choosing Basic Type
At this point, AdSense offers the following types of ad units:
- Display ads
- In-feed ads
- In-article ads
- Multiplex ads
- Search engine
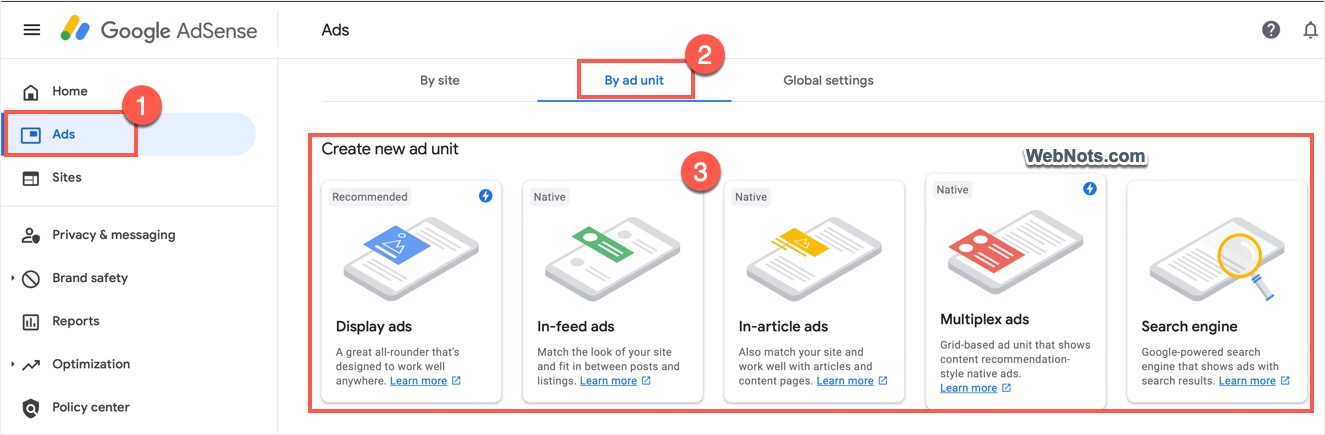
You can select one of the ad types based on your need. In this article, we will explain by choosing “Display ads” option and then show additional styling options available only for other types. You can get more details about search engine and native ads in our separate articles.
Step 3 – Choosing Ad Size
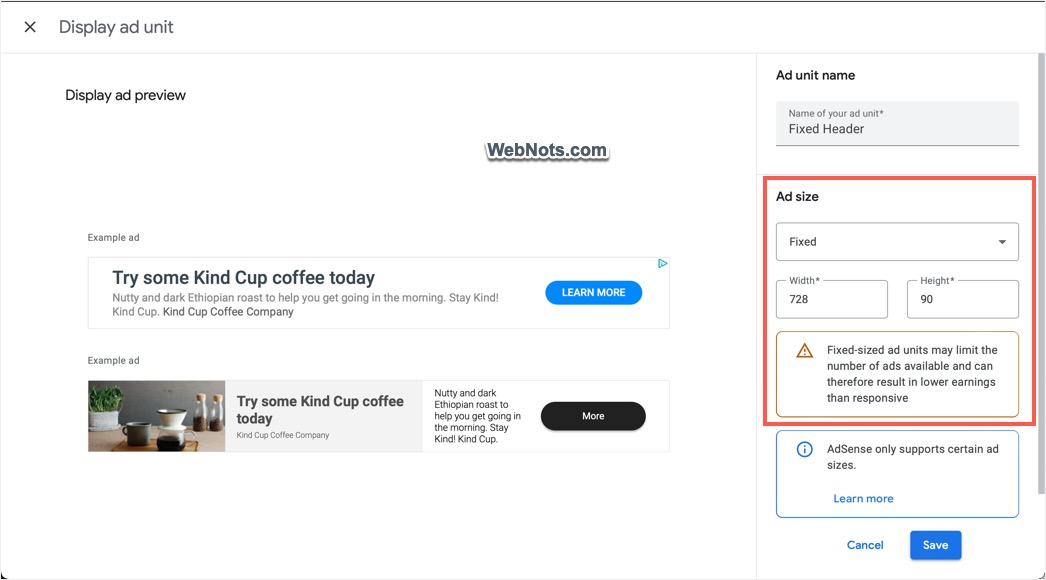
On the next screen, type of the name for your ad unit and choose the size of your ad from the “Ad size” dropdown. Fixed sizes are useful when you have appropriate space on your site’s layout. However, fixed size may reduce the revenue as there will be less inventory if you choose a custom height and width. If you prefer fixed size, make sure to select standard sizes like 728*90 (for desktop) or 300*250 (for mobile). Read our article on how to choose better ad size for your AdSense ads.
Google will show the preview of set size and also show a warning that fixed sizes may result in lower revenue compared to responsive ad units.
The best option is to select “Responsive” option for “Ad size” so that the ad will be automatically filled for the available space on your site. You will see options to preview the ads in Square, Horizontal and Vertical alignments.
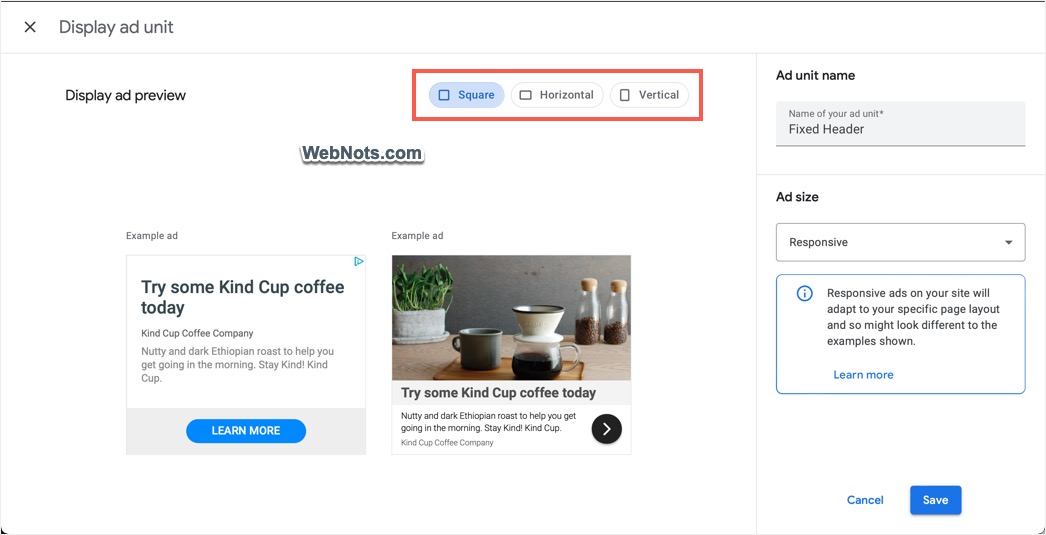
Check the previews and click on “Save” button.
Step 4 – Choose Ad Style
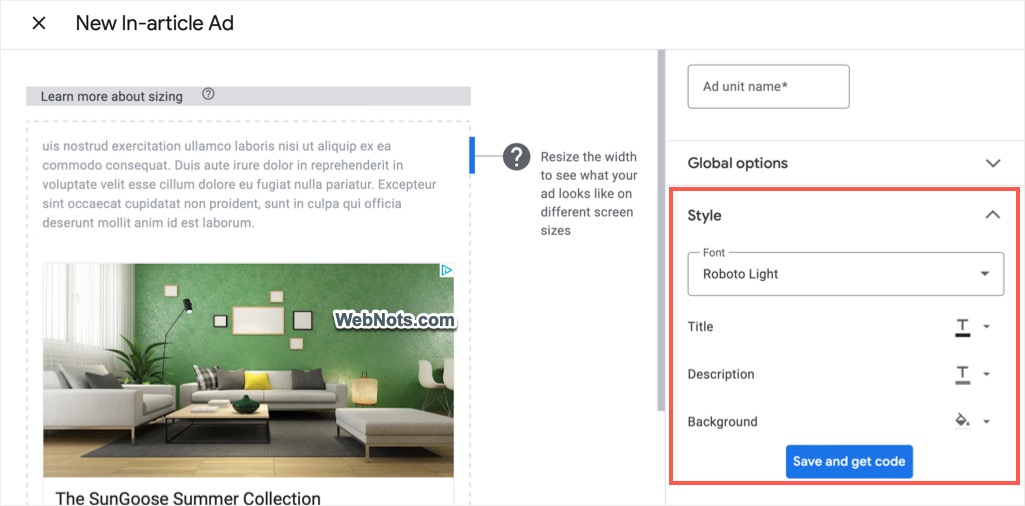
As you can see, Display ads do not have any custom styling option. However, you will see additional styling options for In-feed, In-article and Multiplex ad units. Google will choose the default styles for your ad unit. However, if the default available styles are not matching your site’s design, adjust the parameters and customize as per your need.
Step 5 – Getting AdSense Ad Code
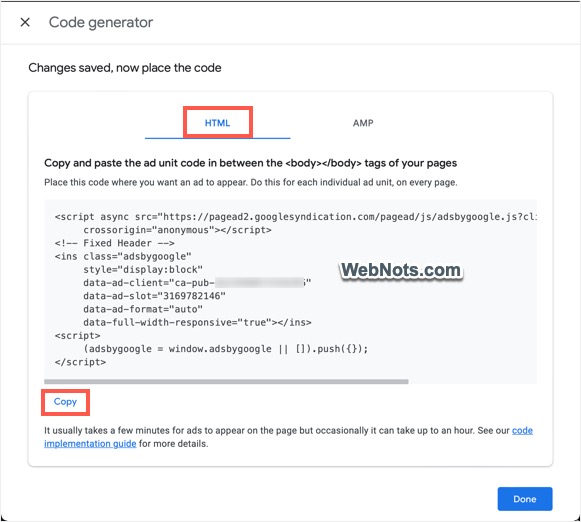
After saving your changes, you will see a “Code generator” pop-up. Go to “HTML” section and click the “Copy” link to copy the JavaScript ad code for the ad you have created.
Step 6 – Inserting Ad Code on Your Site
The last step is to insert the copied ad code on your site. This is a manual process and you can insert the code in any of your approved sites complying AdSense policies. Most of the time ads will start displaying immediately or your will see a blank space till the time AdSensebot grasp your content and the actual ads can be auctioned for the keywords on your page.
Note that Google also offers a plugin called Sit Kit for WordPress sites to crate and place AdSense ads. All you need is to install the plugin, connect with your AdSense account and start showing ads with few clicks.
Step 7 – Global Setting for Optimizing Mobile Ads
Go to “Ads” section and navigate to “Global settings” tab. Here, enable “Let Google optimize the size of your mobile ads” option under “Ad size” section. This is a global setting and will be applied to all your ad units. It will help Google to automatically adjust the mobile ad sizes and optimize your revenue.

Points to Remember
Though the process of creating AdSense ad unit is easy, remember the following important points.
- All available ad units under your account can be viewed under “Ads > By ad units > Existing ad units” section and can be edited later at any point of time.
- Once an AdSense ad unit is created, there is no possibility of deleting it from your account. It can only be archived from the listed display.
- Same ad unit code can be placed multiple places on a same or different pages of a site and also on different sites approved in your account. However, make sure to use the first line of script (which is Auto ads script) only one time on a page. Otherwise, you will see a browser console error mentioning only one AdSense header tag is supported and the second tag is ignored.





Hi. I am using a Wix site for my website. I have to go through the Wix Adsense app in order to put an ad on my site. Now my question is this – I am creating a new ad code for each ad for my website. Because the same ad code is not accepted by Wix Adsense app in another page. Does that mean that I will have to create 1000 new ad units in case i want to put 1000 ads in my website? Please clarify!
That should not be the case in general, you can use the same ad code in the template HTML so that it will show all over the site.
We are not sure about Wix, you can clarify this with their support team.