FileZilla is one of the popular, free and open-source apps for remotely connecting to your hosting server through FTP. You can download free version of the app from their site for Windows, macOS and Linux platforms. However, sometimes the downloaded copy will be in different language making it difficult to use the app. For example, we got the Chinese interface when we downloaded the app instead of English. If your FileZilla FTP client app looks in different language, here is how you can switch the language.
Why FileZilla Opens with Different Language?
When you install and launch the app, FileZilla uses the system language by default. So, if your computer has Chinese or any other language set as a system language, the app uses that instead of English. The problem is that even you use English as a primary language, FileZilla still picks up Chinese. This generally happens if you have purchased the computer from China where Chinese is installed and set as a preferred language by default. Though you change this in your language & region settings, still most of the apps force Chinese (for example, Microsoft will force Chinese MSN and Bing versions).
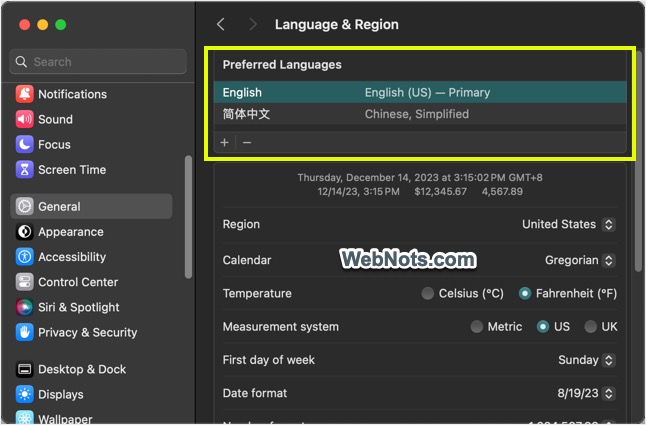
Change Language in FileZilla from Chinese to English
Good part with FileZilla is that you can simply change the interface language without hassle. Below are the steps to change Chinese to English with the latest FileZilla FTP client version.
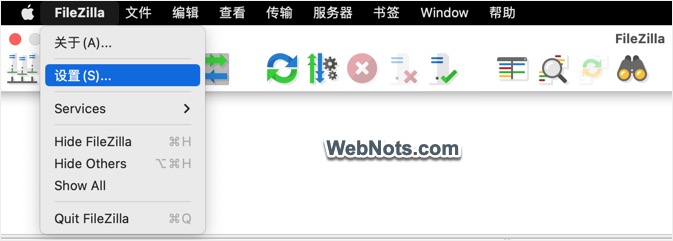
- Open FileZilla app, click on the “FileZilla” menu and select “设置(S)…” menu. This is the second menu item and shows S in the bracket indicating Settings.
- When you are in 设置 panel (Settings), go to 语言 section (language) from the left sidebar. You can collapse all the sections to find the language menu easily.
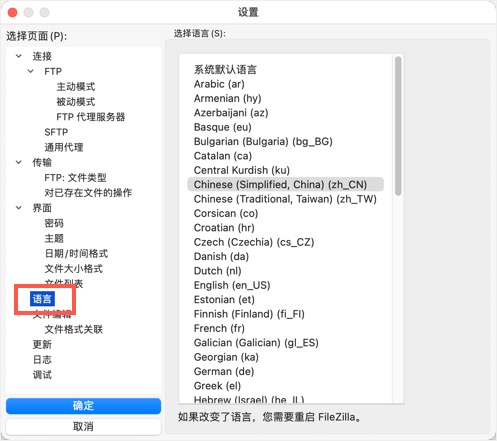
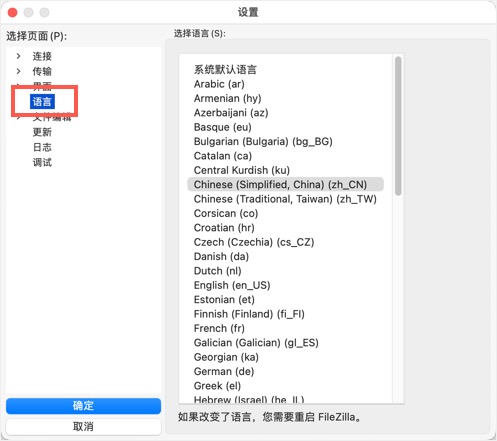
- Now, select English or any other language from the list on right side.
- Click 确定 button (Confirm) showing on the bottom right sidebar.
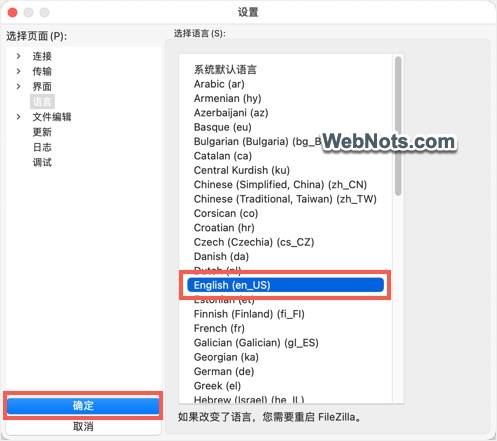
- FileZilla will show a prompt asking you to restart the app for the changes to apply. Press enter or click on the 确定 button.

- Go to “FileZilla” menu and select “Quit FileZilla” option to close the app.
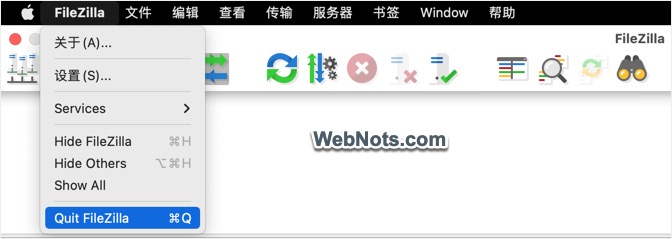
- Relaunch the app and you will see the language is changed to English or the selected one.
Change FileZilla Language from English to Chinese
Follow the below if you want to change the language from English and want to use the app with Chinese interface.
- Launch FileZilla app, go to “FileZilla” menu and select “Settings”.
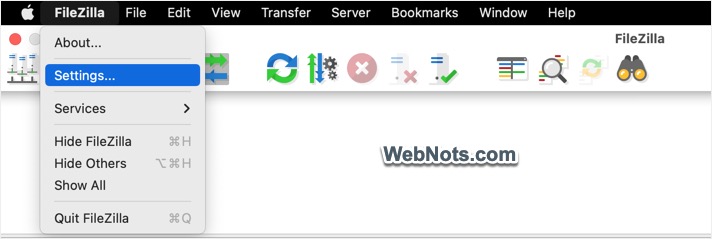
- Go to “Language” section from the left sidebar.
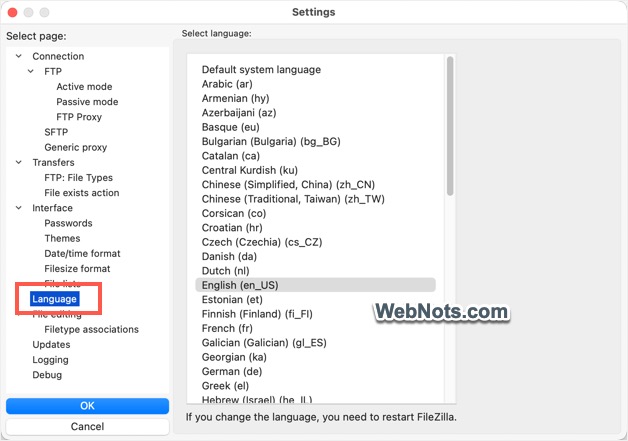
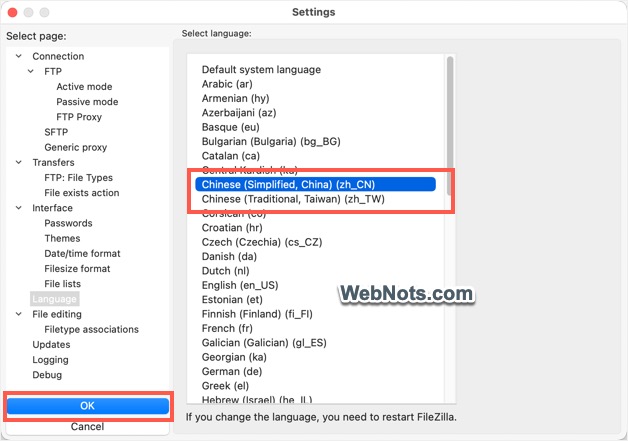
- Find and select “Chinese (Simplified, China) (zh_CN)” or “Chinese (Traditional, Taiwan) (zh_TW)” depending on your need.
- Click “OK” button showing at the bottom of left sidebar.
- You will see a “Language changed” confirmation box asking you to restart the app for the changed to take effect. Click “OK” button to close the pop-up.

- Go to “FileZilla” menu and select “Quit FileZilla” option to close the app.
- Relaunch the app and you will see the interface appear in selected Chinese language.
Note: All screenshots are shown using FileZilla macOS app. Check our beginners guide to learn more about using FileZilla.