Personal Vault is a protected area within your OneDrive storage that offers a higher level of security for your most sensitive files. Unlike the regular folders in OneDrive, which are already encrypted, Personal Vault introduces an added layer of identity verification. This means that even if someone gains access to your device or OneDrive account, they cannot open your Personal Vault without an additional method of authentication. Since OneDrive is integrated in Windows 11 and 1TB storage is offered as part of Microsoft 365 subscription, it makes sense to use Personal Vault feature to safeguard your confidential files.
Why You Should Use Personal Vault?
- Personal Vault uses strong authentication protocols like fingerprint recognition, face identification, a PIN, or a code sent via email or SMS. This two-step verification is designed to prevent unauthorized access, even if your password is compromised.
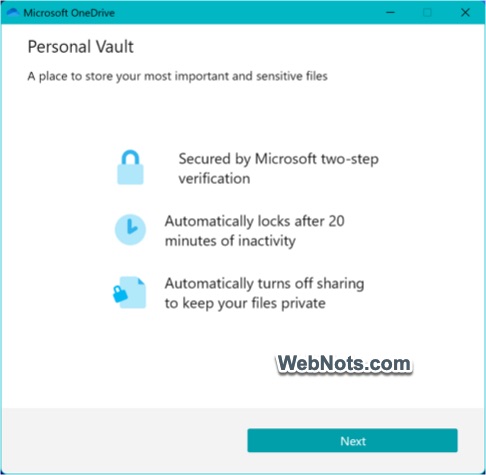
- The vault locks itself after 20 minutes of inactivity, minimizing exposure if you step away from your device.
- Files are encrypted both during transmission and while stored, adding another shield against potential breaches.
- You can directly scan documents, photos, or videos into the vault using OneDrive mobile app, ensuring sensitive data never resides in unsecured folders.
- Security is maintained whether you access Personal Vault from your PC, web browser, or mobile device.
How to Set Up Personal Vault in OneDrive?
If you’re already using OneDrive, setting up Personal Vault is a simple process takes less than a minute. Otherwise, first install the OneDrive app from Microsoft Store and login with your account. You will get free 5GB storage and 1TB with Microsoft 365 subscription. Below are the steps in OneDrive Windows app, and the steps may vary slightly across devices.
- Click the OneDrive icon on system tray. Sometimes you will see a notification about Personal Vault and click the “Get Started” button. If you don’t see a notification, click the gear icon and select “Unlock Personal Vault” option.


- You will see a list of Personal Vault features and click “Next” button.
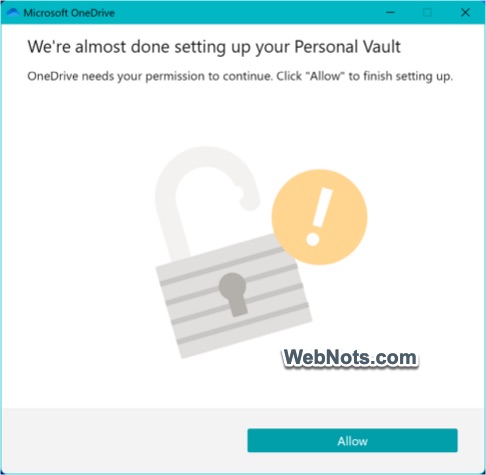
- Click “Allow” button to provide necessary permissions for OneDrive and click “Yes” button on User Account Control pop-up if prompted.
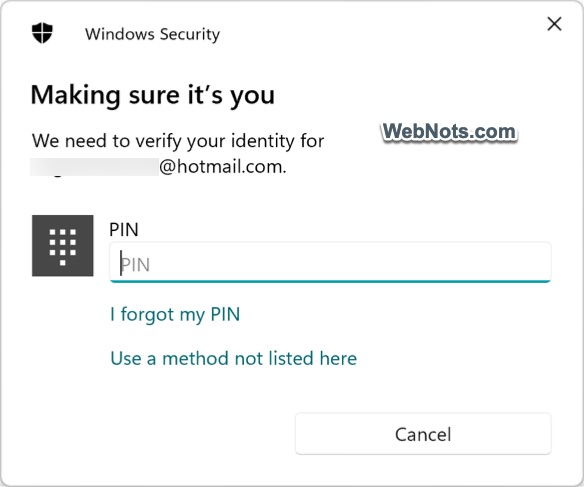
- Type your account PIN or use fingerprint or 2 step verification code and unlock the setup.
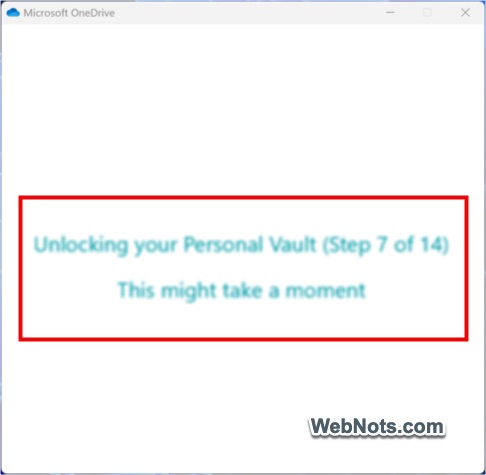
- OneDrive will start setting up the Personal Vault for you.
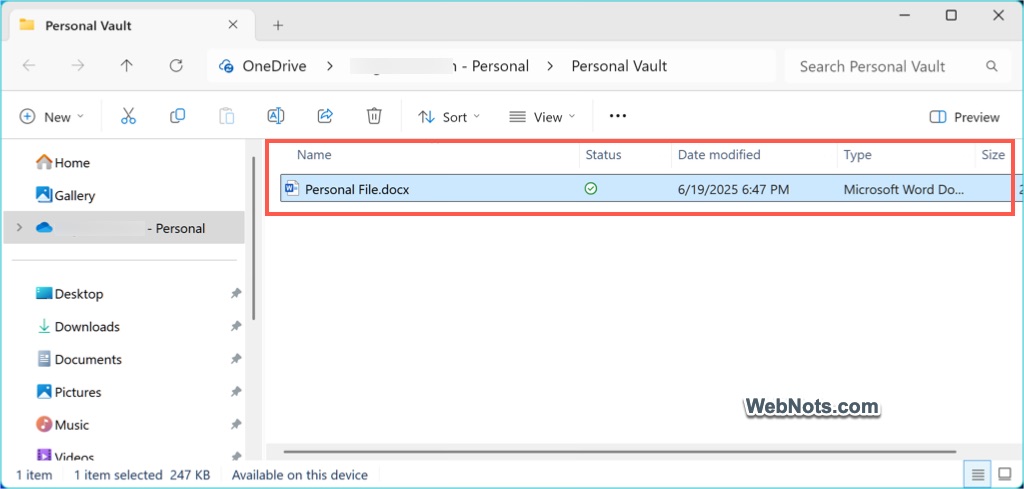
- After finishing the setup, File Explorer will open showing your Personal Vault folder.
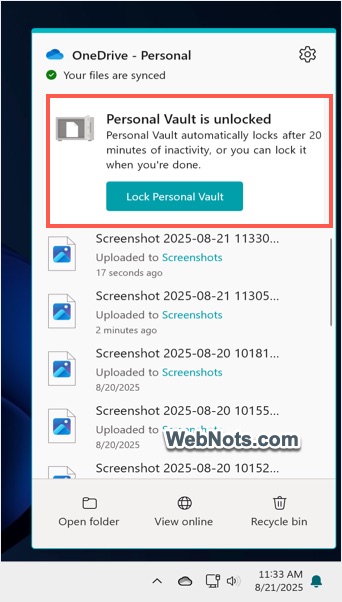
- Make sure the status is showing as green which indicates the folder is setup properly and ready to use. You can also click on the OneDrive system tray icon to find a notification saying, “Personal Vault is unlocked”.
As mentioned, the process is simple if you have previously setup PIN, fingerprint, or two-step authentication for your Microsoft account. Otherwise, OneDrive will prompt you to setup during the process and simply follow the prompts to enable your preferred two-step verification method. This process only needs to be completed once during the setup, but you will use two-step verification each time you want to unlock the Personal Vault folder.
Adding Files to Personal Vault
Once setup is complete, you can move files into Personal Vault just as you would move files into any folder in OneDrive.
- Open File Explorer and navigate to C:\Users\<Username>\OneDrive\ and double-click the “Personal Vault” shortcut.
- Provide your authentication and unlock the folder.
- Now, you can simply drag and drop files into the Personal Vault folder.

On mobile, scan documents or take photos directly into the vault for instant protection. You can organize files into subfolders, rename them, or delete them, just as you would in other parts of OneDrive. However, files can only be accessed while the vault is unlocked. Files stored in Personal Vault are synced across devices. So, if you lose or change the device, your vault can be accessed from another device by completing authentication.
Remember that Personal Vault is not intended to store all your files, but rather those that require an elevated standard of protection. For example, you can store confidential work files, passport or driving license copy, personal health records, etc.
Locking and Unlocking Personal Vault
Personal Vault will automatically lock after 20 minutes of inactivity on the web or a shorter period on mobile. You can also manually lock it at any time by clicking the system tray icon and select “Lock Personal Vault” button on the notification. Otherwise, click the gear icon and select “Lock Personal Vault” from the menu.
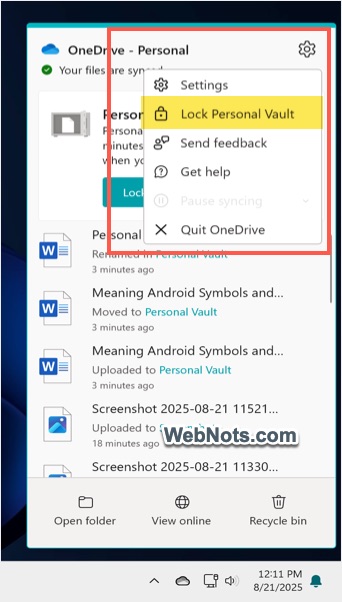
To unlock, simply open the Personal Vault shortcut in File Explorer or select “Unlock Personal Vault” from the gear menu from system tray icon and provide the authentication.
Troubleshooting the Setup
Though the process is simple, you may face various problems while setting up and using the Personal Vault.
- Error message in File Explorer – this indicates your Personal Vault is not setup properly. Restart the OneDrive app and follow the setup steps from the beginning.
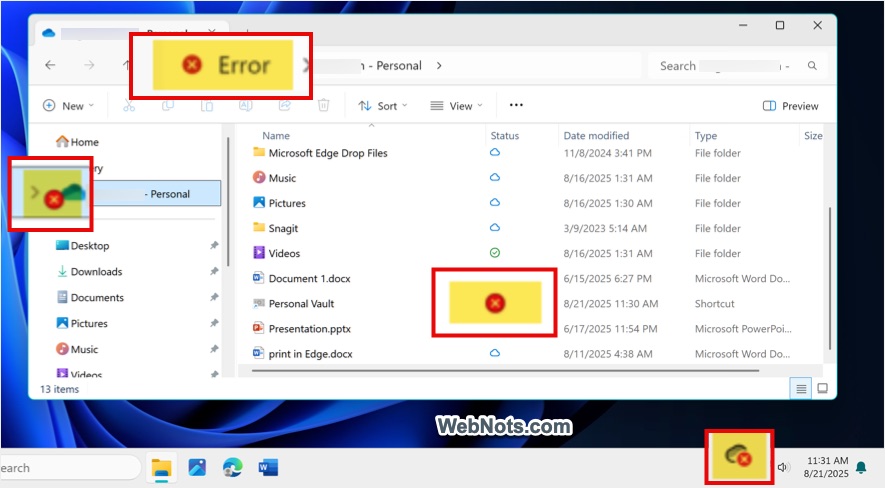
- Personal Vault not up to date – this message appears in the system tray, unlock the vault and allow the files to sync properly to remove this error.

- File sharing – files in Personal Vault can’t be shared with other which is the default feature. A notification message will appear if you try to share file directly from the vault. If required, move the file(s) outside the vault to share and generate OneDrive share link.

Conclusion
Personal Vault is a useful and important feature in OneDrive, designed to secure your sensitive files with ease and confidence. Through strong authentication, encrypted storage, and seamless integration across devices, it helps you to protect what matters most.