Microsoft frequently releases updates for Windows with new features as well as to improve the security. Generally, these update files are larger in size and needs to be downloaded from Microsoft’s servers directly thus taking lot of time for installing. Though you can speed up the update process by allowing delivery optimization, the files will be cached in your computer’s storage. In this article, we will explain how to disable delivery optimization and delete the existing cached files.
Optimizing Windows Updates
When enabled, delivery optimization will download Windows update files not only from Microsoft’s servers but also from nearby devices in the network that have already downloaded the update. In this way, the process can be faster by distributing the network bandwidth across multiple devices. You have two options:
- Completely disable delivery optimization so that Windows updates will only get the files from Microsoft servers. Though this may slow down your update, it will also prevent your computer from uploading downloaded files to others on the network.
- Enable the feature but delete existing cached files on your device. This is useful when your device is running out of storage space.
1. Disable Delivery Optimization in Windows
- Press “Windows Logo + I” shortcut keys to open Windows Settings app.
- Navigate to “Windows Update” section and click on the “Delivery Optimization” option under “Advanced options” heading.

- On the next screen, turn off “Allow downloads from other PCs” option.

1.1. Using Metered Connection
Delivery optimization works only when you have uncapped internet connection. This means enabling metered connection will automatically stop delivery optimization feature though it is enabled in Windows Settings.
- Go to Windows Settings app and navigate to “Network & Internet” section.
- Select your Wi-Fi or Ethernet connection.
- Turn on “Metered connection” option.
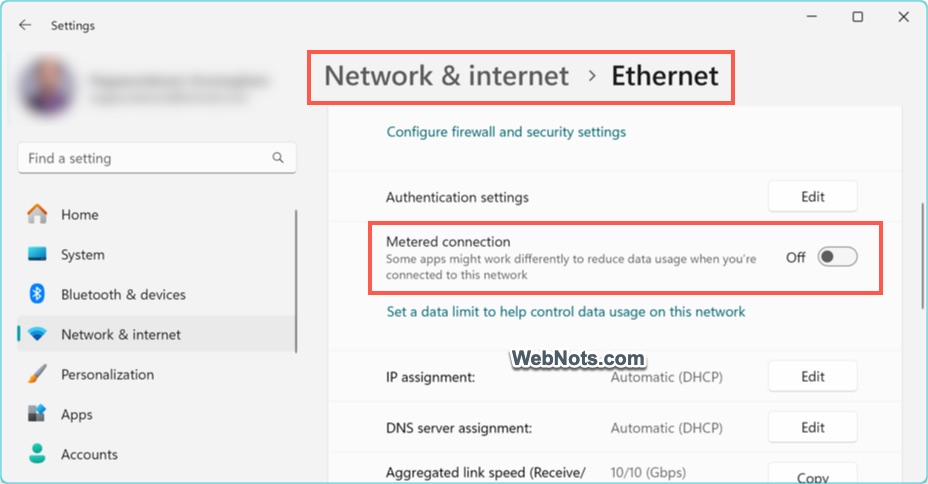
However, this is not recommended as some apps will stop working. For example, OneDrive will stop syncing when metered connection is enabled.
2. Delete Delivery Optimization Files
There are multiple ways to delete these files.
2.1. Using Disk Cleanup App
- Type “cleanup” in Windows Search box and open Disk Cleanup utility.
- Select C drive and click “OK” button (drive selection box appears only when you have multiple partitions on the hard disk).
- Find and check “Delivery Optimization Files” under the “Files to delete” list. You can also check any other items to be deleted. You can see the total amount of space you will gain below the selected items.
- Click “OK” button to permanently delete the files and get free space.

Though delivery optimization files are cached in C drive, you can follow the same steps to check and delete files from all other drives.
2.2. Using Windows Settings App
- Right-click on Start icon from Taskbar and select “Settings” option to open Windows Settings app.
- Go to “System” section and click on the “Temporary files” option.
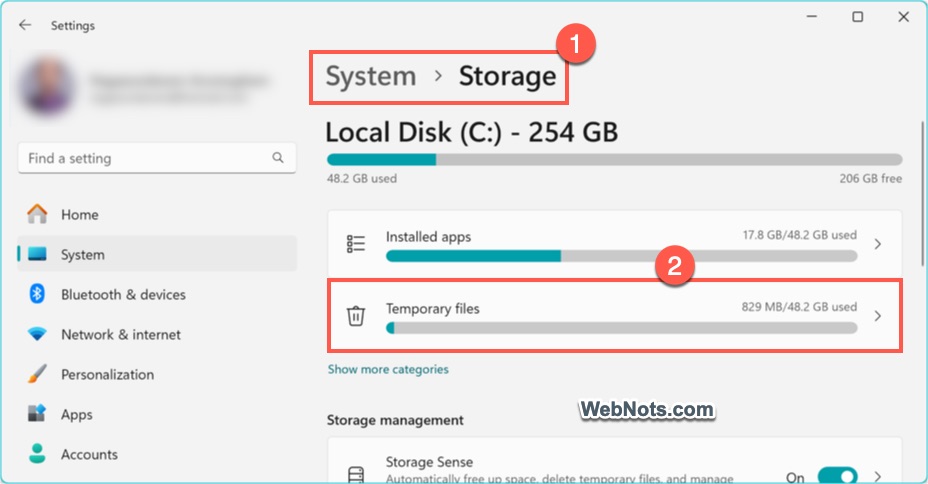
- Check “Deliver Optimization Files” and other required items in the list.

- Scroll up and click on “Remove files” button to delete the selected items.
- Click the “Refresh” link to check the latest status or you may need to restart the PC for the changes to be reflected.
Note: If storage is your primary concern, make sure to check the size of “Windows Update Cleanup” when selecting the items. This is the size old Windows update files retained by your system and normally occupies huge space. Deleting that will give you sufficient free space.
2.3. Delete from Command Prompt
Follow the below steps if you prefer a command-line approach. However, this is not recommended as you can’t visually see the size.
- Type cmd in Windows Search box and click “Run as administrator” option from the right pane.
- Copy and paste the below command in the prompt and press enter.
del /s /q "%SystemRoot%\SoftwareDistribution\Download\*"
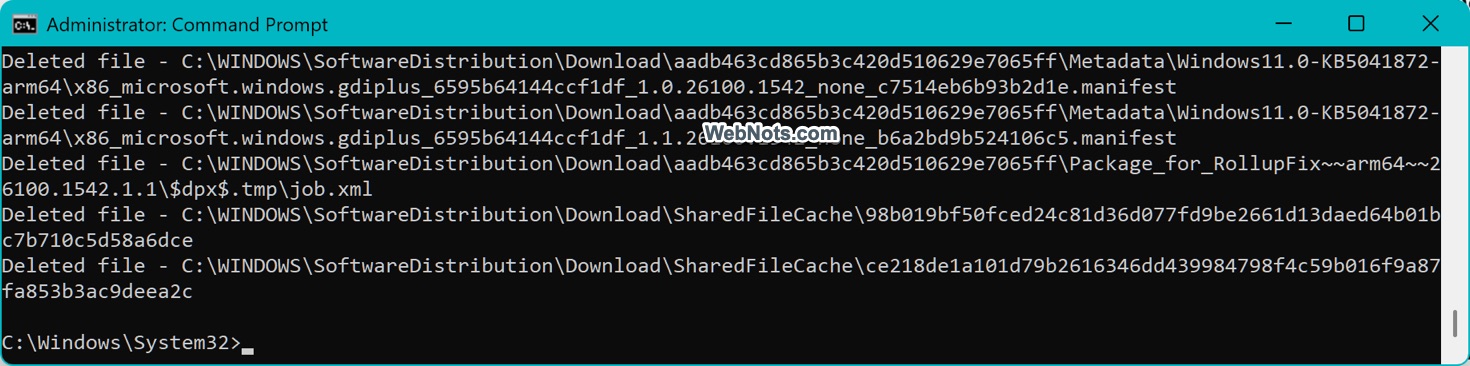
- You will see the command runs for some time and deletes all cached files.