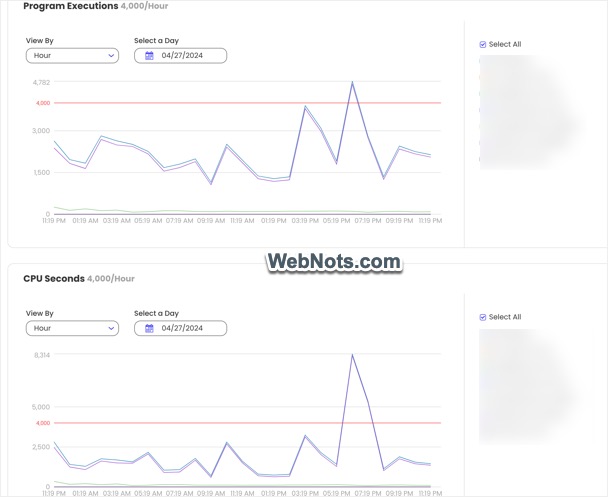
SiteGround offers StartUp, GrowBig and GoGeek shared hosting plans with different set of features. The problem is that you have CPU seconds and PHP executions limitations on shared hosting. This will prevent you from running a WooCommerce or PHP scripts and you will be forced to upgrade to Cloud account (or move to another company). In my earlier article I have explained I downgraded from Cloud to GoGeek plan due to SSD redundancy. After that I have upgraded again from GoGeek shared hosting to Cloud hosting. If you are looking for the process, here is how it works.
Points to Consider Before Upgrading
- All your current backups will be deleted in the shared server and hence I strongly recommend you to backup database and site files.
- Cloud hosting has NO limitations on CPU seconds, inodes and PHP execution. So, you will not have to worry anything about these factors.
- Since server IP and name will change, you need to note down you email and FTP account configurations to change them later with the new IP/hostname.
- Disable any other third-party services that use SiteGround nameservers like Cloudflare CDN and make sure to assign SiteGround’s nameservers in your domain registrar’s DNS zone file.
- Make sure to have a third-party monitoring service like UptimeRobot to get downtime notification as SiteGround will NOT send this.
I have explained all these details in downgrading article, so I am not repeating the same stuff here. You can refer that article in case if you are not aware of how to handle the above points. If you are confused whether you need to upgrade, check the server usage details in “Site Tools > Dashboard” and “Services > Hosting > Settings > Statistics” section. Since the usage limit is per month, you will receive email from SiteGround guys when the CPU seconds or PHP executions nearing the monthly quota (generally at the month end). If you find usage exceeds the limit, act proactively to upgrade instead of waiting for the email or account suspension.
Upgrade SiteGround Shared Hosting to Cloud Hosting
- Login to your hosting account and navigate to “Services > Hosting” section.
- Click the “Settings” link showing in your current hosting plan name.

- Click the “Upgrade” button or click three vertical dots and select “Upgrade” option.

Selecting Cloud Plan
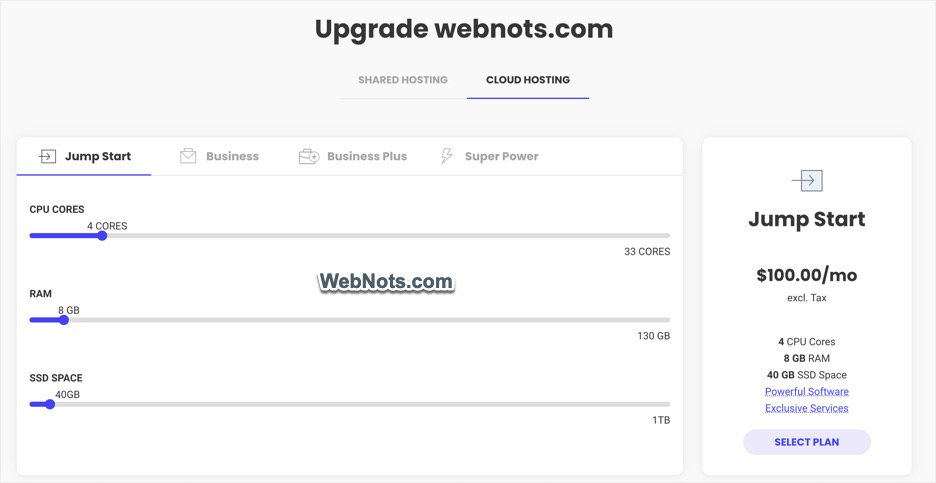
Go to “Cloud Hosting” tab and select the plan you want to use. You can select one of the existing Jump Start, Business, Business Plus or Super Power plans. Unlike shared hosting, you can configure RAM, CPU core and SSD storage to create a custom Cloud hosting plan for your need. Click the “Select Plan” button to proceed further.
Configuring Plan Options
Click the pencil icon showing next to “Data Center” and select the location where you want to store your files. You have Singapore, London, Iowa, The Netherlands, Frankfurt, Sydney, Madrid, Virginia, California, Texas, etc.
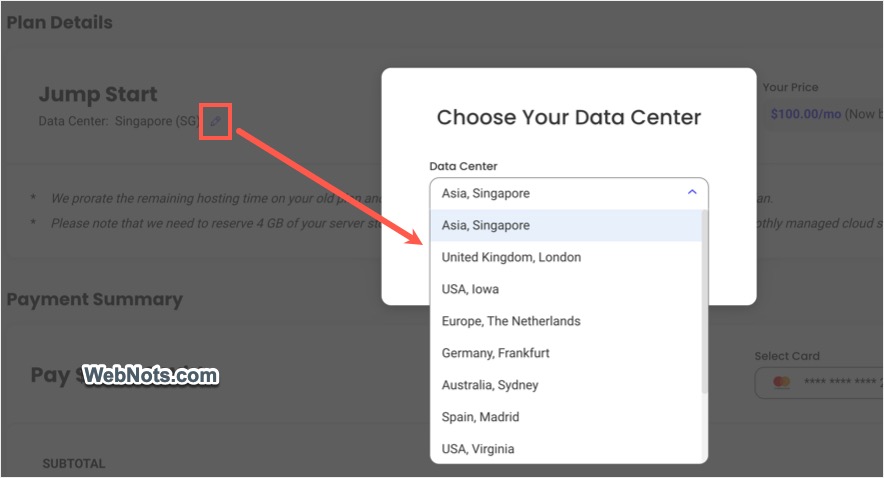
If you have physical business, make sure to select the data center nearer to your location. For general blogging sites, choose one of the data centers from USA. Note that changing data center later is a premium request and you need to pay money for that transfer.
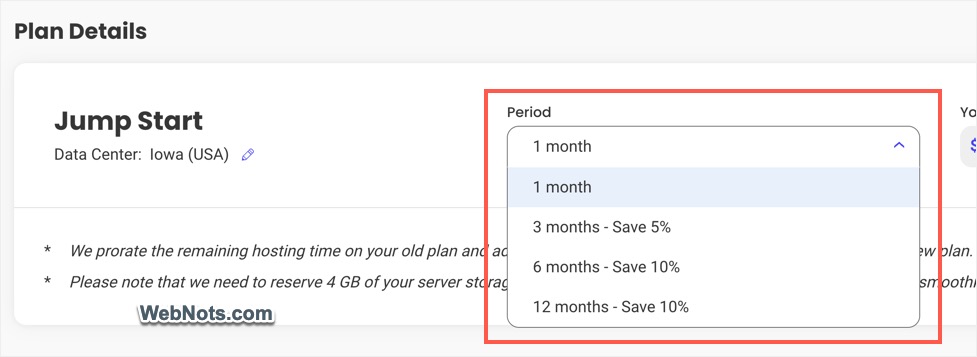
Next, select the payment period from the dropdown. You have 5% discount for 3 months and 10% for 6 and 12 months payments. The balance amount in your shared hosting plan will be added as additional days in the Cloud plan.
Pay and Check Status
Check the total amount and click on the “Pay Now” button. Note that you may not need to pay if your balance amount is sufficient to use Cloud hosting for the selected period.
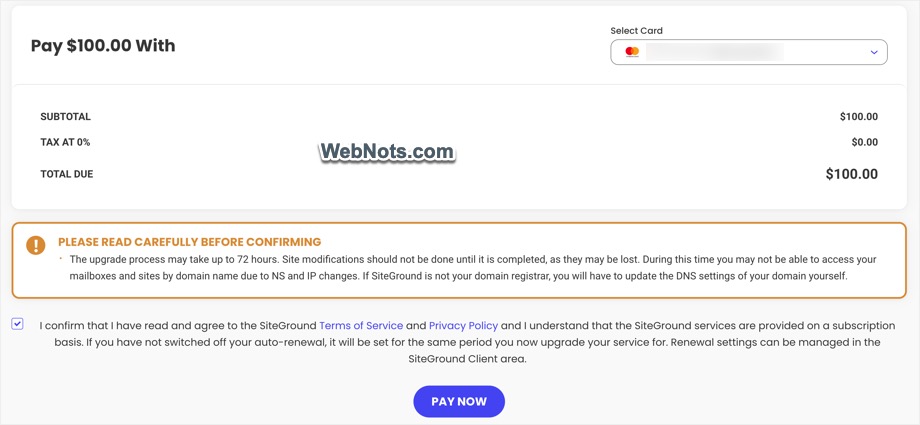
This will raise an automated ticket to support team. Go to “Support History” and check the status of the ticket for upgrading your account.

Test Your Site
Though SiteGround says the process will take 2 business days, it will generally start immediately. This time I have upgraded on Sunday (downgraded on Saturday) and the site went down for 15 minutes for the migration (30 minutes for downgrade).

When the site is up, wait sometime and you will receive the ticket update email from SiteGround support team. This email will have IP and hostname for the new cloud server. Note down the details and change your FTP, email and CDN configurations to start using your Cloud setup.
Your first automated backup in Cloud hosting will start after 6 hours of creating the account. Remember that the backups will be retained only for 7 days and not 30 days like shared hosting.