Using camera for taking pictures and recording videos is the one thing almost all iPhone users do. Though iPhone pictures and videos are of high quality, they can easily occupy too much storage space. This will be a problem especially if you are using 128 GB storage or not using iCloud. Fortunately, there are several ways to reduce photos and videos size on your iPhone without sacrificing too much quality.
Why are iPhone Photos So Large?
Modern iPhones capture incredibly detailed photos, often in HEIF (High Efficiency Image Format) or JPEG format. While HEIF files are more storage-efficient, they can still be large, especially if you shoot in high resolution or use features like Live Photos or Portrait Mode. Similarly, videos are saved in HEVC format with larger sizes.
If you want to find the size, open Photos app and simply swipe up on a photo or video. This will show the format, meta data, and the size. Below are the example photo and video (18 seconds) taken with iPhone 16 which have the size of 2.6 MB and 35.3 MB respectively. So, properly setting up your camera is the first thing you should do after purchasing an iPhone to avoid running out of storage.
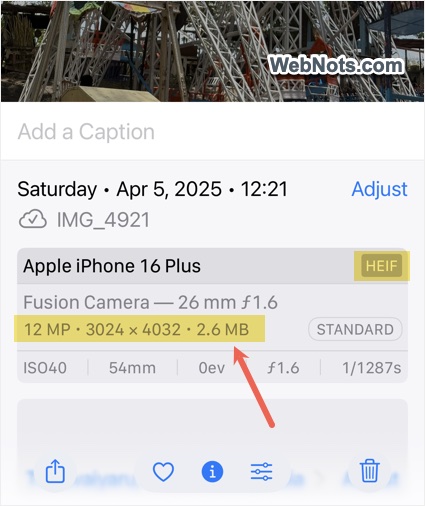
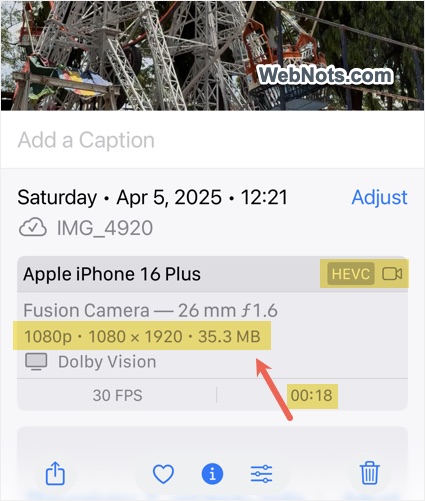
1. Use High Efficiency Format Lower Mode for Photos
The HEIF format reduces file sizes without losing much quality. To enable it:
- Open “Settings” app, scroll down and tap on “Camera” option.
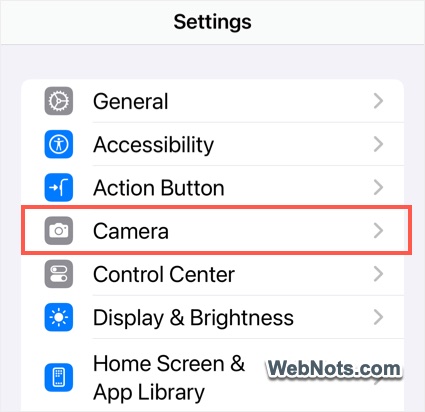
- Scroll down a bit and tap on “Formats” options.

- Select “High Efficiency” instead of “Most Compatible” (JPEG).
- Tap on “Photo Mode” and select “12 MP” or the lowest available option. This will reduce around 1 MB of size for each photo you capture.
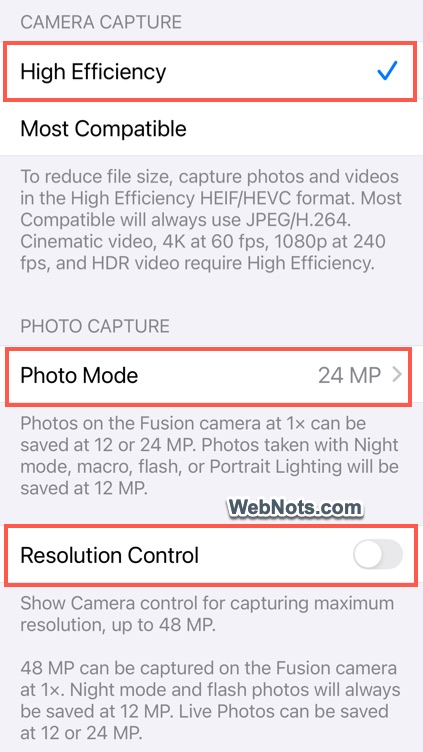
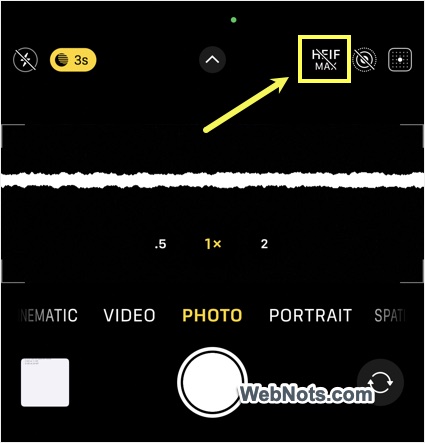
You can also turn on “Resolution Control” option and turn off maximum resolution when capturing pictures. Simply tap on “HEIF Max” icon on top right for this.
2. Lower Video Resolution
If you don’t need ultra-high-resolution videos, you can reduce it for different modes.
- Go to “Settings > Camera” and tap on “Record Video” option.
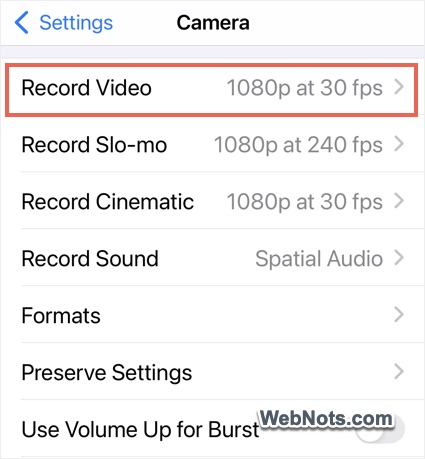
- Select “1080p HD at 30 fps” which is good for most cases.
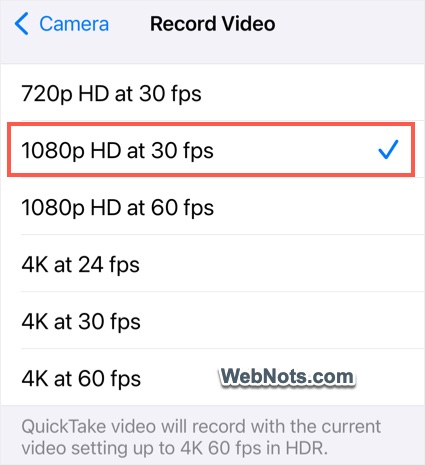
Below are the sizes of 1-minute video taken with iPhone using different resolutions:
| Resolution | Size |
|---|---|
| 720p HD at 30 fps | 45 MB |
| 1080p HD at 30 fps | 65 MB |
| 1080p HD at 60 fps | 100 MB |
| 4K at 24 fps | 150 MB |
| 4K at 30 fps | 190 MB |
| 4K at 60 fps | 440 MB |
As you can see, it is possible to save ~125 MB size for a 1-minute video between 4k and 1080p for the same 30 frames per second. Similarly, you can select the appropriate options for “Record Slo-mo” and “Record Cinematic”. It is also possible to toggle HD to 4K and vice versa while recording a video.
3. Set Auto FPS
On the “Record Video” settings page, scroll down and tap on “Auto FPS” option. Select “Auto 30 & 60 fps” option so that iPhone will automatically adjust the frame rate and optimize the file size.

4. Disable Live Photos
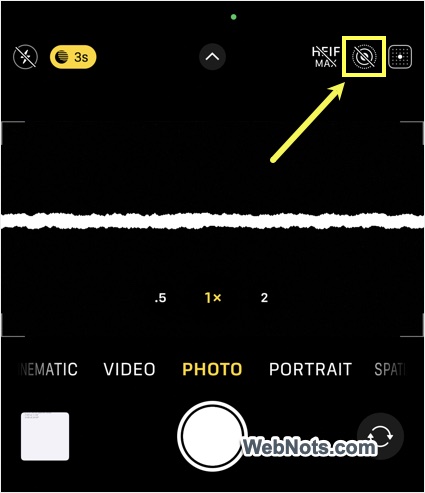
Live Photos take up more space because they include a short video clip. Whenever you take pictures with Camera app, tap the Live Photo icon (circled icon at the top) to disable it.
Additional Tips
Here are some tips to reduce photos and videos size on your iPhone:
- Additional Controls – Some third-party apps, like Pro Camera, allow manual control over image quality and compression.
- Compress Photos After Taking Them – You can reduce photo size after capturing them by using apps like Photo & Picture Resizer.
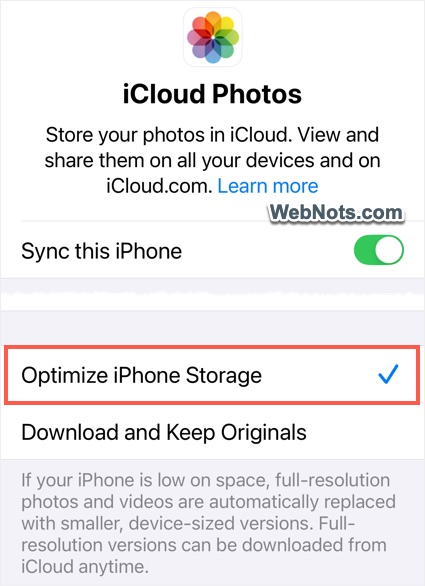
- Enable iCloud Optimized Storage – If you use iCloud Photos, go to “Settings > [Your Name] > iCloud > Photos” and select “Optimize iPhone Storage” to keep smaller versions on your device while storing originals in iCloud.
Final Thoughts
By adjusting your iPhone’s camera settings and using storage-saving techniques, you can take smaller-sized photos and record videos without losing too much quality. This helps free up space while still preserving your favorite moments.