By default, Astra theme allows to showcase the tags below the title as a meta data. Below title area is a consisted place to show multiple tags, especially if you want to show categories, author name, and date details. so, the best solution is to move the tags below post’s content as shown in many commercial themes. Though you can customize the font size and family of the meta data, there are no default options to move the tags below post’s content.
Moving Tags Below Post Content
The solution here is to create a custom section containing tags and insert it below the post. Custom sections can be created using Site Builder module of Astra theme. However, you need the Pro add-on for using this feature.
Step 1 – Disable the Default Tags
- Login to your WordPress admin panel and navigate to “Customize” section.
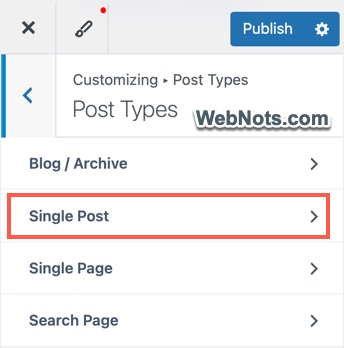
- Go to “Post Types > Single Post” section.
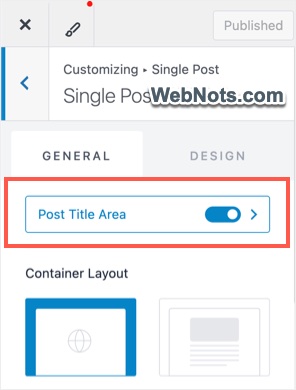
- Turn on “Post Title Area” and then click on that option.
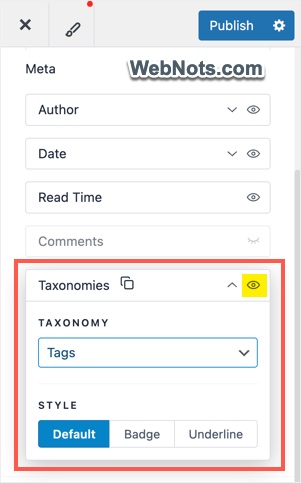
- Expand “Taxonomies” under “Meta” section and make sure “Tags” is not selected. If you have two taxonomy elements for showing categories and tags, then simply delete the tags.
Step 2 – Enable Site Builder Module
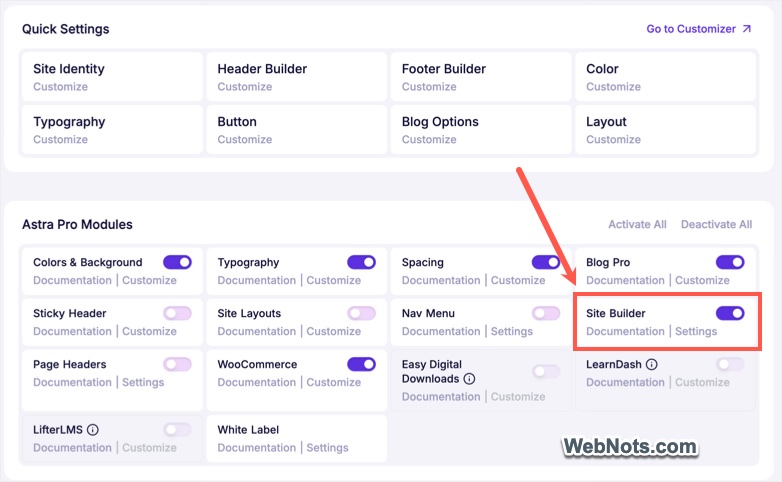
- Go to “Astra > Dashboard” section.
- Turn on “Site Builder” module under “Astra Pro Modules”
Step 3 – Create a Custom Tags Section
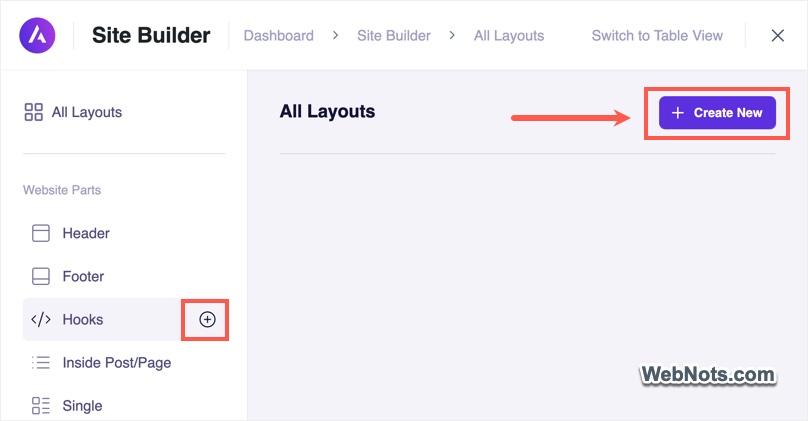
- Go to “Astra > Sit Builder” and click the “+ Create New” button or click the ⨁ on “Hooks” option.
- Provide the name for your hooks as “Tags”.
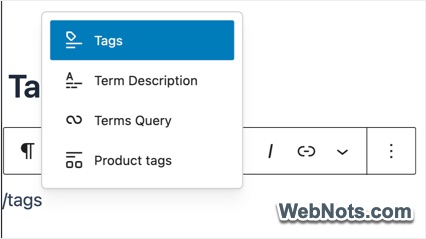
- Search and insert “Tags” block.
- Type Tags: in the “Prefix” area and leave the “Suffix” as it is.
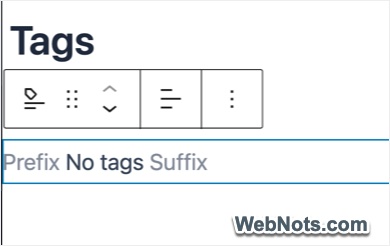
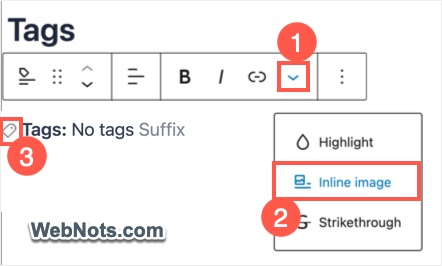
- You can also insert an inline image before the prefix word or insert a label emoji (🏷️).
Important Note: There is no separate Tags block in Gutenberg. This is part of the “Post Terms” under “Theme” group of blocks and when enabled you can type /tags and insert it in the editor. You can transform Tags block to show any other taxonomy like categories, product tags, etc. If “Post Terms” is hidden you can’t insert the Tags block, so make it is not hidden by mistake by going to “Options (three dots icon on top right corner) > Preferences > Blocks” section in Gutenberg editor.
Important Note: There is no standalone “Tags” block in Gutenberg Editor. It is part of the “Post Terms” block within the “Theme” group. When this block is available, you can type /tags in the editor to insert it. You can also transform the Tags display to show other taxonomies such as categories or product tags. If the “Post Terms” block is hidden, the Tags option will not appear. To fix this, go to “Options (three dots in the top-right corner) > Preferences > Blocks” and ensure the block is enabled.
Step 4 – Set the Parameters for Custom Section
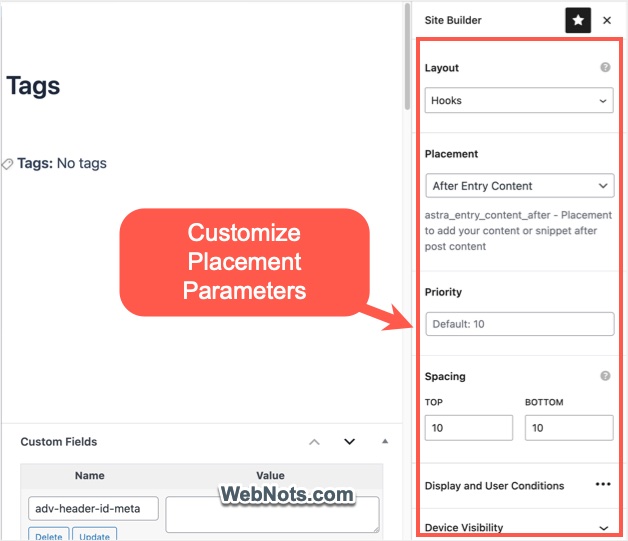
When the block is ready, click the “Site Builder” Astra icon on top right corner of the Gutenberg editor. Chooses the following parameters:
- Layout: Select “Hooks”.
- Placement: After Entry Content.
- Priority: 10 (or change to 20 or 30 if you have multiple hooks using the same placement).
- Spacing: Adjust the top and bottom spacing.
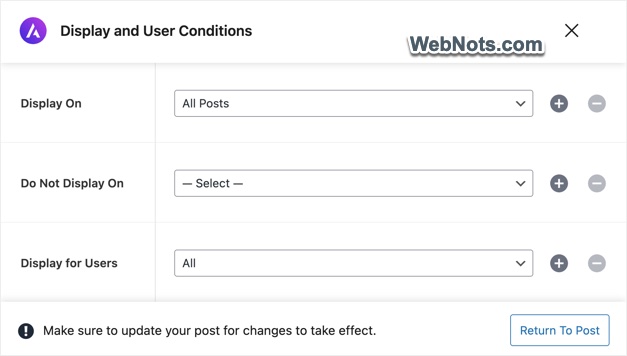
- Display and User Conditions: Display On – All Posts, Do Not Display On – Leave it blank, and Display for Users – All.
- Device Visibility: Turn on the visibility on all Desktop, Tablet, and Mobile devices.
- Date & Time Conditions: Turn off “Time Event” unless you want to schedule the tags display for specific time.
Step 5 – Customizing the Appearance
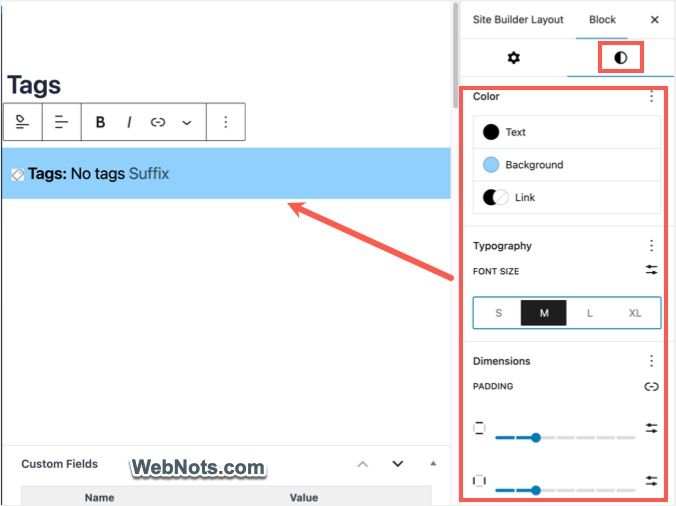
Once the parameters are selected, click on the “Publish” button make the changes live. However, if you want to customize the appearance like background colors and font size of the tag items, select the “Tags” block. Open the Gutenberg block sidebar and adjust the followings:
- Change text, link, and background colors.
- Change the text size to small, medium, large, or extra-large. Otherwise, set a custom font size.
- Adjust line height, letter spacing, decoration, and letter case.
- Change paddings, margins, add border and border radius.
- Finally, publish / save your changes.
Final Words
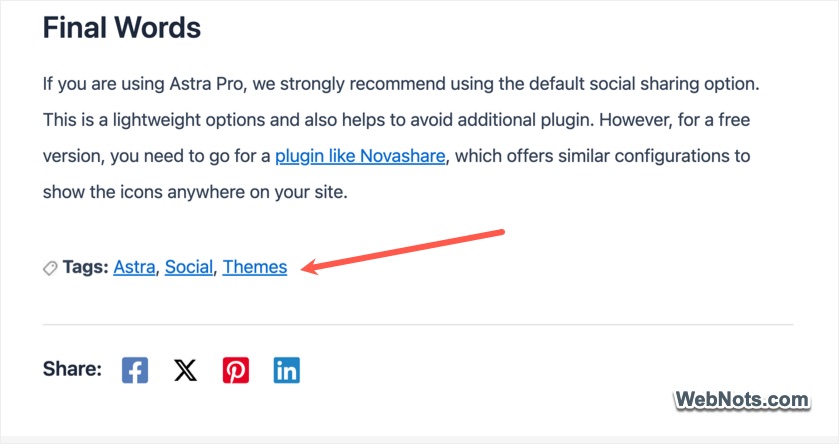
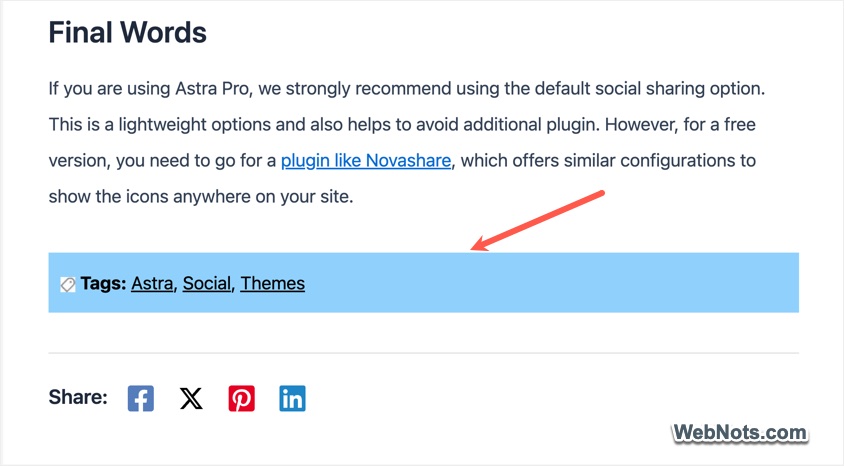
Open some of your posts, and the tags will be displayed below the post content on all posts. Below is how it looks with and without a background color. You can also create custom layouts for any other elements like social sharing icons and place them on correct position using the available hooks.